
Morning Lemon AK-47 Collaboration


Soil
Custom

Indoor
Room Type
LST
weeks Technique
11 l
Pot Size
Start at Harvest
1
Week 1. Vegetation7y ago


5.08 cm
Height
20 hrs
Light Schedule
25 °C
Day Air Temp
6.2
pH
65 %
Air Humidity
23 °C
Night Air Temp
11.36 l
Pot Size
76.2 cm
Lamp Distance
800 PPM
CO₂ Level
Nutrients 1

BioRHIZOTONIC
0.528 mll
Philindicus PHILINDICUS'S QUICK START GUIDE TO INDOOR AUTO FLOWER CANNABIS
The following is a collaboration of some of the knowledge I have acquired through online research, following/talking to hundreds of fellow growers here on Grow Diaries as well as my own personal growing experiences and opinions.
I have for some time wanted to share my experiences with growing feminized auto flower cannabis with other growers especially the newer folks who are either currently growing or are thinking about starting to grow. This will cover some fairly basic aspects that a grower needs to use to their advantage to get off to a quick start at cranking out some sweet sticky dank buds.
It all starts with great cannabis genetics! There’s no way around this if you want a high-quality end product pay the price for high quality seeds from an establish breeder with an excellent reputation. These breeders spend years developing and testing strains for growers to enjoy.
I recommend to the newest growers to read the first 6 weeks of the diary before starting to grow. This could save you some time, aggravation and money. The diary is based on an auto flower strain ready to be harvested in the 70 to 75-day range. Some information may be repeated during the weekly update portion of my diary.
COLLABORATIVE WORKS BY WEEK
Week 1 It’s a Dirty Business
Week 2 Low Down on LED Lights
Week 3 That’s My Biosphere
Week 4 Stretching Things Out
Week 5 Mid-Life Crisis
Week 6 Feeling Chemically In-Balance
Week 7 Pump Up My Buds
Week 8 The Old 1-2 Terpene Punch
Week 9 To Flush or Not to Flush
Week 10 Harvest Recipe: Lemon AK Infused Krupnik (Honey Spiced Vodka)
Week 11 Official Fast Buds Lemon AK Strain Review
IT'S A DIRTY BUSINESS
A Hybrid Soil Mixture for Auto Flower Cannabis
Don’t have the time or want to have 20 bags/ boxes of ingredients to make that batch of super soil! Then take a short cut using commercially prepared soils and soil-less mixes to create your own basic grower customized hybrid soil mix.
With the dizzying number of soil brands and mixtures available to growers how is one able to tell which one will be the best for their grow? Trial and error? Grower recommendations? Advertisement hype?
Why not create your own using a few basic requirements based on your plant’s needs, what type of watering and feeding habits you decide to employ during your grow?
The ideal mix for auto flower plants should not be overly rich, but be moisture retentive yet well-draining and airy to allow more oxygen to the root-zone. Naturally it needs to be of the proper ph. range for your roots to absorb nutrients efficiently and not completely breakdown during the course of your grow. Using a mixture of organic composted products with a soil-less peat and coco coir-based products in combination with added perlite/pumice for a faster draining mix will create an excellent home for not only the roots but also for beneficial bacteria and mycorrhizae you will be adding to bring your soil to life.
I know what you’re saying to yourself why not just use straight organic or straight soil-less? The added organics will definitely add the essence of the materials used. This will add more flavor to your finished product not only is this truly Cannabis’s natural growing medium it will add some balance to your hybrid mixture. Yes, hydro/ coco coir grown weed will get you stoned but how much extra flavor does it really have compared to your soil grown weed? That’s purely a matter of opinion. Basically, we’re taking the best of both worlds.
I’m using three popular brands located in my area. You can substitute brands with similar ingredients if these exact brands aren’t available in your area. For my organic “essence” mix I’m using Fox Farm Ocean Forest which has composted forest humus, sphagnum peat moss, earthworm castings, bat guano, kelp meal, fish emulsions, shrimp and crab meal, oyster shell, perlite. It’s considered by many to be a “hot mix” meaning it is capable of causing nutrient burn on seedlings and young plants if used as a standalone potting mix. For my soil-less components Canna Coco Coir which is an excellent ready to use well-draining product which has been properly washed and buffered. BioBizz Light which is fine peat-based mix with a light nutrient content. It can hold a lot of water and can be a bit on the mucky side when used alone in my opinion. Some already contain a bit of perlite but we will add some more for improving drainage based on our personal watering habits for the best results. They all claim to be optimized for ph. a claim which should always be questioned/tested. Since we’re creating a hybrid soil/soilless mixture 5.8 to 6.4 would work the best for nutrient absorption.
Our bulk potting mix: 32% Fox Farm Ocean Forest, 32% Canna Coco Coir,32% BioBizz light and 4% Perlite.
Seedling mix: 7-parts BioBizz light, 1-part coco coir,1-part perlite.
If mixing several 3 to 4-gallon pots worth by hand, I find that using a large rectangular plastic mixing tub from the masonry section of your local home improvement store works well or even a children’s plastic pool will do. For you hard core growers with many pots a nice cement mixer will make faster work of the job.
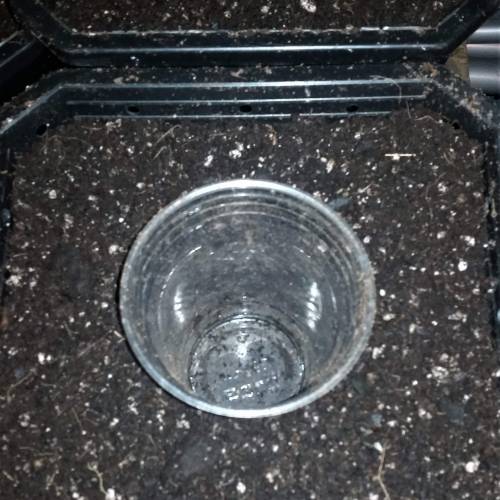
Once you’ve mixed up your batch do a percolator test. Use a plastic solo cup with a dozen holes poked in the bottom of the cup. Fill it ¾ full leaving room for you to add water. Test it to see how quickly the water drains through the mixture. Adjust the amount of coco coir and perlite if necessary, to increase the drainage rate to your personal taste. You should go by what type of waterer you are. If you are someone who tends to heavy handed with watering you will want a faster draining mix. If you believe you water fairly conservatively then use a modestly slower draining mix. Pot choices can also reflect your decision using standard pots will slow down moisture loss while using air pots and mesh type pots will allow your mixture to dry out more rapidly. Speaking of pots, auto flower plants can be grown successfully in pots of any size. Most breeders recommend 4 to 5-gallon pots for larger growing varieties. But 2-3-gallon pots can work well for smaller varieties or for growers wanting smaller more manageable plants or are limited in grow space. Keep in mind larger pots mean more soil, water, nutrients and expense.
Once you’ve gotten what looks like your final mixture now you need to do a slurry test to give you an idea of the “approximate” ph. of your mixture to see where you stand. Use a 2:1 Distilled water to soil mixture. 250 ml of your soil and 500 ml of distilled water mix this together well in a glass or jar. https://www.youtube.com/watch?v=GB5HLqmJzVs
Allow this to settle for about 15-30 minutes or until it separates into different layers. I like to use a turkey baster or syringe to remove enough of the liquid to use my electronic ph. meter on the sample rather than sticking it through the floating solids. Keep in mind bottled distilled water will have a ph. of 5.8 so use this as a guide. A ph. of 5.8 to 6.5 will work well for our purpose but if it’s too acidic (Below 5.8) I would add ½ to 1 tablespoon of pelletized lime per gallon of pot. Mix this into the upper ¾ of the soil for each pot individually to ensure the uniformity of the mixture rather than adding it haphazardly into a large volume of the mixture. This type of lime is slower acting and will begin to gradually increase the ph. of the soil as you water it. If during the course of your grow your runoff ph. is consistently low you can top dressing your pots with additional pelletized lime. Write down how much you are using and add this extra amount next time you mix up another batch. You won’t get to check the runoff until around the end of week 4 because this will be the first time you will be adding enough water to achieve runoff. This should give enough time for the lime to start dissolving and buffer the ph. of your soil mix.
Now add some life to the mix by adding some beneficial nitrogen fixing bacteria and mycorrhizae fungi these will not only improve the soil but also help your plants grower a larger root system with a larger volume of ultra-fine feeder roots. These feeder roots are what absorbs the nutrients that these microbes have broken down for them. Microbes will help your plants root system fight off infections and undesirable pest infestations they will create a harmonic balance that will improve the overall health and harvest potential of your grow. Sprinkle the recommended amount into your hybrid soil mixture then add some to the water then slowly add this to your dry mixture a little at a time then mix this well. Be wise and use gloves and tools that you only use for your cannabis grows. Do not use tools that have been used in your outside garden to avoid cross contaminating your mixture with diseases. You only want to add enough moisture to hold it together when squeezed between your hand yet it will fall apart when you release and slightly touch it. You should not be able to squeeze more than a few drops of water out of it or its too wet. If it is too wet just add some more dry mix to even out the moisture.
Once this consistency is obtained then add it loosely to your pots then lightly tap the sides or bottom of the pot to settle it in. Do not use your hands or fingers to push the soil down in the pot. We are looking for a nice light airy mixture that will be easy for the roots to quickly penetrate. I typically form a small well while filling the pots using the bottom half of a solo cup for the low nutrient “seedling mix” in the center. Be sure to use the beneficial microbe/fungi amended water the when you mix up your seedling mixture you do not need to add lime to this mixture the tap root will shoot through this in a short period of time. This way the seedling has a week or so to grow a decent root system before hitting the more nutrient dense surrounding mixture. I prefer this method over filling a pot with dry mix then watering it in which completely saturates the entire pot which could cause issues with the young roots sitting in overly wet soil until the root system can use the excess moisture.
Lastly float your seeds in a clean/sterile shot glass of distilled or purified water do not touch them with your dirty hands or push them down. Next place this in a dark warm place and check on them in 24-36 hours. Once you see a tiny tail emerge from the seed move them over to a moist but not wet paper towel placed in a covered container back in the dark until the tail of the seed is about a ½ inch long. Then use a pencil or bamboo chop stick to make a shallow dimple in the soil deep enough for the seed and the” tail” which is technically known as a radicle which will become the tap root from which the feeder roots will grow. The shell or seed coat should be lightly covered with about a ¼ inch of the mixture. Then add a small amount of water with an eye dropper, syringe or turkey baster to slightly settle it in. Cover the area with a clear solo cup with five ½ holes in it to allow some air circulation until the seedling emerges. Once you can maintain a humidity level of at least 65% to 70% you can remove the humidity dome. Keep your light at a proper distance to avoid light stressing the seedling.
Typically, 18 hours of light is recommended by most breeders but 20-24 hours can also be used. They do seem to appreciate having a short break from the lights. Slowly begin lowering your light a few inches at a time as growth begins progressing or if the seedlings seem to be over stretching for the light.
Keep in mind over watering is the number one cause of issues with seedlings. Keep watering to a minimum by maintaining a higher humidity level 65%-70% until the seedling starts growing a more substantial root system. Day one is when the first set of true serrated leaves begin to emerge from the cotyledon. On day 10 you can start to give 1/8 to 1/4 strength nutrients. Remember the soil has some nutrients in it already.
OFFICIAL SET UP
Tent 2 ft X 4 ft X 5 ft
(2) G8 Led grow lights 140 actual watts each
(1) G8 Led bloom lights 245 actual watts each
(1) G8 Led Red bloom booster 80 actual watts
Hydrofarm PPF/PAR meter
3 Gallon Maxi pots
(4) 1020 reinforced drainage trays
(2) Exhale Co2 bags
Autopilot Temperature/Humidity/Co2 monitor
(2) 6 inch 2-speed circulation fans
4 inch 190 cfm variable speed exhaust fan with carbon filter
H&M tds meter (0.5 ppm scale)
Hanna ph meter
Small cool mist ultrasonic humidifier
Precision hand held watering device (Turkey baster)
SOIL COMPONENTS
Biobizz Light mix
Canna Coco Coir mix
Fox Farm Ocean Forest mix
Perlite
Azos nitrogen fixing bacteria
Great White beneficial bacteria and mycorrhizae
SEEDLING / VEG. NUTRIENTS
Canna Bio Rhizotonic
Canna Bio Vega
BLOOM NUTRIENTS
Advanced Nutrients
Sensi Bloom A & B
B-52
Big Bud
Bud Candy
Bud Factor X
Canna PK 13/14
Canna Boost
SUPPLEMENTS
Advanced Nutrients Sensi Cal/Mag
Cannazyme
General Hydroponics Armor Si
Organic Blackstrap Molasses
Epsom Salt
FLUSHING SOLUTION
General Hydroponics Flora-kleen
WEEK 1 UPDATE
Floated seeds in sterilized shot glass with distilled water left in the dark. After 24 hours root tips emerged then transferred seeds to moist paper towel in covered container left in the dark. Planted seeds less than two days later in my loose pre-moistened seedling mix just slightly covering the seed then used 2 or 3 ml of R.O. water just enough to further moisten the surface without sinking the seed and mix down. Covered them with a clear solo cups with (5) 1/2 inch air circulation holes in them to keep humidity levels over 70% but under 90%. Seedlings broke the surface over the next 24 to 48 hours. Removed solo cups a few days later when first pair of serrated leaves emerged (This is my Day 1). Seedling mix of 7 parts Biobizz light, 1 part coco coir 1 part perlite, Azos and Great White moistened with R.O. water and 2 ml of Canna Bio Rhizotonic ph corrected to 6.2. Loosely filled in void left by the solo cup that was used to create a pocket in the potting mix (See photo). The potting mix consisted of 32% Biobizz light, 32% Coco Coir, 32% Fox Farm Ocean Forrest, 4% Perlite. Also added Azos (Azospirillum Brazilense) nitrogen fixing bacteria, Great White beneficial microbes and Mosquito Bits ( Bacillus Thuringiensis Israelensis) for natural fungus gnat control. Using R.O. water mixed with 2 ml per gallon of Canna Bio Rhizotonic ph corrected to 6.2 I moistened the soil mixture just enough to hold together when squeezed in my hand but easily fell apart creating a loose mix. Lastly added food grade diatomacous earth to a salt shaker container and lightly sprinkled over surface of soil to hinder any fungus gnats from wanting to explore my pots.
13 likes
4 comments
Share
2
Week 2. Vegetation7y ago


10.16 cm
Height
20 hrs
Light Schedule
28 °C
Day Air Temp
5.8
pH
63 %
Air Humidity
23 °C
Night Air Temp
11.36 l
Pot Size
45.72 cm
Lamp Distance
950 PPM
CO₂ Level
Nutrients 5
Blackstrap Molasses
1.321 mll
BioRHIZOTONIC
1.057 mll

Bio Vega
1.057 mll
Philindicus THE LOWDOWN ON LED LIGHTS
Seems like comparing LED lights is like trying to buy a new mattress. They’re hard to really compare without actually trying it out or comparing the given specifications. The scientific terms can be very confusing and can be misinterpreted by many a new grower getting into cannabis cultivation.
I’ll start by saying it’s very important to use special eye protection when working around LED lights they can cause permanent damage your eyes.
LED (Light Emitting Diode) lights are becoming very popular for a variety of reasons. One reason is they use a lot less electricity compared to HID (High intensity discharge) lights. Next, they put off less heat which is ideal for growers using a smaller tent or grow room. Also, the manufacturers have been tweaking their grow light spectrums making them ideal for growth and bloom stages. Lastly, they are often rated to last for 50,000 hours of use which is about 5.7 years of running your lights at 24 hours a day which most grower don’t do. So essentially, they are well worth the investment.
With all those benefits there must be a down side? Yes, high quality LED lights can be very pricey. I have always felt that you should always buy the best items you can truly afford and this is one of those times. If your serious about growing this will be your most expensive investment in your grow set up.
Making sense of LED light wattage. Let’s start with the diode wattage you may see 3-watt, 5-watt, 10- watt etc. being used in lights. The quality, number and color spectrum of the diodes differ between manufacturers. The interesting part is these diodes don’t actually use their full wattage. They may only use ½ or less of their rated wattage. The reason for this is heat. It’s the enemy of the diodes and excessive heat will shorten the life span of them considerably. When buying lights, they will have a “heat sink” or heat exchanger to draw heat away from the diodes this could be an aluminum fin type design or an extraction fan or a combination of both would be ideal for a well-designed light fixture.
Some manufactures actually deceive buyers in my opinion by listing the total wattage potential of their lights not the actual wattage drawn by their lights. Example: Your light uses 100 five-watt diodes. 5 watts x 100 diodes = 500 watts. This how most/some manufacturers will advertise their lights.
But wait the true amount of wattage that the light was designed to use to power that 5-watt diode is 2.5 watts. Hence 2.5 watts x 100 diodes = 250 watts. This is the true number of watts your light draws during use. It is very important to look for the true actual wattage that your lights will draw in order to estimate the size needed and to compare lights before purchasing them.
Use the true actual wattage draw to determine the light size for the required area. The following is a basic guide for “Novice” growers using the bare “minimum” amount of wattage needed for a half way decent successful harvest of 32 watts per square foot. You can expect to get 0.5 to 1.0 gram per watt from your grows. For advanced/experienced LED growers I recommend using a higher wattage light in the 50 to 60 watts per square foot for the same areas will/could increase your final harvest amounts, quality and density of your buds but using a PAR meter is highly recommended to measure the light intensity to prevent damage to your plants and buds. Larger grow spaces will typically use more than one light to meet the wattage needs required.
Quick Guide (Minimum to Maximum)
1' x 1': 32 watts (~32 watts to 50 watts to 60 watts)
2' x 2': 128 watts (~128 watts to 200 watts to 240 watts)
2' x 4': 256 watts (~256 watts to 400 watts to 480 watts)
3' x 3': 288 watts (~288 watts to 450 watts to 540 watts)
4' x 4': 512 watts (~512 watts to 800 watts to 960 watts)
5' x 5': 800 watts (~800 watts to 1250 watts to 1500 watts)
4' x 8': 1024 watts (~1024 watts to 1600 watts to 1920 watts)
6' x 6': 1152 watts (~1152 watts to 1800 watts to 2160 watts)
For experienced LED light growers using advanced measuring techniques and manufacturer specifications using the following terms to get the most out of your lighting investment.
PAR is the amount of light in the 400 - 700 nm color spectrum that can actually be used by the plant.
PAR does not measure the amount of UV, Far Red and Infrared that could play a part in trichome formation and cell quality.
PPF measures the total amount of PAR emitted from the lighting system per second. PPF is measured in umol (Micro moles) per second. I will shorten this to just umol.
PPFD is a measurement of the amount of Photosynthetic Photon Flux per unit area.
DLI is the total amount of PAR the plant has received per day. It is calculated as Moles per day.
Our goal is to work our way up to a “minimum” DLI in the 38-40 mole range when in bloom.
https://horticulturelightinggroup.com/blogs/news/horticulture-metrics-par-ppf-ppfd-dli
Using manufacturers PPF/PAR reading grids to help adjust your light distance, spread and intensities are very useful to get a general idea of your light’s potential. But the best and only way to accurately measure these is by using a PPF/PAR meter. These readings will be essential in determining the optimum amount of light your plants will receive during different stages of growth and bloom by calculating the DLI (Daily light integral). This not wattage is the most accurate way of calculation your true lighting needs.
https://www.waveformlighting.com/horticulture/daily-light-integral-dli-calculator
LED Light Intensities for Auto Flower Cannabis
Recommended LED PPF/PAR Values / DLI Based on 20 hours of light.
Seedlings 150 - 200 umol / DLI 10.80 - 14.4 moles per day
Veg up to 9" 450 umol / DLI 32.40 moles per day
Early bloom 500 umol / DLI 36.00 moles per day
Mid bloom 650 umol / DLI 46.80 moles per day
Late bloom 750 umol / DLI 54.00 moles per day
Ripen 400 umol / DLI 28.80 moles per day
*** Use extreme caution going 700 umol or higher @ 20hrs/day this could cause light burn.
https://www.hydrofarm.com/p/LGBQM
https://www.apogeeinstruments.com/full-spectrum-quantum-sensor/
Why is this so important? Keeping the light intensities in specific ranges will prevent your plants from over stretching, maximize photosynthesis/growth and trigger your plants natural response to protect itself from intense lights during bloom by producing copious amounts of trichomes.
Even though natural sunlight in midsummer can be as high as 65 moles a day at its highest intensity in higher altitudes where cannabis grows naturally, we need to be very cautious about taking it this high with artificial lights to avoid crop damage. Each strain or phenotype you grow will need to be tested to determine how tolerant they will be to the light intensity and stress.
***NOTE*** This is for photo period growers reading this information. Since you are only running your lights 12 hours per day during bloom you can push your PPF/PAR readings higher in order to achieve the desired DLI needed for proper bud development. Using a PPF/PAR in the 900 to 1000+ umols range during peak bloom will get you into the 38.88 to 43.20 mole per day. You may be able to take this higher depending on the strain’s tolerance to light.
Plant signs of excessive light stress would be the leaf blades curling along the serrated edges, folding up in a canoe or taco like shape in order to conserve moisture. If not corrected this will lead to light burn which will be seen in the leaves closest to the lights starting to discolor or turning a lighter pale green or yellowish green with brown edges and tips. So, if your lower leaves look fine yet your upper leaves show these stress signs back your lights off a bit for a few days until they show signs they are recovering. If in bloom if the upper white pistils on the buds are drying and curling prematurely this could be a sign of an intensity issue also. If it is affecting mostly the dominant main cola re-positioning the highest point to the outer edges or corners of the grow area will lessen the light intensity leaving the lowest parts of the plant more directly under the light. Direct center under the lights is always the highest intensity.
The effective use of different light color spectrums will influence vegetative and bloom growth. To put this in basic terms using a heavy blue spectrum with produce shorter stockier plants while heavy red spectrum will encourage over stretching if used during the vegetative stage. Heavier red spectrum is typically used to encourage bud development while in bloom. While there aren’t any definitive studies done on why the red spectrum benefits bud development it is still used as an industry standard. Quality lights will use the proper proportions of each color spectrum to balance and promote growth or bloom. Essentially, it’s termed as full spectrum lighting because using the entire spectrum is important to maintain the overall health of your plants during both stages.
Some led light manufacturers use the addition of color spectrums outside of the PAR range of 400nm to 700nm including UV-A, UV-B and Far Red, Infrared. A study of UV-B light during late stages of bloom has shown that this may increase the amount of trichomes produced by cannabis plants. This particular study unfortunately did not include any comparison as to whether or not UV-A light would also produce or enhance trichome development. While both are hazardous to our eyes and skin using these types of lights should be done using extreme caution to protect ourselves from prolonged exposure.
https://www.karger.com/Article/Fulltext/489030
https://alliedscientificpro.com/web/content/product.attachment/1256/product_attachment/UV%20in%20Plant%20Photobiology%20-%20White%20Paper
For all of the techno-geeks
https://www.ncbi.nlm.nih.gov/pmc/articles/PMC6455078/
WEEK 2 UPDATE
Growth is progressing well gave the first light feeding on day 10 with Bio Vega, Bio Rhyzotonic which worked out well seems Bio Rhyzotonic tends to be alkaline so adding Bio Vega which is acidic balanced out fairly well. Also applied Azos and Great White beneficial microbes which I will continue to apply every 2 weeks during my grow with my last application in week 6. Using a feeding solution of 50 ml per plant in a circular pattern directly around plants about every 3rd day using a minimal moisture approach. I am also using new pots for this grow and use an electronic moisture meter to gauge the moisture amount at different depths within the pots to make sure the lower portions are not over saturated.
PLAN OF ACTION, My goal in the first 3 or 4 weeks is to try to keep everything "leaning" to the organic side in order to allow the natural microbial growth to establish themselves in the soil and root system. It has come to my attention that some chelating agents and chemical fertilizers can hinder microbial growth. Since these microbes do actually produce natural chelates I am confident they will do there job until I obtain a well defined root system with abundant feeder roots. Depending on the growth pattern and flower timing I will switch over to chemical nutrients in order to maximize nutrient uptake during bud formation, bud growth and bud bulking up stages. Seems auto flower plants tend to show Cal/Mag deficiencies around week 6 so adding Cal/Mag into my feeding regime during week 4 has worked out well for me on previous grows.
I'm running my temperatures a bit higher at an average of 82 F this grow. Using a infrared thermometer average leaf temperature was about 75 F with an average of 63 % humidity giving me a LVPD (Leaf Vapor Pressure Deficit) of 0.61 kPa.
Having your plants in the optimum LVPD ranges helps them absorb Co2 to properly conduct photosynthesis and allows the root system to adequately utilize water and nutrients. Using average leaf temperature is the best way to calculate LVPD.
LED lights tend to have leaf temperatures lower than atmospheric temperatures in the grow room. Growers using HID, Fluorescent bulbs typically will have temperatures higher than room temperature. With HPS leaf temperature can be 8 - 10 F higher than room temperatures due to the amount of infrared emitted by the bulb.
Recommended LVPD
Seedlings/Early Veg 0.4 - 0.8 kPa
Late Veg/Early Bloom 0.8 - 1.2 kPa
Mid/Late Bloom 1.2 - 1.6 kPa
*** Danger Zone*** Below 0.4 kPa / Over 1.6 kPa
https://www.dimluxlighting.com/knowledge/vapor-pressure-deficit-vpd-calculator/
https://vpdcalculator.com/vpd-calculator
https://www.blackdogled.com/lst
Lowered LED grow lights to 18 inches on day 12. PPF/PAR meter reading 350 -400 umoles. Giving me a DLI (Daily Light Integral) range of 25.20 - 28.80 moles.
Recommended LED PPF/PAR Values / DLI Based on 20 hrs of light.
Seedlings 150 - 200 umoles / DLI 10.80 - 14.4 moles per day
Veg up to 9" 450 umoles / DLI 32.40 moles per day
Early bloom 500 umoles / DLI 36.00 moles per day
Mid bloom 650 umoles / DLI 46.80 moles per day
Late bloom 750 umoles / DLI 54.00 moles per day
Ripen 400 umoles / DLI 28.80 moles per day
*** Use extreme caution going 700 umoles or higher @ 20hrs/day this could cause leaf burn***
PPF measures the total amount of PAR emitted from the lighting system per second.
PAR is the amount of light in the 400 - 700 nm color spectrum that can actually be used by the plant.
PAR does not measure the amount of UV and Infrared that plays a part in trichome formation and cell quality.
DLI is the total amount of PAR the plant has received per day
Our goal is to have a minimum DLI in the 38-40 mole range when it bloom.
https://www.waveformlighting.com/horticulture/daily-light-integral-dli-calculator
https://horticulturelightinggroup.com/blogs/news/horticulture-metrics-par-ppf-ppfd-dli
11 likes
5 comments
Share
3
Week 3. Vegetation7y ago


30.48 cm
Height
20 hrs
Light Schedule
27 °C
Day Air Temp
6.0
pH
60 %
Air Humidity
23 °C
Night Air Temp
11.36 l
Pot Size
40.64 cm
Lamp Distance
950 PPM
CO₂ Level
Nutrients 4

Armor Si
0.264 mll

CANNAZYM
0.528 mll
BioRHIZOTONIC
1.585 mll
Philindicus THAT'S MY BIOSPHERE!
Seeds, pots, soil, lights check! Now how about creating our perfect micro climate for our plants to thrive.
In general cannabis plants grow best at temperatures between 20–30°C (70–85°F) during the day.
Growers tend to agree that the ideal temperature is around 25°C (or roughly 75°F).
At night, cannabis plants like slightly cooler temperatures of roughly 17-20°C (62-68°F). The night temperature can drop 5 – 10°F (2 – 5°C).
Daytime cannabis temperatures above 85°F (29°C) or below 60°F (15°C) will slow growth and should be avoided at all cost. When CO2 is enriched to 0.12 – 0.15 percent (1,200 – 1,500 PPM), a temperature of 85°F (29°C) promotes the exchange of gases.
When enriched with CO2, plant photosynthesis and chlorophyll production are able to take place at a higher rate, thus causing the plants to grow faster. Adding an Exhale bag or other source of CO2 is an inexpensive way to increase atmospheric CO2 levels of 400ppm up to 800 to 1000+ ppm. Using an automated CO2 injection system would be ideal to achieve higher levels but becomes a steady expense and CO2 levels in a living space need to be closely monitored to avoid CO2 toxicity to people and pets.
Cannabis temperatures that are below 50°F (10°C) will seriously stress the plants and lower productivity. If the electricity goes out in the middle of winter, be sure to be able to keep the room temperature above 40°F (5°C) to keep your plants alive. No guarantees though.
The correlation between temperatures and humidity are a very important factor in plant transpiration. This effects how your plant will pull water/ nutrients through its root system into the plant/leaves where moisture exits the stoma which are located mostly under the leaves and CO2 is absorbed during photosynthesis.
Adding a digitally controlled cool mist humidifier will add that much needed moisture to your grow space. If the humidity is too low for the temperature the stoma will close in an attempt to conserve moisture this also slows down much needed CO2 absorption. When this happens moisture and nutrients being absorbed by the roots slows down. It’s the equivalent of trying to drink water through a straw while biting down on it. Seedlings and very young plants are very reliant on having a high humidity level to lower the transpiration rate (Need to conserve moisture) until they can establish a large enough root system to handle the amount of water lost during the day.
In other words, root growth is more important than seeing large amounts of vegetative growth in the beginning of your seedlings or young plant’s life.
Maintaining a consistent temperature while slowly lowering your humidity during the course of your grow will result in forcing your plant to slowly increase transpiration which forces them to feed more during important phases of growth and bloom.
https://en.wikipedia.org/wiki/Transpiration
A major influence on transpiration which keeps the stoma open deals with LVPD (Leaf Vapor Pressure Deficit). Using the leaf or canopy temperature of your plants and the humidity levels will give you the most accurate information needed to calculate the ideal amount of LVPD for each stage of your grow. Take the average temperature of the leaves using an infrared thermometer, the average humidity and use the LVPD calculator in the link located below to see if it’s in the proper range there are some various charts available on this site for your particular difference in leaf and room temperature. Often growers make the mistake of using the room temperature rather than the leaf temperature in their calculations. The reason this is a factor is because the use of LED lights will usually result in a leaf temperature that can be as much as 4 to 5 degrees lower than room/ tent temperatures. Also using HID or Fluorescent bulbs can result in temperatures higher than room/ tent temperature. With HPS leaf temperatures can be 8 - 10 F higher than room temperatures due to the amount of infrared emitted by the bulb.
Recommended LVPD
Seedlings/Early Veg 0.4 - 0.8 kPa
Late Veg/Early Bloom 0.8 - 1.2 kPa
Mid/Late Bloom 1.2 - 1.6 kPa
*** Danger Zone*** Below 0.4 kPa / Over 1.6 kPa
https://www.dimluxlighting.com/knowledge/vapor-pressure-deficit-vpd-calculator/
https://www.dimluxlighting.com/knowledge/blog/vapor-pressure-deficit-the-ultimate-guide-to-vpd/
https://vpdcalculator.com/vpd-calculator
https://www.blackdogled.com/lst
Air circulation is important to avoid air stagnation which can lead to mold or mildew issues. Using small fans indirectly blowing around near your plants simulates a natural breeze which will help strengthen your plants stems to hold up those heavy buds. It’s important not to stress the plants by having them blowing directly on them. If you notice your leaves curling or clawing it “could” be caused from too much air being blown directly on them just try to adjust the fans to point directly at each other with opposing air currents this will disperse the air a little bit more indirectly. Do whatever gives you the best results.
Air extraction using an inline exhaust fan venting outside with a variable speed controller will help regulate heat from your lights, humidity and exchange stale air from your grow space. If using an automated CO2 whole system controller, you will be able to properly time and regulate the release of CO2 to avoid waste. Remember to leave space for “clean” intake air to enter your tent or room while your exhaust fan is running. Lastly using a good carbon filter in your extraction system will help mask the odor from your plant to keep your grow as stealthy as possible.
WEEK 3 UPDATE
Take off! These girls shot up quickly which made me a bit nervous seeing it's only week 3 and my vertically challenged grow tent. They are unofficially starting to bloom. I'm calling this week veg since I'm continuing with veg nutes until they are 3/4 way through stretch and continue to do everything to prevent over stretching that too much nitrogen and phosphorus would cause also avoiding using a heavier red spectrum bloom light too soon.
Started doing some LST training bending back the main cola about midway up the stem then manipulated a few branches for positioning using some anodized aluminum bonsai wire with a hook bent on one end and did some leaf tucking where needed. I'm trying to create a more uniform canopy if possible rather than having a predominant main cola sticking up to give equal light intensity to all top bud sites.
They received 2 feedings about every 2nd to 3rd day only as needed still not watering to run off but moistening the entire surface of the pot to allow enough moisture for the microbes to thrive.
Dropped lights to 16" PPF/PAR meter reading of 450-500 umoles giving me a DLI of 32.40 to 36.00 moles per day.
Tent temperature 81 F with an average leaf temperature of 75 and average humidity of 60%. Giving me a LVPD of 0.80 kPa
16 likes
comments
Share
4
Week 4. Flowering7y ago


45.72 cm
Height
20 hrs
Light Schedule
27 °C
Day Air Temp
5.8
pH
450 PPM
TDS
60 %
Air Humidity
23 °C
Night Air Temp
11.36 l
Pot Size
40.64 cm
Lamp Distance
950 PPM
CO₂ Level
Nutrients 9

pH Perfect Sensi Bloom Part A
0.528 mll

pH Perfect Sensi Bloom Part B
0.528 mll

B-52
1.057 mll
Philindicus STRETCHING THINGS OUT
It’s about that time when if all is going as planned your plants should be showing signs of wanting to start stretching over the next couple of weeks. This signals the transition from vegetative growth into the bloom phase. Timing for the stretch can vary between strains as well as how much stretching can occur this may be affected by different factors like light, nutrients, temperature, genetics and phenotype differences even if they are from the same strain.
It’s natural and beneficial to allow the inter-nodes to reasonably stretch in order to allow more light to reach the bud sites emerging from the nodes. What we want to avoid is over stretching causing long weak lanky stems subjecting them to breaking under the weight of those heavy buds later in the bloom phase spelling disaster. We also want to incorporate some plant training techniques to try to develop a more manageable and even plant canopy if possible.
Keeping plants in too low of a light intensity will cause the plants to want to reach or stretch for the light so this needs to be addressed before it becomes an issue as early as possible right from the start of your grow. Keep in mind using too high of an intensity of light will cause the opposite effect of slowing growth possibly permanently stunting the plant. Using your trusty PPF/PAR meter to ensure the ideal light intensity almost eliminates this issue.
The light spectrum is also important with auto flower plants it’s not unusual for the plants to begin showing pre-flowers by week 3 or 4. Try to avoid the temptation of hitting them with your bloom lights too soon because adding more red spectrum lights will cause even more stretching. Holding off until they are ¾ of the way through stretch or completely done stretching would be ideal to control or limit the amount of desired stretch. It can be a matter of preference and experience with knowing how much each strain will tend to stretch.
Auto flower cannabis require less nutrients than photo period plants. Even during the peak stage of bloom, I find it is unusual to use more than ½ strength nutrients. Using too many nutrients too soon that are high in nitrogen and even phosphorus can cause excessive stretching.
Remember our soil mixture has some nutrients in it already so using smaller 1/8 to1/4 strength nutrients which should be more than adequate during the first 3 or 4 weeks. If your plants are showing good progress and the leaf color is a healthy shade of green, you’re in good shape. If growth is slow or your leaves are very light green or yellow you have issues that need to be addressed. I will be discussing more about nutrients in week 6. So, skip ahead if needed.
Larger differences between daytime and nighttime temperature can contribute to stretching. Maintaining a smaller temperature drop will help limit over stretching. Large swings can be avoided by running your lights longer hours or 24/7 if needed during the stretch. Plants also seem to stretch more after lights first come on after a dark period. Using air conditioners or heaters if necessary, to limit or eliminate temperature swing can also help.
Because we are growing from seeds genetics and phenotype variants occur regularly. Sativa strains tend to do more stretching while Indica strains tend to grow shorter and wide. XL and XXL strains can produce larger plants and harvests so extra room may be needed. While most plants of the same strain will have similar traits there’s always a chance of a dominant rebel breaking out that’s larger or a runt which is smaller than the rest. Recognizing these plants early enough you can employ a few different strategies to keep them under control by using more of or limiting a few of the other items that influence growth and stretching. Growing multiple different strains creates a greater chance of height, growth and bloom time variables.
Plant training using LST (Low Stress Training) to manipulate branch positions can help limit height, position branches and bud sites to create a more uniform canopy to ensure maximum light intensity to all buds for proper growth. For taller plants more aggressive LST work can be done by gently pulling branches lower and directing the growth to the outside edge of your pots using coated wire, pipe cleaners and twine if needed. For smaller plants you may only need to lightly LST the main stem and a few outer branches.
I try to put off LST training when plants are small in order to prevent disturbing the crown of the plant which would mean possibly tearing some roots setting it back. I now wait until it’s about 8-9 inches tall and prefer to start bending back the top of the main stem at about 5 to 6 inches above the base of the plant. This needs to be done at a point where and while the stem is still soft and flexible enough to be manipulated. Bending it too far all at once could cause it to snap. You can bend it in stages while it’s still growing then bend it over more in a few days. You will acquire a feel for how far or much she’s willing to bend for you after a few grows.
I don’t recommend using HST (High Stress Training) techniques like topping, FIM (Fimming), super cropping on auto flower plants while many growers have had excellent success in doing so these plants grow and bloom so quickly if done too late or incorrectly it can add too much time for them to recover hindering growth, flowering.
While using multiple light stress techniques during your grows can produce a better end result the opposite effect can happen when causing too much stress. It can actually trigger your auto flower plants natural survival instincts and cause your plants to turn into hermaphrodites. If this goes unnoticed and pollen gets released you will have seeds in most of if not all of your plants if it gets blown around your tent, grow room, house clothes. It can also possibly contaminate future grows. Not a good thing! So, proceed with caution.
WEEK 4 UPDATE
The bloom is officially on! These girls are giving some stretch but still have some more left in them with the tallest one stopping at 18 inches.
Started week with just straight ph correct water since I squeezed in one last feeding late in week 3.
Middle of the week gave these girls a nice flush to get them ready for some bloom nutes. Highest runoff was 1250 ppm I'm sure there was a lot of stuff building up in there so I continued to flush until I got the runoff ppm in the 800-850 ppm range. Runoff ph was great in the 6.0-6.2 range. Followed up with a light nutrient solution of 450 ppm for the last quart of flush water.
Let them dry out nicely for a few days last day of week I used 1 table spoon Organic Blackstrap Molasses per gallon of water ph corrected and added 1/2 teaspoon Great White beneficial microbes. Planning on one more application of great white in week 6.
Flipped on my bloom lights PPF/PAR meter reading 550 - 650 umoles Giving me a DLI of 39.60 to 46.80 Moles per day great for budding stage.
Tent temperature 81 F with an average leaf temperature of 75 and average humidity of 60%. Giving me a LVPD of 0.80 kPa
18 likes
2 comments
Share
5
Week 5. Flowering7y ago


50.8 cm
Height
20 hrs
Light Schedule
25 °C
Day Air Temp
6.2
pH
Weak
Smell
650 PPM
TDS
55 %
Air Humidity
23 °C
Night Air Temp
11.36 l
Pot Size
40.64 cm
Lamp Distance
950 PPM
CO₂ Level
Nutrients 9
pH Perfect Sensi Bloom Part A
0.793 mll
pH Perfect Sensi Bloom Part B
0.793 mll
B-52
1.057 mll
Philindicus MIDLIFE CRISIS
OMG! Are my plants big enough? Are my buds growing fast enough? Am I doing everything right? Etc.
These among many other thoughts are going through most growers’ heads when they hit the midpoint of the grow. The transition into the bloom phase takes a little bit of time and a lot of patients. It’s perfectly normal to have these reactions.
Hopefully by this time you should see some signs of bud development in the form of multiple pistils starting to form clusters. It’s important not to jump the gun and blast your plants with bloom lights and start dumping bloom nutrients into your pots until you’ve pretty much finished or are close to finished with the stretching phase. Over stretched plants can lead to loose over stretched buds which is not what we like.
Since not every strain will grow and bloom identically or even each plant of the same strain may be growing/blooming at different times it’s important to keep feeding light doses of veg nutrients until you’re sure the stretch is nearly completed. Then switch on the bloom lights and start to use bloom nutrients. This could happen at any point during week 5 or beginning of week 6.
During this time, you can concentrate on slightly increasing the light intensity (Use a PAR meter) and adjusting branch positions to optimize the amount of light that’s reaching the bud sites. You are still trying to achieve a nice even canopy if possible. The main cola is usually a little taller than the surrounding branches so if needed you can loosen the reigns and let the lower branches grow up closer to the height of the main cola.
You may include tucking/tying down or back some of the larger fan leaves by any means needed. As the buds continue to grow over the next few weeks, they will be producing new leaves and throwing out hundreds of fresh white pistils.
A look ahead: In the beginning of week 6 you will do some light defoliation by removing the lower fan leaves and tiny bud sites on the lower 1/3 of the plant. These small bud sites will never get enough light to amount to anything worthwhile. The other reason for doing this is we are creating some slight stress forcing the plant to direct more energy into developing the upper buds’ sites rather than allowing the smallest buds to waste that energy. Some growers will do something called “Lolli Popping” where only the top several buds are left to develop in size and density. It’s very important not to overdo the defoliation on your plants they need the fan leaves to conduct photosynthesis which equals energy! So, if you have a very densely leafed plant you can also gradually remove the lowest 1/3 of the fan leaves over the period of a couple of weeks (6,7) but definitely nail the bud sites. Remember creating small stresses are better than causing too much stress during this key phase.
Lastly your plants will be drinking more water and you need to make sure they are getting enough moisture to prevent salt build up from nutrients in your pots. Watering to the point of a 5%-10% run off helps prevent this. I use a digital moisture meter this helps me see what the moisture levels are at different depths of the pot. You can also try lifting your pots before and after watering take notice of the difference in the weight. It takes a bit of practice but keep in mind you need to water each pot as needed not all at the same time each one may be different. It helps to number your pots and use a note book to keep tracked of when you water or feed each plant. Under watering can also cause issues since any left-over nutrients will actually increase in concentration as the soil dries. This is very important since auto flower cannabis can be sensitive to higher concentrations of nutrients which can lead to root/ leaf burn. Over watering can cause roots to rot and lead to nutrient absorption issues leading to deficiencies. Expect to be watering/feeding about every 2nd to 3rd day as needed. More about watering/nutrients will be discussed in week 6.
WEEK 5 UPDATE
From the looks of things I believe they are done with what ever stretch they had left in them stopping at 20". I would be surprise if they grew in height any more. Seeing a lot more white pistils showing up so the buds are developing a more complex shape to them. Performed bit of house keeping trimming off some lower fan leaves a micro bud sites, leaf tucking was mandatory and finished tying off my branches to allow a nice spread for more light to penetrate the inside of the plants bud sites.
Performed a Half-Cropping technique I utilized on my Fast Buds Zkittlez grow where I lightly roll the stems between my thumb and index finger then gently squeeze the stem then gave them a slight bend at that point with my other hand to maybe a 45 degree angle but not taking them to the point of performing a full super cropping by taking them to the 90 degree point. They seem to recover and strengthen the bent area almost over night. I would call this Half-Cropping the stem or so I will coin the technique. Using this creates some stress to mimic an injury that will force the plant to send more energy to repair the damage and hopefully create more resin and terpenes in the buds.*** Warning you may not be able to use a grinder on your weed if you do this technique it will jam it up no shit!***
Increased my nutes slightly still haven't reached the 1/2 strength dosage as of yet. Trying to compensate for AN nutrients in my opinion have a bit of a high nitrogen ratio for the bloom stage I think overly leafy buds add weight but I like to see calyx dense buds instead so this is my ultimate end goal in bud development. I will start adding extra phosphorus and potassium in week 6 to prepare them for some bulking up over the next 3 weeks. I also check my runoff after feeding. ph averaged 6.1 and PPM was running 950 or less. I do this to make sure they are feeding properly and will adjust feedings or just water if needed. They are getting 2-3 feeding a week about every 2nd or 3rd day as needed they are getting thirstier and are watered to the point of less than 5% runoff. Sorry I'm not into wasting nutrients.
Light intensity has been challenging since I'm maxed out in terms of being able to raise my lights any higher. I had a few hot spots of 750+ umoles which hit one plant a bit with some light stress. I have been trying to keep the main colas to the outside of the tent where the intensity is lower yet keep the lower buds more directly under the lights and rotate the plants when ever possible. Only time will tell if the leaves will have some light burn over the next few weeks it should show itself. Hopefully they won't look worse for wear by the end of the grow.
PPF/PAR meter readings range from 650 -750+ which is pushing it. Giving me a DLI range of 46.80 to 54.00 Moles Per Day
Lowered my temperature to 77 F and humidity to 55%. Leaf temperatures are an average of 73 F which gives me a LVPD of 1.07 kPa
21 likes
1 comment
Share
6
Week 6. Flowering7y ago


50.8 cm
Height
20 hrs
Light Schedule
25 °C
Day Air Temp
6.0
pH
Normal
Smell
750 PPM
TDS
47 %
Air Humidity
23 °C
Night Air Temp
11.36 l
Pot Size
40.64 cm
Lamp Distance
800 PPM
CO₂ Level
Nutrients 12
Epsom salt
0.264 mll
Blackstrap Molasses
0.66 mll
pH Perfect Sensi Bloom Part A
1.321 mll
Philindicus FEELING CHEMICALLY IN-BALANCE
WATER
Using good, clean, quality water is very important when growing cannabis after all you will be consuming the fruits of your labor.
I will try to keep this topic fairly simple whenever possible.
Two important tools you will need a TDS meter and a PH. meter.
TDS METERS
TDS meters will typically give two types of readings E.C. (Electrical Conductivity) and PPM (Parts Per Million) To put this simply it will allow us to measure how concentrated our nutrient solution is when we feed our plants.
E.C. is really the most accurate and universal reading that is the same where ever you live in the world.
PPM is the most confusing part about using a TDS meter. The fact that manufacturers of the meters use 3 different conversion factors from EC to achieve a ppm readout, depending on which country you live in - 0.50, 0.64 and 0.70. The use of ppm when measuring the strength/concentration of nutrients in solution is not optimal, a bit cumbersome and prone to error or confusion. Higher quality TDS meters will allow you to measure using E.C. and 0.50, 0.64 and 0.70 conversion factors.
These conversion factors are important to take into account when comparing grower diaries since some one growing in Australia may be using a different conversion factor than a grower in the E.U or USA.
This could lead to over feeding or under feeding your plants.
When calculating nutrient concentrations, you need to measure your tap water ppm level and subtract that amount from your total ppm reading after adding your nutrients to your water.
Example: Tap water reads 200 ppm. You add your nutrients to the water it now reads 500 ppm. The actual concentration of nutrients is 300 ppm (500ppm – 200ppm = 300 ppm)
If using tap water/well water, a ppm range of 50 to 300 ppm (0.50 scale TDS meter) would be acceptable if it’s higher than this you may have water quality issues. These issues can cause future difficulty when mixing your nutrients and trying to adjust your ph. Typically “hard water” due to high amounts of calcium carbonate and magnesium carbonate just to name a few can create a condition called ph. bounce. Ph. bounce occurs when you attempt to lower the ph. of hard water using acids which initially lower the ph. of the water but within a few hours the ph. bounces back up because of excess minerals in the water. This ph. instability issue can lead to a condition known as nutrient lock out. This will lead to serious deficiencies in your plants.
If your tap water contains chlorine simply fill a bucket with water and leave it open for 24 hours and the chlorine should dissipate. If you’re in a rush use an aquarium air pump with an air stone for a few hours to speed up the process. Chlorinated water will kill your beneficial bacteria in your soil. If you live in an area where your water contains Chloramines do not use this on your plants it will not dissipate from the water. If you’re unsure contact your local water authority and ask which product they add to kill bacteria in your drinking water. Most water companies will list the water quality results on their web sites.
I highly recommend using reverse osmosis water it is ideal because it’s very close to pure water. If your serious about growing, invest in a small portable unit to filter your water. These units typically have a carbon type filter to help remove chlorine. Distilled water should be pure water and can be used if you only have one or two plants. Both of these after processing will start off with a neutral ph. of 7.0 then when exposed to air the ph. will drop to 5.0 to 5.5. The lack of dissolved solids in the water makes it easier to add only the necessary nutrients in the ideal proportions that meets our plant’s needs. It also allows the ph. to be adjusted more easily.
https://medteknutrients.com.au/ec-electric-conductivity-science/
https://www.thegoodearthorganics.com/tips/ppm/
PH. METERS
An ideal ph. for growing cannabis in soil would be 5.8 to 6.2 for the best nutrient absorption. Some growers will use a ph. as high as 6.5 with good success. Using a ph. that is outside this range will increase the likely hood of a nutrient lock out condition which will cause nutrient absorption issues for your roots.
I highly recommend purchasing a good quality ph. meter that allows you to replace the sensor tip which is usually made of glass. These sensors do wear out over time and if not maintained properly will give you an erratic or false ph. reading. It’s important to keep your meter clean, calibrated and stored using the proper storage solutions recommended by the manufacturer to ensure a longer sensor life. Using manufactured ph. up and ph. down solutions is your best and most effective option for adjusting your final ph. after adding your nutrients to your water.
Most ph. meters have a thermometer. There is a correlation between temperature and ph. levels which your meter automatically takes into consideration when calculating ph. The ideal water temperature for marijuana is between 68° and 73° F (20° to 23° C). If the water gets too hot or too cold, the roots can’t properly absorb nutrients as well. Hot water also holds less oxygen than cold water. You want to avoid temperature shocking your root zone. The plants roots and beneficial microbes need oxygen to stay healthy.
https://www.hannainst.com/
https://www.bluelab.com/home
NUTRIENTS
Let’s talk nutrients this is definitely a very opinionated aspect of growing any plant period.
Auto flower cannabis “do not” need high concentrations of nutrients. It would be unusual if you used more than half-strength nutrients during the high point of bloom when nutrients are most needed for great bud development.
The dizzying array of nutrient products is truly insane. There are a lot of good nutrients brands to choose from so do a bit of research before you choose one.
What I do recommend for beginners is to stick with one nutrient line up if possible, that’s specifically formulated for growing cannabis. Occasionally mixing different brands of nutrients can create issues with conflicts occurring between the different types, and forms of nutrients which different manufacturers use. This can lead to nutrient excesses or deficiencies. Each product in a manufacturers nutrient line up is designed to give your plants what they need when they need it. Save the experimenting when you have a few grows under your belt.
MACRO NUTRIENTS
Typically listed as the proportions N-P-K
N-Nitrogen: Although nitrogen is readily available in the atmosphere, most plants can’t absorb it from the air and instead need to take it up from the soil via their roots. It is particularly important for photosynthesis and more of this nutrient is used during the vegetative phases.
Nitrogen is vital for the production of chlorophyll, which plants use to convert carbon dioxide (or CO2) from the atmosphere into glucose, used as energy for vegetative growth.
P-Phosphorus: This is vital for the development of strong roots.
Flowering plants usually need extra phosphorus, which is reflected in its higher concentration in fertilizers designed for use during flowering. It encourages more bud sights to develop.
K-Potassium: Like nitrogen and phosphorus, potassium helps strengthen a plant’s metabolism and is necessary for both photosynthesis and the plant’s production of vital proteins. It also helps strengthen the plant’s immune system, leaving it more resilient to pests, infections, and diseases. It is also essential to help the buds’ bulk up properly during the late bloom phase.
While nitrogen, phosphorus, and potassium are important all throughout the cannabis growth cycle, the ratios in which plants need these nutrients changes depending on which part of the growth cycle a plant is in.
Seedlings, for example, need different nutrients than plants that are about to begin flowering. Here are some “basic” guidelines to the NPK ratios to meet the needs of cannabis plants in various stages of the growth cycle. Ideal proportions vary between different nutrient manufacturers.
1-1-2 Seedling stage up to 3 nodes
2-1-3 Vegetative
2-2-4 Bloom
0-3-3 Late bloom
You will typically see one-part, two-part, three-part nutrients. The most affordable are one- part nutrients these would contain basic macro nutrients like N-P-K in specific ratios for either vegetative stage of growth or bloom/flowering stage. They will also contain most of, if not all the micro nutrients needed to keep your plants healthy.
Next would be two-part nutrients. The quality of the nutrients is usually of higher quality and contain “chelated” nutrients which allow for better absorption by the root system. I’ll keep this simple. The reason they are separated is because they contain specific elements which will not mix together properly when in a concentrated form. But when added to your water separately and become diluted they will mix properly in the correct proportions.
Three-part nutrients use a separate grow formulation, micro nutrient formulation and bloom formulation in varying proportions depending on which stage you’re in and can be a very cost-effective way to feed your plants.
It is possible to only use these basic types of nutrients to grow cannabis to harvest. But I would highly recommend adding a few supplemental nutrients to your arsenal.
Adding supplemental calcium and magnesium is usually required at some point especially when your plants start to enter the flowering stage. They will become cal/mag hungry and need this for proper bud development or the buds will start to steal the nutrients from your leaves. In my experience with auto flower strains cal/mag deficiencies start showing up around week 6. In order to prevent this, I recommend adding small doses of cal/mag in to your nutrient regime starting in end of week 3 or beginning of week 4 no later. I say small doses because most cal/mag products will contain nitrogen. Using too much nitrogen can cause nutrient burn especially in smaller or younger plants. Start with ¼ strength cal/mag then as the weeks progress slowly increase to ½ strength by week 5 or 6. Note: Using “too” much calcium and magnesium can lead to nutrient lock out issues with macro nutrient potassium which is also needed for proper bud development.
Calcium (Ca): Low mobility
Used in making cell walls, and in some enzyme reactions, calcium provides a base for the neutralization of organic acids. It facilitates the activities of growing points, especially with root tips.
Calcium deficiencies can show as dying or dead tissue on new leaves. Leaves may curl under. Overdoses of potassium or nitrogen can cause calcium deficiencies – even if calcium is available. Over-watering can also interfere with calcium uptake. Absorption slows in cooler weather. Root diseases and nematodes may cause calcium deficiencies.
Overdoses of calcium may cause iron deficiencies
Magnesium (Mg): Very mobile
Magnesium is a key element in making chlorophyll and used in certain enzyme reactions. Magnesium also assists in phosphorous uptake and carbon fixation.
Deficiency symptoms consist of yellowing between veins, which can lead to dead patches in the affected areas, giving a mottled appearance. Signs of magnesium deficiency appear first on the oldest leaves and progress systematically toward the youngest leaves. Overdoses of calcium and potassium can block magnesium uptake.
Epsom salts, agricultural lime, and magnesium carbonate can all supply magnesium.
Sulfur (S): Very mobile
Used in amino acid and enzyme production, deficiency symptoms consist of a general yellowing of the leaves. This appears similar to a nitrogen deficiency, but starting in the upper leaves, not the lower leaves (as with a nitrogen deficiency).
Cannabis can generally tolerate quite high concentrations of sulfur, and overdosing is uncommon. However, over-application can lock out molybdenum, and hinder beneficial microbial life.
Sulfur is commonly paired with another nutrient. Potassium sulfate (0-0-50 18% S) and Epsom salts (Magnesium Sulfate) (13% S 10% Mg) both supplies more than one nutrient. I prefer Epsom salts as it supplies both sulfur and magnesium in approximately correct proportions.
Potassium deficiency often shows as a yellowing/browning/dying of the leaf edges and/or curled over leaves, followed by yellowing spots in the interior of the leaf face. Discolored spots may appear on the undersides of leaves. Deficiency symptoms show first on lower leaves as flecking or mottling on the leaf margins. Prolonged deficiency results in cell death along the leaf margins and the plants can show signs of wilt. These symptoms first display in older leaves, and continue to work up through to the newer leaves if not corrected. Growth, root development, disease resistance and bud size are reduced.
Silica additives like potassium silicate while not technically a necessary nutrient can be very beneficial in helping your plants build stronger cell walls which will help strengthen the stems which support your heavy buds. It will help your plants grow faster and improve the uptake of macro and micro nutrients. It can also improve your plants resistance to pests and diseases.
MICRO NUTRIENTS
The last six nutrients – iron, manganese, boron, zinc, copper and molybdenum – are only used in very small amounts (and most in very, very small amounts).
Iron, manganese, and boron are used in small doses. They are needed on the order of a hundredth as much as the macronutrients. Commercial micronutrient fertilizers often contain at least these three:
Iron (Fe): Low mobility
Iron is used to facilitate chlorophyll production and enzyme reactions. Iron chelates are soluble and aid in keeping iron in solution available for uptake.
Iron deficiency shows as upper leaf yellowing between the veins, which may progress to cell death of the affected leaves. New leaves come out bleached. Yellowing begins on the lower part of the leaflets. Iron deficiencies can look similar to a manganese deficiency. Overdoses of calcium, zinc, manganese, phosphorous and copper can lock up iron and cause a deficiency. Basic (pH above seven) conditions or over-watering can also lock out iron uptake.
Manganese (Mn): Semi mobile
Manganese is required for chlorophyll formation and enzyme reactions.
Manganese deficiency consists of yellowing between green veins, similar to a magnesium deficiency but appearing first on the upper leaves, and more mosaic looking. Yellowing may turn brown as the leaf dies. Basic (pH above seven) environments can lock out manganese uptake.
Toxicity appears as marginal leaf necrosis. Manganese may decrease the solubility of iron by oxidation, so an overdose of manganese may lead to iron deficiency.
Boron (B): Low mobility
Boron aids in the creation and stabilization of the cell walls in plant cells. It is required for root tip development and new growth. It can delay the onset of calcium deficiency, but is not a substitute for calcium. It tends to keep calcium soluble, and may assist in the absorption of nitrogen.
Boron deficiency affects the growing and root tips first. Leaf tips curl under, yellow, and die; growth may be stunted and bushy. High pH may lock up boron.
Glossy-looking leaves may be an indication of boron overdose.
Even smaller amounts of zinc, copper and molybdenum are needed. They are used in quantities down to a thousandth as much as the macro nutrients. Organic matter or soil usually has sufficient quantities of micro nutrients to fulfill the needs of plants, but in a highly sterile hydroponic environment they may need to be added to the system. Only trace amounts of these are needed. For example, water running through house pipes has been known to pick up enough copper to meet the needs of Cannabis.
Zinc (Zn): Semi mobile
Zinc is used to activate enzymic reactions and indoleacetic acid.
Young leaves show yellowing between the veins. Sometimes a zinc deficiency can lead to plants with shortened inter-nodes. Zinc deficiency may occur in cold, wet soils, or in basic pH conditions.
Overdoses of zinc may cause copper and iron deficiencies.
Knowing what nutrients, the plant needs is half the battle; knowing how much is the other half it’s also the more debated of the two. Reacting to deficiencies and overdoses is one way to get a feel for how much of which nutrient you should be adding to your solution. Another is to start with someone else’s best shot at it, and then try to improve upon it yourself.
Growers must proceed with caution in order to avoid under or over feeding their plants based on particular strains and phenotype differences. You must have a basic understanding of how a healthy plant should look during each stage of its life.
A healthy cannabis plant should be a nice even shade of green. The leaves and the leaf blades should be held out somewhat flat and straight not drooping down or folded up or cupping down.
Light green/yellowing coloring can indicate nutrient deficiency issue.
Dark green leaves are usually the result of excess nitrogen possibly excess iron and should be carefully watched looking for leaf tips clawing or yellowing/brown leaf tips indicating nutrient burn.
Leaves with brown edges can be a sign of both nutrient excesses and deficiencies.
Brown or yellow spots showing up on the leaves can be a sign of calcium and or magnesium deficiencies.
It’s not unusually for the oldest lower fan leaves to fade and show deficiencies about half way through your grow. As long as the issue isn’t steadily progressing to the upper leaves it usually isn’t a sign of any major issue.
Mixing your nutrients in the proper order is also important. Also shaking or completely mixing after each nutrient is added to your water will prevent nutrients from binding together becoming useless when it comes to absorption.
First always shake your nutrient bottles well before using them.
If using a silica additive this must be added first to your water it needs to be kept in an alkaline state to remain in solution. It tends to be very alkaline in ph. so don’t overdo it. Start with 1 ml per gallon.
Next add your calcium/magnesium supplement if needed and mix well
Next add your base nutrients they tend to be acidic and will balance out the alkaline effects of the silica.
If using a one-part nutrient simply add and mix
If using a two-part add part A first and mix well, then add the part B and mix again.
Some growers may argue that you should add part B first then part A. If that was the case the manufacturers would tell you to do this on the bottle.
If using a 3-part add Micro then Grow then Bloom mixing well between each part.
Next add any bloom boosting additives.
Next add any additional supplements
Check and adjust ph. after mixing. Wait 15 to 30 minutes then recheck ph. again until it stabilizes.
Use your nutrient solution as soon as possible do not store or use them for more than 24 hours after mixing.
With auto flower cannabis try using a starting dose of 1/8 to 1/4 the recommended starting dose suggested by the nutrient manufacturer to achieve the ideal concentrations.
You must use either the EC. or proper conversion scale that your TDS meter uses to calculate PPM.
Adding beneficial microbes to your soil are an important part of the nitrogen cycle. Although the major constituent of the air we breathe is nitrogen, plants cannot take nitrogen directly from the air. Through the processes of nitrification and assimilation, plants can obtain an adequate amount of nitrogen in the form of nitrate.
Nitrogen goes through various forms in the nitrogen cycle. Each of its many forms is necessary to maintain a balance in the ecosystem. For plants, nitrogen is the most in demand nutrient. The majority of the nitrogen in the soil exists as organic matter and is relatively immobile. When the organic matter breaks down, it releases ammonia. The ammonia in turn is converted into nitrate by microorganisms. Nitrate is a mobile form of nitrogen and is easily accessible by plants.
Please see AUTO FLOWER CANNABIS FEEDING CHART in weekly photos above this is based on 70 to 75 harvest day.
Use this chart as a starting point for creating your own personalized feeding chart based on your particular strains growth and feeding habits.
WEEK 6 UPDATE
Nice progress with the buds developing a bit of size/density and seeing some pistils starting to dry signaling the end is approaching. Smell is picking up becoming more noticeable even with my exhaust fan on. Reminiscent of ripe citrus with a slight floral undertone.
The "Half Cropping" technique that was performed in the beginning of week 5 has healed over leaving a slight swelling at the point of trauma on the stem very pleased with the result so far. I removed a few more random fan leaves that were blocking light to the lower buds and will continue to perform this slowly over the next few weeks as needed.
Increased my nutrients this week adding in some Canna PK 13/14 and Canna Boost to start giving them the extra phosphorus and potassium needed to start bulking up in week 7-8. Also I used 1/5 teaspoon of Epsom salt (Magnesium Sulfate) to help the buds develop and boost terpene production. Studies have shown that magnesium and sulfur is beneficial and aids plants that produce the terpene limonene. I feel safe doing this with the increase of potassium and calcium. Proper ideal proportions are 4 parts potassium to 2 parts calcium to 1 part magnesium in order to prevent one or more from blocking absorption of each other.
Made my last application of Great White beneficial bacteria and mycorrhizae at 1/2 teaspoon per gallon water with 1 teaspoon Organic Blackstrap Molasses added to feed those little buggers. Even though I'm using chemical nutrients I feel that at least some microbes will survive to be beneficial until the end of the grow.
Light intensity is the same as week 5 PPF/PAR meter readings range from 650 -750+ which is pushing it. Giving me a DLI range of 46.80 to 54.00 Moles Per Day
Tent humidity average of 47% humidity with an average leaf temperature of 71.6 F giving me a LVPD of 1.15 kPa
Since I dropped my humidity I needed to increase my exhaust fan speed to maintain a reasonable temperature which in turn lowered my Co2 to 800 ppm.
16 likes
5 comments
Share
7
Week 7. Flowering7y ago


50.8 cm
Height
20 hrs
Light Schedule
25 °C
Day Air Temp
5.8
pH
Normal
Smell
875 PPM
TDS
47 %
Air Humidity
23 °C
Night Air Temp
11.36 l
Pot Size
40.64 cm
Lamp Distance
800 PPM
CO₂ Level
Nutrients 10
Epsom salt
0.264 mll
pH Perfect Sensi Bloom Part A
1.585 mll
pH Perfect Sensi Bloom Part B
1.585 mll
Philindicus PUMP UP MY BUD'S!
This is definitely the moment of truth when growing any strain. It’s all about the buds! We all want not just big buds but buds of substance. What I mean is some nice sugar-coated calyx density with a nominal amount of trichome covered sugar leaves to fill in a bit. While genetics plays a huge part of the overall bud quality, it’s our job to give them what they need when they need it to maximize the bud building potential of each and every plant regardless of strain or phenotype.
We’ve spent some time performing a number of low stress techniques to give the buds the energy needed to focus on bud growth but now it’s time to put some weight on these jewels.
Progressing through the vegetative stages focused on leave and stem growth, then transitioning through early flower development required a change in our nutrient proportions to maximize bud sites. Now we need to tweak or start using some extra phosphorus and potassium to feed those hungry buds. While the need for nitrogen has dropped during bloom it’s still needed for photosynthesis to occur. Too much nitrogen could lead to excessively leafy buds not what we like.
Using a bloom nutrient with low nitrogen with medium to high phosphorus and high potassium is important in order for the buds to start the bulking up stage. Over the next few weeks you will see a significant increase in density and size of the buds as they begin to swell up.
Adding a PK 13/14 type product during this time will give the extra phosphorus and potassium needed to maximize bud size. In addition to these macro nutrients it’s very important to note your buds are also hungry for calcium and magnesium. Hopefully you’ve been keeping an eye out for cal/mag deficiencies over the past few weeks and have increased the amount of cal/mag to satisfy bud growth which can really drain the leaves to feed their need.
Another micro nutrient sulfur is very often over looked but it is needed in small quantities to ensure good bud growth. If you have stagnant bud growth/development and if you have upper leaves with a part yellow part green with red leaf stems, possibly showing red/purple streaks running up your main stem you may be looking at a sulfur deficiency. If this issue is encountered adding an Epsom salt (Magnesium sulfate) solution can help alleviate the issue. Some supplements may contain potassium sulfate which would actually be beneficial to the buds since we’re in bloom. What is important is trying to keep the nutrients in proper proportions to help prevent nutrient lock out. It should be 4- parts Potassium to 2- parts Calcium to 1-part Magnesium. Each one has the potential to lock out each other. So, in other words adding too much potassium too soon won’t do much for your buds since they aren’t using all of it. In turn if you keep adding it the concentration could lead to issues with calcium and magnesium deficiencies. The same goes for too much calcium locking out the plants access to potassium or magnesium. Hence too much magnesium will lockout calcium and potassium. In other words, it’s key to add the nutrients only when they are truly needed to avoid major bud growth issues caused by nutrient lock out.
One way to avoid this issue is to make sure you perform a small flush prior to switching to bloom nutrients. This will help wash out any excess salts that have been building up during the first 4 to 5 weeks. I’m using a TDS meter with a 0.50 scale so when flushing I’m checking my runoff ppm’s they will sometimes be up into the 1500+ppm (3.0 EC) ranges a bit higher than I like. I will flush until I can get it down into the 850 to 900 ppm (1.7 EC -1.8 EC)range then add my nutrients to the last quart of flush water. I like to allow my pots to dry out a bit longer before the next watering or feeding. I find that doing this will prepare the plants and soil/pots for the steady increase in nutrients which will be at their maximum dosages during week 7 and 8 thus preventing any nutrient lockout issues during such a key period of bud development.
Some growers like to start adding in some smaller amounts of PK 13/14 starting in week 6 then increasing it slightly in week 7 then giving the largest dose in week 8. Others suggest using it in one big pop around 3 weeks before harvest. To play it safe I like to use the gradual approach to adding PK 13/14 while adding in extra calcium, magnesium and sulfur supplements in an attempt to maintain some type of balance in the soil. Aside from truly overdosing with your nutrients and burning the hell out of your plants it’s nice to find out what their limits actually are when it comes to nutrient strength. What’s important to remember is auto flowers don’t need as many nutrients as photo-periods. You rarely ever need to use more than half strength nutrients on them even during the peak bloom period.
I do recommend keeping detailed notes on each pot/plant in order to prevent your runoff ppm’s from getting too high or too low. If it gets too high use plain water in between feedings to bring it down slightly. Each plant may also be feeding/drinking a bit faster or slower than the others so always feed and water them individually depending on their actual needs. If it’s too low feed every watering to get it back up to where it needs to be. During week 7 and 8 I like to see my runoff after feeding to be in the 850 – 1000 ppm (1.7 EC -2.0 EC) range. It seems to work well for me. I do see some growers taking it up a bit higher for larger heavier feeding strains that burn through nutrients. Always a few rebels pushing their plants to the limit. Lastly this is the best way to develop your own custom feeding schedule for your nutrient line up to use on your future grows.
So, get to it and start pumping up those buds!
WEEK 7 UPDATE
Buds are filling in getting denser. Increased nutrients ppm this will be the maximum I will be feeding. They are receiving a feeding about every third day as needed taking almost 1/2 gallon to take them to the point of slight runoff. I continue to remove/tuck a few fan leaves as needed to allow more light to bud sights. Temperatures ,humidity light conditions are the same as week 6.
16 likes
comments
Share
8
Week 8. Flowering7y ago


50.8 cm
Height
20 hrs
Light Schedule
25 °C
Day Air Temp
5.8
pH
Strong
Smell
875 PPM
TDS
47 %
Air Humidity
23 °C
Night Air Temp
11.36 l
Pot Size
40.64 cm
Lamp Distance
800 PPM
CO₂ Level
Nutrients 10
Epsom salt
0.264 mll
pH Perfect Sensi Bloom Part A
1.585 mll
pH Perfect Sensi Bloom Part B
1.585 mll
Philindicus THE GOOD OLD 1-2 TERPENE PUNCH
By this time your plants should be kicking out some great smells. While doing work around your plants inevitably we brush against a bud or two releasing some of those luscious smelling terpenes.
Terpenes are actually part of the plants natural defenses to either attract beneficial insects or repel pests or animals. For us it provides flavor and smell to our buds. Specific terpenes can actually have an effect on the type of high you will get after a smoking session. There may even be some medical benefits from using certain terpenes in treatment of many illnesses.
These terpenes start to develop during your flowering stage so it’s important to perform a few smaller stresses on our plants to increase terpene production.
One of those that I have covered is performing a light defoliation of the lower 25%-30% of the plant about 2 weeks into bloom. This is simulating an animal eating the lower leaves off your plants. Your plants reaction is to redirect its energy into the upper buds on your branches in order to increase terpenes so the plant will be unpalatable to some animals. Ever try chewing on a bud? See that’s the point!
Next, we can cautiously use a higher stress technique of branch pinching. Creating a slight amount of damage to the inner stems of the branches. Slightly rolling a softer yet strong spot of the branch well below your buds between your thumb and index finger or middle finger slightly squeezing the branch is all it takes. You can stop right there or take this a step further by utilizing a “Half Crop” technique or so I have coined it by then slightly bending the branch over at that same point say to maybe a 30 to 45-degree angle at most. When taking the branch all the way over to the 90-degree angle this would be considered a Super Cropping technique. I feel this would create too much high stress on the plant. So once again we are basically simulating an animal bending some branches creating some damage. When using any high stress techniques, we really increase the risk of triggering yet another self-preservation reaction in the plants which is the dreaded Hermaphroditism of the flowers occurs. Auto flower plants can be a bit more sensitive than photo-periods to high stress techniques. Yes, she’s quite a lady until you find out she’s putting out bananas behind your back. It’s important to keep your eyes out for those tricky bananas which if they go unnoticed will pollinate your flowers which means seeds. Once pollinated the flowers will focus on seed development not THC and terpene production. Definitely not what we want. If you see bananas cut out all stresses on your plants try to remove the affected bud/buds as soon as possible or if it’s just one plant remove it from the rest of the grow. Now if they throw out a few bananas during the late ripening phase or end of your harvesting window I would simply harvest them as soon as possible to hinder any seed development.
We know our girls put on a great show under those bright lights. Our reward is lots of trichomes baby! This is where most of the terpenes are located. Trichomes are another one of the plants natural defenses to protect itself from extreme light damage. So, creating some light stress using the ideal color spectrums during each stage of growth and bloom while gradually increasing the intensity will force the plant to grow more trichomes during the peak parts of bloom in an effort to protect the sugar leaves and flowers from too much light. Remember to achieve the proper intensity without burning your plants you may need to splurge for a PAR meter. Using this will give you some of peace of mind.
If you want to kick stress levels up a notch or two try adding 3 to 4 hours a day of UVB light during the last few weeks of your grow. A study has shown that this can increase trichome growth and density. While this study never compared if UVA light has the same effect some light manufacturers are already adding UVA bulbs in their lights.
https://news.californialightworks.com/uvb-light-and-thc-potency/
https://www.blackdogled.com/blogwhich-is-better-uva-or-uvb/
How about those beneficial bacteria and mycorrhizae we’ve been adding to our soil throughout the grow? Seems like Cannabis is like a fine-tuned plant which protects itself from every angle. These beneficial microbes form a very close mutual relationship with our plants root systems they both give and receive the nourishment by breaking down our nutrients and producing natural chelates and amino acids to benefit our plants. It’s usually a good idea to use some Organic Unsulfured Blackstrap Molasses to add some carbohydrates to feed the microbe herd. Some growers claim using the molasses aids in improving the smell and taste of their buds. There is even some information that using Lactic Acid Bacteria (LAB) can boost potency, terpenes and yield. Check it out. I’ll have to give it a try one day.
https://www.royalqueenseeds.com/blog-lactic-acid-bacteria-lab-boosts-potency-terpenes-and-yield-n1153
Others swear by using commercially produced terpene enhancers. While I make no claim of being a chemist, I couldn’t help but notice most of these products typically contain Magnesium Sulfate or Potassium Sulfate and or some mystery bio magical ingredient. There are a few over my head type research journals on the internet which associate certain metals and sulfur are essential in forming some of these compounds found in terpenes. Oddly enough Blackstrap molasses has magnesium, potassium and even some sulfur in it plus many more beneficial nutrients. It’s important to note that “unsulfured” molasses does not contain the preservative “sulfur dioxide” which could damage your microbe herd.
Temperature for maximizing terpene production
The high temperatures from artificial light sources can damage terpenes and essential oils. This is one reason why I recommended to lower the operating temperature during the last couple of weeks of flowering (peak terpene production). Generally, the optimal operating temperature for growing cannabis is 75-80˚F. During the last couple of weeks of flowering, some growers drop the temperature range by 5-10 degrees Fahrenheit. This reduction in temperature slightly stresses the plants and increases terpene production while protecting the terpenes from being damaged by excessive heat. Just be sure the temperature doesn’t drop too low or there is not a differential of more than 10 to 15 degrees Fahrenheit from the light and dark periods. Operating temperatures below 60˚F can be counterproductive and reduce yields. Also, a large temperature differential between the light and dark periods could cause condensation and/or humidity related issues.
Humidity for maximizing terpene production
Ideally, the humidity level in a cannabis flowering room would fall between 50-60 percent during bloom. However, during the last few weeks of flowering, the humidity level can be dropped to around 30 percent to slightly stress the plants. This usually requires a dehumidifier. The lower humidity lightly stresses the plants which, in turn, increases terpene production. Lower humidity during the last weeks of flowering also reduces the likelihood of molds and other humidity-related problems.
Drought stress is the last trick up our sleeve to fake out the plant into thinking it’s going to die. This needs to be done very carefully. Last three weeks before harvest try to allow your plants to get a bit drier before the next watering. Not to the point where the leaves wilt from extreme lack of water but just let your pots get a bit lighter in weight. This can be dangerous if you have a high nutrient salt build up in your pots. Letting them dry out can increase the salinity in your pots and cause nutrient burn. Always monitor your runoff ppm’s when watering and feeding. You can continue this wet then dry type watering cycle after you flush your plants right up until harvest. Also, excess nutrients can hinder terpene development so don’t over feed your plants and flush 2 weeks before harvest.
Bring on the dank buddy goodness!
WEEK 8 UPDATE
They were given their last feeding a few days before the end of the week. Buds are smelling incredible with a nice heavy ripe citrus overtone filling my tent over powering the FB Blackberry Kush's berry/earthy smell. I even catch a nice whiff when I'm outside near my vent even though I'm using a carbon filter on my exhaust. I'm very impressed with this strains perfect size for using 3 gallon pots, shape, overall uniformity and the ease of lst training of the plants and buds. Bud development is nice with a low leaf to high dense calyx ratio just the way it should be. As the pistils are drying and curling the calyx are starting to show signs of swelling up. Trichome color is some clear with mostly cloudy/milky with sporadic ambers showing up mostly on the small sugar leaves. Guesstimating 10-14 days for flushing then harvest. Looking to use this as a day time smoke so I will try to take them when the main cola shows 15+% amber trichomes this should give me a nice mixture of ripening stages to sample from the lower buds. Grow tent conditions are the same as week 6.
16 likes
comments
Share
9
Week 9. Flowering7y ago


50.8 cm
Height
20 hrs
Light Schedule
25 °C
Day Air Temp
5.8
pH
Strong
Smell
43 %
Air Humidity
23 °C
Night Air Temp
11.36 l
Pot Size
40.64 cm
Lamp Distance
800 PPM
CO₂ Level
Nutrients 1

FlashClean
1.321 mll
Philindicus TO FLUSH OR NOT TO FLUSH
Why is this even a question?
I absolutely believe in flushing my plants before harvest. There are definitely a few rebels out there who don’t flush or flush properly, who are still trying to figure out why their buds burn and taste all kinds of funky.
Our goal when growing in soil is to guesstimate when our harvest day will be in order to leave us a 2-week window to flush any excess nutrients from the soil. This will then force the plants to begin cannibalizing the nutrients from the lower leaves which will progress all the way to the top of the plant. If done properly it will bring out the natural colors but spare your buds from turning yellow if timed just right.
Some newer growers may freak to see the lowest leaves start to go yellow with reddish colored stems after flushing. But this is actually a good sign because it signifies that nitrogen is being depleted in the leaves. This will slowly occur throughout the plant in a last chance attempt to survive it will also deplete the next macro nutrients phosphorus and potassium. Since buds typically bulk up the most during the last three weeks of bloom, they will quickly utilize the remnants of those nutrients during the bulking up/ripening stage.
Amazing fall like colors can present themselves during your flush especially if combined with a nice drop in nighttime temperatures. Essentially what we are doing is simulating each season in our biospheres. Fall like conditions signals the plants chemistry to stop producing chlorophyll which is green in color. In nature shorter daylight hours and colder nighttime temperatures slow down or even can stop nutrient movement/absorption through the plant and roots this is nature’s way of flushing. This tells the plant the end is near and it will focus on reproduction by putting all its energy into flower/ budding and or seed production in order to guarantee the survival of the species. We need to remove as many nutrients from the soil to duplicate this effect.
When to start your flush is the most asked question besides when to harvest. Oddly enough they are actually connected by one thing trichome color. Yes, that’s right you need to start checking the trichome color on the buds when about 50% of the white pistils have dried and turn orange/red.
You will need a 40x LED lighted jewelers loupe (Amazon.com). The loupe with led light is the bomb and you will be glad you paid the extra money on that model. I personally have tried those little 60-100x handheld microscopes but they are impossible to keep still save yourself some money and go for the jeweler’s loupe you’ll have no regrets. I’ve tried using my cell phone to take closeup photos of the buds then enlarge the photo but find that cell phone photos don’t show the true trichome colors. My eyes don’t lie!
When checking the trichomes you will see they start out clear which is like looking at a clear plastic bottle. They will change into some showing partly cloudy or possibly milky in color, then they will turn amber in color. You will see a mix of all three colors on your buds.
If you’re just starting out, I would suggest beginning your flush when you have more cloudy/milky trichomes showing than clear trichomes you may see a sporadic amber here and there in some of the upper sugar leaves. For more experienced growers you can wait a bit longer when you see a few more ambers showing up on the older calyxes look deeper inside the bud since the outer calyx are the youngest.
Flushing your plants. You will need a TDS meter to help you gauge when to stop flushing. If you’re on a budget you can use ph. correct non chlorinated tap water. Or if you would like try a good quality flushing solution. Personally, I use a flushing additive in the water about 8 to 12 hours before I flush. I do this first thing in the morning mixed with R.O. (reverse osmosis) water. I then start flushing later in the evening putting 3 time the pots volume in pure R.O water through the pots until my runoff is reading between 50-100 PPM (0.1 EC to 0.2 EC) or close to it. Example: 1 Gallon pot = 3 gallons of R.O. water or more if needed. For those of you using tap water check the ppm of your water then add 50-100 PPM to that amount to get you into the zone. Example: Tap water measures 125 PPM. After flush runoff in the 175 to 225 PPM range would be fine. If you only have one or two plants you can use distilled or purified water also.
I like to allow the pots to dry out well before the next watering which is creating a bit of drought stress (Not to the point where the leaves wilt) to the plants which is a continuation if the slight stresses we have been intentionally causing the plant in an attempt to create more terpenes, resins and THC. You will continue to water your pots to a nice 20% runoff every few days allowing them to dry out well between each watering. If after the first week of flush you find that the runoff ppm’s are still too high say 200-300-400 PPM (0.4-0.6-0.8 EC) perform another flush until you’re in the lowest range possible. Sometimes you will see your ppm’s bounce back up depending on how much salt build up was not dissolved and removed during the first flush.
During the ripening phase which is now, concentrate on keeping daytime temperatures under 80 F (26 C) in order to preserve the natural terpenes and THC. Ideally having them under 75 F (24 C)with a night time temperature in 60 F to 65 F (16 C to 19 C) range would be perfect. Also maintain good air circulation and maintain a humidity level in the 30% to 35% range will help prevent any issues with mildew growth on or inside of your buds.
Finally, when to harvest. This takes time and patience waiting for the trichome to ripen. It really depends on what type of high you like. It’s usually safe to harvest once you see about 5% ambers showing up on the calyxes they will be swelling up with resin and all sorts of stuff by this stage. You will see a mixture of some clear trichomes still on the youngest bud growth but you will have mostly cloudy/milky trichomes with 5% amber on the rest. This will give you more of a head type high which for some people can be a bit on the racy/speedy side. Most growers tend to wait until they see mostly cloudy/milky trichomes with about 30% amber this gives you a nice more balanced high starting off with a nice head high ending with a nice body high. Of course, anywhere in-between works well also. You will find the main cola tends to ripen first before the lowers buds so check all of your buds for ripeness. They can also be harvested in stages or if they are harvested all at the same time this can give you a nice range of different stages of ripeness to sample and see which stage you like best. Happy Harvesting!
WEEK 9 UPDATE
Began by selectively removing larger leaves from the buds to allow more light to the entire branches leaving a few strategically located leaves for some unknown reason.
Started the big flush day 58. Used 5 ml Florakleen per gallon of water then soaked each pot with a bit more than a half a gallon of the solution early in the morning to let things soak in nicely. Later in the evening put another 5+ gallons R.O. water through each pot until I was able to get my runoff ppm down under the 100 ppm range. Let these girls dry out really well before the next watering creating a bit of drought stress.
I also switched out my bloom lights and only ran my veg/bloom full spectrum lights which have a heavier blue than red spectrum while the buds finish ripening. Trichomes are some clear but mostly cloudy/milky with a greater percentage of ambers starting to make an appearance.
I have turned off my cool mist humidifier in an attempt to get my humidity lower.
PPF/PAR meter reading of 400 - 475 umoles @20 hours/day giving me a DLI of 28.80 to 34.20
Temperatures are 77 F and 43% humidity leaf surface temperatures are 72 giving me a LVPD of 1.32 kPa.
22 likes
12 comments
Share
10
Week 10. Flowering7y ago


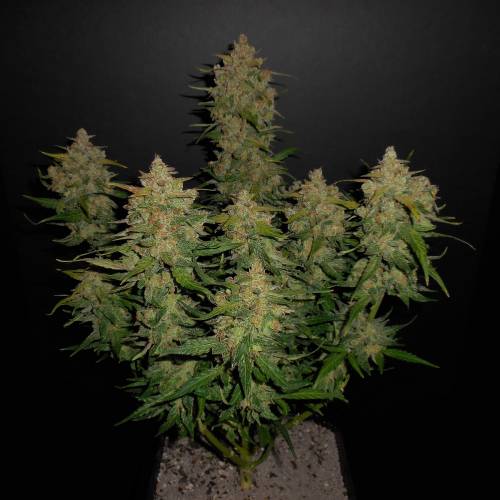


53.34 cm
Height
20 hrs
Light Schedule
25 °C
Day Air Temp
5.8
pH
Strong
Smell
40 %
Air Humidity
23 °C
Night Air Temp
11.36 l
Pot Size
40.64 cm
Lamp Distance
800 PPM
CO₂ Level
Nutrients 1
100% Pure H2O
0.264 mll
Philindicus HARVEST RECIPE
Lemon AK-47 Infused Krupnik (Polish Honey Spiced Vodka)
I like it when I see someone who shows pride in their family heritage and cultural traditions.
My great grandparents were from a small town located in Belarus. They were basically Polish but since countries boarders have changed many times over the years, they also adapted local Russian traditions prevalent at the time.
I wanted to celebrate one of my heritages with a traditional recipe for all to enjoy. With a modern cannabis twist of course! Na Zdrowie! (Cheers)
Krupnik originated in the area that is now Belarus in the 1600s, it was then part of the Polish-Lithuanian Commonwealth. Legend has it Krupnik may have first been made at a Benedictine Monastery in Niasviz.
There are hundreds of family recipes which vary in ingredients so feel free to add or omit any spices not to your liking.
***Please Read Cannabis Dosages***
Dosing edibles can be very difficult to calculate without knowing the exact THC content of your weed. Please proceed cautiously when testing your final product for an enjoyable experience. Please follow the links to get a better understanding of calculating proper safe dosages.
https://tripsafe.org/edibles-dosage/
https://www.cannaconnection.com/blog/7426-how-to-calculate-dosage-edibles
Total time required to complete recipe 2 hours 45 minutes
PART ONE
Ingredients
750ml 80 to 100-proof vodka
4 to 6 grams of Lemon AK-47 cannabis. (Depending on your THC tolerance)
STEP 1
Decarboxylated Cannabis Recipe
This will convert your cannabis THCA into the psychoactive THC by using heat.
https://weedmaps.com/learn/cannabis-and-your-body/difference-between-thca-thc/
DIRECTIONS
Finely chop or grind (Not powder) 4 to 6 grams of Lemon AK-47 cannabis
In a Pyrex dish place a slightly crumpled piece of aluminum foil flatly on the inside of the bottom of the pan.
Next place a piece of parchment paper on top of the aluminum foil then spread the ground cannabis evenly on top of the parchment paper. Cover dish with lid or aluminum foil.
Preheat oven to 225 F (110 C)
Put dish in oven for 40 to 45 minutes.
Remove from oven with oven mitts.
Remove cover
STEP 2
Sous Vide (Hot Water Bath) Method of Infusing Weed into Vodka
When using this technique, we can speed up the infusion process.
When cool enough carefully remove the cannabis covered parchment paper use this as a type of funnel and add the cannabis to a 1-quart glass canning jar.
Fill the jar with vodka place top on finger tight but yet not tight.
If you own an actual Sous Vide this will give you more control over the temperature. If not use the stove top method of heating the water.
Fill pot part ways with water and add jar to pot (3/4 up the side of the jar is deep enough.)
Turn on heat to low temperature then increase to low/medium (Do not boil the water) heat until temperature of the water reaches 140 F (60 C) adjust as needed. Use a candy type thermometer or an instant reading meat thermometer to carefully read the temperature.
Set timer once 140 F (60 C) is reached.
Allow jar to sit in hot water bath for 2 hours this will allow the cannabis to infuse into the vodka faster. (The un-heated old school way would be to allow it to sit for two weeks to infuse)
Note: If water evaporates add more “Hot” water slowly to the pot. Do not use cold water it could cause the jar to crack! You may not need to add any more water if you use enough from the start.
Remove jar allow to cool. Then pour it through a stainless-steel wire strainer, then pour through a coffee type filter to remove any finer particles if needed. Cover this and set aside.
While your weed is being infused into your vodka take this time to prep all of your part 2 ingredients. Start heating the part two ingredients during the last half hour of the part 1 infusion.
PART 2
Ingredients
1 cup (237 ml) honey
1/2 cup (118 ml) of Water
¼ teaspoon (1.23 ml) Nutmeg
1 Vanilla Bean Split or 1 teaspoon (5 ml) Vanilla Extract
4 Whole Cloves
1 Star Anise
2 Cinnamon Stick
4 Whole Allspice Berries
4 Peppercorns (Go easy on these they can counter act THC)
1 Medium Sized Un-waxed Lemon Rind (White pith removed)
1 Medium Sized Un-waxed Orange Rind (White pith removed)
Note: Support your local farmers and use some local raw unfiltered honey to compliment the recipe.
Vanilla beans are very expensive so you can substitute a good quality vanilla extract in its place.
If you are unsure if your citrus has been sprayed with wax simply boil a small pot of water then dunk the citrus into the boiling water for a few seconds then remove and place into a bowl of ice water. It’s important to remove the white pith from inside the citrus peels or it will make your Krupnik bitter. I find slicing the peel into one-inch strips then laying a sharp paring knife flat against the peel will trim off the bulk of the pith. Then hold the knife straight up using the sharp edge to scrape any residual pith off.
DIRECTIONS
Start by adding the water to a stainless-steel pot and heat up then slowly whisk in the honey a little at a time until it dissolves. Bring it to a “very” low simmer (Not a rolling boil) remove any foam/scum which accumulates on the surface with a spoon or ladle. When no foam/scum remains add the rest of the spices and allow to finish simmering for 10 minutes.
***IMPORTANT***
TURN OFF THE STOVE. ALCOHOL AND ITS FUMES ARE HIGHLY FLAMMABLE
Once the pot is in a safe place pour in the cannabis infused Vodka in and stir until well blended.
Allow it to cool slightly then cover tightly so the alcohol doesn’t evaporate. Then put this into your refrigerator overnight.
Next day use a stainless-steel strainer or cheese cloth lined strainer to remove the spices from the mixture then pour through 2 ultra-fine mesh rigid coffee filters with a double layer of paper towel sandwiched between the two in order remove the smaller particles.
Use a funnel then fill your glass bottles. Properly label the bottles so it is clear that the Krupnik contains THC. List a suggested starting dose on the label for beginners, part time users then experienced users.
The Krupnik may be slightly cloudy at first but if allowed to sit for a few days any small particles will settle on the bottom of the bottle and clarify with time.
I would like to note that you should test your own product first before sharing it with anyone else. Alcohol will increase the effects of the THC. I recommend trying 1 - teaspoon of your Krupnik then wait 45 minutes to an hour to judge the effects. If you seem fine then try another teaspoon then wait again. Keep repeating this. To give you an idea a typical shot glass contains 6 teaspoons (30 ml). If you can’t get to 6 teaspoons it’s too strong you will need to dilute it with more liquid either more vodka or make a simple syrup of 1-part honey one-part water heat this until incorporated. Then slowly add as much of this to the Krupnik as needed shake the bottle well in-between. Then retest the dosage. Take your time this is a very important part to perfect.
If the effect is too weak just drink more shots to get you where you need to be. Adjust your recipe for the next time. This stuff will be gone very quickly if you have a few friends around.
THC effects people differently based on their particular tolerance, this should be a pleasant and enjoyable experience so please drink responsibly and don’t drink and drive.
For all the folks who enjoy using cannabis in their recipes check out this site for wonderful recipes.
https://www.sousweed.com/
WEEK 10 UPDATE
Flushing these girls with plenty of R.O. water this week. I am continuing to follow a nice wet then dry cycle and will keep remove any larger fan leaves up until harvest.
At this point it looks like I have two phenotype out of 4 plants. Two are flushing out well showing off some amazing fall like colors and buds are nice with a high calyx to sugar leave ratio and started to show more amber trichomes by the end of the week. These should be ready to harvest any day.
The second phenotype has held on to it's green color longer showing a little yellowing a some signs of purple in spots. Will need a bit longer to flush. Buds seem to have more tiny sugar leafs along with nice dense calyx growth. The trichomes are also a bit slower to show up amber. Guesstimate they will be ready to chop 4-5 days after the other two. 😉
22 likes
10 comments
Share
10
Week 10. Harvest7y ago
Happy Harvest Day!


10/10
Rated
Official Fast Buds Lemon AK Strain Review
Let me start off by saying that I chose this strain specifically because I was looking for a nice day time smoke to share with my friends. Well the breeders at Fast Buds nailed it perfectly.
Even though I typically prefer to smoke Indica and Indica dominant strains I was pleasantly surprised by the Lemon AK Sativa dominant strain and this has left a lasting impression of how I perceive Sativa strains in general.
I was always under the impression that Cannabis Sativa produced large unruly plants along with a loose less dense bud structure than Indica strains. The hybridization of the Lemon AK-47 by Fast Buds put this misconception to rest.
About the grow. I was very impressed by how rapidly the seeds sprouted and developed in to quick growing plants in the matter of a few weeks throwing out the first pistils at day 17 and showing signs of wanting to start stretching. This caught me completely off guard I had crazy thoughts of them growing into monstrously large sativa type plants and becoming unmanageable. To my delight and probably because I chose to limit the pot size to 3 gallons, I was able to use some simple LST training to force them into a very uniform optimal shape and size which was perfect for my grow set up. Note: I’m sure if one desired larger plants 5-gallon pots would fit the bill they definitely showed the potential to grow larger if given the space for a larger root system. The stretching phase was perfect they produced nice sturdy stem length with good internode spacing allowing ample light to the bud sites. The plants handled nutrients very well with no signs of nutrient burn. I stopped short of using slightly less than ½ strength base nutrients during the high point of bloom. Buds showed an excellent response to adding in a PK 13/14 product during peak/late bloom. No signs of any major deficiencies were seen. Slight issue with light stress/burn on the upper leaves from high LED light intensity on one plant resulted in a lightening in the coloration of the leaves. These leaves were removed in the later stages of bloom. No ill effects on the buds they seemed to enjoy the intensity of light.
About the flower structure. All had a nice even shape with no excessive fox tailing even during the last few weeks of growth. I appeared to have two phenotype one with a nice dense heavy calyx to sugar leaf ratio with fewer fan leaves which was the first to be ready for harvesting. They also pull out some amazing purple coloration which extended into the buds. The other phenotype also had nice dense calyx growth but with many tiny trichome covered sugar leaves protruding and more fan leaves. This phenotype took about 5 days longer to ripen and seemed to hold on to the green coloration even after multiple flushing for over 2 weeks throwing out mostly yellowish/reddish type leaves.
About the harvest. Did I mention I how much I love Indica? Well taking that into account I chose to allow the top buds on the main cola ripen a bit more than my usual 5 % amber. Since this part of the plant seems ripens first, I let the trichomes go until I achieved a nice heavy 30% amber. I figured this would give me a nice pleasant and more balanced high more to my liking. Also, it would give me a nice variety of lower buds which were less amber to sample in the future.
The smell of the fresh buds while chopping was reminiscent of ripe citrus and permeated the house during harvest. Since I began slowly removing selected large fan leaves during the last few weeks of my grow harvesting went very smoothly. Basically, I like to do a wet trimming initially by removing as many large fan and accessible sugar leaves then I proceed to do a tight cut using curved bladed shears taking the tips off any tiny sugar leaves not completely covered in trichomes. I also take this time to remove any dried leaf tips or yellowing that made it up to the buds. I exclusively hand trim all my buds. I will typically perform a second tighter final trimming to properly manicure my buds after they have cured a couple of weeks and “hardened up” then back in the jar they will go to finish a nice long-term cure.
About the drying process. I typically hang my branches from regular wire clothes hangers I like to use a fine florist type wire to wrap under the stems of the last buds give it a twist then wrap it a few times over the hanger. One hanger seems to hold one plants worth of branches. These are placed in a dark closet with a small fan indirectly blowing near them. I typically dry for the first 2 days at 45% humidity 73 F to get the bulk of the moisture out of them. Then the humidity is raised to 55% to slow down the drying process. I will begin removing the smallest looser buds on the lower branches around day 5 and jar them up. Then over the next few days proceed to remove the medium size buds next then the largest ones last and put them in a Teflon coated baking pan with indirect air moving over them and turn them every day. I like to make sure the outside of the buds are dry enough so when they are in the pan, they don’t develop a flat side or shape. Drying time ranges from 7-10 days for the whole process.
About the curing process. The buds were loosely put into ½ gallon glass jars about ¾ full with an Inkbird digital hydrometer and it usually takes a few days to stabilize my humidity into the 62% to 63% range then I drop a Boveda 62% humidity pack into them and start my cure. The larger buds can be a bit rebellious and if I find the humidity to be 67% or higher, I will remove the buds from the jar for several hours then repeat the whole process if needed. If they land in the 66% or lower, I’ll remove the top off the jars a few/several hours a couple of times a day as needed.
From this point I will let them cure for three weeks then pull the best top cola bud and sample the smoke. I like to allow the buds to finish curing for a minimum of 6 weeks before I send my buds out for others to enjoy. During this time, I will open the tops of the jars to allow some fresh air in a few times a week then once a week toward the end. Yes of course I squirrel the top choice buds away for my head stash for a nice longer-term cure. This cure gives the buds time to improve the overall complexity of flavors, smells and smoothness that even the most discerning connoisseurs of fine cannabis can appreciate.
About the smoke. The moment of truth! After my last experience with dealing with Fast Buds Zkittlez jamming up my grinder I chose to forego the part of removing the sticky residue left inside the grinder which seemed like a waste in my opinion. I did it old school and used a tiny pair of sharp scissors to micro shave the bud into a form worthy of any true craftsman and proceeded to twist up a fatty.
But wait we need to compliment the moment with some music. I cued up the Chemical Brothers “Morning Lemon” song. Seemed appropriate since it’s been a while since I literally waked and baked.
I stoked up the joint and took three nice hits. Even with only a 3 week cure the smoke was incredibly smooth going in and coming out (Must have been the good flush). I say this because if I’m not coughing on the exhale that’s a great sign since I’m only a part time smoker “Lightweight”. The flavor was very familiar reminded me of smoking some old school Central and South American strains that were prevalent back around 1978 to 1982 strains like Acapulco Gold with a nice pleasant slightly citrus/earthy yet floral finish on your tongue type taste.
I sat back and let things take shape feeling the bass kick out of the speakers and vibrations of the music reverberate off me. Then it started hitting me like a small wave hitting the back of my head spilling over the top then dropping down my forehead across my face. Not crazy like someone dropped the curtain in front of me but a very pleasant relaxing even flowing cerebral type buzz flowing over the top then down into my upper body and arms. This intensified over the next 10- 20 minutes then peaked. It was just right in terms of the intensity for my taste. I was a bit on the quite side during this time just taking in some tunes amazed with the effects of the weed on my now enhanced hearing ability. At about 45 minutes I snapped out of my trance and was actually very functional mentally and physically. The high tapered off after about a good 2.5 hours with a nice body high must be the Indica effect but with no drowsy aftermath. I have yet to partake in a higher quantity of hits after learning my lesson with under estimating potency and test smoking taking 6 hits of Fast Buds Zkittlez for the first time on my last grow.
About my conclusion. I found Fast Buds Lemon AK was exactly what I was looking for a great day time smoke that if smoked conservatively would allow me to be functional and social. I would definitely recommend this for social gatherings or a great anytime smoke it will make you a bit talkative with a nice uplifted mood and you may be surprisingly quick witted when joking around with friends.
Fast Buds Lemon AK should be on every growers list of strains to enjoy check it out!😉
WEEKLY COLLABORATIVE CONTENTS
Week 1 It’s a Dirty Business
Week 2 Low Down on LED Lights
Week 3 That’s My Biosphere
Week 4 Stretching Things Out
Week 5 Mid-Life Crisis
Week 6 Feeling Chemically In-Balance
Week 7 Pump Up My Buds
Week 8 The Old 1-2 Terpene Punch
Week 9 To Flush or Not to Flush
Week 10 Harvest Recipe: Lemon AK Infused Krupnik (Honey Spiced Vodka)
Week 11 Official Fast Buds Lemon AK Strain Review
Show more
Translate
Spent 71 days
Ger Veg Flo Har
278.32 g
Bud wet weight per plant
59.46 g
Bud dry weight per plant
4
Plants
Easy
Difficulty

Happy, Talkative, Uplifted
Positive effects

Dry mouth
Negative effects

Citrus, Earthy, Flowery
Taste
Height
Day air temperature
Air humidity
PPM
PH
CO2
Light schedule
Night air temperature
Pot size
Lamp distance


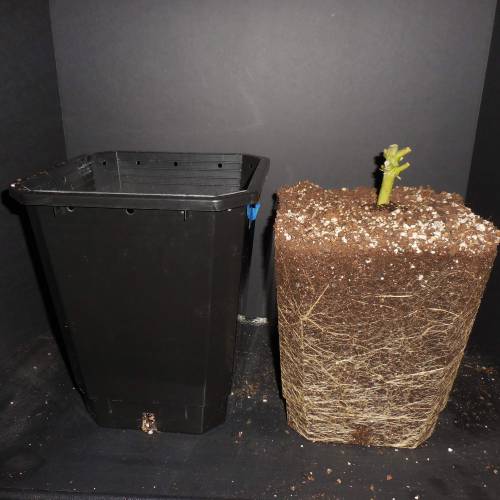


49 likes
18 comments
Share
Equipment Reviews


57 comments
Sort by
popularity
popularity
newest
oldest

Buddha2 commentedweek 107y ago
What a fantastic diary and tutorial! I bookmarked this grow and will certainly re-read it multiple times in the future. Thanks a lot! One can clearly see that you put a lot of thinking into it. What a pleasure to read. 😍👍💪
likes 3

Philindicus commented7y ago
@Buddha2, Thank you feel free to contact me anytime if you have,any questions.
like 1

Master_weeda commentedweek 107y ago
Congratulations very nice trophy🏆 you can be proud of yourself 💪
likes 2
Philindicus commented7y ago
@Master_weeda, Thank You. “Always pass on what you have learned.” — Yoda😉
like 1
Master_weeda commented7y ago
@Philindicus,👏👏👏👍
likes

ThrashedTV_BakedByGlaze commentedweek 107y ago
Looking goooood 🙌 I just got my first Fast Buds Auto grow going now, will be following your example for sure. 💪
likes 2
Philindicus commented7y ago
@ThrashedTV_BakedByGlaze, Thanks brother I'll be sure to check it out. Fast Buds has some kick ass genetics to work with.👍👍
like 1

PrairieFrostGrow commentedweek 17y ago
Nice Dairy......appreciate the efforts!!!! Deserve the trophy 🏆!!!!🙏
likes 2

mrmateo commentedweek 107y ago
damn that looks tastie.. I got some of them seeds on the way soon cant wait... and today I saw one of fast buds pre-released strains was the original ak, im glad the new strains are coming ive grown every single seed fast buds sells except for their rhino...anyways good diary nice pics and great write up
likes 2

Ashbash commentedweek 107y ago
Amazing diary man, i really enjoyed going through. Congratulations on the result!
likes 2

visco commentedweek 97y ago
Great work Phil they look amazing :D
like 1
visco commented7y ago
@Philindicus, in the USA :)
like 1
Philindicus commented7y ago
@visco, I sent you some info about Hella Dank Seed Company out of Nevada via the private chat tab. They carry Fast Buds Seeds and a number of other high quality genetics. If you catch a Fast Buds buy one get one free promotion you"ll make out pretty good stocking up on seeds. Just make sure they are honoring the FB promotions. If anyone else reading this post has any questions about Hella Dank Seed Company just shoot me a message and I can fill you in on the details. https://dankseed.store/genetics?olsPage=t%2Ffast-buds
likes 2
visco commented7y ago
@Philindicus, I appreciate it Phil thank you !
like 1
Show More (3)

Mrs_Larimar commentedweek 107y ago
Nice Diary and very entertaining . I like it that you shared your thoughts to the grow. And i found myself in this toughts. And iam going to tst your reciepe for vodka... but uncarboxylated. ) i would fall to slep immediately) i like the ideas of spices and hoeny in it....gotta test it
like 1
Philindicus commented7y ago
@Mrs_Larimar, Thank you, I usually have a shot or 2 late in the evening then glide off to sleep after a few hours. I have shared this at a holiday party with freinds it was very well received it created a nice social atmosphere. I think the effect would be determined by the strain and ripeness of the bud. Also using Vodka problably doesn't extract as much thc as say using pure grain alcohol. I think my concern was more about not winding up with a green colored mixture. Grain alchohol will extract some of the chlorophyll in the bud.
like 1
Mrs_Larimar commented7y ago
@Philindicus,iam definitely try it..... sounds promising
likes
Master_weeda commentedweek 67y ago
Very nice plant May the force be with you 💪
like 1
Philindicus commented7y ago
@Master_weeda, Thanks brother. May the Swartz be with you.😂Hint: Spaceballs!
like 1
Master_weeda commented7y ago
@Philindicus,😂thanks bro
like 1

Med_in_Tropic commentedweek 27y ago
Thanks for the details. I am looking to get a light meter and this helps. Also your thoughts on week six cal mag deficiency. I’ll add in bone meal to my mix.
At the moment worm casting works great for me.
But yeah, more organic would be better.
like 1
Philindicus commented7y ago
@Med_in_Tropic, I bought an inexpensive hydro farm PAR meter for LED light use. I've already had to break out the soldering iron to fix a loose wire from pulling on the sensor cord. It gets the job done but the Apogee 500 full spectrum is $550 this is better quality. I'll put it on my long wish list. Just nice to know how intense your lights are at different positions in your tent you can pull denser trichome growth out of your buds. Also on the list is a UVB light.Growers of photo period plants running their blooms at 12 hrs a day can go a lot higher than I'm running my autos that's where the DLI comes in to play. Trying a few new things this grow with 3 gallon deeper pots. I will know if leaning organic is working by the amount of root mass leading up to nice top growth. Once again I am height restricted so I prefer to try to keep them no taller than 24 inches after stretch if possible.
I think if you premix bone meal into your soil mix ahead of time and allow it to break down for a while it could help but being high in phosphorus there's always a risk of root burn. Possibly layering the richest mix on the bottom of the pot would be better with a leaner mix closer to the plants young roots.
like 1
Med_in_Tropic commented7y ago
@Philindicus, hey thanks - i'll go lightly on the bone meal then. Thought I was gonna put in 10% in the mix. Better to use 5%.
With light meters, I was really confused. But I already notice how my seedlings are doing better under cfl than LED. There are rooms to play with with various specialty light colors like green and UV.
I do grow out door but thinking about setting up an indoor space to veg.
like 1

SirDillton commentedweek 107y ago
A Solid 2+bags on every plant of very nice looking weed. Well done and Congrats on the harvest.
like 1
Philindicus commented7y ago
@SirDillton, Thanks, This has really been my best grow so far. I usually lolly pop my plants a bit more than I did this time. Seems like the top 5-7 buds on the branches have nice density. I typically run around 1.5+ oz per plant of top solid bud. I haven't separated out the larf buds yet but I will be doing a few recipes with this stuff.
likes

GrowGuyTy commentedweek 107y ago
Hello friend, congrats on your harvest! Looks like everything ran smoothly. Im looking forward to the smoke report!
like 1
Philindicus commented7y ago
@GrowGuyTy, I was trying to add more photos and stuff but the site keeps logging me out in the middle of trying to update. I've been having to log back in at least a few times per hour. I messaged GD about the issue. Wonder if anyone else is having the issue of constantly being logged out. I know GD has been making improvements to the site it could be on their list.
likes

BudXs commentedweek 97y ago
Excellent photos
like 1
Philindicus commented7y ago
@BudXs, Thanks I've got more coming soon.
like 1

EZgrower commentedweek 97y ago
Time to prepare your Bong, buddy. I foresee a great harvest. bul bul bul
subscribed and watching your grow.👍
like 1
Philindicus commented7y ago
@EZgrower, Wish I could handle a good bong hit. Fact is since I quit smoking cigarettes like 20 years ago I can't take deep hits any more. I would like to invest in a nice vaporizer at some point.
likes

LACREME commentedweek 17y ago
Dank grow mate, congratz.
One more inspiration to my start..
Thnx for share, keep on fire
👽
like 1
Philindicus commented7y ago
@LaCreme, Thanks for following along👍
likes

Fast_Buds  commentedweek 17y ago
Hey there!
Thanks so much for growing our genetics 🙌🏼
Let us know if you need any assistance
Happy Growing! 💚🌱
like 1
Philindicus commented7y ago
@Fast_Buds, Great to have you following my grows.
like 1

GODSGIFT_2005 commentedweek 105y ago
fantastic Lemon AK. Enjoy the fruit of your hard work bro! 420FASTBUDS are best to start with when growing autos for sure! 👍 i'm Flowering the Gorilla, check it out if you like! thanks!! 👍
like 1

Magicc commentedweek 106y ago
Wonder photos. Great work journaling. Cheers.
like 1

Silky_smooth commentedweek 107y ago
Good luck in the competition...🙏❤️
like 1

amazongrow commentedweek 57y ago
Incredibly detailed!
Tchau, do Brazil!
like 1

the end.
Enjoying this diary? Follow for more updates!


Prefer the old Diary view?
Go back to the old Diary view