


Zami seed



VEG
Lampwin Light Emitting Diodes/300W
Lampwin
FLO
Lampwin Light Emitting Diodes/300W
Lampwin

Soil
Custom

Indoor
Room Type
LST
weeks 4-5
Defoliation
weeks 7, 10
10 liters
Pot Size
Start at Harvest
1
Week 1. Vegetation7y ago


5 cm
Height
24 hrs
Light Schedule
6.3
pH
70 %
Air Humidity
21 °C
Night Air Temp
10 liters
Pot Size
0.1 liters
Watering Volume
90 cm
Lamp Distance
Nutrients 3

BioBloom
3 mll

BioGrow
3 mll

BioEnhancer
0.6 mll
Master_weeda Hello to all the padawans and Jedi masters!
First of all, thanks to Zami from Zamnesia and Greenhouse for allowing me to do this grow by providing the Greenhouse feeding and seeds.
I remind you that I'm simultaneously growing 9 pots of 10 and 11 liters in a box designed for 4, and I'm only using the bare minimum of equipment necessary for a proper grow at the lowest possible cost.
EQUIPMENT CONFIGURATION
Box 80×80×160
Lamp LED Lampwin 300 watts ×2
Clip fan 15 watts
Xiaomi Deerma humidifiers 5L
Hygrometer thermometer
Extractor PROFAN 107 m3/h - 100
Programmable electronic socket ×2
1 black square pot 10 liters
Greenhouse feeding enhancer
Greenhouse feeding biobloom
Greenhouse feeding biogrow
Biobizz lightmix substrate
Wire and cutting pliers
Microscope
Small precision scale
GROW STEP BY STEP
First, I germinated my seed with the Easy Start from Royal Queen Seeds, and I'm pleasantly surprised because honestly, the success rate is very high (17 seeds out of 19), easy to use, and very effective.
Once the seedling is out and about 2 or 3 centimeters tall, I gently take it and place it directly into its final pot. I recommend pots ranging from 10 liters to 15 liters for autoflowering grown indoors.
The pot will have been previously prepared (video in diary) with 30 grams of Greenhouse feeding biobloom and 30 grams of Greenhouse feeding biogrow, which is the equivalent of 3 grams per liter of substrate.
I then place the seedling in its final pot, cover it a bit with soil, lightly compact it, and water it to keep the substrate moist, no more.
I place my 300-watt LED lamp about 90 centimeters from the seedling with a light cycle of 24/24 for a week. At the beginning of week 2, the light cycle will switch to 20/4 thanks to a timer because for me, this light cycle offers the best yield for an autoflowering.
Day 1: light watering
Day 2: light watering
Day 3: the seedling starts to become more vigorous, setting up ventilation to increase its root mass and light watering
Day 4: watering with one and a half liters of water at pH 6.3 to which I added 0.9 grams of Greenhouse feeding enhancer (which is 0.6 grams per liter of water)
Day 5: no special technique
Day 6: no special technique
A pleasantly calm week with no apparent problems or deficiencies.
May the force be with you!
13 likes
comments
Share
2
Week 2. Vegetation7y ago




8 cm
Height
20 hrs
Light Schedule
24 °C
Day Air Temp
6.3
pH
70 %
Air Humidity
21 °C
Night Air Temp
10 liters
Pot Size
0.1 liters
Watering Volume
90 cm
Lamp Distance
Nutrients 3
BioBloom
3 mll
BioGrow
3 mll
BioEnhancer
0.6 mll
Master_weeda Hello to all the padawans and Jedi masters
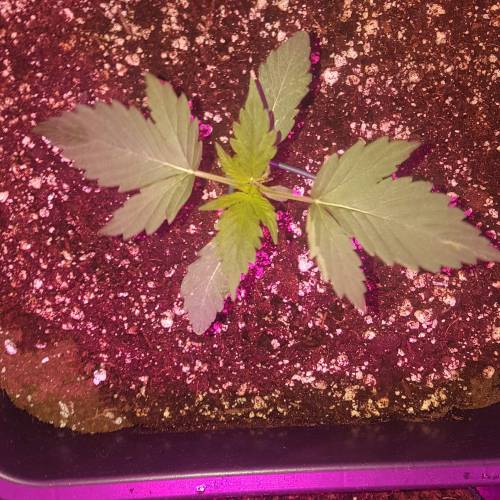
For this week 2, no techniques practiced, I just monitored that the humidity stays at a rate of 70%. I did a light watering until day 10 because the fact that the autoflowering plants are transplanted into their final pots increases the risk of overwatering the substrate. 🤐
To mitigate this risk, it’s better to water with 10 or 20 centiliters of water at pH 6.3 during the first 10 days of the seedling. On day 11, I water my pot normally with a quarter of its volume in water (for a 10-liter pot, 2.5 liters) still with a pH of 6.3, I add to this water 0.6 grams of greenhouse feeding enhancer per liter of water. 👍
Enhancer is a mix of humic acids, seaweed extracts, strains of Trichoderma harzianum, and Bacillus subtilis.
It increases the vitality of the plant, improves nutrient absorption, and enhances soil quality. 👍
I will do a similar watering in 2 weeks.
May the force be with you. 💪
14 likes
1 comment
Share
3
Week 3. Vegetation7y ago


12 cm
Height
20 hrs
Light Schedule
23 °C
Day Air Temp
6.3
pH
70 %
Air Humidity
21 °C
Night Air Temp
10 liters
Pot Size
0.1 liters
Watering Volume
90 cm
Lamp Distance
Nutrients 3
BioBloom
3 mll
BioGrow
3 mll
BioEnhancer
0.6 mll
Master_weeda Hello to all the padawans and Jedi masters!
For this week, I’m not planning any special techniques, just some watering. I’m taking advantage of this relatively calm week to remind you of what I believe is the best technique for watering an autoflowering plant.
By following these simple tips, you’ll achieve optimal results throughout your grow:
Cannabis is a plant that doesn’t like to receive light watering continuously. It’s imperative to water it in large quantities, then wait for the soil to be well dry before watering again!
To calculate the amount of water needed for each plant, follow this rule:
The volume of water to give during each watering should represent at least about a quarter of the pot volume!!
Examples:
for a 1L pot, give 0.25L of water at each watering; for a 4L pot, give 1L of water at each watering; for a 12L pot, give 3L of water at each watering; for a 30L pot, give 7.5L of water at each watering! etc…
To give such a volume of water, it’s often necessary to water in two (or even three) times, slowly and evenly over the entire surface. Place good saucers under the pots; they will fill with water that will rise into the pot by capillarity in less than a day. It’s also very important to use good quality potting soil, with good water retention capacity but that also ensures good drainage (it should contain perlite, and/or coco, etc.)
You then need to wait a few days while regularly lifting the pots with your arms. When they become very light again, you can water once more!!
Indeed, since water weighs much more than soil, a pot soaked with water weighs several times the weight of a pot of a plant ready to be watered. With a little practice, you’ll quickly learn to lift your pots to know when a plant is thirsty.
It’s a technique that is both very easy and very effective, and can be applied to all potted plants!
By watering this way, generally, you’ll need to water your plants every 3 to 6 days.
May the force be with you 💪
15 likes
comments
Share
4
Week 4. Vegetation7y ago




17 cm
Height
20 hrs
Light Schedule
23 °C
Day Air Temp
6.3
pH
70 %
Air Humidity
21 °C
Night Air Temp
10 liters
Pot Size
0.1 liters
Watering Volume
90 cm
Lamp Distance
Nutrients 3
BioBloom
3 mll
BioGrow
3 mll
BioEnhancer
0.6 mll
Master_weeda Hello to all the padawans and Jedi masters
14 likes
comments
Share
Used techniques
LST
Technique
5
Week 5. Vegetation7y ago


17 cm
Height
20 hrs
Light Schedule
23 °C
Day Air Temp
6.3
pH
70 %
Air Humidity
21 °C
Night Air Temp
10 liters
Pot Size
0.1 liters
Watering Volume
90 cm
Lamp Distance
Nutrients 4

Top-Max
0.5 mll
BioBloom
3 mll
BioGrow
3 mll
Master_weeda Day 33 watering
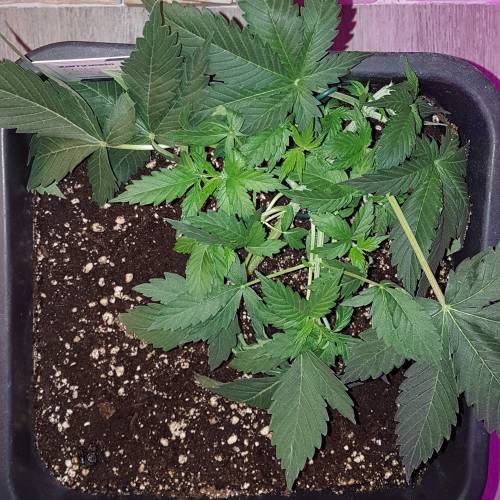
Day 36 watering with 2 liters of water pH 6.3 to which I add 3 grams of biobloom greenhouse feeding while scratching the soil. I keep an eye on humidity and watering as usual. I'm fine-tuning my LST while stressing my plant as little as possible. I'm combining my LST with an Apex pinch, which will allow me to have a more uniform canopy, thus better light penetration and consequently a better yield.
A little reminder about the Apex pinch:
Pinching cannabis plants
Close to the apex trimming principle, this technique has several advantages, the main one being to preserve the large central bud of the plant, for maximum production and quality.
Pinching cannabis plants
Apex pinching (the top of the plant) simply involves gently pinching the stem of the last tier of the plant between the thumb and index finger until you feel the fiber crush under your fingers with a characteristic little crunch sound. If the available space on the stem of the last tier does not comfortably allow you to place your fingers, you should pinch the tier below instead.
Pinching will significantly slow down the vertical growth of the plant while stimulating the development of secondary branches, thus giving the plant a bushy shape. The plant will take a few days to repair this pinch, forming a knot at that spot, and will then continue its growth normally. The pinch can then be repeated if necessary on the newly formed next tier, as well as on any secondary branches that may exceed the apex.
Pinching is therefore an excellent technique for achieving a nice uniform canopy of the sea of green type. By regularly pinching the apex of the larger plants in your space during growth and at the beginning of flowering (stretch), you will easily obtain plants of uniform height in full bloom, which will facilitate cultivation and increase final production, especially if you are simultaneously growing multiple marijuana varieties.
With a little practice, pinching can be done as quickly as effectively. In case of too violent a pinch resulting in a torn apex, it will simply produce the same results as a classic apex trimming, which won’t be dramatic.
May the force be with you 💪
16 likes
2 comments
Share
Used techniques
LST
Technique
6
Week 6. Flowering7y ago


15 cm
Height
20 hrs
Light Schedule
23 °C
Day Air Temp
6.3
pH
70 %
Air Humidity
21 °C
Night Air Temp
10 liters
Pot Size
0.1 liters
Watering Volume
60 cm
Lamp Distance
Nutrients 4
Top-Max
0.5 mll
BioBloom
3 mll
BioGrow
3 mll
Master_weeda Hello to all padawans and jedis masters
Week 6 this magnificent plant enters bloom and portends an exceptional stretch for an autoflowering.
(Stretch explanations more)
EXPOSURE TO LIGHT
One of the main culprits in abnormal stretching of cannabis plants is the lack of light. Plants that are too far from an adequate light source will respond by accelerating stem growth in order to get closer to the lamp themselves. Especially when there are many other plants. A lack of lighting can easily cause overcrowding in a growing chamber, reducing the steady progression of your crop and the distance ratio between your bulbs and your plants.
To address this problem, be sure to provide enough light to your plants to prevent stem growth. At the same time, you should not position your lights too close to your plants either since this would also result in an over-stretching of the stems and in some cases, the loss of your crop.
In addition to the distance between the light source and the plant, the type of light you will use also affects the size of the stretching of your crop. The orange and red lights encourage stretching and result in thinner, larger stems. And conversely, blue light stimulates a growth of thicker stems and a smaller size. When a species is ready to enter the vegetative phase and undergo its most drastic stretching period, metal halide lamps can be used to deter far too long stems.
THE HEAT
Heat is another essential element that can determine the stretch size of your plants during vegetation. Temperatures above 27 degrees push the stems to lengthen more and more and will propel the potential of sativas to push as high as possible. Heat lamps that are positioned too close to plants create an intolerable environment that will grow large, soft plants that will potentially wobble until they fall and lose flowers in its fall.
OTHER CAUSES OF STRETCHING
There are multiple variables that can lead to the stretching of plants beyond what could normally be expected of the plant. Environmental stressors resulting from transplantation (when a plant passes from one pot to another) can cause the plant to return to shock. This will eventually trigger a reaction causing a stretch. Cannabis plants that are not grown in decent conditions or do not receive enough nutrients will respond in a variety of ways and this includes stretching.
Crops that are not spaced far enough apart are likely to stretch to sting the light to other plants. Due to extreme proximity, the plants will fight among themselves to reach the light, forcing them to expand as much as possible throughout the crop.
HOW TO CONTROL STRETCHING DURING FLOWERING
Stretching during flowering, you guessed it, takes place when you move your plants from the vegetation stage to the flowering stage. This is a completely normal reaction, as your plants are preparing to bear the weight of their heads.
Stretching of a plant at the beginning of flowering varies widely; some plants can double in height while others grow only a few centimetres. There are, however, two main variables that can give you at least an idea of how your plants are stretching during flowering, and how much. Here are these two variables:
Variety: Genetics has the greatest impact on the size of your plant. In general, sativa varieties stretch more than indicas and tend to develop long, slender stems.
Light: Some lights, such as HPS, are more likely to encourage stretching. In addition, great distances between your canopy and your lights will cause the plants to stretch as they try to get closer to the light source.
Stretching during flowering usually lasts the first two weeks of the phase. To minimize stretching, keep your lights between 10 (for CFL) and 30 centimetres (for HID) of your canopy. Finally, choose indica varieties if you have a smaller growing space.
HOW TO AVOID STRETCHING
In many cases, you can expect your cannabis plants to stretch during the flowering phase. Keeping that in mind helps to make a plan in case your species ends up growing much more than you could have imagined. If the information is available, get information on the standard size of your species and compare it to the size of your growing space taking into account the necessary distances between the bulbs and the plants.
TRAFFIC
While outdoor crop operations benefit from natural air to naturally limit stretching, indoor crops must assume the maintenance of air circulation within a confined space. Basic ventilation is enough to help the cannabis stems strengthen and become thicker rather than too high. In this way, the plants continue to grow vigorously without reaching heights and at the same time, your tolerance ceiling.
MANUAL INTERVENTION
For growers who want to get their hands dirty, there are physical procedures that can be done to reduce stretching. Similar to the natural effect that the wind has on cannabis plants, manually bending the leaves and stems will cause tiny cracks in the plant's tissues that will cause the plant to focus on regenerating its wounds instead of its vertical growth.
THE TOPPING
Topping is a form of manual intervention on cannabis to influence its performance, shape or size. In essence, topping is a process in which a new node is cut, growing from the plant to reduce its size and create a "v"-shaped notch that will eventually form two heads. Topping may be an effective measure to combat stretching, but it is important not to do so when the flowering phase begins.
In most cases, an abnormal stretch of cannabis plants will not completely destroy your crop. In fact, stretching can indeed help increase your performance. For growers with a growing operation large enough to contain tall plants, stretching can increase the total yield of a species with more vertical space for head formation. In both cases, stretching can easily be planned in advance and there are multiple solutions to help you with this problem which is all too common.
14 likes
1 comment
Share
7
Week 7. Flowering7y ago


28 cm
Height
20 hrs
Light Schedule
23 °C
Day Air Temp
6.3
pH
70 %
Air Humidity
21 °C
Night Air Temp
10 liters
Pot Size
0.1 liters
Watering Volume
60 cm
Lamp Distance
Nutrients 4
Top-Max
0.5 mll
BioBloom
3 mll
BioGrow
3 mll
Master_weeda Hello to all the padawans and Jedi masters
Stretch 13cm defoliation day 42
Day 45 nothing just the thrill
I’m doing a slight defoliation to allow better light penetration to the lower apices.
What is defoliation?
AMATEUR GROWERS, BE CAREFUL, BUT DON’T BE AFRAID
Defoliation involves removing leaves from indoor cannabis plants to increase the final yield. The amateur grower must be vigilant when starting to apply this pruning technique. Despite the endless debate between those who advocate this technique and those who disparage it, there’s no reason an amateur shouldn’t give it a try to see if it suits them or not.
HOW TO DEFOLIATE
Whether you’re trimming the leaves or branches of cannabis plants, it’s best to use a sterile pair of scissors that feels comfortable in your hand. Pulling leaves off by hand lacks finesse and often accidentally tears layers of a stem along with the leaf. The main goal of defoliation is to allow better light penetration and promote the production of larger buds. Shade-casting fan leaves should be removed. Trimming the main stem and/or secondary shoots is not defoliation.
The golden rule when giving your plants a refresh is to start with the largest and broadest nutrient leaves, trimming from the bottom up. It’s important to remove leaves strategically and not randomly. Also, keep in mind that you should limit your refresh to approximately 10 to 20% of the total leaves on your plant. It’s very easy to get carried away during trimming and end up with bald plants. Excessive leaf trimming will hinder photosynthesis and paralyze your plants.
WHEN TO DEFOLIATE
It’s quite rare to apply defoliation as the sole technique to achieve a high yield. Leaf trimming is generally associated with other pruning and training methods for better yield such as topping, FIMming, LST, manifolding, supercropping, and ScrOG. Growers using the ScrOG method will need to remove all lower growth as well as leaves and stems beneath the net.
Cannabis plants can be defoliated as soon as they transition from the seedling phase to the vegetative growth phase. However, it is recommended that amateur growers allow the plants 1 to 2 weeks of vegetative growth before tackling their defoliation. Additionally, some strains are more sensitive to pruning than others and will therefore be more stressed by leaf trimming. Closely monitor your plants' behavior after trimming. A recovery period of at least 3 to 7 days before resuming defoliation is strongly recommended to avoid too much stress on the plants. Growers can also defoliate during the flowering phase, which will allow the plant's energy to be focused on bud production while limiting shade and excess moisture. Nevertheless, it’s important not to defoliate too late, as it may simply harm your plants unnecessarily.
THE ADVANTAGES OF DEFOLIATION
Obviously, the number one advantage of defoliation is the increased yield potential of this pruning technique for all types of cannabis, from photoperiod to autoflowering varieties. It’s no secret that flowers receiving more light become larger and wider than those hidden in the shade of leaves. Furthermore, removing inner leaves from bushy plants helps prevent any threats of mold. Very leafy plants with dense inner foliage will produce a significant amount of popcorn buds. In the worst-case scenario, dense bud branches and buds will succumb to rot.
If you see water droplets forming on the surface of the leaves, it’s high time to consider defoliation. Clearing the lower and middle areas of leaves is a great way to improve air circulation.
THE DISADVANTAGES OF DEFOLIATION
Indoor cannabis plants benefit from defoliation for two reasons. The first is because they receive light from a stationary source above them, and the second is because the environmental conditions are controlled by the grower and not Mother Nature. Outdoor plants, on the other hand, don’t gain much, as the same conditions apply to them. The sun moves across the sky, illuminating different portions of the plant from sunrise to sunset.
Outdoor growers do not need to manipulate the plants to grow in a flat structure since the sun is infinitely more powerful than any grow light and, moreover, it is always moving. Trimming the leaves of outdoor plants also makes them more vulnerable to humid conditions and breaks their natural barriers against pests.
Many indoor growers can, and unfortunately often do, reduce the final yield due to defoliation done at the wrong time and/or excessively. Trimming seedlings is not advisable and often results in stunted plants. Scalping mature plants is even worse, and instead of getting long bud branches, you’ll likely end up with even fewer flowers. Similarly, trimming sick or unhealthy plants at any stage of growth risks stunting growth rather than encouraging the formation of dense flowers.
May the force be with you 💪
12 likes
comments
Share
Used techniques
Defoliation
Technique
8
Week 8. Flowering7y ago


40 cm
Height
20 hrs
Light Schedule
23 °C
Day Air Temp
6.3
pH
50 %
Air Humidity
21 °C
Night Air Temp
10 liters
Pot Size
0.1 liters
Watering Volume
60 cm
Lamp Distance
Nutrients 4
Top-Max
0.5 mll
BioBloom
3 mll
BioGrow
3 mll
Master_weeda Stretch 12 centimeters
Day 52 watering with 2 liters of water pH 6 6.3
14 likes
comments
Share
9
Week 9. Flowering7y ago


61 cm
Height
20 hrs
Light Schedule
23 °C
Day Air Temp
6.3
pH
Weak
Smell
50 %
Air Humidity
21 °C
Night Air Temp
10 liters
Pot Size
0.1 liters
Watering Volume
60 cm
Lamp Distance
Nutrients 4
Top-Max
4 mll
BioBloom
3 mll
BioGrow
3 mll
Master_weeda + 21 centimeters Day 56
Day 56 watering with two liters of water pH 6.3 adding 5 grams of greenhouse feeding biobloom while scratching the soil
Day 59 watering with two liters of water pH 6.3 to which I add 4ml per liter of water of topmax biobizz
14 likes
comments
Share
10
Week 10. Flowering7y ago


84 cm
Height
20 hrs
Light Schedule
23 °C
Day Air Temp
6.3
pH
Weak
Smell
50 %
Air Humidity
21 °C
Night Air Temp
10 liters
Pot Size
0.1 liters
Watering Volume
60 cm
Lamp Distance
Nutrients 4
Top-Max
4 mll
BioBloom
3 mll
BioGrow
3 mll
Master_weeda Stretch 23 centimeters
Day 63 watering with two liters of water pH 6.3
Day 66 defoliation and watering with two liters of water pH 6.3 to which I add one gram per liter of water of feeding enhancer greenhouse
12 likes
1 comment
Share
Used techniques
Defoliation
Technique
11
Week 11. Flowering7y ago




94 cm
Height
20 hrs
Light Schedule
23 °C
Day Air Temp
6.3
pH
Weak
Smell
50 %
Air Humidity
21 °C
Night Air Temp
10 liters
Pot Size
0.1 liters
Watering Volume
60 cm
Lamp Distance
Nutrients 4
Top-Max
4 mll
BioBloom
3 mll
BioGrow
3 mll
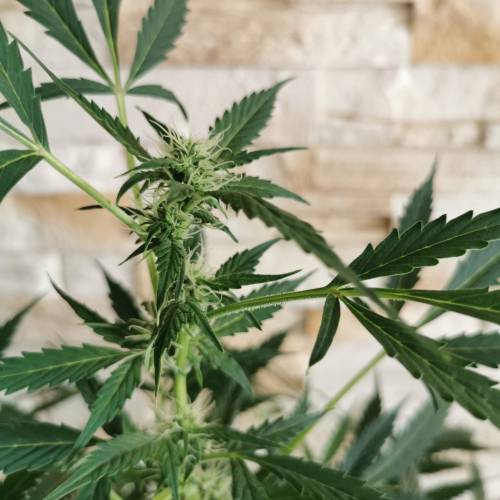
Master_weeda Plus 10 centimeters!
Day 70 watering with 2 liters of water pH 6.3
Day 72 watering with 2 liters of water pH 6.3
Day 75 watering with 2 liters of water pH 6.3
16 likes
comments
Share
12
Week 12. Flowering7y ago




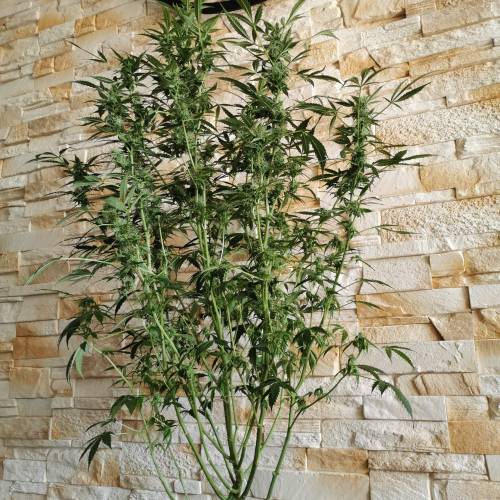


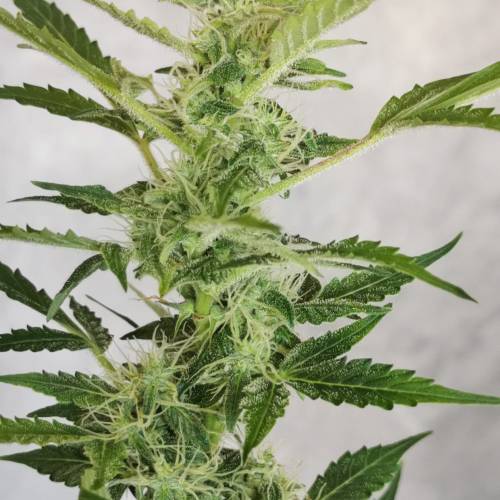

99 cm
Height
20 hrs
Light Schedule
23 °C
Day Air Temp
6.3
pH
Weak
Smell
50 %
Air Humidity
21 °C
Night Air Temp
10 liters
Pot Size
0.1 liters
Watering Volume
60 cm
Lamp Distance
Nutrients 4
Top-Max
4 mll
BioBloom
3 mll
BioGrow
3 mll
Master_weeda Hello to all the padawans and Jedi masters
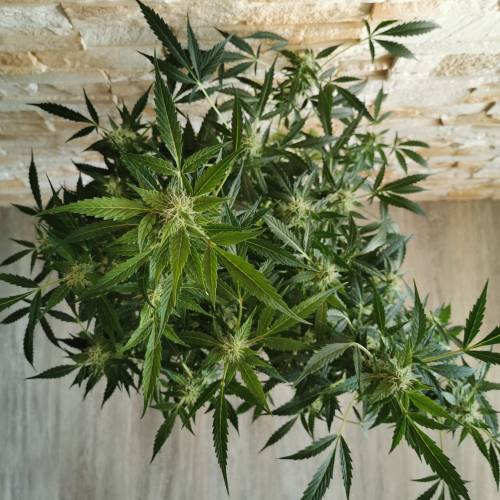
Stretch plus 5 centimeters (but where will it stop?)
Day 77 watering with 2 liters of water pH 6.3
Day 80 defoliation so the buds can get light, I'm adding by scratching the soil 3 grams of biobloom feeding @greenhouse and I'm watering with 2 liters of water pH 6.3
15 likes
2 comments
Share
13
Week 13. Flowering7y ago




99 cm
Height
20 hrs
Light Schedule
23 °C
Day Air Temp
6.3
pH
Strong
Smell
50 %
Air Humidity
21 °C
Night Air Temp
10 liters
Pot Size
0.1 liters
Watering Volume
60 cm
Lamp Distance
Nutrients 4
Top-Max
4 mll
BioBloom
3 mll
BioGrow
3 mll
Master_weeda Hello to all the padawans and Jedi masters
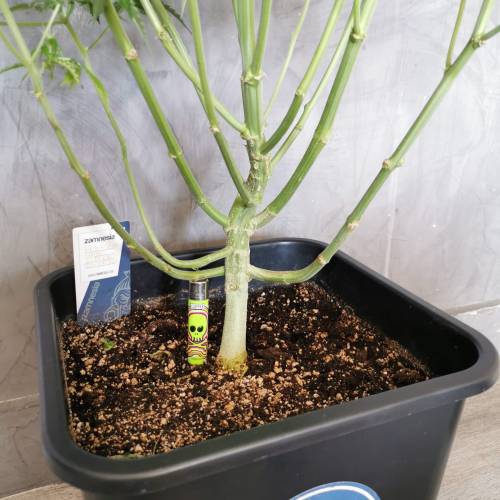
Day 84 watering with 2 liters of water ph6.3
Day 87 watering with 2.5 liters of water ph6.3
Day 89 watering with 2.5 liters of water ph6.3
14 likes
2 comments
Share
14
Week 14. Flowering7y ago




99 cm
Height
20 hrs
Light Schedule
23 °C
Day Air Temp
6.3
pH
Strong
Smell
50 %
Air Humidity
21 °C
Night Air Temp
10 liters
Pot Size
0.1 liters
Watering Volume
60 cm
Lamp Distance
Nutrients 4
Top-Max
4 mll
BioBloom
3 mll
BioGrow
3 mll
Master_weeda Hello to all the padawans and Jedi masters
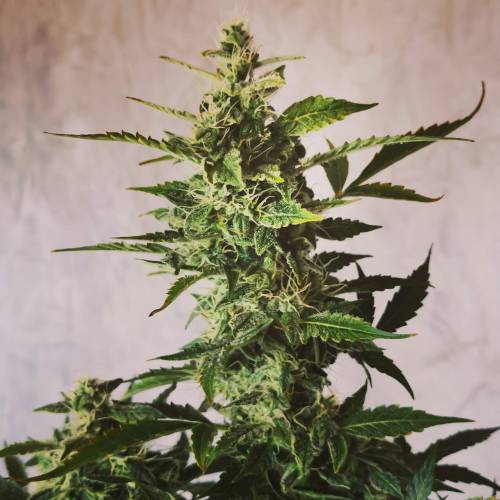
Day 91 watering with 2 liters of water pH 6.3
Day 93 watering with 2 liters of water pH 6.3
Day 95 watering with 2 liters of water pH 6.3
Day 97 watering with 2 liters of water pH 6.3
12 likes
comments
Share
15
Week 15. Flowering7y ago


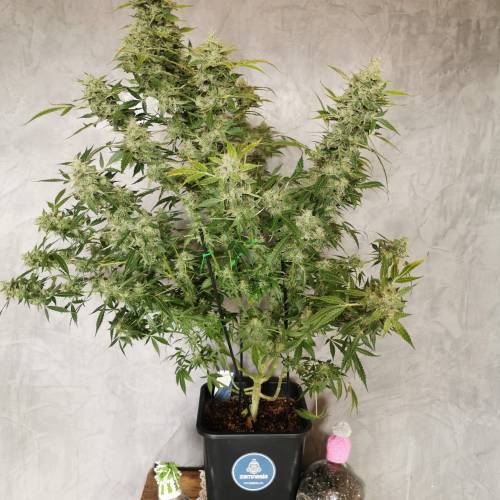


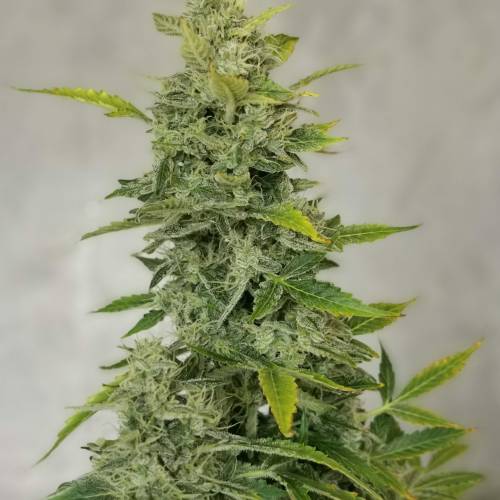


102 cm
Height
20 hrs
Light Schedule
23 °C
Day Air Temp
6.3
pH
Strong
Smell
50 %
Air Humidity
21 °C
Night Air Temp
10 liters
Pot Size
0.1 liters
Watering Volume
23.62 cm
Lamp Distance
Nutrients 4
Top-Max
4 mll
BioBloom
3 mll
BioGrow
3 mll
Master_weeda Hello to all the padawans and Jedi masters
Day 98 watering with 2 liters of water pH 6.3
Day 101 watering with 2.5 liters of water pH 6.3
Day 103 watering with 2 liters of water pH 6.3
14 likes
comments
Share
16
Week 16. Flowering7y ago




102 cm
Height
20 hrs
Light Schedule
23 °C
Day Air Temp
6.3
pH
Strong
Smell
50 %
Air Humidity
21 °C
Night Air Temp
10 liters
Pot Size
1 liters
Watering Volume
45 cm
Lamp Distance
Nutrients 4
Top-Max
4 mll
BioBloom
3 mll
BioGrow
3 mll
Master_weeda Hello to all the padawans and Jedi masters
Day 106 watering with 2 liters of water pH 6.3
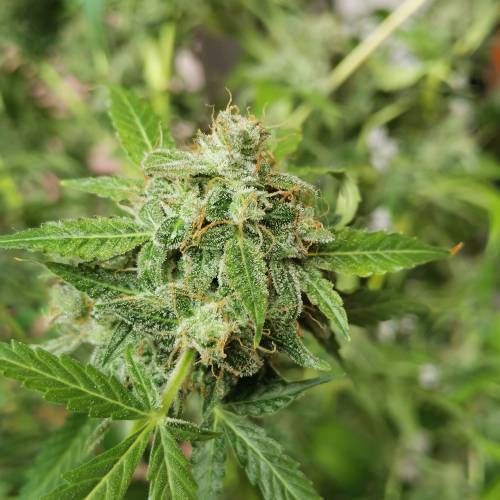
Beginning of senescence on day 106, the trichomes are starting to amber. It should be ready by Monday, either on day 113 or maybe 116, it all depends on the evolution of the trichomes.
16 likes
3 comments
Share
16
Week 16. Harvest7y ago
Happy Harvest Day!


10/10
Rated
Bonjour à tous les padawans et maîtres jedis
Commentaires à venir..
Show more
Translate
Spent 113 days
Ger Veg Flo Har
563 g
Bud wet weight per plant
107 g
Bud dry weight per plant
1
Plants
0.8 m²
Grow Room size
Easy
Difficulty

Creative, Energetic, Happy
Positive effects

Dry eyes, Dry mouth
Negative effects
Height
Day air temperature
Air humidity
PH
Light schedule
Night air temperature
Pot size
Lamp distance


15 likes
7 comments
Share
Equipment Reviews


19 comments
Sort by
popularity
popularity
newest
oldest

Master_weeda commentedweek 27y ago
Hello to all the padawans and Jedi masters
likes 7

Bouleuss commented6y ago
@Master_weeda, Hello putting Yoda from the Mata 😉
likes

WILLIAMSII_Fr_Farm commentedweek 137y ago
Very nice your auto amnesia! 👌
likes 4
Master_weeda commented7y ago
@Williamsii, thank you my friend 🙏
likes 5

TegridyCal commentedweek 57y ago
Very nice, the autoflowering of zamnesia always go fast, even more than the average, beautiful!
likes 3
Master_weeda commented7y ago
@ TegridyCal, Thank you very much my friend 😉 May the force be with 💪
likes 6

Castafunk commentedweek 167y ago
Congratulations it's beautiful 👍 😂
likes 2
Master_weeda commented7y ago
@CastaFunk, always the word nice you 😁 thanks poto 👍
likes 3

Tom_Jay commentedweek 127y ago
she's a tall beauty =D if only one of mine becomes that big i would cry tears of joy!!! ..its me the Auto-Dwarfler xD
05the4thbewithyou!!!! 🙌 🙏
likes 2
Master_weeda commented7y ago
@Tom_JayI wish you well 🤞 ! I was lucky to have 4 like this (sleepy Yoda, zkittlez, Alaskan and amnesia) 👌 👍
likes 5

Huggomadd commentedweek 166y ago
Wow she's a beastly beauty. 💚 👍
like 1
Master_weeda commented6y ago
@Huggomadd,thx my friend 🙏 may the force be with you 💪 🇫🇷 ❤️
likes 3

Buddha2 commentedweek 167y ago
Congratulations! Impressive harvest! 👍
like 1
Master_weeda commented7y ago
@Buddha2, 🙏 thx
likes 4

Pot_Portraits commentedweek 167y ago
Looks beautiful 👌
like 1
Master_weeda commented7y ago
@Pot_Portraits,thx bro 👍
likes 4

AcidTundra commentedweek 107y ago
absolut beaty on ur hands.what do you do for defoliation.i mean:a little by little or all in one go With time inbetween.im getting good but very bushy Critical i fimmed Growth finnaly.
like 1
AcidTundra commentedweek 67y ago
the force is strong uin these padawanplants
like 1

Warzouz_grass commentedweek 167y ago
Crazy bro, more than 100 days 🤘
likes

the end.
Enjoying this diary? Follow for more updates!

Prefer the old Diary view?
Go back to the old Diary view