


Super Lemon HA #1 auto greenhouse



VEG
Lampwin Fluorescent/300W
Lampwin
VEG
Lampwin Light Emitting Diodes/300W
Lampwin
FLO
Lampwin Light Emitting Diodes/300W
Lampwin

Soil
Custom

Indoor
Room Type
Main-Lining
weeks 4-5
LST
weeks 5-6
Defoliation
weeks 8
10 liters
Pot Size
Start at Harvest
1
Week 1. Vegetation7y ago


3 cm
Height
24 hrs
Light Schedule
26 °C
Day Air Temp
6.3
pH
70 %
Air Humidity
21 °C
Solution Temp
21 °C
Night Air Temp
10 liters
Pot Size
0.1 liters
Watering Volume
90 cm
Lamp Distance
Nutrients 3

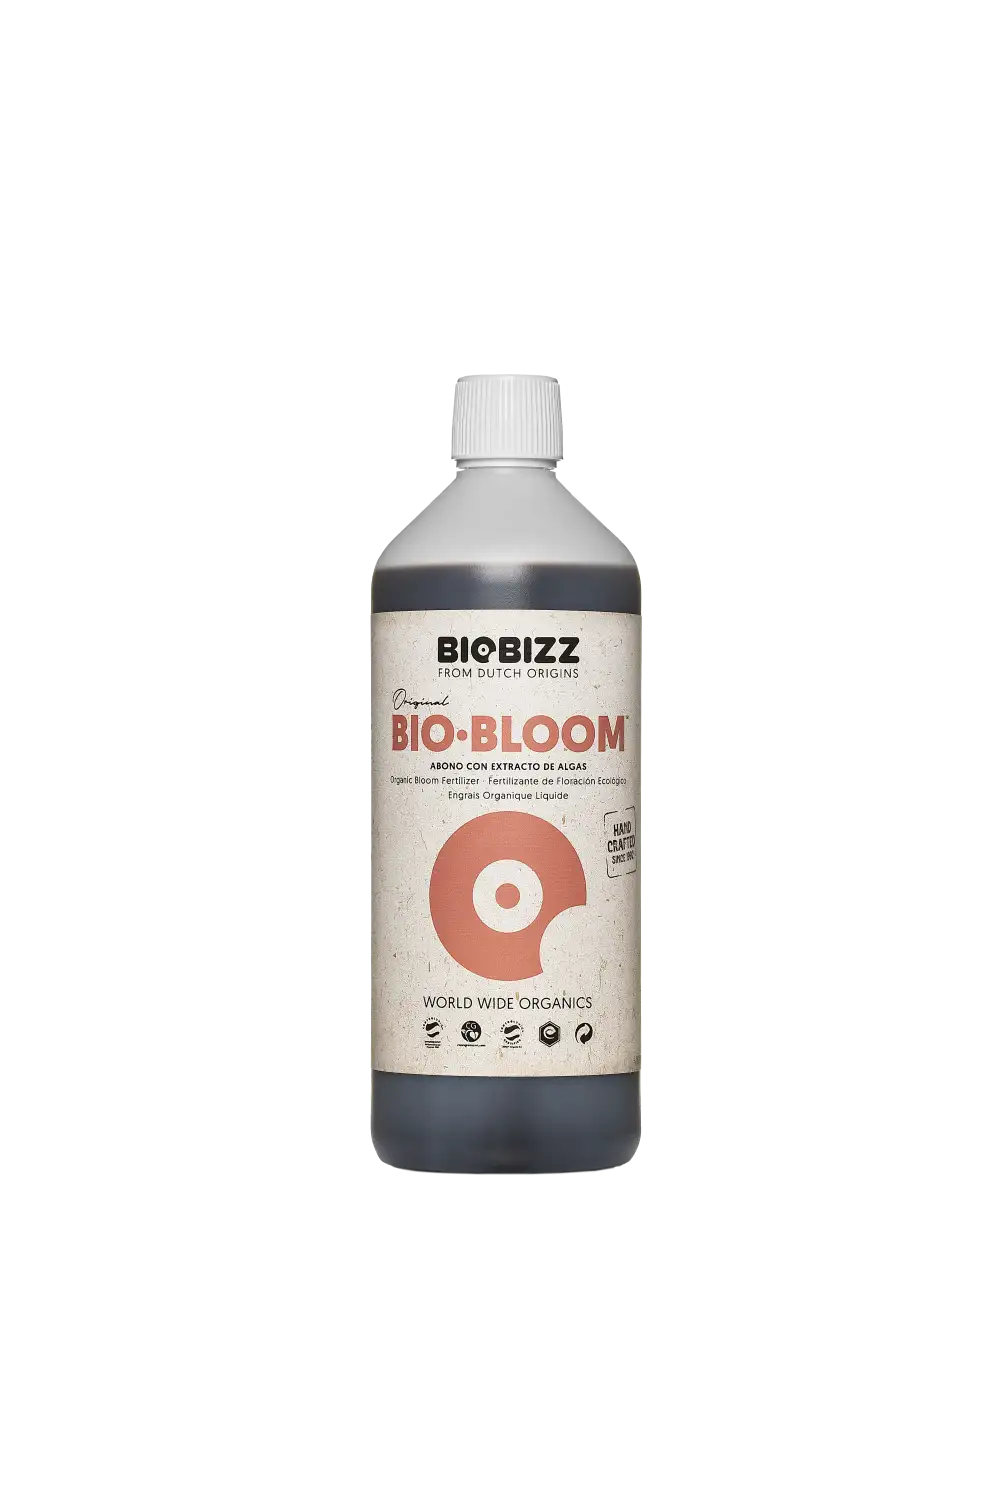
BioBloom
3 mll

BioGrow
3 mll

BioEnhancer
0.6 mll
Master_weeda Hello to all the padawans and Jedi masters!
First of all, thanks to Greenhouse for allowing me to do this grow by providing me with the Greenhouse feeding and seeds.
I remind you that I am simultaneously growing 9 pots of 10 and 11 liters in a box designed for 4, and I only use the bare minimum of equipment necessary for a proper grow at the lowest possible price.
EQUIPMENT CONFIGURATION
Box 80×80×160
Lamp LED Lampwin 300 watts ×2
Clip fan 15 watts
Xiaomi Deerma humidifiers 5L
Hygrometer thermometer
Extractor PROFAN 107 m3/h - 100
Programmable electronic socket ×2
1 black square pot 10 liters
Greenhouse feeding enhancer
Greenhouse feeding biobloom
Greenhouse feeding biogrow
Biobizz lightmix substrate
Wire and cutting pliers
Microscope
Small precision scale
GROW STEP BY STEP
First, I germinated my seed with the Easy Start from Royal Queen Seeds, and I am pleasantly surprised because honestly, the success rate is very high (17 seeds out of 19), easy to use, and very effective.
Once the seedling is out and about 2 or 3 centimeters tall, I gently take it and place it directly into its final pot. I recommend pots between 10 liters and 15 liters for autoflowers grown indoors.
The pot will have been previously prepared (video in diary) with 30 grams of Greenhouse feeding biobloom and 30 grams of Greenhouse feeding biogrow, which is the equivalent of 3 grams per liter of substrate.
I then place the seedling in its final pot, cover it a bit with soil, lightly compact it, and water it to keep the substrate moist, no more.
I place my 300-watt LED lamp about 90 centimeters above the seedling with a light cycle of 24/24 for a week. At the beginning of week 2, the light cycle will switch to 20/4 thanks to a timer, as this is the light cycle that offers the best yield for an autoflower.
Day 1: light watering
Day 2: light watering
Day 3: the seedling starts to become more vigorous, setting up ventilation to increase its root mass, and light watering
Day 4: watering with one and a half liters of water pH 6.3 to which I added 0.9 grams of Greenhouse feeding enhancer (that’s 0.6 grams per liter of water)
Day 5: no special technique
Day 6: no special technique
A pleasantly calm week with no apparent problems or deficiencies.
May the force be with you!
17 likes
3 comments
Share
2
Week 2. Vegetation7y ago




5 cm
Height
20 hrs
Light Schedule
24 °C
Day Air Temp
6.3
pH
70 %
Air Humidity
21 °C
Solution Temp
21 °C
Night Air Temp
10 liters
Pot Size
0.1 liters
Watering Volume
90 cm
Lamp Distance
Nutrients 3
BioBloom
3 mll
BioGrow
3 mll
BioEnhancer
0.6 mll
Master_weeda Hello to all the padawans and Jedi masters
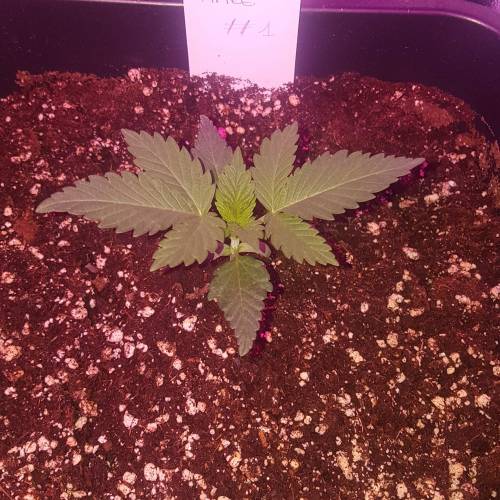
For this week 2, no techniques practiced, I just monitored that the humidity stays at a rate of 70%. I did a light watering until day 10 because transplanting the autoflowering plants into their final pots increases the risk of overwatering the substrate. 🤐
To mitigate this risk, it's better to water with 10 or 20 centiliters of water at pH 6.3 during the first 10 days of the seedling. On day 11, I water my pot normally with a quarter of its volume in water (for a 10-liter pot, 2.5 liters) still with a pH of 6.3, I add to this water 0.6 grams of greenhouse feeding enhancer per liter of water.👍
Enhancer is a mix of humic acids, seaweed extracts, strains of Trichoderma harzianum, and Bacillus subtilis.
It increases the vitality of the plant, improves nutrient absorption, and enhances soil quality.👍
I will do a similar watering in 2 weeks
May the force be with you 💪
15 likes
comments
Share
3
Week 3. Vegetation7y ago


5 cm
Height
20 hrs
Light Schedule
24 °C
Day Air Temp
6.3
pH
70 %
Air Humidity
21 °C
Solution Temp
21 °C
Night Air Temp
10 liters
Pot Size
0.1 liters
Watering Volume
90 cm
Lamp Distance
Nutrients 3
BioBloom
3 mll
BioGrow
3 mll
BioEnhancer
0.6 mll
Master_weeda Hello to all the padawans and Jedi masters!
For this week, I’m not planning any special technique, just some watering. I'm taking advantage of this relatively calm week to remind you of what I think is the best technique for watering an autoflower.
By following these simple tips, you'll achieve optimal results throughout your grow:
Cannabis is a plant that doesn't like to receive light watering continuously. It's imperative to water it in large quantities, then wait for the soil to be well dry before watering again!
To calculate the amount of water needed for each plant, follow this rule:
The volume of water to give during each watering should represent at least about a quarter of the pot's volume!!
Examples:
for a 1L pot, give 0.25L of water at each watering; for a 4L pot, give 1L of water at each watering; for a 12L pot, give 3L of water at each watering; for a 30L pot, give 7.5L of water at each watering! etc...
To give such a volume of water, it is often necessary to water in two (or even three) times, slowly and evenly over the entire surface. Place good saucers under the pots; they will fill with water that will rise into the pot by capillarity in less than a day. It is also very important to use good quality potting soil, with good water retention capacity but also ensuring good drainage (it should contain perlite, and/or coco, etc.)
You then need to wait a few days while regularly lifting the pots with your arms. When they become very light again, you can water once more!!
Indeed, since water weighs much more than soil, a pot soaked with water weighs several times the weight of a pot of a plant ready to be watered. With a little practice, you will quickly learn to lift your pots to know when a plant is thirsty.
It’s a technique that is both very easy and very effective, and can be applied to all potted plants!
By watering this way, in general, you should water your plants every 3 to 6 days.
May the force be with you 💪
17 likes
comments
Share
4
Week 4. Vegetation7y ago




11 cm
Height
20 hrs
Light Schedule
24 °C
Day Air Temp
6.3
pH
70 %
Air Humidity
21 °C
Solution Temp
21 °C
Night Air Temp
10 liters
Pot Size
0.1 liters
Watering Volume
90 cm
Lamp Distance
Nutrients 3
BioBloom
3 mll
BioGrow
3 mll
BioEnhancer
0.6 mll
Master_weeda Hello to all the padawans and Jedi masters
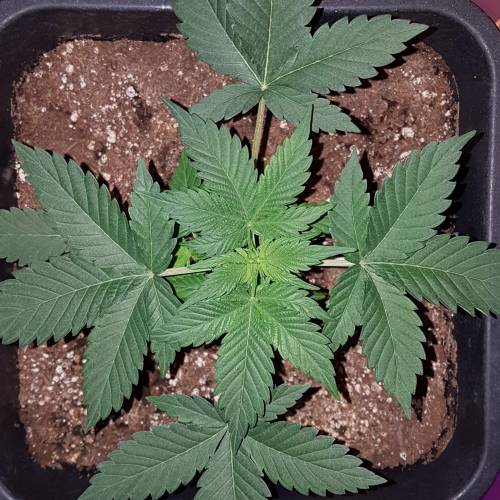
Week 4 is going to be crucial for this young lady because I'm going to practice main-lining and LST on her. I want to clarify that main-lining is not recommended for autoflowering strains because its predefined life cycle doesn't allow it to fully recover. This will definitely impact its yield; for aesthetic reasons and limited growing space, I have no other choice. For this main-lining, I waited until day 24 and the appearance of the seventh node. Once the main-lining is done, I will practice the LST technique, which will allow me to have a more uniform canopy, thus better light penetration and consequently a better yield. You can see a video of my main-lining detailing how I proceed to perform this technique. A little reminder and explanation about this technique: Main-lining has always been a very popular technique among growers, as with simple adjustments during the first stage of growth, you guarantee yourself more than productive harvests. It involves growing the plant vertically and symmetrically to maximize light and space, which are highly sought after aspects in indoor cultivation. By guiding the branches with strings and a series of initial trims, you will establish vigorous growth patterns for your plants.
HOW TO SET UP MAIN-LINING
Starting from the seed, wait until your plant has developed at least 5 nodes. Once they are formed, trim the plant at the third node. Remove everything that has developed below the third node (I only remove the first and keep the second and third). This will form the initial Y or T shape you are looking for. Allow your plant to recover from this imposed stress for a few days before moving on to the next step.
Your plant now has two main shoots (or 4 if you keep the second node). These should be tied down with wire or string (or garden wire). This will direct the growth horizontally. Be very careful when tying the branches, do not break them. Be gentle.
Once the plant has developed a bit, you will end up with 4 main stems. You can repeat this process as many times as you wish, thus accessing larger yields. However, remember that the more you repeat this process, the longer the growth period will be. Except for autoflowering strains, as given the extra time they need, main-lining is not compatible with autoflowering varieties. Autoflowers have very fast growth cycles, and by the time the technique is implemented, half of their development will already be over. This could potentially damage the harvests and affect the yield. As soon as you have produced the desired amount of separations, it will just be a matter of time before uniform buds start to appear. A slight regular defoliation during the growth cycle will also ensure an even distribution of light and prevent your plant from wasting energy on large unnecessary leaves. Remove those leaves as soon as they start taking up too much space.
May the force be with you 💪
20 likes
4 comments
Share
Used techniques
Main-Lining
Technique
5
Week 5. Vegetation7y ago




10 cm
Height
20 hrs
Light Schedule
24 °C
Day Air Temp
6.3
pH
70 %
Air Humidity
21 °C
Solution Temp
21 °C
Night Air Temp
10 liters
Pot Size
0.1 liters
Watering Volume
90 cm
Lamp Distance
Nutrients 3
BioBloom
3 mll
BioGrow
3 mll
BioEnhancer
0.6 mll
Master_weeda Hello to all the padawans and jedi masters
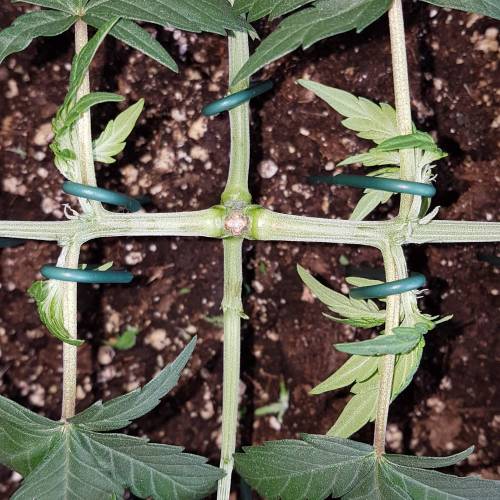
For this week 5, I'm finalizing my mainlining and for this, I'm removing leaves and branches from the second nodes, keeping only the nodes on the horizontal branches for aesthetic reasons and greater ease in practicing LST. I repeat the operation until I achieve the desired shape and number of colas. I limit the number of nodes because, as a reminder, this technique is not very suitable for autoflowering strains.
For more information on this technique, refer to week 4.
I regularly weigh my pot to monitor my plant's water needs.
I'm pleasantly surprised by the recovery capacity of this autoflowering strain, which handles the mainlining quite well.
Day 31: The plant's growth is vigorous; I'm letting it recover from the stress of the mainlining it has undergone. I'm just in time to finalize the shape of my plant, which will soon enter flowering.
Day 33: Watering with 2.5 liters of water at pH 6.3 to which I add 0.5ml of TopMax from Biobizz per liter of water.
May the force be with you 💪
14 likes
8 comments
Share
Used techniques
LST
Technique
Main-Lining
Technique
6
Week 6. Flowering7y ago


11 cm
Height
20 hrs
Light Schedule
24 °C
Day Air Temp
6.3
pH
70 %
Air Humidity
21 °C
Solution Temp
21 °C
Night Air Temp
10 liters
Pot Size
0.1 liters
Watering Volume
60 cm
Lamp Distance
Nutrients 4

Bio-Bloom
1 mll
BioBloom
3 mll
BioGrow
3 mll
Master_weeda Hello to all the padawans and Jedi masters!
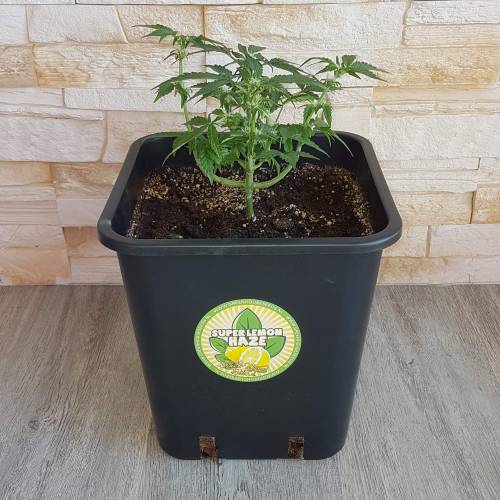
I’m keeping an eye on humidity and watering as usual. I’m fine-tuning my LST while stressing my plant as little as possible. I’m combining my LST with apex pinching, which will help me achieve a more uniform canopy, leading to better light penetration and consequently a better yield.
A little reminder about apex pinching:
Pinching cannabis plants
Close to apex topping in principle, this technique has several advantages, the main one being to maintain the large central bud of the plant, with maximum production and quality.
Pinching cannabis plants
Apex pinching (the top of the plant) simply involves gently pinching the stem of the top tier of the plant between your thumb and index finger until you feel the fiber crush under your fingers with a characteristic little crunch sound. If the available space on the stem of the top tier doesn’t allow you to comfortably place your fingers, you should pinch the tier below instead.
Pinching will significantly slow down the vertical growth of the plant while stimulating the development of secondary branches, thus giving the plant a bushy shape. The plant will take a few days to repair this pinching, forming a knot at that spot, and will then continue its growth normally. Pinching can then be repeated if necessary on the newly formed next tier, as well as on any secondary branches that might exceed the apex.
Pinching is therefore an excellent technique for achieving a nice uniform canopy of the sea of green type. By regularly pinching the apex of the larger plants in your space during the growth phase and at the beginning of flowering (stretch), you will easily obtain plants of uniform height in full bloom, which will facilitate cultivation and increase final production, especially if you are simultaneously growing multiple cannabis varieties.
With a bit of practice, pinching can be done as quickly as effectively. In the case of overly aggressive pinching that results in a torn apex, it will simply yield the same results as a classic topping of the apex, which won’t be dramatic.
May the force be with you 💪
15 likes
2 comments
Share
Used techniques
LST
Technique
7
Week 7. Flowering7y ago


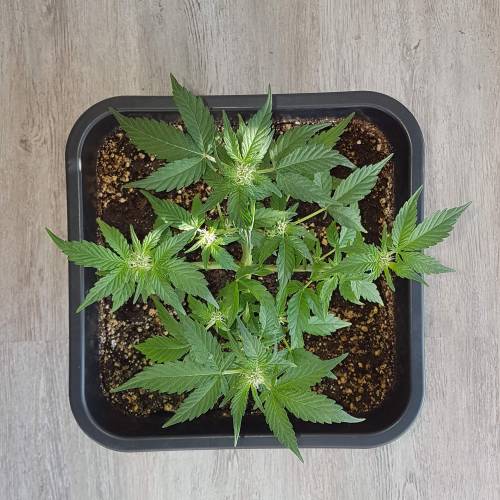


17 cm
Height
20 hrs
Light Schedule
24 °C
Day Air Temp
6.3
pH
55 %
Air Humidity
21 °C
Solution Temp
21 °C
Night Air Temp
10 liters
Pot Size
0.1 liters
Watering Volume
60 cm
Lamp Distance
Nutrients 4
Bio-Bloom
1 mll
BioBloom
3 mll
BioGrow
3 mll
14 likes
comments
Share
8
Week 8. Flowering7y ago


23 cm
Height
20 hrs
Light Schedule
24 °C
Day Air Temp
6.3
pH
55 %
Air Humidity
21 °C
Solution Temp
21 °C
Night Air Temp
10 liters
Pot Size
0.1 liters
Watering Volume
60 cm
Lamp Distance
Nutrients 4
Bio-Bloom
1 mll
BioBloom
3 mll
BioGrow
3 mll
Master_weeda Stretch 6 centimeters
Day 52 watering with pH 6.3 water
Day 54 defoliation
17 likes
1 comment
Share
Used techniques
Defoliation
Technique
9
Week 9. Flowering7y ago


23 cm
Height
20 hrs
Light Schedule
24 °C
Day Air Temp
6.3
pH
50 %
Air Humidity
21 °C
Solution Temp
21 °C
Night Air Temp
10 liters
Pot Size
0.1 liters
Watering Volume
60 cm
Lamp Distance
Nutrients 4
Bio-Bloom
4 mll
BioBloom
3 mll
BioGrow
3 mll
Master_weeda Hello to all the padawans and jedi masters
Day 56 watering with two liters of water ph6.3
Day 59 watering with two liters of water ph6.3
18 likes
3 comments
Share
10
Week 10. Flowering7y ago


25 cm
Height
20 hrs
Light Schedule
24 °C
Day Air Temp
6.3
pH
Strong
Smell
50 %
Air Humidity
21 °C
Solution Temp
21 °C
Night Air Temp
10 liters
Pot Size
0.1 liters
Watering Volume
60 cm
Lamp Distance
Nutrients 4
Bio-Bloom
4 mll
BioBloom
3 mll
BioGrow
3 mll
12 likes
2 comments
Share
11
Week 11. Flowering7y ago


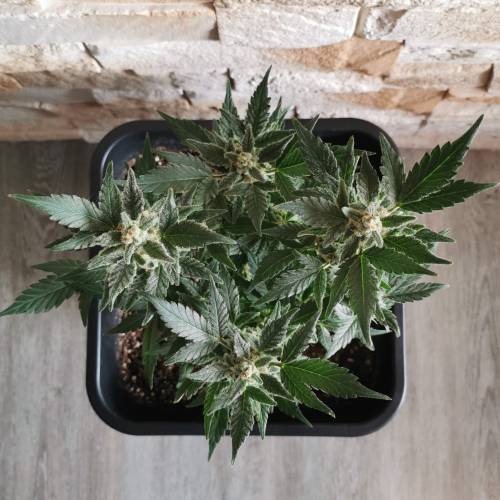


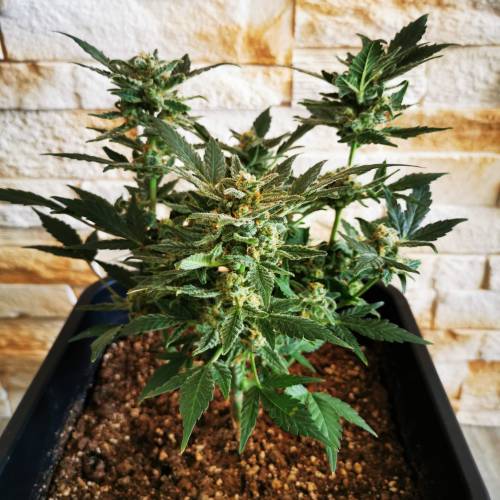
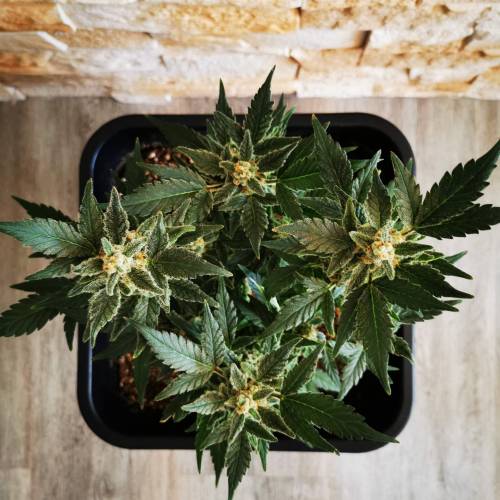


25 cm
Height
20 hrs
Light Schedule
24 °C
Day Air Temp
6.3
pH
Strong
Smell
50 %
Air Humidity
21 °C
Solution Temp
21 °C
Night Air Temp
10 liters
Pot Size
0.1 liters
Watering Volume
60 cm
Lamp Distance
Nutrients 4
Bio-Bloom
4 mll
BioBloom
3 mll
BioGrow
3 mll
Master_weeda Day 70 watering with 2 liters of water pH 6.3
Day 72 watering with 2 liters of water pH 6.3
Day 75 watering with 1 liter of water pH 6.3
20 likes
comments
Share
12
Week 12. Flowering7y ago


25 cm
Height
20 hrs
Light Schedule
24 °C
Day Air Temp
6.3
pH
Strong
Smell
50 %
Air Humidity
21 °C
Solution Temp
21 °C
Night Air Temp
10 liters
Pot Size
0.1 liters
Watering Volume
60 cm
Lamp Distance
Nutrients 4
Bio-Bloom
4 mll
BioBloom
3 mll
BioGrow
3 mll
22 likes
4 comments
Share
13
Week 13. Flowering7y ago


25 cm
Height
20 hrs
Light Schedule
24 °C
Day Air Temp
6.3
pH
Strong
Smell
50 %
Air Humidity
21 °C
Solution Temp
21 °C
Night Air Temp
10 liters
Pot Size
0.1 liters
Watering Volume
60 cm
Lamp Distance
Nutrients 4
Bio-Bloom
4 mll
BioBloom
3 mll
BioGrow
3 mll
Master_weeda Hello to all the padawans and
14 likes
2 comments
Share
14
Week 14. Flowering7y ago


25 cm
Height
20 hrs
Light Schedule
24 °C
Day Air Temp
6.3
pH
Strong
Smell
50 %
Air Humidity
21 °C
Solution Temp
21 °C
Night Air Temp
10 liters
Pot Size
0.1 liters
Watering Volume
60 cm
Lamp Distance
Nutrients 4
Bio-Bloom
4 mll
BioBloom
3 mll
BioGrow
3 mll
Master_weeda Hello to all the padawans and Jedi masters
Day 91 watering with 2 liters of water pH 6.3
13 likes
comments
Share
14
Week 14. Harvest7y ago
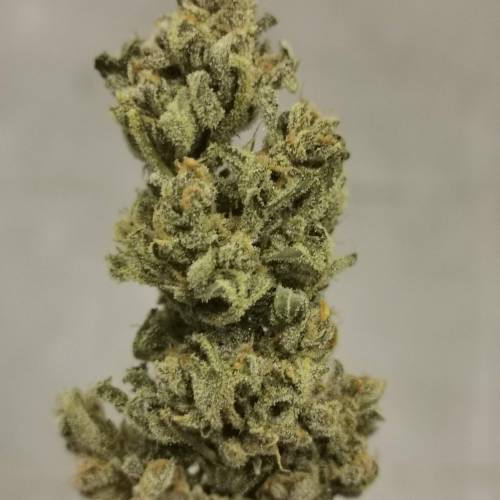
Happy Harvest Day!


8/10
Rated
Bonjour à tous les padawans et maîtres jedis
Show more
Translate
Spent 99 days
Ger Veg Flo Har
75 g
Bud wet weight per plant
1
Plants
Easy
Difficulty

Relaxed, Sleepy
Positive effects

Dry mouth
Negative effects

Citrus, Woody
Taste
Height
Day air temperature
Air humidity
PH
Light schedule
Solution temperature
Night air temperature
Pot size
Lamp distance




19 likes
8 comments
Share
Equipment Reviews




37 comments
Sort by
popularity
popularity
newest
oldest

Castafunk commentedweek 67y ago
You rock, top notch 👌
likes 5

Master_weeda commented7y ago
@CastaFunk, Merci mon pote 🙏 🙏 🙏
likes 11

Bouleuss commented7y ago
@Master_weeda, 👍 👍 🙏 🏻 🙏 🏻 🙏 🏻
like 1
Castafunk commentedweek 137y ago
Did you see the mold in the bottom left?? .......................................Just kidding
likes 4
Master_weeda commented7y ago
@CastaFunk, 😂 not kidding! 🙏
likes 5
Bouleuss commented7y ago
@Master_weeda, 👍 👍 🙏 🏻 🙏 🏻
like 1

WeedTheNorth commentedweek 127y ago
They don't always grow big but at least it's frosty. All the best my friend.
Keep em popping
😏 🇨🇦 👏 🤜 👊 🙏
likes 4
Master_weeda commented7y ago
@OHcanaDAbiz,she's soon ready for prom 😊
likes 9

MrRaid commentedweek 47y ago
Nice bro 🔥 🔥
likes 4
Master_weeda commented7y ago
@MRRAID, 👍 thx 🙏 🙏
likes 11

Blueboy2019 commentedweek 87y ago
Y so small
likes 3
Master_weeda commented7y ago
@Blueboy2019,it's not the size that matters 😉
likes 13
Blueboy2019 commented7y ago
@Master_weeda, 😂 😂 must admit biggers is always better tho lol y is it so small have u done that on perpes or she just not grow for u
likes 4
Master_weeda commented7y ago
@Blueboy2019, look at this one you're going to laugh less since you like big ones 😉 👏 👏 👏
growdiaries.com/diaries/44119-philosopher-seeds-sleepy-yoda-auto-grow-journal-by-weedawan
likes 9

Crwfz1 commentedweek 57y ago
Looking perfect u going to scrog ?
likes 3
Master_weeda commented7y ago
@Crwfz1,no my friend it's mainlining 😉
likes 10
Crwfz1 commented7y ago
@Master_weeda,I'm new to this got about 5 years of outdoor under my belt nothing crazy I'm new to all this training lol 😂
likes 4
Master_weeda commented7y ago
@ Crwfz1, here we are all masters and all students 😉
May the force be with you 💪
likes 11

MrJones commentedweek 127y ago
Serious training bro! Great Job!
likes 3
Master_weeda commented7y ago
@MrJones, thx bro 👊
likes 6

mrs314 commentedweek 47y ago
Nice looking grow! And good explanation of main lining, helps me a lot 🤗
likes 2
Master_weeda commented7y ago
@ Crwfz1, this is a mainlining and all the explanations are in week 4
May the force be with you 💪
likes 13
mrs314 commented7y ago
@Crwfz1, as @Master_weeda mentioned, i also meant the explanation which he wrote:)
likes 3
Master_weeda commented7y ago
@MRS314, 🙏 😉
likes 11
Show More (2)

JackPi commentedweek 17y ago
Good luck man 🔥
likes 2
Master_weeda commented7y ago
@JackPi,thx bro ! 🤐
likes 6
Master_weeda commented7y ago
@JackPi, thx my friend
May the force be with you 💪
likes 9

AcidTundra commentedweek 107y ago
Very tidy easy to get the mainlining process.Piece of art
likes 2
Master_weeda commented7y ago
@AcidTundra,thx 🙏
likes 4

Buddha2 commentedweek 147y ago
👍
likes 2
Master_weeda commented7y ago
@Buddha2,thx 🙏
likes 5

DoDrugs420 commentedweek 145y ago
Beautifull Super Lemon Haze Auto !!!!!!
like 1
Master_weeda commented5y ago
@DoDrugs420,yes bro she's strong and good taste 💪 🌱 ❤️
likes
Bouleuss commentedweek 147y ago
Pretty work my friends 😊 🙏 🏻 🙏 🏻
like 1

Tom_Jay commentedweek 147y ago
🙏 TO_HANDP
like 1

the end.
Enjoying this diary? Follow for more updates!

Prefer the old Diary view?
Go back to the old Diary view