Likes
Comments
Share
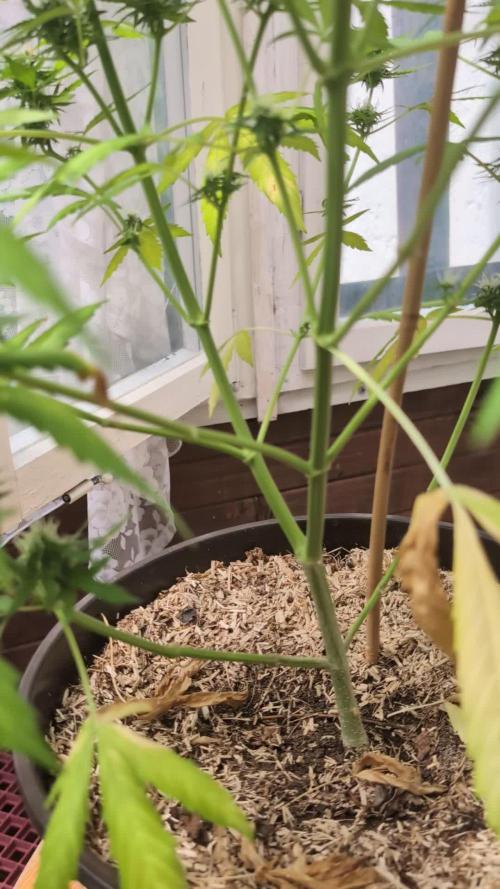
Welcome to the last week! The ladies are allready showing some discoloration on the leaves. This last week they will only get plain cold water, no nutrients.
Likes
43
Share
🌱: one of 2 seeds made it, probably treated too roughly and too wet, the second one did it, 2 days in the glas of water, 3 days in soil. 💧 : Start with SIP 4l 💡 : Start with ppfd 280 μmol/m²/s 🤔:
Likes
19
Share
Que pasa familia, puesto que la compañera y yo estamos bajo mínimos, hemos decidido proceder a un lavado de raíces temprano, y un estrés hídrico para limpiar raíces y estresarla un poco. Todo va sobre ruedas , puesto que el Covid afecta al confinamiento, decidimos cortar las gorillas estos días siguientes para secar y en nada tener algún bote para subsistir 😂🤣. -El estrés hídrico es reducir cada riego la cantidad de agua, para que la planta se estrese y escupa tricomas sus últimos días. Esta variedad de sweet seeds es INCREÍBLE, aun cortándola pronto me parece que los resultados son inmejorables, su olor a melón me encanta y se ve repleta de thc. Nos vemos en la cosecha fumetillas, y mucho ánimo para todos.
Likes
27
Share
Bueno pues ya llegamos al final familia, do sweet dos es una variedad bastante productiva. De cuatro plantas casi 180gs y la verdad que bastante contento, no tuve tiempo para poder hacer más fotos y trabajar más este post pero con la prisa y la mudanza pues bueno, bastante e cosechado. Humedad en el secado relativamente baja al 40% y la temperatura estuvo entorno a 23 grados ambientales. Hasta aquí todo familia, os recomiendo también la gama de productos de agrobeta, ya que los resultados son llamativos.
Likes
45
Share
5/28 It poured yesterday so i dodnt bring the girls outside. Seedlings are transplanted into gallon pots. Once the fill that they'll go in final homes. I brought the plants out on this overcast day to harden them off. They're under the cover of the barn though placed by the open door. I've been putting in some work. Once this rain stops I have a couple things to do on the cage then I'll put the bags in the spots I have mapped out and mix my soil and fill the bags. The next day I typically transplant and add the first layer of supports. I have more pictures but not enough time to download them. 5/29 wow this site sucks. I have already done and saved this shit but its not here. Good thing I copy and pasted from grow with Jane. Only thing that sucks is I can't upload videos. It's not working here anyway so.... Watered and used about 3 gaterade bottles total. I may have messed up and watered the event horizon to much. They seem to be getting rootbound. Plants are doing well though with the transition. They are still hardening off. Tomorrow I plan to position and fill the bags with soil and if able I'll transplant them in the next few days. I want to make sure they're hardened off. Low tonight is 49 but it's 50s after that so I should be good. I'm hoping this video will load. Very stressful to do this shit over and over. 5/30 Plants have spent all day in tje Cafe and are coming in for the night. I finished mixing soil and filling the grow bags. They are ready for transplant. Weather is looking good so if plants respond well to this mild weather they will be transplanted with first set of supports added either tomm or the next day. Depends on plants response today (so far they're doing great) on whether I transplant tomorrow or the day after. I am sore as hell. Pictures are having trouble uploading and I'm not even gonna try to upload the video I took. 5/31 Plants have been taking a few days of full sun and they're doing fine. I'm planning on transplanting this afternoon. I had to water today. I weighed the pots and some were in tje 1200's grams which is dry. I'll update as I work. I have some errands to run then I'm putting the girls in their final homes. EDIT: WIND WAS RIDICULOUS! I TRANSPLANTED 3 OF THE HEALTJY GMO'S. WHEN I GOT BACK PLANTS WERE RIGHT SIDEWAYS FROM THE WIND. I WENT WITH INTUITION AND TRANSPLANTED 3 GMO'S. OTHER BAGS ARE READY. THE REST OF THE PLANTS WILL GO OUT TOMORROW MORNING. THE SMALL SUPPORTS I HAD DIDNT DO SHIT. I HAD TO ADD TOMATO CAGES AND TOE THE STALK TO THE TOMATO CAGE. SUCKS I COULDNT GET THEM ALL IN BUT BETTER SAFE THAN SORRY. TRANSPLANTS WENT REAL SMOOTH. KNOCK ON WOOD. I TJ8NK THE OTHERS WILL TOO. THEY'RE READY FOR A NEW 6/1 Finished transplanting everything. Easiest transplant I've had so far. 4 gmo 1 toasted toffy 1 sherb pie and 2 event horizon. Everything is in 20 gal smart pots. One gmo is in a 30 gal smart pot. The medium is 1/3 of each roots organic 707, fox farm happy frog and fox farm ocean forest. Used mykos when transplanting. Wind gusts were coming from everywhere direction so I couldn't put a tarp up to block it. I bought "grow cages" which are kind of like tomato cages. The wind is so strong it blows the plants right against the cage. Oh well. I hope it works out. I'll check on them a little later and see how they're doing. 6/2 It was 45 degrees this morning. Nice out now. Plants are doing good. A couple gmos are drooping but it was cold. One gmo looked as good as ever! Sherb pie and toasted toffy are totally unaffected. In this new area plants get a lot of direct sun. Slight tacking on the gmos in the front. The event horizons really needed that transplant. Grow cages seem to be working out well. 6/3 I Watered the garden this morning as its been 75-80 out. I only used a gallon of water for the 8 clones. I'm not sure if I watered enough when I transplanted or not. Some plants have some burns from the intense direct sunlight. Plants could've used a bit more hardening but they'll be fine. A few of them seem great and have no real signs of stress dispute 25mph wind gusts and 15 mph constant wind and this hot sun. I should go check on my plants again this evening but I figure they'll be alright until morning. I've had an incredibly busy day and they were fine at noontime. I'm going to consult my other diaries and see what I did watering volume wise. I've for some videos but they take FOREVER to upload. EDIT: Looked at last year's diary and it was rainy as fuck and I took way more time hardening the plants. I've had more going on in life which has effected that. Went over at 3pm and gave the plants 3 more gallons of water. Bags were light and soil was dry af. Granted I added soil after it settled but still. I watered one gallon this morning so I figured 3 more gallons would make it a half gallon a plant. Planning to increase to a gallon each if they do OK. Its supposed to thunder storm tomorrow so hipfully we will get some rain. I removed one leaf that was bleached but there are a few others. The weather is beautiful but we've gotten zero rain. In hindsight perhaps I should've given the plants an extra gallon at least.
Likes
16
Share
@Ensign420
Follow
Introduction - Week 14|07 Summary - Ensign's log, stardate 9437.65, Great week of growing! Wow what a good week! Growth in the main tent has all around been incredible! Submitted my first submission to the Global Grow Cup! Filmed a video of the solo cup container (marked with the ticket/order number) that will be used for the competition. Also had to fill and prove the solo cup holds 2 cups of soil. Now I need to root a clone (for the first time), transplant her into this cup, and submit my 2nd entry before the 30th of this month. As far as my first attempt at cloning, have already begun the rooting process! Managed to take cuttings from 3 out of the 6 phenos in the main tent (the first cutting was also my first time topping). Soaked the cuttings for two days before planting them into Coco Coins. So far everything has gone surprisingly well! The clones are now rooting under the propagation dome with the vents fully closed. Will check for roots soon! At the end of the week, growth was just raging! Was planning on flipping to flower in a week, but decided to begin the first week of flower next week! Thus this is the last week of veg. Plan to flip to 12/12 next Monday! Onwards to next week! [START OF WEEK 14|07] ========================================================== Garlic Budder #1 - WEEK 14|07 - Full Veg Wk5 Garlic Budder #2 - WEEK 14|07 - Full Veg Wk2 Garlic Budder #3 - WEEK 07 - Full Veg Wk5 Garlic Budder #4 - WEEK 06 - Full Veg Wk4 06/03/24 → 06/09/24 This Week's Estimated Goals ---------------------------------------------------------------------------------------------- DLI: ~26 mol/m²/d PPFD: ~400 μmol/m²/s VPD: ~1.0 kPa This Week's Meter Readings & Averages [Lights On: 16:00 - 10:00] ---------------------------------------------------------------------------------------------- DLI: 24.56 mol/m²/d PPFD: 379 μmol/m²/s VPD: 0.91 kPa Soil %: [32.7, 37.6, 37.9, 34.1] ========================================================== Day 01 - Monday - 06/03/24 - Total Days: 098 ----------------------------------- Daily Averages [~23:00] - Temps: 80.7°F [27.1°C] - Humidity: 74.4% - VPD: 0.90 kPa - Soil %: [31, 34, 39, 35] ----------------------------------- - [09:57]: Quick morning check! --- #1 is looking a bit droopy, but almost lights off (at 10:00) so not concerned. --- Nice! Mainly wanted to check on #4 and she is looking great! She’s perked back up and looking good! - [23:08]: Evening check. --- Wow! It’s a jungle in here! --- #1 has gotten too big? Nah!? Keep on growing girl! --- #2 is growing and definitely getting bigger! Growth just looking really weird. --- #3 has continued to get larger and is looking quite uniform in growth! --- #4 is growing and looking perky again! --- Even the original #1 and #2 phenos (in the back) are looking good! --- Wow! #4 is really getting close to the light. - [23:14]: Checked down both fill tubes. --- Both reservoirs were completely dry! - [23:27]: Checked the Ecowitt soil moisture sensor data: --- 30% - [CH01 EB1 - Garlic Budder #1] --- 34% - [CH02 EB2 - Garlic Budder #2] --- 39% - [CH03 GFP - Garlic Budder #3] --- 32% - [CH04 FPT - Garlic Budder #4] - [23:32]: Poured 4 cups of distilled water down EB1’s fill tube. --- Poured 2 cups of distilled water down EB2’s fill tube. - [23:38]: Checked the humidifiers. --- Refilled the 4X4’s humidifier with distilled water. --- Tomorrow, plan to defoliate and start cloning for the first time! --- Going to take multiple cuttings from both #1 and #4 for sure, but still deciding on the rest. --- Getting hyped! Day 02 - Tuesday - 06/04/24 - Total Days: 099 ----------------------------------- Daily Averages [~23:00] - Temps: 81.4°F [27.4°C] - Humidity: 74.3% - VPD: 0.93 kPa - Soil %: [29, 35, 38, 32] ----------------------------------- - [11:59]: Time to film the first entry for the Global Grow Cup! --- Going to be using BuildASoil 3.0 potting soil. --- Filming the video using a stand and my phone. --- This video is mainly to establish the container that the plant will be grown in. Also to prove that the container is a 16oz container and that it can hold 2 cups of soil. --- The ticket (order) number also had to be written on the cup. - [12:36]: Done! --- The video had to be done in one continuous shot with no edits (my original submission does not have the logo). --- There was also a photo that needed to be shot which shows the cup filled with 2 cups of soil (just like the video, the original image submission did not have the logo). --- I think I did everything correctly, but also sent an email for verification of submission and validation. --- Getting hyped! --- [*smokes a bowl] --- Going to defoliate today along with for the first-time, going to take cuttings for clones! --- After a bit of online research, decided to split the cloning process into two days. --- Today going to take cuttings and will soak them in a solution of aloe for 24hrs. Afterwards will change the water out and use straight distilled water. --- Then in a couple days, plan to transplant into coco plugs (Coco Coins) for rooting. --- For optimal results, also be using a rooting hormone (Clonex). --- Well.. Here goes nothing! - [17:01]: Evening check. --- Wow! #1 is looking huge! Her main top is stretching above the lower canopy which is continuing to bush out. --- #2 is growing along. Growth is gnarly and a bit droopy, but she’s getting taller! --- #3 is looking great! Still a bit small, but she is continuing to get larger. --- #4 looks like she needs a watering. --- Both plants in the back are also looking surprisingly great as well! - [17:05]: Checked down both fill tubes. --- Both reservoirs were completely dry! --- As far as today's defoliation, going to leave #2 and #3 alone and will focus my defoliation and cloning on the rest of the plants. --- This will be my first attempt at cloning, also going to try topping for the first time today. --- No pressure Ensign. What can possibly go wrong right? - [17:27]: Time to start the cloning and defoliation process! --- Filled a measuring cup with 3 cups of distilled water. ------ Added 3/4tsp of Horticultural Aloe ------ Added 1 more cup of distilled water --- Mixed the solution and poured an even amount into three separate solo cups. --- Made sure to mark two of the cups (#1 and #4). The unmarked one will be for any other clones from amongst the 6 phenos (if any at all). - [17:43]: Time to top and defoliate #1! --- Using a pair of brand new trimmers (AC Infinity), --- Gently cut the main stalk to even out the canopy. --- Then trimmed and cleaned most of the nodes leaving the top node or two. --- Also trimmed the leaf fingers a bit before placing the top cutting into the cup of aloe solution. --- Now for the rest of the cuttings! --- [~45 minutes later] - [18:32]: Managed to finish defoliating and cutting the rest of the clones. --- Took two more lower cuttings from #1 (3 clones total). --- Took 3 lower cuttings from #4 --- While defoliating, decided to try and clone the original #2 pheno as well. Took 4 small cuttings. --- Similar to the top cutting, trimmed and cleaned each lower node for each cutting before placing them into the cups. --- Before finishing up the 2nd cutting, I noticed the first cutting (the top cut that was also trimmed) was drooping. --- So I did not trim and the leaf fingers for the other cuttings. --- In total there were 10 cuttings taken for potential clones. --- My main focus was to take cuttings and to clean up all the lower growth from both #1 and #4. --- Defoliated and cleaned up the back original phenos as well (also trimmed back the cover crop). - [18:35]: Temporarily placed the cuttings onto the floor of the 4x4 tent. --- Took the trimmings (about 3 cups) and spread them onto the top mulch of #1 and #2. --- Time to set the environmental controls for the 3x3 veg tent. - [18:43]: Within the AC Infinity App, --- For the Veg Tent [3x3] controller, --- Adjusted the 'Vegetative [18/6]' Schedule for the grow light. ------ Set the Mode to ‘On Mode’ ------ Set the START/END times to 04:00PM/10:00AM ------ Set the MAX to 1 --- The IonBoard S33 is now utilizing around 60.8W (at intensity 1 out of 10). --- Adjusted the 'Vegetative [18/6]' Schedule for the exhaust fan. ------ Increased the Humidity’s HIGH trigger value from 81% to 87% --- Adjusted the 'Vegetative [18/6]' Schedule for the humidifier. ------ Decreased the VPD target value from 1.5kPa to 0.8kPa - [18:52]: Moved the cuttings into the 3x3 veg tent. --- It begins! I think. --- Going to let these cutting drink some aloe for a day before switching to straight distilled water. --- Hmm. Could be the white floor of the 3x3 veg tent, but have noticed the S33 has a whiter spectrum whereas the FC-6500 seems to be warmer in color. --- Anyways, - [18:58]: Poured 4 cups of distilled water down EB1’s fill tube. --- Poured 2 cups of distilled water down EB2’s fill tube. - [19:06]: Filled a pump sprayer with 5 cups of distilled water. --- Focused mainly on the straw mulch of #4. --- But also misted the straw mulch for the rest of the plants a bit. - [19:12]: Checked the humidifiers. --- Refilled the humidifiers with distilled water. - [19:44]: Going to be using Clonex rooting gel before planting the cuttings into Coco Coins (pre-soaked with microbes and aloe). But before that begins, going to transfer the Clonex gel into a squeeze bottle. --- Gently peeled back the seal on the original Clonex bottle. Just enough make a tiny opening, --- Then slowly and carefully poured the gel into an empty squeeze bottle. --- Also removed the sticker from the original bottle and placed it onto the new one. - [19:54]: Perfect! --- Instead of applying the gel to the cutting, going to be applying the gel to the Coco Coin. --- This squeeze bottle will make applying the gel a lot easier. --- Will take PPFD readings tomorrow. --- Also will change out the aloe solution to distilled water. --- I really hope I didn’t screw things up before they could even begin. --- Don’t die on me ladies! --- Please. Day 03 - Wednesday - 06/05/24 - Total Days: 100 ----------------------------------- Daily Averages [~23:00] - Temps: 81.9°F [27.7°C] - Humidity: 75.5% - VPD: 0.90 kPa - Soil %: [29, 36, 38, 36] ----------------------------------- - [09:40]: Quick morning check! --- #1 is looking a bit droopy, but looking okay. Topping is a high stress technique so going to take some time to recover. Don’t plan on flipping the main 4x4 tent to flower for a good week or so which should be enough time. --- #4 looks great! The defoliation seems to have no effect on growth. Nice! - [09:41]: Also quickly checked on the 3x3 veg tent, --- Nice! The cuttings are looking great! --- No yellowing and they all seemed to have turned up towards the light. --- So far so good! - [22:53]: Evening check. --- #1 is continuing to dominate this grow! She has spread wide and looking incredible! --- #2 is looking gnarly, but getting there. --- #3 is getting larger! But still a runt. By far, her leaves are the darkest of the bunch, but she is still growing! --- #4 looks happy and growing along beautifully! Wow! - [22:55]: Checked down both fill tubes. --- Both reservoirs were completely dry! - [22:59]: Poured 5 cups of distilled water down EB1’s fill tube. --- Poured 2 cups of distilled water down EB2’s fill tube. - [23:05]: Checked on the 3x3 veg tent. --- Ooo yea! The cuttings are still green! Nice! - [23:07]: Took PPFD readings. --- The cuttings were around 121 μmol/m²/s which gives a DLI of 7.84 mol/m²/d --- Nice! These levels are on the lower range for seedlings (~100-300), perfect! I think. - [23:14]: Swapped the aloe water out to straight distilled water. --- Going to let these cuttings soak for one more day before planting. --- Please don’t die girls! - [23:15]: Checked the humidifiers. --- Refilled the humidifiers with distilled water. --- Ooo yea! --- Tomorrow is the big rooting day! Day 04 - Thursday - 06/06/24 - Total Days: 101 ----------------------------------- Daily Averages [~23:00] - Temps: 81.9°F [27.7°C] - Humidity: 75.2% - VPD: 0.91 kPa - Soil %: [32, 38, 38, 34] ----------------------------------- - [16:20]: Evening check. --- #1 is a bit droopy, but growth is looking green and healthy. --- #2 is looking bigger! She’s also looking sort of droopy. --- #3 is growing along nicely! Looking good girl! --- #4 is looking great! A bit droopy but plan to water today. - [16:23]: Checked down both fill tubes. --- EB1's reservoir still has some water. --- EB2's reservoir was completely dry! - [16:23]: Checked the Ecowitt soil moisture sensor data: --- 28% - [CH01 EB1 - Garlic Budder #1] --- 36% - [CH02 EB2 - Garlic Budder #2] --- 37% - [CH03 GFP - Garlic Budder #3] --- 30% - [CH04 FPT - Garlic Budder #4] - [16:30]: Using a pump sprayer, --- Misted the straw mulch of #4 with 6 cups of distilled water. --- Focused mainly on the straw mulch. --- Also misted the straw mulch of #3 (in the grassroots fabric pot) a bit. - [16:43]: Poured 5 cups of distilled water down EB1’s fill tube. --- Poured 3 cups of distilled water down EB2’s fill tube. - [16:52]: Checked the Ecowitt soil moisture sensor data: --- 56% - [CH01 EB1 - Garlic Budder #1] --- 44% - [CH02 EB2 - Garlic Budder #2] --- 40% - [CH03 GFP - Garlic Budder #3] --- 45% - [CH04 FPT - Garlic Budder #4] - [17:01]: Took general PPFD readings. --- #1 was around 379 μmol/m²/s which gives a DLI of 24.56 mol/m²/d --- #2 was around 333 μmol/m²/s which gives a DLI of 21.58 mol/m²/d --- #3 was around 293 μmol/m²/s which gives a DLI of 18.99 mol/m²/d --- #4 was around 378 μmol/m²/s which gives a DLI of 24.49 mol/m²/d - [17:09]: Took the weekly height and light distance measurements. --- #1 was about 21" tall. --- #2 was about 13.5" tall. --- #3 was about 9.5" tall. --- #4 was about 19.25" tall. --- Hmm.. - [17:19]: Adjusted the right oscillating fan a bit. --- Re-angled the CloudRay S6 oscillating fan upwards. Been noticing that the air has been hitting the tops of the plants so easing off a bit (#1 is still getting hit, but she’s huge so not too worried). - [17:23]: Back to the measurements! --- #1 was about 9.5" away from the grow light. --- #2 was about 17" away from the grow light. --- #3 was about 17.5" away from the grow light. --- #4 was about 11.5" away from the grow light. - [17:46]: Checked on the 3x3 veg tent. --- Cuttings are still green! They do look a bit droopy but no signs of yellowing. --- Okay! - [17:55]: Time to begin the rooting process! --- For my first attempt at rooting, going to be using Coco Coins pre-soaked in saponins, microbes and aloe. --- To further help with rooting, going to also be using Clonex rooting gel. --- Filled a measuring cup with 4 cups of distilled water. ------ Added half of 1/64tsp of Quillaja Saponaria Extract [60] ------ Added 1/16tsp of Horticultural Aloe ------ Added 1/8tsp of Mycrobe Complete --- Mixed the solution thoroughly. --- Time for the Coco Coins! --- 10 cuttings means 10 Coco Coins. - [18:09]: Dropped 10 Coco Coins into the measuring cup. --- The coins immediately started to expand. --- A bit too much.. Oops! --- Poured the solution and Coco Coins into a pitcher. --- Added 2 cups of distilled water to the solution (now at 6 cups). --- Great! The coins are pretty much fully expanded, but going to wait a bit longer to fully saturate each coin. --- [~20-30 minutes later] - [18:42]: Great! --- Took the seedling and flood tray from the AC Infinity propagation dome and placed all 10 Coco Coins into the slots. --- Gave each Coco Coin a quick shake to remove excess solution. The coins were not dripping with solution but still pretty saturated. --- Arranged them into 3 groups with the cuttings in mind. --- Also tried to keep the pre-made holes intact. --- Time to inoculate the Coco Coins! - [18:54]: Using a squeeze bottle, --- While keeping the nozzle from making contact with the coco, gently filled each pre-made hole with Clonex rooting gel. Just enough gel to fully cover the hole of each coco coin. - [19:00]: Time to plant the cuttings! --- Gave each cup a misting of distilled water. Focused on wetting the top growth with water. --- Okay! --- To avoid mixing cuttings up. - [19:01]: Starting with the original #2 pheno cup, --- For each cutting, --- Using a pair of clean trimmers, made a final 45° cut about 1/2" from a bottom node. --- Then stripped away and scared the protective membrane below the node before planting. --- Made sure the node was about 1/2" below the surface of the coco. --- To help with planting, while inserting each cutting, gave the Coco Coin a gentle squeeze to loosen the coco. This also helped to ensure the coco and gel was in good contact with the cutting. --- Once the cutting was planted into the Coco Coin, made sure to place back in the same spot (made sure to keep the cuttings in their groupings). --- Once a cup was complete, made sure to keep the label with the group. --- Re-misted the top growth as needed to keep it wet. --- Also wiped the trimmers with isopropyl alcohol in between cuttings (plan to use 10% bleach solution for next time). --- Repeated this process until all 10 cuttings were cut, planted, and in the tray. --- The coco coins fit perfectly into the tray and don’t reach the bottom. Nice! --- The bottom air gap is important. --- Poured a bit of distilled water through one of the empty slots into the bottom of the tray. Just enough to fill the bottom of the tray, but not enough to reach any of the Coco Coins (~1/4cup). - [19:35]: Placed the propagation tray with cuttings into the 3x3 veg tent. --- Placed the first layer of the propagation dome on before giving the sides a misting of distilled water. --- Also sprayed the top of the propagation dome before covering the cuttings. --- Vents are all fully closed. - [19:40]: Placed the bar lights onto the top of the dome before configuring the controller. ------ Set the START/END times to 04:00PM/10:00AM ------ Set the bar light’s intensity to 2 (out of 10). --- Also made sure the propagation light controller’s time was in sync with the Controller 69 Pro. - [19:47]: Took PPFD readings. --- The cuttings were around 136 μmol/m²/s which gives a DLI of 8.81 mol/m²/d --- The PPFD levels are similar to the floor. --- Perfect! --- Going leave the IonBoard S33 on during this rooting process. --- Will check back tomorrow to cycle the air under the dome. - [19:56]: Checked the humidifiers. --- Refilled the humidifiers with distilled water. - [20:17]: Quick night check! --- Ooo yea! Growth is raging and looking perky! --- Mainly checked on #1 and #4 which were looking incredible! --- Keep on growing ladies! Day 05 - Friday - 06/07/24 - Total Days: 102 ----------------------------------- Daily Averages [~23:00] - Temps: 82.7°F [28.2°C] - Humidity: 76.2% - VPD: 0.89 kPa - Soil %: [37, 40, 38, 35] ----------------------------------- - [10:03]: Decided to increase the ambient temp in the 3x3 veg tent. --- Within the AC Infinity App, --- For the Veg Tent [3x3] controller, --- Adjusted the 'Vegetative [18/6]' Schedule for the heater. ------ Increased the Temp target value from 78°F to 82°F --- Hopefully this will help to keep the veg tent at a more consistent temp. - [22:26]: Evening check. --- Ooo yea! The garden is looking incredible! --- #1 is looking perky and just bushing out! Wow! --- #2 is getting big! Growth is weird and leaf fingers are huge! Just going to let her grow. --- #4 is looking happy and growing along like a champ! Nodes are starting branch out and she is turning into a bush! - [10:28]: Checked down both fill tubes. --- Both reservoirs were completely dry! - [22:33]: Poured 5 cups of distilled water down EB1’s fill tube. --- Poured 3 cups of distilled water down EB2’s fill tube. - [22:40]: Checked on the propagation dome (inside the 3x3). --- Ah yea! Looking great ladies! --- Lifted the top of the dome to let some fresh air in for a bit. --- Wow! --- Leaves still look nice and green! --- So far everything looks great! --- Just going to continue on! - [22:53]: Checked the humidifiers. --- Refilled the humidifiers with distilled water. - [11:01]: Decided to adjust the humidifier for the 3x3. --- Within the AC Infinity App, --- For the Veg Tent [3x3] controller, --- Adjusted the 'Vegetative [18/6]' Schedule for the humidifier. ------ Increased the VPD target value from 0.8kPa to 1.5kPa --- The higher VPD level will essentially turn the humidifier off. --- I won’t be needing the humidifier for a good week so might as well save the water. Day 06 - Saturday - 06/08/24 - Total Days: 103 ----------------------------------- Daily Averages [~23:00] - Temps: 81.6°F [27.6°C] - Humidity: 74.9% - VPD: 0.91 kPa - Soil %: [35, 40, 37, 31] ----------------------------------- - [07:40]: Quick morning check! --- #1 and #4 are looking perky and happy! --- Also checked on the propagation dome, --- All cutting still look green! Hyped! - [20:02]: Evening check. --- Wow the garden is raging with growth! --- #1 has blown up! She has clearly recovered and growth is ramping up again! --- #2 is stretching upwards! --- #3 is now the smallest of the 4, but still getting larger! --- #4 is looking incredible! Wow! Growth looks perky and happy! - [20:05]: Checked down both fill tubes. --- Both reservoirs were completely dry! - [20:10]: Poured 6 cups of distilled water down EB1’s fill tube. --- Poured 2 cups of distilled water down EB2’s fill tube. - [20:16]: Checked the Ecowitt soil moisture sensor data: --- 35% - [CH01 EB1 - Garlic Budder #1] --- 40% - [CH02 EB2 - Garlic Budder #2] --- 36% - [CH03 GFP - Garlic Budder #3] --- 27% - [CH04 FPT - Garlic Budder #4] - [20:19]: Using a pump sprayer, --- Misted the straw mulch of #4 with 5 cups of distilled water. --- Focused mainly on the straw mulch. --- Also misted the mulch of #3 a bit (in the fabric pot). - [20:27]: Checked propagation dome (in the 3x3), --- To cycle the air under the dome, lifted the top off for a bit. --- Ooo yea! Everything is still green and looking great! --- Keep on rooting ladies! --- Oops! - [21:45]: Checked the humidifiers. --- Refilled the humidifiers with distilled water. Day 07 - Sunday - 06/09/24 - Total Days: 104 ----------------------------------- Daily Averages [~23:00] - Temps: 81.5°F [27.5°C] - Humidity: 74.8% - VPD: 0.91 kPa - Soil %: [36, 40, 37, 36] ----------------------------------- - [08:18]: Quick morning check! --- Nice! The main tent is looking great! #1 and #4 are both raging with growth! --- Checked on the propagation dome (inside the 3x3) and the clones are still looking green! --- Wow! Everything is going almost too well! Just keep on growing! - [19:08]: Evening check. --- Garden is just exploding with growth! Seems everyone has fully recovered from the defoliation and topping! --- Wow #1 is bushed out and looking incredible! --- #2 is growing really starting to get large! Growth still is funky, but stoked none-the-less. --- #3 is starting to fill in the pot! Getting larger! --- Wow! #4 is getting taller and looks healthy and green! - [19:12]: Checked down both fill tubes. --- Both reservoirs were completely dry! --- Wow the canopy is really starting to get taller and closer to the light. May need to raise it up soon. --- Absolutely surprised how low the light levels have been throughout this entire cycle. Barely moved the light and have not increased the intensity past 2 (out of 10). Less is really more. --- Anyways! - [19:18]: Checked the Ecowitt soil moisture sensor data: --- 36% - [CH01 EB1 - Garlic Budder #1] --- 41% - [CH02 EB2 - Garlic Budder #2] --- 37% - [CH03 GFP - Garlic Budder #3] --- 34% - [CH04 FPT - Garlic Budder #4] - [19:19]: Poured 6 cups of distilled water down EB1’s fill tube. --- Poured 3 cups of distilled water down EB2’s fill tube. - [19:24]: Checked propagation dome (in the 3x3), --- To refresh the air, lifted the top off for a bit. --- Sweet! Still green! Wow! --- Using a spray bottle, misted the top growth with distilled water. - [20:35]: Checked the humidifiers. --- Refilled the humidifiers with distilled water. --- Wow what a week! --- Growth has been just insane in the 4x4 tent! All plants have fully recovered and have just exploded with growth. --- I think it’s time to flip to flower! --- Also, I’m absolutely baffled about how well the cloning process has been going. --- So far no issues! --- Not complaining, but just surprised. Keep on growing ladies! --- If all goes well, should have fully rooted clones soon ready for transplanting (into solo cups of course). --- Absolutely hyped for next week! --- Maximum warp Ensign, Engage! [END OF WEEK 14|07]
Likes
30
Share
@BudXs
Follow
Amber at about 1%. We are gonna see real soon who is right.
Likes
1
Share
Likes
24
Share
Week 5 – Beast Mode & The Big Flip! This week I set up a timelapse to capture just how vigorous these ladies really are — and it didn’t disappoint! 🌱 The tallest Lemon Cherry Runtz even surpassed the Papaytons, though to be fair she’s sitting right in the sweet spot in the center of the tent. I also bumped up the light a bit, and the response was instant. Big thanks to SANlight, AC Infinity, and Autopots for keeping this jungle happy. Some of the girls figured out that there’s basically an endless water source waiting under their pots, and in search of it they threw down insane root systems. You can tell they went into full-on beast mode. This time I’ve been home for almost a month straight, so I could keep a daily eye on the propagation tent. It paid off: the first clones of all four strains rooted within 6–10 days! They’ll be kept safe until we find out which phenos are the real winners. Before flipping them to 12/12 on 19.08, I pulled each cultivar out, gave them a clean topping, and prepped them for flower. Since they were so big already, I skipped cloning the tops and went for side branches instead — they root faster, which is crucial in summer when cloning isn’t the easiest game in my setup.-äpl-.lp0üß0 Meanwhile, the moms I sent to the flower tent are already flashing their first pistils — can’t wait to show you how those develop. The rest will have to stay in the 4x3 for now until the flower run is done in 3–4 weeks, so I went hard on them: lollipopped, defoliated, topped — the works. For now, the goal is to keep them compact and healthy until it’s their time to shine. The real fun is just beginning… stay tuned for flower! 🔥💚
Likes
24
Share
@Mathew
Follow
She's really starting to smell like lemom drops and french vanilla ice cream. Her run off water seems to be coming out alkaline even watering with tea at a ph of 5.4 she is handling it like a champ . Next soil build will include much less bone meal, crab meal, and crushed oyster shell depending on my harveat reaults, hopefully she stays looking healthy and strong!
Likes
24
Share
@nonick123
Follow
Día 115 (23/09) Riego con 250 / 500 ml H2O Día 116 (24/09) Riego con 500 / 1.000 ml H2O - Hace mucho calor! (31 ºC) LemonPaya empieza a formar nuevos pistilos a velocidad decente! Día 117 (25/09) Riego con 500 / 1.000 ml H2O - Hace mucho calor! (31 ºC) OnionOG #1 empieza a oler a tierra húmeda y champiñón 😍 Purple Punsh S1 está empezando a llenar los bordes de las hojas de abanico de una espesa capa de tricomas. Increíble! 💥 Día 118 (26/09) Riego con 500 / 1.000 ml H2O - Sigue haciendo muchísimo calor! Hoy hemos tenido un día con 37 ºC de máxima! Increíble la cantidad de tricomas que están formando Purple Punsh S1 & KS1! Las hojas está completamente perladas! 😍💥 Día 119 (27/09) Riego con 500 / 1.000 ml H2O Que calor! Seguimos con 32 ºC de máxima! Día 120 (28/09) Riego con 500 / 1.000 ml H2O OnionOG #1 muestra unos cogollos brutalmente densos y gruesos! I'm in love! Día 121 (29/09) Riego con 1 litro H2O pH 6,5 + Kelp Hidrolizado 0,3 g/L 💦Nutrients by Lurpe Solutions - www.lurpenaturalsolutions.com 🌱Substrate PRO-MIX HP BACILLUS + MYCORRHIZAE - www.pthorticulture.com/en/products/pro-mix-hp-biostimulant-plus-mycorrhizae
Likes
6
Share
Hello colleagues! As I expected, in the middle of the week all the plants bloomed, especially pleased that almost in unison, including our medical strain. I did nothing except remove the extra large burdocks, I will do a thorough defoliation after the large "dandelions" appear. In the meantime, I continue to observe. The lamp power is still 75% Thank you for stopping by, and be healthy! 🙏 To be continued... 😶
Likes
21
Share
White Truffle Automatic exceeded expectations in terms of aroma, resin production, and especially yield under a modest 100W LED. The sativa-like scent gave the whole thing a surprising old school twist. Perfect for growers looking for top quality in a small space. Another topstrain from Zamnesia 👌
Likes
26
Share
Day 64 02/09/24 Monday Feed today using de-chlorinated tap water pH 6 with calmag. Day 66 04/09/24 Wednesday De-chlorinated tap water pH 6 today only. Smell is really coming on strong now!! Day 68 06/09/24 Friday Feed again today using de-chlorinated tap water pH 6 only. Day 69 07/09/24 Saturday De-chlorinated tap water pH 6 only today. Mould 😔🤦‍♂️ Absolutely gutted!! Had a very humid past 3 days, wet with no wind... 2 plants have suffered... Auto Orange Bud has lost a side branch. Auto critical orange punch has lost her main colar, and 2 sides, the yeild is going be to now be appalling, but this is due to environmental, not the seed or genetics, as far as they go this was one of the strongest and biggest in the group Day 70 08/09/24 Sunday (END of week) Feed today using de-chlorinated tap water pH 6. ☠️ Auto critical orange punch 🍊👊 Had to remove completely, after isolating the rest of the greenhouse, mould persistently grew on her. The remaining plants after 2 days isolation have been moved indoor to finish underground 600w hps and a more controlled environment.
Likes
13
Share
@russrahl
Follow
Mid way through week three in these pics and all is good so far. They stretched up a bit more this week and I am continuing to tuck and remove the large guard leaves where needed. I will continue this til the end of week 3 then I will do a final small defoliation of all the larger leaves and let her go do her own thing for the rest of the grow. I’m trying something different then I normally do this go round in this tent, as I’m trying to maximize bud sites on the net. Usually my motto is less defoliation is best, but I decided to see what happens when I go the opposite with it and defoliate to the max during the first 2 weeks of flowering then keep everything open for the third week with selective defoliation. So far so good, we will see what happens when bud sites lock in. Well we are all caught now on this diary, see ya next week! Cheers 💨
Likes
21
Share
Super pumped to try it out, reminds me of when I was a teenager. 🌱😎💨
Likes
27
Share
Still no definite preflower. Getting impatient.
Likes
12
Share
@Shinobi
Follow
Napriek počasiu vyzerajú ok..ešte sa chcem zbaviť malých popcornov,trochu defoliácie aby to šlo všetko do vrchu.mier