


Likes
Comments
Share


@GrownwithLED
Follow
After germinating the seeds are transplanted into small pots with soil (see tutorial in VIDEO above). The soil is prepared with water mixed with a little bit of BIO NOVA Roots (0,5 ml/l), which aids the development of the seedling. Transplanting is very easy now, because they have grown a STRAIGHT tap-root while hanging during the SERIOUS' WAY of germination. This straight root allows for easy potting of the seeds. Simply make a little hole in the center of the soil with your pinky finger and carefully place the germinated seed with the white root pointing DOWNWARDS into the hole. Best is to lay it onto one side-wall of the hole with the seed shell right at the surface. Then I push the other side inwards and enclose the whole root with soil. At the end only the top of the seed-shell peeks out of the soil. IT IS VERY IMPORTANT to plant the seeds NOT TO DEEP into the soil. The seedling only needs extra strength to work itself upwards thru the soil and you run the risk of the soil drying out and the seed dying off. When you PLANT THE SEED VERY SHALLOW into the soil (=with the top of the seed-shell still peeking out) your seedling can grow out right away and you have a small plant already 24 hours after putting the seed into the soil.
The small seedling sometimes still has the seed-shell on its 'head', it normally falls off by itself, but sometimes you have to carefully help and take it off with your finger nails. Be careful to NOT clip of the seedling accidentally when you do this!
The seed-shall has an inner lining, which feeds the small seedling when it germinates. This inner lining sometimes gets tangled around the stem of the small seedling after the shell has fallen off. This little skin MUST be taken off the stem right away! Once it dries up, it gets hard and can strangulate the seedling around the stem. In order to avoid this, the skin must be taken off as soon as possible! I show it in the pics above and also made a video about taking off the inner lining of the seed.


Likes
4
Share

@Bear_Grows_Green
Follow
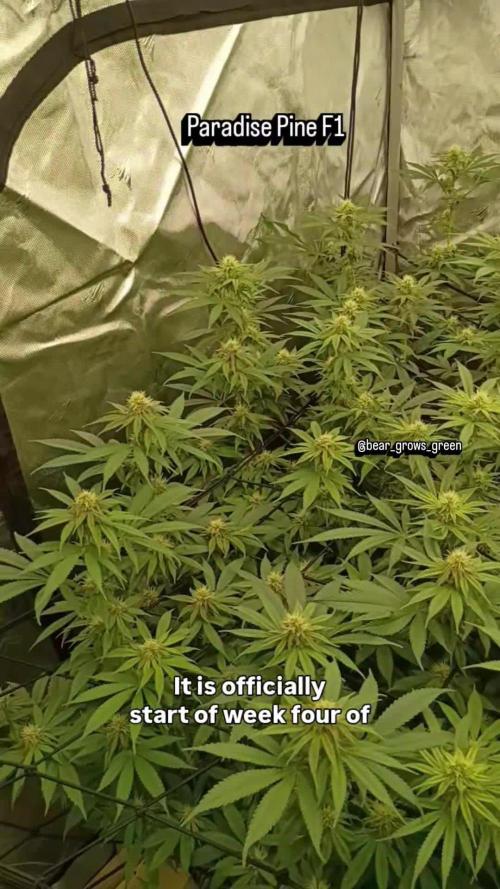
01/29 day 23 start of week 4 and things are popping!! Haven't fed at all this week should tomorrow .
01/30 bed for 7 gallons water 2.5 gallons feed full bloom recipe
Likes
35
Share


@The_Bearded_Grower
Follow
welcome to Day 64 2/19/2021 so she looks about ready for harvest so I'm giving her overdrive for just one last kick. she has had a hard life with me learning the new autopot system but I think I fixed the problem and she is recovering. this will be the last week and i may even skip flush it depends on her I just need to keep and eye on her I don't want to wait to long and get bud rot.
happy growing and as always keep your stick on the ice

Likes
1
Share

@DodoGarden
Follow
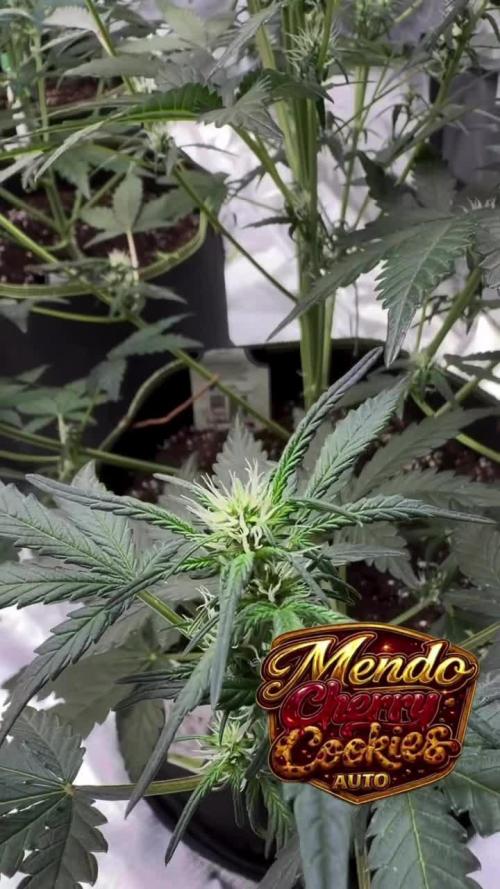
Ich liebe es?🏽😜
Blühte Phase hat begonnen die kleine Buds wachsen schnell und schön gleichmäßig.
Mango riecht momentan nach Kotze🤣😂😜🤷🏽♂️

Likes
16
Share


@GODSGIFT_2005_JM
Follow
🍼Greenhouse Feeding BioGrow & Bio Enhancer
⛺️MARSHYDRO
The ⛺️ has a small door 🚪 on the sides which is useful for mid section groom room work. 🤩
☀️ MARSHYDRO FC 3000 LED 300W
☀️Also special thanks to VIPERSPECTRA P2000 (200W) & XS2000(240w) LED growlights
🌱 DUTCH HEADSHOP SEEDS:
www.dutch-headshop.eu
www.dutch-headshop.nl
ONE STOP SHOP
. 100% germination success on first try! with HUGE seed selection!
. Very friendly customer service
. Best bio-seed packaging
. Sells other products @ best prices:
. Nutrients
. Vaporizers
. Smoking accessories (grinders, cones)
. CBD Tinctures
. Resin Extracts
. Boveda humidity packs
. Ziplock bags
. Other health supplements such as:
. Lion’s Mane Organic Capsules
. Hemp Seed coffee

Likes
21
Share


@gr3g4l
Follow
Esta semana a los 73 dias de floracion decidí que ya tenia que cosecharlas. No podia dejar pasar mas dias puesto que se corria mucho riesgo de botritis y los tricomas estaban ya suficientemente maduritos, igual demasiado.
Jamás me habia encontrado con unas jack con tanta cola de zorro pero de oler huelen a gloria.
hasta el último dia estubieron siempre dentro del armario y posiblemente por la extracción no pude percibir el olor tan agradable que desprenden, intenso . Algo mas terroso de lo que pensaba.
Cogollos duros como piedras, algo exsagerado.
Con 74 dias al secadero, calefactor 80w más un par de ventiladores con ventilacion indirecta, extraccion, intraccion pasiva

Likes
20
Share


@Dunk_Junk
Follow
18cm vertical growth this week. She's growing well. Not much else to report.

Likes
2
Share


@Mr_nugs_lover_David
Follow
She's looking super healthy and strong ready to start flowering! She's definitely loving this organic super soil I prepared for my baby girls.

Likes
6
Share


@JackSkellington
Follow
oggi si e rotto l igometro..un casino domani sistemo..per ora vedo la cosa sempre peggiorare proverò a mettere una busta di co2 in fine settimana su consiglio di una persona perche le cime non si stanno ingrossando per niente oggi ho ridato fertilizzante
Processing
Likes
14
Share


@mrekansh
Follow
3 ml npk in 2 l water
And given half of it! Plant seems to like it
And pruning worked wonder! Leaves are healthy and getting much bigger in size! 15 cms+ excited!!
Likes
13
Share


@Weedig_Weedigson
Follow
Heute gingen die kleinen zum keimen. Ich bin gespannt wie die neue Anzuchtstation ist. Diesmal werde ich 6 Pflanzen mit Plagron Bio und 3 Pflanzen mit BioTabs, alles ganz nach schema düngen. Als Blütekammer kommt wieder die Homebox R120. Man darf gespannt sein. 😊
Leider ist eine Gorilla Zkittlez nicht gekeimt. Die hab ich durch eine Alienz von Greenhouse ersetzt

Likes
8
Share


@artems
Follow
In the first week after switching to a 12/12 light cycle, the plant appears healthy and hasn't shown rapid growth yet, but its green mass is increasing rapidly 🌱. All seems promising for the flowering phase ahead! 😊

Likes
6
Share


@Ciscohash
Follow
Esta semana fue genial las plantas crecieron todas muy parejas..teniendo por ahora mucha homogeneidad en el tamaño y forma de las plantas

Likes
16
Share


@DudeGrowsWeed
Follow
This was the first grow of my own, and it went pretty smooth overall. I'll update the outcome, tastes & effects after it has dried. growdiaries.com has been a great experience so far, very happy! 😀
Final dry weight was 2.4oz!!!👍
Likes
34
Share


@ScotlandHaze
Follow
Overall very happy with the grow. Got 24oz of very dense nugs! I also managed to get 2oz of less dense but still pretty bag-appeal, and a shit ton of trim which I made into tidy ass brownies, which have made typing this incredibly difficult😂! Both of these strains are definitely bed time strains. The Critical kush is has the usual overwhelming kush taste, however the peyote(purple nugs) have a very sweet / flowery taste and smell. Disappointed I only done 1 peyote but more than happy with the critical. Would definitely grow both these strains again!
Likes
2
Share


@Fireproof
Follow
Ich habe die Erde von meinem Outdoor Grow wieder verwendet: Das war in einem 12l Stofftopf als Basiserde BioBizz Light-Mix mit Bio Tabs 50g Startrex und 5g Mycotrex wie in der Anleitung angegeben. Dann habe ich zwei neue Langzeitdünger Tabletten ca. 10cm tief in die Erde eingebracht. Anschließend mit 1g/l Bactrex und 10ml/l Orgatrex in 1l Wasser aufgelöst und gegossen.
Lampe zunächst auf 30cm Abstand zur Erde. Nachdem der Sämling etwas gespargelt hat, habe ich die Lampe auf 15cm gehängt.
Die beiden Umluftventilatoren laufen meistens 10h pro Tag, da sie mir aktuell im Home-Office noch zu laut sind.
Die Lampe ist auf 40% gedimmt. Die Abluft ist noch aus.
Temperatur liegt bei 24 Cº, bei 60-80% Luftfeuchtigkeit.
Details:
15.10.24: Samen in Wasserglas
21.10.24: Samen ist gekeimt, direkt in großen 12 l Topf mit BioTabs Erde vom Outdoor Grow, 12l Stofftopf auf Fensterbank
22.10.24: Topf ins Zelt gestellt
23.10.24: 2xBioTabs Langzeitdünner in Erde gedrückt. Mit 1l Wasser gemischt mit 1g Bactrex + 10ml Orgatrex gegossen
24.10.24: Geschlüpft
25.10.24: 09:30: Scheint etwas zu spargeln, Lampe von 30 auf 15 cm geändert. / 17:00 Höhe Stamm: 30 mm
27.10.24: 09:30: Höhe Stamm: 35 mm / Abstand Lampen zu Blattspitze: 10 cm
Habe mich gefragt, ob der Abstand der Lampe nicht zu gering ist. In https://www.weed.de/wissen/anbau/hanf-wachstumsphasen steht folgendes zur Sämlingsphase.
✅ Lichtquelle positionieren: Positioniere die Lichtquelle etwa 5-10 cm über den Pflanzen, um das Wachstum zu fördern und ein Ausdünnen (Stretching) der Sämlinge zu vermeiden.
✅ Luftzirkulation: Eine leichte Brise, erzeugt durch einen Ventilator, stärkt die Stängel und verhindert Schimmelbildung. Stelle sicher, dass die Luftzirkulation sanft ist, um die zarten Sämlinge nicht zu beschädigen.
✅ Eintopfen: Wenn die Wurzeln der Sämlinge das Anzuchtmedium durchdringen, ist es Zeit, sie in größere Töpfe umzupflanzen. Verwende ein gut durchlüftetes, nährstoffreiches Medium und sei vorsichtig, um die empfindlichen Wurzeln nicht zu beschädigen.
Processing
Likes
46
Share


@Visions
Follow
Week 6 is here. Finally starting to see a little fade. Full force on her flowers. They are already rock hard beautiful bastards. Stripped some dead weight and bigger fans over sights. At this point in the game I'm giving a low grow feed and high pk for 2 more weeks then flushing. Should be a 9 to 10 weeker. Trichomes are massive.
Day 40 she is showing pink and purple hues. Man even the clone is showing pollen signs! She smells super strong with berries.
Day 41 more colors and denser buds. Expected harvest day, day 63. Next feed which I fed plain water today, will be a heavy pk boost. She can take so much at this point, she can take a half tsp of flower fuel. So week 6 flower start a heavier feed for a week 10 to 11 ending. If not expect week 9. Noted. Shes going to be an amazing mom. Let's see what colors we get our of her dense ass buds.
Likes
17
Share


@Leonard_Lunte
Follow
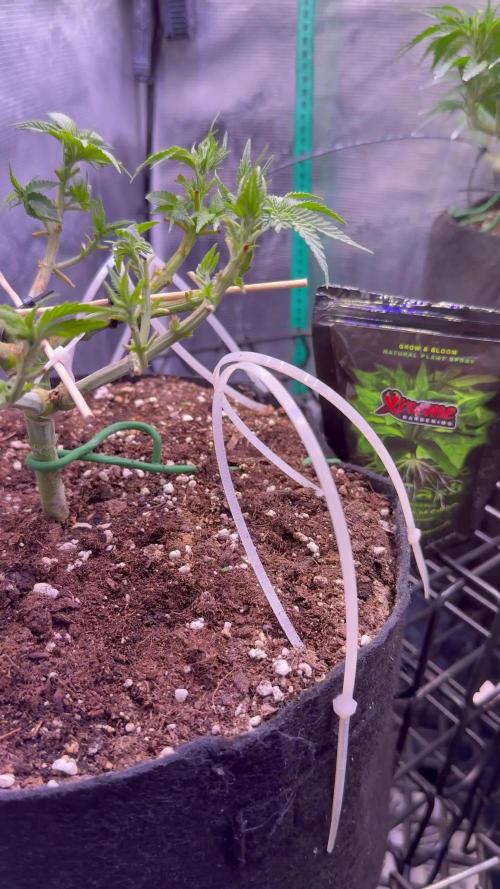
Picture 1 - Day 8 - Seedling 1 got its nutrients the first time today. 1ml/L Biobizz Grow about 700ml.
Picture 2 - Day 8 - Seedling 2.1 still stretching a bit too much, am waiting for the new light to arrive.
Picture 3 - Finally got the new setup, the grow tent isnt perfect yet but itll do for the next few weeks (its just an old temporary closet) it leaks a lot of light and moisture but since I only have these 2 mini plants rn I dont think its gonna be a huge problem until flowering.
Picture 4 - Day 9 - Seedling 1 looking good and Seedling 2.1 (3 Days old) will hopefully stop stretching now that I finally got the bigger light here. Watered 2.1 again today with just ph water.
Picture 5 - Day 10 - Nothing special happening, the plants are looking good!
Picture 6 - Day 11 - I now installed a fan in the grow area to better the ventilation. The fan is doing a great job at moving air around, but kinda messing up the moisture coming out of the humidifier... (With fan and humidifier on at same time = 40% with just humidifier running = 60-70%) Not sure how to fix that yet... Will water Seedling 1 again tomorrow.
Picture 7 - Day 12 - Seedling 1 growing good but its leaves are still looking really weird, I think theyre going up on the edges because I put them under slight wind stress, but that issue is fixed now. Some parts of some of the leaves still look really odd to me, like they got cut off or something? I dont know
Picture 8 - Day 12 - Seedling 2.1 is 6 days old now and growing good, theyre some tiny yellow dots on the leaves surface but its really slight so I dont know if its something bad. I watered both plants today, Seedling 1 with Bio Grow Nutrients and Seedling 2.1 with just Ph'd water.
Video - Day 13 - Both seedlings still growing, but looking kinda sus.



Likes
14
Share


@Kendoda
Follow
This week the plants have started to get hungry. The 3 gal pots feel solid with roots and the growth has slowed down, so I’ve made the decision to repot into 7 gal. It’s a little late for it but i still think they’ll benefit from the fresh soil and more root space.
Currently feeds are
Feed 1 .. grow,bloom,topmax,cal-mag
Feed 2 .. bio heaven, acti-Vera
Feed 3 .. Alg a mic
I also added a watering of fish mix to the master kush and alienz to give them some extra N.
