The Grow Awards 2026 🏆 


Likes
10
Share
@barlobruz
Follow
08/30/2021
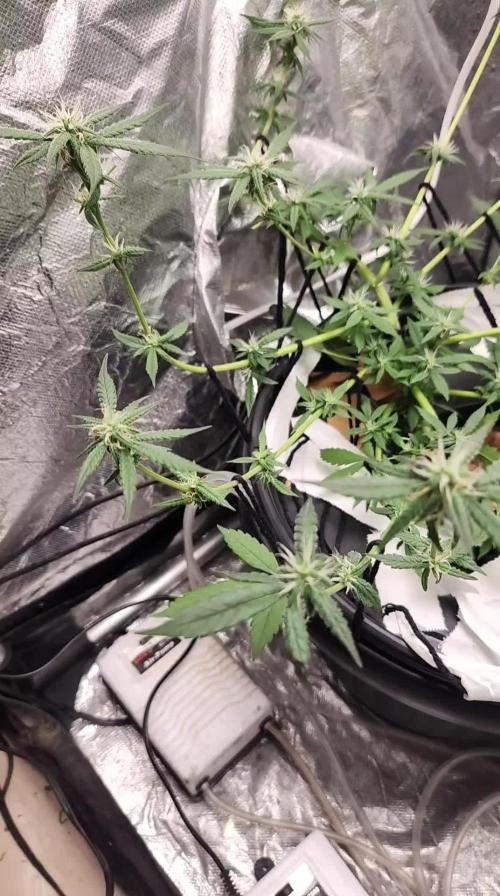
- Noticing more gnats than usual. Could be overwatering, anaerobic soil conditions, or both.
- Going to set up fly traps, starve both the plant and the gnats of water for about a week.
- Will observe any stress responses due to an extended dry period.


Likes
38
Share
@Green_Mountains
Follow
This week was kind of all over the place. 2 plants have done well despite my efforts.... haha!! One was struggling because I let it go dry on accident. Then when it continued to lag I decided to give all 3 a little Big Bloom. I had about 1.5ml of Big Bloom in 2 cups of water. I only used 1 cup feed total between the 3 plants.
I then just watered the last few days and moved them into the 5 gallon pots today.
I tore holes through the bottom of the manure pots and "lightly crushed" the corners a little bit. I watered them with 2 cups of water. They are planted in Fox Farm Ocean Forest soil. I had started them with Happy Frog in the manure pots.
I hope they start growing big! I figured out the temp/humidity issue. I'm dialing it back in now with the 3 large pots in the tent.
I need to reset the height of my second camera and I will start doing some more time lapse videos!
As always, advice is welcome.

Likes
14
Share
@Quintall
Follow
Die erste Woche ist da die Pfalze in der Mitte hat leider ihren Samen erst recht spät abgeworfen. Deswegen glaube ich das die bisschen gespargelt hat.
Die Pflnazen schlucken langsam immer mehr Wasser. Sie fangen sehr leicht an zu riechen.
Luftfeuchtigkeit immer zwischen 60-70 %
Temperatur 20-25 grad


Likes
21
Share
@StrontiumGrow420
Follow
Some nice red and pink hues appearing around the buds and the smell is really lovely, not overpowering but it is a pleasure to stick your nose in the tent and just inhale the aromas.
Getting close to harvest time (10-11wks), will be cutting back on the nutes and begin flush feeding and watching the trichomes closely for any changes, they still look clear. Expecting her to start autumning off anytime soon.
18/10 Gave her a water feed 1.5 ltrs with molasses diluted ec 60ppm 6.8 pH
Likes
19
Share
@Adam420
Follow
Week 5 April 12th
1 week after topping
She has surpassed her baby stage and focused on being a teen plant
This time last year April 12th:
Not yet started

Likes
11
Share
@Chimney_Chief
Follow
Plant has shown slow but healthy growth since its arrival, LST continues and I've managed to keep the plant at the same height it was last week but now at a horizontal angle.
I did up the nutes for one feed to a slightly under recommended dose but in the days following I noticed the plant looking a little 'droopy' and since she has been with me she hasnt been drinking very well so I opted to flush her for a feed, since then she has seemed very happy :) whilst drinking much better (possible nute lock was imminent). Now back down to half doseages with the exception of CalMg (to help after flush) but will be increasing them in the following days.
As of next week I will be transferring her and another plant my partner is nurturing into single bucket DWC set ups. Fingers crossed I will see some hearty results for making the crossover to hydro.

Likes
32
Share
@Roberts
Follow
Critical x Animal Cookies is just about done bulking. She will likely be switched to ph water in the next week. She is really nice, and frosty. She has been growing under the Hortibloom Solux 350. She struggled in the beginning, but is gonna finsh with some nice colas. Nothing else to report at the moment. Thank you Hortibloom, and Ripper Seeds. 🤜🏻🤛🏻💪🏻❄️🌱
Thank you grow diaries community for the 👇likes👇, follows, comments, and subscriptions on my YouTube channel👇. ❄️🌱🍻
Happy Growing 🌱🌱🌱
https://youtube.com/channel/UCAhN7yRzWLpcaRHhMIQ7X4g

Likes
46
Share
@Capo420
Follow
Week has had ups and downs🙃
Plants seem to be growing fine 🙂 But there is yellowing and spotting still that I cannot resolve.🙄
Day 22- Still having some kind of deficiency/issue. They are growing well, don't really seem to be stunted. I think I may have burnt them with nutes.🤧 Flushing may help. 🤷♂️😅
Run-off pH is at 6.08, PPM 266
I have flushed them, lowered feeding... I'm driving myself crazy. Hahaha
Update 119 Day 23- Things are looking better. I definitely have been overfeeding them.😅
They are responding well to half nutes.🙌
Issues seem to be getting much better.
Happy Growing!
🤙💚💪🌱😎🌱💪💚🤙
Likes
9
Share
@datrobspeoria
Follow
It was a easy strain to grow and was happy with the several watering she needed! I was feeding her every couple of days and she rewarded me with some immense dense buds! I have one more of this strain that might be heavier!
I just got done with my 2nd plant and she was a big one! Got 792grams or 27 Ozas Wet weight! My best so far with a 5 plant limit this is the weight of only 2 of the 5 I grew..


Likes
2
Share


Likes
8
Share
@BlackForestGrower
Follow
Week 25 Day 1 Flushing
Week 25 Day 4 plant 1/2 for 48h in the darkroom and then hung up

Likes
10
Share
@Xspellsx
Follow
Here it is...Fucking bomb id definitely grow again Sadly this was a single bag seed it did HERM but late in the game so the seeds it did make which there weren't many are white and empty....got clones of his jet fuel so we will see the similarities.. Gave me about 3 ounces. Been smoking on it hard so hard to tell hahha aging well has a grapefruit smell that does not inhibit the taste which is fresh flowery chronic similar to a skywalker but much lighter
Likes
Comments
Share
@Bredinha
Follow
Talvez tenha desfolhado demais, espero que engordem nas próximas semanas.

Likes
20
Share
@pollice
Follow
Girls started their last mile; buds are growing and smell is getting strong. I think in 2 weeks they will be ready to harvest. During the last week I removed all leaves bigger and I will continue to do it just to favorite penetration of light. I feel satisfied, it’s my first indoor experience.
Likes
12
Share
@Tanjalope
Follow
This week I continued trying to expose as much light as possible to the bud sites by getting rid of some fan leaves and tieing branches down as best as I could. I never quite know how much to take off the girls when they get hair cuts but I am confident there is much more light getting to the lower bud sites now.
No nutes this week just ph water at 5.9
There are 3 plants that I am loving the most so far are
a 6 shooter plant in a small pot, she is large a well spaced out nodes excited to see what the bud she produces is like. Never smoke any before. Very interested to try again in a 1 gallon pot.
The zkittles og is another that has shocked me. She is in a larger 1 gallon fabric container an to be honest is exactly the right size and nicely bushy too. If the tent had 4 or 5 zkittles plants like that one i think It would be perfectly filled. Something else I have learned from growing multiple strains at once in a tiny space. I have smoked this before that I grew and loved it.
The 3rd plant in buzzing with it the cosh kush from zamnesia. Again it's in one of the 1 gallon fabric pots its grown to a nice height for my tent with nice side branches. Grew this outside last year and got a little bit of smoke was alright I'm hoping with it been grown indoor will make it pretty dam tasty.
I had a missile 33 seed going outside that's doing shit, think I gambled to early with my outside girls this year.
Will take a pic of my 3 faves for you all next week if I remeber
Peace 🍁


Likes
29
Share
@Wrongholn519
Follow
These girls are busting out the seams.
Giving them heroic doses of Calmag and molasses to finish the job off.
I just did a Trichome check and we're at 5-10% amber so they are ready to be pulled. These photoperiod plants are ready in under 100 days.
The smell is wildly pungent .. thankfully I have my exhaust venting outside for the whole world to enjoy ☮️🇨🇦

Likes
5
Share
@Mr_nugs_lover_David
Follow
I have had a very nice journey growing her, she has given a great quality and quantity pf buds, very hard dense flowrs with a clasic strong amnesia smell that I enjoy a lot specially for the happy energetic buzz that provides you.

Likes
10
Share
@HideAndFly420
Follow
Hi all growers
Day 64 this is lady is gone so fast and Fat, every bus is full from up to bottom, and i already said it: FAT :D
I stopped Big Bud and this is the last week of fertilising, i think i've got 3 weeks left for this baby before harvest.
This week i give also aptus regulator to regulate some eventual issue before flushing, Next cycle i'll use it for all the cycle.
Day 66
Nothing to say, I ‘ve got last or two last fertilising before flushing. This baby did all alone without any help needed. She is really beautiful , bud are fat and full. I think that small size won’t be reflect on the harvest weight.
Day 68
Two days ago last feeding at ph 7 and 1100 ppm.
From tomorrow I’ll start flushing for 15/20 days before harvest.
I had to add a little fan because this blue dream is too bushy, I don’t defoliate anymore and soil needed more aeration
Can’t wait to see this baby good .
Day 69
Started flushing with 1 lt with water, i ll'keep flisghiung woth ph controled water at 6.2 ph. Last 10/15 days max, then Harvest is coming!!
Let's see!!
ANY SUGGESTION IS REALLY WELCOME :)