
Processing
Likes
Comments
Share


@Sctanley007
Follow
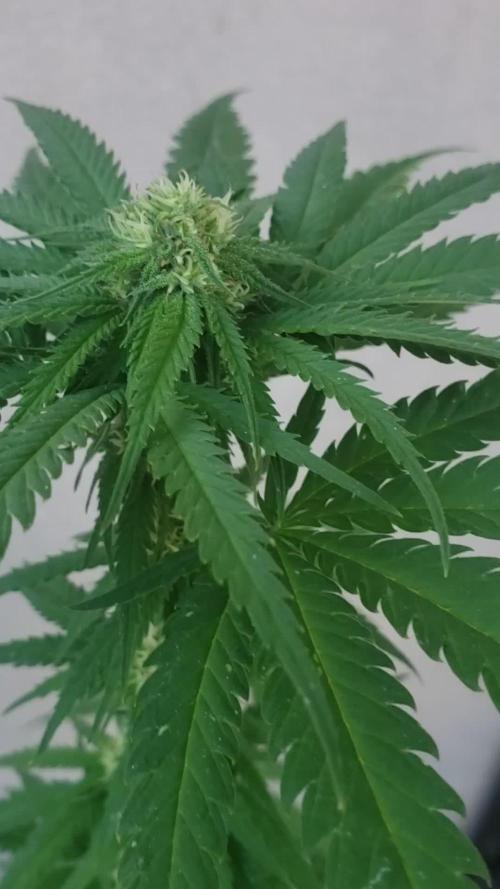
9/30/18. She still looks great. No burn and no deficiencies so far. I fed her a liter and a half . The pot is now heavy but not totally soaked. I did not water to runoff but the lower portion of the pot is wet. I don't like soaking the pots because the bottoms take ay too long to totally dry and I have had issues watering schedules.
10/5/18 Still doing perfect with minimal attention. Bumped up the amount of Grow Big last feeding with no ill effect.
Looking ahead and having weeks before the auto is done I didn't know how to face the upcoming issue of vertical space. Shes too big to LST and I did not want to top her because shes doing incredibly well and want to see what she will produce. I rigged up a scrog contained within the bucket. I did a mod years ago to a smoker which gave me the idea in the middle of the night. I might change out the screen itself since it was just what I had on hand but will see how it works.. The openings are 2.5" so it should suit my needs. I have it set at 8 inches above soil but it is fully adjustable up and down by the nuts on the threaded rod.
I plan on keeping the main stem under the screen to induce the plant to keep producing shoots and fill the area. Im pretty excited about trying this and Stay Tuned.

Likes
4
Share

@The_Doctor_Green
Follow
Hola a todo el mundo 🌎.
Perdon pero no se porque me ocurre que no me carga las imágenes, pero bueno , les cuento que esta #BigBang de @DivineSeeds esta en su segunda semana de floración, y para ser honesto , de las 3 geneticas que estoy cultivando, es la que en comparación ya tiene los cogollos más desarrollados ( las otras 2 son de rápida floracion, pero los cogollos son más pequeños).
A la planta le di un riego foliar con jabón para combatir los trips y los pulgones que vi aparecer.
En cuanto a fertilizantes utilice top candy y top bloom 1 y 2 ml x litro de agua respectivamente.
Esta semana también he medido el drenaje, y obtuve valores altos (ph 7.5 y Ec 950ppm). Asique los próximos riegos los hare con un ph más bajo (5.6-5.8) para poder estabilizar los niveles nuevamente.


Likes
7
Share


@Mrg7667
Follow
Rough week! Found two major hermie issues Pheno #5&2. Could be because they where the OGs and they just had a long stressful life. Really bummed because they where the biggest in the tent for sure. Have a coupoe tops with orange hairs so maybe got pollinated, all i can do is keep my eye on them!
Besides that everything is looking so great had to re-train and move canopy around but still have full coverage. Getting allot more tops

Likes
6
Share

@Chubbs
Follow
What up Fam, weekly updates on these lovely ladies. This week it's been warm and such a bad time for my AC to go out but overall temps been in the mid it's inside the tent and the plants seem to not mind at all. They're still getting fed 16oz daily. I'd say from the looks, maybe 2-3 more weeks until harvest. Happy Growing

Likes
9
Share


@Green_Friends_Inc
Follow
Commencing Week 8: day 50 on January 19th
Update is late my sincerest apologies. I will make it up by giving a very thorough smoke report when all is done.
Otherwise all is going very well 😁😁👏👏
On day 50 I took the head off of bloody skunk.
I checked trichome colors under USB microscope. At least 90% fully milky-white with maybe 5 or 6% Amber and the remainder clear. 😁
On day 55 I gave all of the plants a fan leaf trim including the remaining bottom half of bloody skunk. as I sit here and think about it I believe this will help with ensuring the entire plant ripens and matures at the same time - versus the tops being ready before the bottoms.
I still plan on letting the bottoms of all these plants go way beyond the recommended time to see if I can initiate the process of rodelization. Either way I am glad to report that Bloody skunks pollenization looks like it is resulting in some seeds. (See photo). In hindsight my only concern is that because the plant finished a bit earlier than I expected the seeds may not make it to full maturity but I believe it should be okay we'll just have to wait and find out.
That being said besides the bloody skunk being done just a few days early everything else seems to be right on time as described in plant profiles on company websites.👍
That's all for now thank you for your patience and attention and support and as usual feel free to leave any suggestions comments or questions and I'll do my best to get back sooner rather than later 😁

Likes
48
Share


@Professor_Chaos
Follow
Beginning of week...
She is doing her thing.. Slowly but surely lol.. Healthy as far as I can tell.. Maybe the reused coco is too reused? Idk. There is a bit of coco/perlite from my first grow in there lol.. Some others too.. But she is still truckin along.. Went up on the Armor Si (Silica) and a little on the FloraGro.. She does look like she is gonna beginning flowering very soon tho.. Pistils are forming slowly.. Much like the rest of this grow.. But she is starting.. I'm not going to start counting flower till I actually see that she is flowering.. Stretching and all.. That's how I like to count flower.. Always seems to line up perfectly when you count flower that way.. Even with photoperiods.. Not from the 12/12 flip because there is still 2 weeks of transition. Anyways.. Another week in the making...
Next day...
So my Mars Hydro is crapping out. I have to drop it down to 20 inches from the canopy and run it at 75%.. So pissed.. It glows when it is powered off and still plugged in.. And if I turn it on while the power is set to 100%.. It just blinks until I turn it down to 75%.. I can have it set to 75% and it will turn on like normal.. But I need to use 100% power.. And Mars Hydro sucks with responding to emails apparently.. I'm gonna have to buy a new one and return this POS.. Then hopefully buy a new stronger light for my 2x2.. I am so pissed.. Mars Hydro sucks.. The build is amazing.. The components are awesome when they are not flawed.. But damn this is the 3rd light to crap out on me in 2 years.. I do nothing but run them 18/6 or 12/12.. Run 1 fan on top at the driver and heatsink and 1 under toward the diodes.. Nothing different.. I think I'm gonna buy the Wakyme J-2000.. It comes with 2 fans blowing on the heatsink.. Honestly, noise is not an issue to me.. Heat is.. I sleep with all my fans running already lol.. Its actually hard to sleep without them now hahah.. But yeah. It has a Meanwell driver.. Samsung diodes.. Dimmer.. And the fans.. I think it's my best bet at this point.. Fuck Mars Hydro.. They had 3 chances with me.. My Sunraise 1000 (blurple) is like 4 years old and still running strong.. Smh.. Mars Hydro is crap. How did they even get so popular??? I'm sure more people will realize how crappy they really are.. No name brand everything.. Runs hot as ass.. Craps out after 3 - 4 months.. So so pissed...
Almost mid week..
I went ahead and pulled a couple branches down a bit.. The canopy is perfectly even.. It looks AwEsOmE! Lol
Mid week..
Well, she seems to be doing a bit better than before, I'd say. Normally, my previous autos would be flowering and probably almost finished stretching by now.. Live and learn.. I hope all the Zkittlez Autoflower seeds aren't like this.. And hopefully this strain turns out pretty dank to be wasting a few extra weeks on growth but not getting much growth at the same time.. And I hope harvest doesn't come quicker than the swelling of the calyxes.. But shit happens.. I have Mars Hydro sending me a new driver/dimmer. I sure hope it's just "plug-in" because if I'm going to take this light apart, I'm just going to go with the Meanwell HLG-240H-54B.. From what I was told from LEDSupplier dot com.. The 240W would be better due to the different current. We are still trying to figure out if the dimmer is 0-10V to see if I can just keep using the Mars Hydro dimmer along with the MeanWell HLG-240H-54B.. That would be cool.. Sorry but Mars Hydro sucks.. I bet running a different driver would help alot of issues.. Maybe even run cooler. Anyways.. About the plant lol.. She is doing great.. The stiples are still showing some weird colors on the tips.. Doesn't seem like an issue.. Some plants have the stems change colors.. Some have pistils change colors.. Some have leaves change colors.. Maybe that is just in her genetics.. The pics that ILGM shows, it should be a pretty colorful strain.. Guess we shall see! But she is happy and healthy.. I think I'm going to stop using Hydroguard next week.. Just doesn't seem like it's doing much of anything.. I really only bought it to fight root rot when I attempt DWC which I am going to attempt again very soon.. Maybe after this grow... We shall see...
Almost end of week..
Went ahead and defoliated/lollipopped a bit. She was getting too bunched together.. She is nice and opened up now.. 2 side branches stayed pretty short.. Not sure what that is all about.. Flowers are slowly forming at this point. Next week will be week 1 of flower and stretching should begin! She is still getting good light even with the power only being at 75%.. Just have it down lower.. Which I could get away with till harvest.. But fuck that. I ordered a new Mars Hydro TS 1000.. And Mars Hydro is also sending me a new driver/dimmer box to replace the old one.. Going to return the light and I still want to replace the stock driver with the MeanWell.. Trying to get more professional opinions before I attempt that tho.. So far, I am hearing to get the HLG-240H-54B.. The 150H (150W) doesnt have the correct current so I'd have to go with the 240H (240W) due to the output current and voltage to match correctly. Can't wait to try it out!
End of week..
So I got a new Mars Hydro TS 1000 in.. It comes with a Moso driver instead of the old Juson driver.. Hmm.. Ok.. Seems to not heat up as much.. The diodes still get hot, but the lack of the driver heat should help keep things cool.. Nice... I am able to raise the light back up and run her at 100% power.. I went ahead and tied the branches down a little more.. There are 2 that are still staying a little short.. But I think it's the way I started the whole LST process.. I should have tied down a different 90° angle instead of the angle I used.. But live and learn.. Wont use that way again lol.. Other than that, the flowers are forming nicely.. Happy happy happy.. Next week will begin flower! Niceeee.. On to the next!!!...


Likes
2
Share


@Dralph
Follow
Una black berry y la crystal meth se me han estirado bastante... Ya estoy usando base de flora y algun boost de hesi y delta 9 junto a super vit y micorrizas con el agua nivelada sobre el 6.3


Processing
Likes
4
Share


Likes
56
Share


@Organic_LarF
Follow
High GD community,
Week 29,
All i harvested was much to early, and had some mold in there while drying, so yield is very low.
These popcorns i let go an other week, so i get i tiny taste of the real taste. The tiny buds got much more fat these last 2 weeks, and aroma is getting intenser but not stinky.
Little video of my 2 friends playing in the warm greenhouse. Both 9 years old and inseparable.
Thats it for this week boys and girls,
Thanks for reading and passing by and 💚💚💚👏👏👏👍👍👍 for Marshydro leds. Quality/price top!
Grow safe buds and feel free to check out my other ladies doing fine thanks!
🌈viparspectra🌈
🎟️Organic_LarF♡viparspectra 🎟️
for your discount!!!!
https://www.viparspectra.com/?aff=nbemz68cxril&utm_source=affiliate
🌈Join us now🌈
🙏🌿🌿🌿🙏
Special thanks to
🏅🌿greenbuzzliquids🌿🏅
Use organic_larF for 15% discount
👏👏👏Weedseedsexpress!!!! 👏👏👏
LarfxWSE for discount at
weedseedsexpress!!! 15% off!!!
👽👽👽Zamnesia!!! 👽👽👽
Add OrganicLarF as a code when buying your own MarsHydro LED light and get a nice reduction!!!👽🚀🛸

Likes
3
Share


Processing
Likes
8
Share


@nelgrow
Follow
vorrei provare a far crescere ua pianta sul balcone nel periodo invernale e vedere che viene fuori
Likes
9
Share


@Mr_nugs_lover_David
Follow
Another beautiful pheno of the big jeff by Gecko seeds which is the cross of: Cookies kush X Casey Jones, the plant is showing beautiful indica hybrid characteristics, it's gonna be a wonder plant for sure! Let's keep on working!! 💛💚❤️👨🌾

Processing
Likes
88
Share


@Fergie
Follow
hey guys so otheother week has passed the ladies are coming along real nice , some more flavours hitting my nose now and some intensity is kicking in and is stinking i love it . Still await Aircon 😫but temp fix in place bought 20 freezer blocks and me and my missus rotate daily to keep under control 😀my Epson salt arrived so all have had a treatment still waiting on my molasses coming should be a few days and will treat aswell . til next week family 😀

Likes
10
Share


@Nix6969
Follow
Buenas noches comunidad.
Esta noche se ven creciendo con gran vigorosidad estas cepas Chilenas Pure Inferno y Bloodnana, actualmente estas mitad de la semana 4, desde sus 2 hojas reales.
las nenas se alimentas bien y se ven felices actualmente se da alimenta con fertilizante Advance nutrients.
Veremos como se ven las ultimas semana antes de tirarlas a floración.
en riego, se da una vez por semana advance nutriens y 2 solo agua sola.
las mas grandes tienen 4 semanas.
la mediana tiene 3 semana.
la mas pequeña tiene 2 semana.
se tiran a flora en un total de 6 semanas a 7.
PH:6.3
EC:750
Likes
13
Share


@Chubbs
Follow
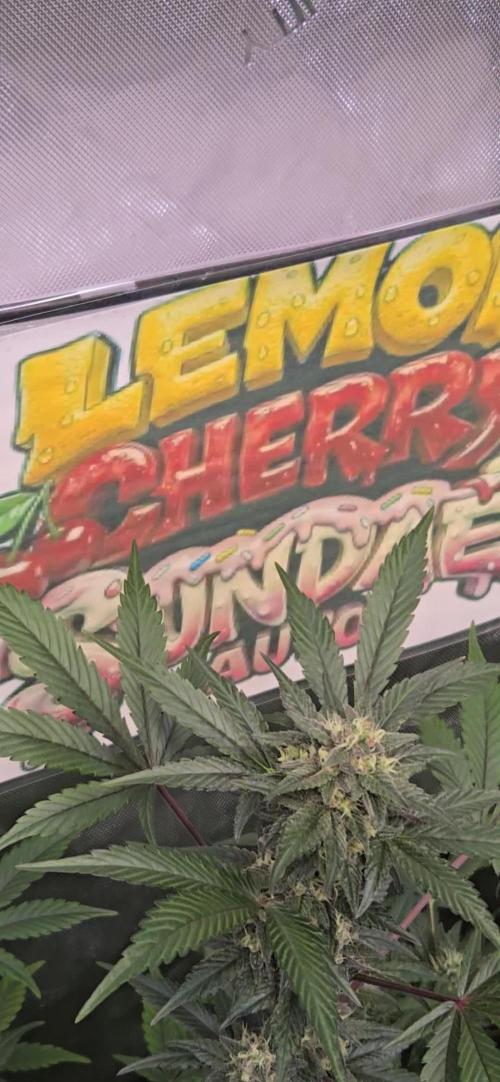
420Fastbuds
FBT2311/Week 6
What up growmies. Weekly update on these beautiful ladies. This week we've had some temperature swings and wow did they not like getting down into the high 50's. They both bounced back but won't be letting it get that cold again if I can help. Flower sites are all over with pistols. No signs of any major issues so will keep the same routine. All in all Happy Growing
Likes
50
Share


@DogDoctorOfficial
Follow
Eternity Grow Cup - Week 7 Veg Report
Another week down, and what a week it has been! Our Runtz ladies are thriving, pushing forward in their vegetative stage with strength, beauty, and some seriously impressive root development. This week, we officially transplanted them into the Autopots, and let me tell you—the roots are stunning.
Root Health & Mycorrhizal Magic
The mycorrhizal fungi have been doing their thing, and it's truly a sight to see. When transplanting, I could clearly see how beautifully the roots had colonized the medium, forming a healthy, snow-white network that fully surrounded the pot. The Aptus Holland Mycormix is once again proving itself as an absolute game-changer in root development. Strong, well-established roots mean better nutrient uptake, stronger resistance to stress, and overall improved plant health. If you’re serious about growing, this is something you don’t want to overlook.
Aesthetic Update – Pink Vibes!
Yes, I know, I know—the pink background is still here, and I’m absolutely loving it! It’s giving the photos that extra pop, bringing out the vibrancy of the plants, and making every shot feel unique. Hope you all are enjoying these visuals as much as I am!
New Home - TrolMaster Ecosystem
This week also marked another major move—the plants officially transitioned into the TrolMaster Ecosystem. And guess what? They are absolutely loving it! With optimized climate control, precision automation, and a perfectly dialed-in environment, these plants are thriving under their new conditions.
Current Environmental Conditions:
Room Temperature: ~20°C
Relative Humidity: ~67%
CO2 Levels: ~1400 ppm
Light Intensity (PPFD): ~300
A balanced combination of temperature, humidity, CO2, and light intensity ensures that the plants continue to grow at their full potential. The high CO2 levels combined with the moderate PPFD allow the plants to photosynthesize efficiently, maximizing growth while keeping stress minimal.
Nutrient & Watering Program
Right now, I’m sticking with the Aptus Holland Clean Program, which consists of:
Regulator
System Clean
RO Water Conditioner
All-in-One Liquid
The water parameters are as follows:
EC: 0.55
pH: 5.86
Water Temperature: 15°C (a bit cold, but still manageable)
Ensuring clean, well-balanced water with optimal nutrient availability is essential for healthy root development and vigorous vegetative growth. With this setup, they are getting everything they need to flourish!
Shoutouts & Thank Yous!
Huge shoutout and thank you to all the amazing sponsors who help make this grow possible:
Aptus Holland – Premium plant nutrition
TrolMaster – Intelligent environmental control
Cannakan – Precision germination & planting tools
Grove Bags – Advanced curing & storage solutions
Ziggi Papers – Innovation in rolling technology
And of course, a massive thank you to Zamnesia, Plagron, and GrowDiaries for putting together this incredible Eternity Grow Cup!
Final Thoughts
Week 7 has been phenomenal—our girls are thriving, adapting beautifully to their new environment, and setting the stage for what’s to come. The next phase is going to be exciting, and I can’t wait to share every step of the journey with you all!
A big thank you to the community—whether you’re watching, supporting, learning, or even just stopping by out of curiosity. Lovers or haters, you all have a place in my heart!
Stay tuned for the next update and don’t forget to check out the exclusive content on Instagram and YouTube—let’s grow together!
Until next week—happy growing, and good luck to all competitors! 🌱🔥
Genetics - Runtz https://www.zamnesia.com/6000-zamnesia-seeds-runtz-feminized.html
Nutrients - Plagron https://plagron.com/en/hobby
- Aptus Holland https://aptus-holland.com/
Controls - Trol MAster https://www.trolmaster.eu/
LED - https://www.futureofgrow.com/en
LED - https://www.thinkgrowled.com
Soil - https://www.promixgardening.com/en
Germination - Cannakan https://cannakan.com/?srsltid=AfmBOopXr-inLXajXu3QFgKXCXXos4F1oEvScjMKIB5MR5dk8-GJ-F49
DOGDOCTOR 15% off
Smoking Papers - https://ziggioriginal.com/
Terpene saver - https://grovebags.com/
As always thank you all for stopping by, for the love and for it all , this journey of mine wold just not be the same without you guys, the love and support is very much appreciloved and i fell honored with you all in my life
With true love comes happiness Always believe in your self and always do things expecting nothing and with an open heart , be a giver and the universe will give back to you in ways you could not even imagine so
As always, this is shared for educational purposes, aiming to spread understanding and appreciation for this plant. The journey with nature is one of discovery, creativity, and respect. Let’s celebrate it responsibly and continue to learn and grow together!
Growers Love To you All 💚
#EternityGrowCup #RuntzHunt #GrowersLove #CannabisCommunity #AptusHolland #ProMixSoil #TrolMaster #Zamnesia #Plagron #ZiggiPapers #Grovebags
Eternity Grow Cup episode 08 uploaded at 720P ,4K will came out on youtube

Likes
10
Share


Likes
36
Share


@MadeInGermany
Follow
Unfortunately, I had to find out that my account is being used for fake social media sites.
I am only active on growdiaries here.
I'm not on Facebook Instagram Twitter etc.
All accounts except this one are fake.
Have fun with the update.
Hey everyone 😀.
The plant develops as it should 😍.
It grows very well and very beautifully. She also coped with the topping very well, so I will top it a few more times before it finally goes to the flower tent 😃.
Until then, I wish eucb a lot of fun until the next update.
Stay healthy and let it grow 🙏🏻
You can buy this Strain at :
https://originalsensible.com/original-sensible-seeds-zkittlez~20503
Type:
Zkittlez
☝️🏼
Genetics:
Afghan Kush Indica x Grandaddy Purple x Grapefruit hybrid
👍
Vega lamp:
2 x Todogrow Led
Quantum Board 100 W
💡
Bloom Lamp :
2 x Todogrow Led
Cxb 3590 COB 3500 K 205W
💡💡☝️🏼
Soil :
Canna Coco Professional +
☝️🏼
Fertilizer:
Green House Powder Feeding
☝️🏼🌱
Water:
Osmosis water mixed with normal water (24 hours stale that the chlorine evaporates) to 0.2 EC. Add Cal / Mag to 0.4 Ec Ph with Organic Ph - to 5.5 - 5.8 .

Likes
3
Share


@undermink
Follow
I started cutting most of the fan leaves today. She looks good and I can see buds beginning to grow :) She really has giant fan leaves and massive stems... In case you're wondering: the scrogging net makes no sense at all since there was no space left to do anything with it :) It's just there for the other plants...