
Likes
Comments
Share


@TightNugs
Follow
Plants looking awesome and packing final weight.Flush and fade starting Tuesday for plant 1 for 5 days with plain water.
Plant 2 needs another 2 weeks so will be moved elsewhere till I can get more nutes into her.
No issues through grow so happy days
💪🤞🏴🍁
Breeder-White label purple bud auto x2
🍁🍁🍁
Light-Voost VST 120 veg VST 240 for flower discount code- TightNugs
https://voost.com/
🍁🍁🍁
Update 06/12/21
Plant 1 harvested,pulled 26.2oz wet
Plant 2 still in flower

Likes
2
Share


@ChiTaN
Follow
It's been another successful week.It's another successful week. The girls will soon get mineral food because the deficits are definitely too large despite the increase in food doses.💪


Likes
20
Share


@Tracie67
Follow
It's been a pretty easy week. Enjoying watching the buds get thicker! Just going to coast to the end at this point....hoping to harvest within the next 2 weeks. Already getting excited for my next grow...thinking Ethos Planet of the Grapes or Ethos Crescendo.
Likes
2
Share


@Ninjabuds
Follow
Bubble og I still have 4 of these guys going. A few of them are still dark green and pretty decent growers they have thiner leaves. I'm sure a few of these will be on the chopping block later down a few of them just have crappy start growth and they need the humidity at 75% or above 100% the time with the light lower than normal or they start to shrivel up. That's not all of them just a couple. Also I am only going to flower 8 plants out if the 12 seedling and I have 5 strains going so can't have half my plants bubble og (wish I had room to grow the full 12 plants at a time)
It's looking like a good start to a week the plants are strong they are getting to the point I can let the dried dry out completely. I'm thinking by the end of this week the plants will be starting to be sold.
Last week I put all the plants into my bigger 2x4 tent with my medicgrow mini sun 2 the 500w version. Only a few of the plants were ready for that light. Seems like the only plants that really have good resistance and have a strong start are the weedseedsexpress.com seeds. Shout out to weedseedsexpress.com for the strong plants.
I ended up putting all the plants back into my 2x2 tent with the 55w amazon light it has alot more blue light in its spectrum. It's kinda weird b4 I switched the plants to the 2x4 tent they were getting 220umol under my amazon 55w led then when I put them under the 500w light 25% strength about 50in from plants and they were getting only about 195umol in that tent but it was stressing most the plants. I assume a larger light has more side lighting hitting the plants. I think when useing larger lights it's good to measure umols from the top but also coming from the sides. I think durring seedling stage they only need about 50% the umols coming from the side the plants as the top is receiving.
When I put the plants back in the small tent about the same umols as they were getting b4 the switch and they were still a little stressed. So for a few days I put the small light at the top the tent giving them 100umols for a few hrs then 130umols the rest the day.
Likes
6
Share


@Mr_nugs_lover_David
Follow
She looks extremely healthy and happy let's see how she performs at the end,she's 100% organic grown without any chemicals from bottles. Starting to show the first pistils on August 24th

Likes
5
Share


@pzwags420
Follow
I sowed cantaloupe bag seeds directly to flower box drip irrigation.I transplanted my white widow seedling to flower box. So the new line up this run is cantaloupe, blueberry, Girl Scout cookies and white widow. Cantaloupe seeds sprouted and i will keep the most vigorous grower.bb is throwing pistils.GSC is producing first set of true leaves. At the end of week 2 cantaloupe has first leaves so does white widow. My Gsc has first set of true leaves and my blueberry is putting out pistils and trichs.Things are going well


Likes
3
Share


@SupaDank
Follow
Jan 23rd 2018 so makes it day 57 from seed.
On transition nutes right now and will go into bloom nutes next week. She's growing real fast and with a short flowering time, she will be harvested by March 5th

Likes
5
Share


@Therapy420
Follow
Frosting and thickening up nicely, no sign of milky trichs yet.
Hopefully done in about 2 weeks.

Processing
Likes
39
Share


@G4NJAG4NG
Follow
100419Day 70 flower 28 - switched fully to bloom nutes now and they are all starting to slowly fatten up, they are all turning lovely and frosty and the size of laughing Buddha on the middle is crazy, she is my monster 👌😁
140419 - changed feed to 2.5ml/l bloom 1.5ml/l bud candy and 1ml/l Calmag, half way through flowering and leaves are starting to turn yellow, don't think I have added enough bloom therefore lack of nitrogen in the soil. Buds are increasing in size however.
150419 - I think zkilltez of will be ready soon, trichomes are cloudy with a few amber , began 10 day flush today feeding 4 litres of 7.0 pH water every day now till the 25th which will be harvest day 😎


Likes
15
Share


@MrJones
Follow
Mr. Jones Fast Buds Moby Dick
╰⊰´🌿 ╰⊰´🌿 ╰⊰´🌿 ╰⊰´🌿 ╰⊰´🌿 ╰⊰´🌿 ╰⊰´🌿
🏡Indoor - 3"x4"x8" Custom Built Grow Closet
🌾This strain likes to stretch, so a heavy training regiment will be needed.
🗓️Germenation - Soaking in Water Strait into Amended Soil.
⚱️3-Gallon Pots 📊6.4 / 6.8 PH
💧 Feeding - Gaia Green Grow / Bloom
🕷️ IPM - We will be using Green Cleaner" 1 OZ per Gallon, and CannControl from Mammoth alternating between products each month for Integrated Pest Management.
🌿╰⊰´🌿╰⊰´🌿 PLANT UPDATES 🌿╰⊰´🌿╰⊰´🌿
🗓️Saturday - 11.11.23 So last week I did some training 1 plant was topped, 1 plant was LST, and the last one, the smallest one, was left alone, I am happy with the recovery as we head into week 4, this week that most FB strains begin to stretch into flower, today I started a compost tea, see recipe below, will be feeding tomorrow.
Moved the plants into my stealth closet, under 2 Vipar Spectare XS 1500s.
╰⊰´🌿 ╰⊰´🌿 ╰⊰´🌿 ╰⊰´🌿 ╰⊰´🌿 ╰⊰´🌿 ╰⊰´🌿
📝 Notes - Original Moby Dick Auto is a world-renowned Sativa-dominant giant created from two of the most popular strains ever, the White Widow and Haze cannabis strains which are known for the huge delicious aroma, huge size and yields; It’s an extremely easy-to-grow variety highly recommended for growers of all levels seeking for maximum yields with minimum effort as this strain grows up to 150cm and yields up to 650 g/m2 in 10 weeks without extra maintenance. Thanks to its 23% THC, this marvelous hybrid is all about happiness as it will melt your worries away while boosting your mood, leaving you with a big fat smile on your face and ready to get things done as soon as you take the first hit, making it an excellent choice for social scenarios and busy workdays. The Sativa effect comes hand-in-hand with a mix of lemony, piney, and woody terpenes that translate into that classic aroma every stoner loves.
╰⊰´🌿 ╰⊰´🌿 ╰⊰´🌿 ╰⊰´🌿 ╰⊰´🌿 ╰⊰´🌿 ╰⊰´🌿
Compost Tea
3 Gallons Dechlorinated H20
3 Cups Malibu Compost
2T Molasses
2 T Alfalfa Meal (DTE)
2 T Kelp Meal (DTE)
1 T Bat Guano (DTE)
1 teaspoon Rootwise Bio Elixir
1)- I used a small paint strainer to hold my composts, placing an air stone right in the bag and zip-tie it nice and tight - this allows air bubbles to really agitate the micro matter off of the compost and into your tea
2)- I like to mix in the molasses (microbe food) and start my main air stone, the dry amendments and Rootwise can be just measured in the bubbles
3) - Keep the temp of the water warm to 75F/85F - too cool and the microbes reproduce too slowly and too hot will kill them.
I do not delete my teas and let the plant pots dry out slightly before feeding.

Likes
9
Share


@HashCakes
Follow
Great growth this week. Only one water/feeding.
****I will post this with every update. This was planted with 40 grams of real growers Grow Dots in 4 gallons of RG coco and 1 gallon of BAS 3.0 for an all in one amendment ****

Likes
14
Share


@GodZilla_Owner
Follow
Week 9 Update – Pushing Limits 🌿
Everything is running as it should, but AN#3 is completely maxed out—there’s no more room left in the tent. One thing is clear, though: the difference in stem thickness between BioBizz#1 and AN#4 is striking, likely due to Rhino Skin. AN#4 is also developing a gorgeous layer of frost as expected. ❄️
BioBizz#1 – BT35
The CalMag issue is fully under control now—she’s getting 140/40 and shows no visible deficiencies anymore. Overall, she’s in great shape!
AN#4 – BT35
There’s a minor calcium deficiency visible on one leaf, but at this stage, it’s not a concern. Advanced Nutrients CalMag Xtra is doing its job well at 1ml/L.
EC: 2.4
pH: 6.5
Drain: pH 6.1 (EC not measurable due to organic soil).
AN#3 – BT31
She’s lagging slightly behind the others, though she should be further along. This is due to suboptimal conditions—she’s far too close to the light, and there’s nothing I can do about it. Supercropping is nearing its limits, but thankfully, vertical growth has almost stopped!
EC: 2.4
pH: 6.5
Drain: pH 6.1 (EC not measurable due to organic soil).
Likes
21
Share

@RockoCalenberg
Follow
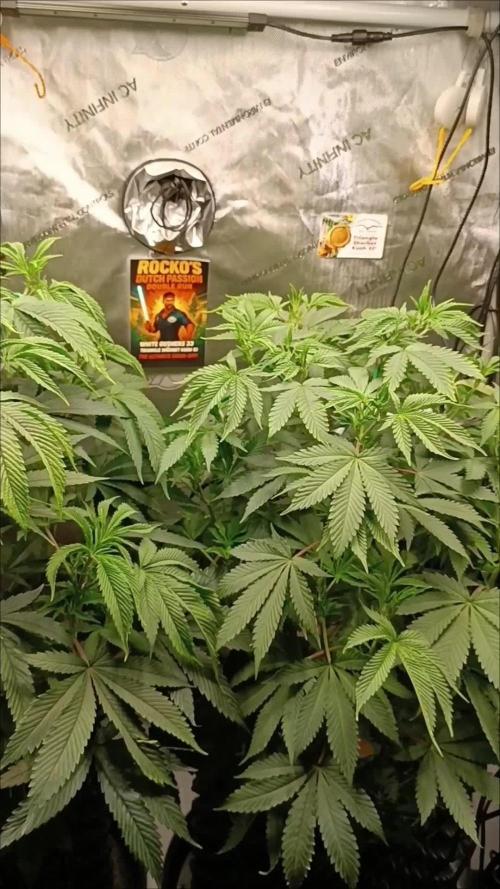
9. Woche
Die beiden sind zu kleinen Büschen geworden und messen 65 cm 📏
Ich habe ein wenig entlaubt und jeweils die höchsten Triebe etwas runter gebunden.
Ein paar Tage dürfen sie noch wachsen und dann wird geblüht 😁
Happy Growing 2026 !!!
Update : am Tag 60 wurde auf 12 h umgestellt


Likes
12
Share


@Jodas
Follow
Waiting game begins. Posted a video as well so you can see a bit more of the plant. Patience is the game we are playing now. Hopefully they can finish soon. Although the trics are 50-50 milky and clear.

Likes
14
Share


@Jays_Not_Here_Man
Follow
Hey-O ! The girls are doing great, lots of frost development and thickening up. Big fat colas and nugs on these ones. Pretty sure the Mai cola is a solid OZ on its own 🤤 smelling very dank, and feeling greasy to the touch.
All I have had to do this week is fill the humidifier and admire them as they grow 😎 not too much longer, hoping they finish around the same time as my other strain . Happy Gardening 🇨🇦👊❤️🌱

Likes
8
Share


@ChitownCannaChica
Follow
She is looking good! Weather has been a huge factor in this grow! Literally in one week I have been experiencing high winds, temps that are swinging 30+ degrees, and humidity from rain at 100% to 50%. Tough plant! ✌️🏻💚🌿💨
Likes
45
Share


@Secretflower
Follow
Hello my friends,
...May 30, 2022.. Day N°79..
...Flowering day N°23...
My three Feminized Bubblegum are fine, developing very good, they are beautiful, the flowers are awesome. I made a little defolliation.
I feed them with the Hybrid Powder and some Booster from Green House Feeding Nutrients,
I gave them some CalGreen from Metrop, the best Cal-Mag of the market.
They are under a MarsHydro TS 3000 at 60% of power and at 40cm of the canopy.
www.00seeds.com
www.mars-hydro.com
Thank a lot for passing through here.
Wish you the best with your green projects, peace.
See you soon 💨💨💨
