


shorts_status_processing


@Excalibur
Follow
2nd October 2018 -
Day 99
Burn slows down
Third day of flush and she starts to thicken up.
Day 100 -
Sweet smell begins as she starts to mature.
Day 103 -
Begining to mture and dense.
Day 104 -
Water added and pH balanced 5.4
Day 105 -
Last week of Flush

shorts_status_processing


@Crazy_zx10r
Follow
About middle of week 2 plants are loving the conditions, everyday noticeable growth and
Still just fed with plain RO water. Soil still has lots of nutrients in it.


@TheBudWhisperer
Follow
Week 8 of flower is in the books and this show is quickly coming to an end. I said last week we had about 7-10 days and I was spot on at the 10 day mark. I was only wrong about the order. The cheese is ready to chop before the rest and the gorilla cookies, cherry Bomb and lemon haze will follow in due course. The cheese is a beast and it’ll take a little time to get it all run through the bowl trimmer. At least the big one goes first. Her tallest colas have foxtailed like mar, despite the late supercrop. You can tell where the sweet spot for the light is at about 10” distance from the canopy. Any closer than that and the tails begin to show prominently. It’s a good example of just how close you can get to these fixtures with a little bit of prior experience. It’s been noted for the next run😎👍😎. The res. is on an h2o2 only flush for the remainder until the rest are ready to come down. Not a moment too soon either - the pollen chucking project has stalled out waiting for these girls to finish and now that we’ll have a little extra room, we can start running our cuts in the aerocloner🤟. Not long at all now folks. Thanks for tagging along through all this. Learned a bunch about this system and we’re back to hardware mode to make some serious improvements for the next run🤙😎. I love hardware mode😉.
Background/Repetitive Nonsense
The strain line up on this grow is look’n quite saucy 😈. We’ve got 2 FB strains this time around - Gorilla Cookies (seems we always have some GSC cross in the works). Mainly because the colours look stellar and remind me of a sugar breathe we did last year that was 🔥. The other FB is their original Cheese strain... because we already smoked all our cheese... and we really like our cheese...😉. Emerald triangle was kind enough to include a freebie of Lemon Haze. Wasn’t really big on the list but we haven’t done a haze strain to write home about yet so worth a go👍. The last is a Cherry auto from Bomb seeds that we’ve been trying to get to for months. Let’s just hope that she’s not a dud like the last bean.
The new digs for this run are courtesy MarsHydro👊. Their 2x4 single grow tent, paired with a shiny new 240w QB courtesy ViparSpectra.
These folks were kind enough to discuss a collaboration and as a result, here we are to test out the gear with an inaugural run of autos. Each week, we’ll try to expand on some of the benefits of each, as well as any limiting factors or considerations that need attention when pondering purchase.
Already I can say that both are high quality products in terms of overall craftsmanship.
MarsHydro 2x4 Grow Tent:
Excellent construction in terms of durability. Reinforced stitching on the zippers and corners ensures zero tearing. Conveniently placed screen vents and intake/exhaust ports. The ceiling exhaust port only exists on the right side. Perfect for me but not great if you’re running exhaust from the top on the left side (left side wall port makes up for this however). The aluminum frame is rigid enough to support the weight of the lights and accessories. Once you have some weight in the tent, she’s go’n nowhere and you can assemble and break it down in record time if moving or stashing the grow op.
Only limiting factors I’ve noticed is that temp. Control will be an issue for a tent. It just doesn’t have the same insulating ability as a wood cabinet or other permanent enclosed space. No worries, this is offset by a small desktop heater and keeps the environment exactly where desired. The other issue was a production problem - the ceiling vent was accidentally stitched into the corner seams on the assembly line. Again, no real issue - just pulled it out with no damage or fraying to the tent or port👍.
Website link here:
https://www.mars-hydro.com/grow-tent/buy-mars-hydro-grow-tent-24x48x70-2-x-4-cabinet-closet-grow-box-upgraded-diamond-1680d-mylar-for-sale
ViparSpectra 240w Quantum Board:
This thing is sleek and slick in terms of design. Closest comparable to it that I’ve seen would be spiderfarmers line of qbs. They feature the same top-o-the-line components and roughly similar spectrums. Where VS takes the advantage is in the convenience of the dimmer nob which is easily accessible and works great at 50% with no strobing👍. The heat sink is also larger which contributes to lower temps. That’s not a good thing in my case but beneficial for most folks.
I can already say that this will be a great fixture through all stages of growth. Where I know this light will excel will be in the veg. Stage for sure. Dimming function gives seedlings a much better chance of success with the ability to use lower lighting levels early on and the coverage area on a 240w is great. The average grower will find this panel suitable and fitting to their needs in a 2x4 grow space although I’d suggest 2 units if going any larger than that. The total output in this space equates to about 30w/sq.ft. Which is a decent amount of coverage based on power vs. Growprint. Ideal for veg. Certainly but, in flower - I tend to run closer to 50-60w/sq.ft to achieve higher yields. Again, similar fixtures have performed admirably in the past and while this wouldn’t be considered an “entry-level” fixture, I’d recommend that any grower new to the game not skimp on lighting and start with one of these. The price points are a great value for quality LED tech. These days, so there’s little reason to even consider a lesser fixture👍.
I have no detail on limiting factors for this light as yet but have heard that stock branded fixtures don’t necessarily incorporate enough red diodes. I’ve seen no issue myself but confess - I’m no lighting guru.
Website link:
https://www.viparspectra.com/collections/xs-series/products/xs-series-xs2000
***8% discount when using code: “ItBudWhisper”***
Happy to have you along for the ride if you made it this far through my opening rant!!😎🤟😎🤟😎


@TheBulldozerSicily
Follow
Inizio nuovo ciclo
Giovedì 26 settembre 2024
Aggiungo 75 lt acqua osmosi inversa ec 146 ph 9
Aggiungo tutti I nutrienti ottenendo ec 908 ph 6.5


@Krautbauern
Follow
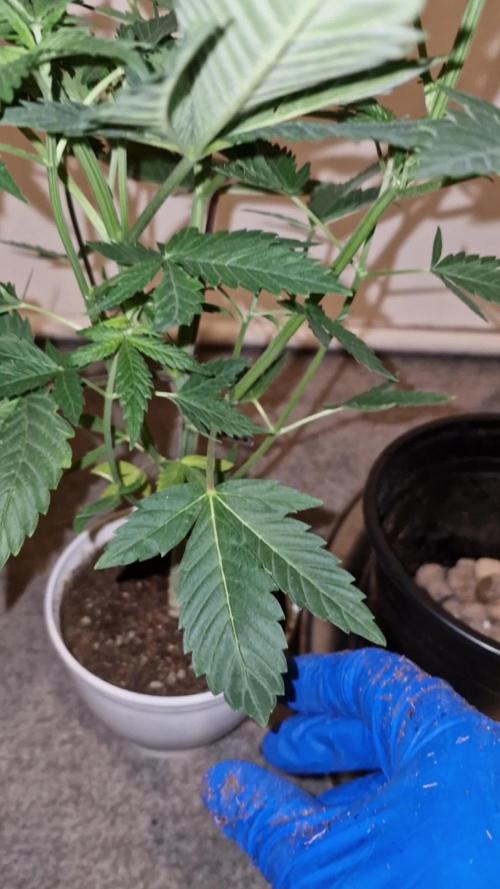
Flowers are growing great. All the plants have been given 2 small shovels of compost. The compost was mixed into the soil on top.


@farah4weed
Follow
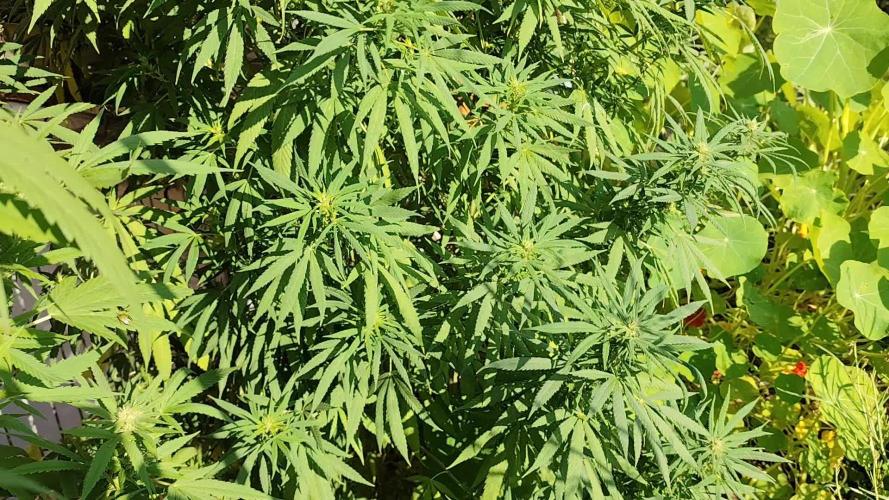
The sixth and final week of the growing season😍👽
I changed the pots this week⚱️
I changed the light to 12/12 hours.🌓
It's time to bring the project closer to success.🔥🔥
Of the 10 seeds we planted to test #OgCream, all of them germinated successfully and were healthy.
Now, in the coming weeks, I will check them for feminization😍😍👽👽
Thanks for your feedback🙏🌐
"farah4weed"


@Growbody
Follow
Hallo und herzlich willkommen zu meinem Growbericht Outdoor 2025 mit den Sorten Power Flower Feminized, Royal Medic Feminized und Special Kush #1 Feminized, alle 3 von Royal Queen Seeds. Es ist das erste Mal, das ich Töpfe für den Outdoor grow verwende, bisher waren alle Gorilla grows und direkt in die Erde gepflanzt.
Die URL der Power Flower Feminized: https://www.royalqueenseeds.de/feminisierte-hanfsamen/120-power-flower.html
Die URL der Royal Medic Feminized: https://www.royalqueenseeds.de/cbd-samen/148-royal-medic.html
Die URL der Special Kush #1 Feminized: https://www.royalqueenseeds.de/feminisierte-hanfsamen/138-special-kush-1.html
Die Planung für den Grow ist, die Samen in easyplug Anzuchtwürfeln keimen zu lassen und danach in 0,6L und 2,2L Plastiktöpfen, dann letztlich in die neuen komplett doppellagigen ROOTIES 15 Liter Wide Version Stofftöpfe umzutopfen. Sobald die Witterung es zuläßt, sollen die Pflanzen an die frische Luft.
Es ist schon eine Weile her, das der Grow losging, die Bilder sind jetzt aktuell.
Tag 205: Endlich wieder Sonne, wenn auch mit vielen Wolken. Die letzte Woche hatte nach den 40 L/m² am Wochenende weitere 23 L/m² Regen gebracht. Die drei Ladies haben die ganze Woche unter'm Balkon gestanden, jetzt können sie wieder Sonne tanken. Sie duften sehr fein.
Tag 206: Hab das schöne Wetter genutzt und die drei Großen etwas entlaubt. Es waren jeweils eine große Handvoll Laub, man sieht es aber kaum. Bei der Menge an Laub werd ich das noch ein paarmal machen. Das Große Heupferd darf im Canabis nach Beute jagen.
Tag 207: Die drei Feinen waren heute morgen ziemlich nass, hab nochmal ordentlich entlaubt, das mehr Licht und Luft reinkommt.
Tag 208: Hab mal Fotos der drei Bäume um die Mittagszeit gemacht. Man kann gut sehen, wie nass die Blätter da noch sind. Werde also nicht bis November warten.
Wenn's dir gefallen hat, schau wieder vorbei ✌️😎

shorts_status_processing


@Dunk_Junk
Follow
Well she looks a bit better than last week!!
Still chugging along.
6.5cm vertical growth this week.


@Cariboo_OG
Follow
Utopia Haze is a rare heavily sativa dominant hybrid (90% sativa/10% indica) strain created through back crossing Brazilian Sativa strains. This tasty little bud took home 1st Place for Best Sativa in the 2008 High Times’ Cannabis Cup and for good reason – with its potent 18-22% average THC level and long lasting cerebral effects, Utopia Haze is one powerhouse smoke. The Utopia Haze high comes on soon after you finish your first toke, hitting you with a strong cerebral lift that infuses you with a sense of hazy relaxation.
Type: Feminised/Photoperiod
Cultivation: Indoor/Outdoor
Flowering Time (days): 70-75
Indoor Yield (g): Up to 650
Feminised Outdoor Harvest Month: October
Feminised Outdoor Harvest Month Week: 3rd-4th week
Aroma: Citrus, Woody, Pungent, Mint
Effect: Cerebral Lift, Hazy Relaxation, Sleepy
Welcome Everyone to the Final Entry of my Utopia Haze Grow !
There is so much to discuss ! I have been extremely busy as of late trying to get this Harvest together, but i am happy to have it here for you now !
I Seriously under estimated the amount of time, help from others, and my own necessary skills to pull this off.. and i still kind of screwed it up lol !
But its worth noting i have never actually done this before and trying to document it during....was extremely hard.
It is next to impossible to work an iPhone with rubber gloves on !
First I want to discuss everything step by step so before you jump straight into the comments on how the end product is so small in "quantity"
Rest assured i am happy with its"quality"...and thats all that matters to me because Life is a journey not a destination! and i have learned so much from this grow that I couldn't be any happy even if i messed some things up :)
But at the very least I hope you read through this entry in its entirety with an open mind and focus more on the process, rather than just the outcome!
I ran out of Ice & i was only able to wash three times..(normally I've heard you should go sometimes 5-6 washes)
Preparation is Key & things will be much better next round :)
Photos 1-22
These are pretty self explanatory but for those of you just tuning in now.. this is what happens to a very happy plant when you don't have the necessary tools to monitor key components of growing cannabis.. Ph, as well as EC levels play a very key role in the outcome of your grow lol that being said I was just able to save this plant by purchasing both tools but that doesn't mean the plant didn't suffer because of the prior events.. This was a Huge reason behind me choosing to turn this harvest into what i would consider
"Solventless Hash Rosin" from "Ice water extracted Bubble hash".
Pictures 23
The idea here is the process of using "fresh Frozen Cannabis" this has been discussed many a time online on such sites as instagram and here on grow diaries as well.. I personally have Never tried the process so i decided to try it out and make a judgement for myself..
Video 24
The Cannabis has now been in the freezer for 72 hours making it very well frozen.. as you can tell i struggled getting it all into the 25u Screen Wash Bag. One thing of note i would do differently is i will de-stem my next batch as i also believe this played a part in the amount of plant matter that escaped through the sieves.
Photo/Video's 25-28
The idea here is "ice water Seiving" & especially with the bags that I am using here that are only have screen material on the bottom portion of the bag it is very important to have spaces in-between the screens to allow the water to pass directly through the screens into the bottom bucket with the least amount of resistance.. because the hash is so extremely temperature dependant if it gets warm on the side of the bag.. it will stick there and not make it to the bottom to become use able product..
29
You do not need to use as much Ice as i used here lol... the idea is to keep everything very cold..i certainly achieved that but at the sacrifice of using so much that i ended up grinding product and producing "contaminants" but in the end they are just plant matter that i would be smoking when i rolled up my joint either way so.. I'm not super disappointed..
But it should be noted that what you want to achieve here is a Layering effect where you have the wash bag between two small layers of ice while the "water current" washes the Trichomes away allowing them to be separated by the screens setup below :)
Before Starting the machine you should allow some time (i.e.;10-12minutes pre soak to allow the product to become saturated) before the first cycle.
By video 32 I have just ran out of ice lol..
Video 33-34
Here I have a tip for you.. to separate the screens that you sieve through.. cut 5 gallon buckets to stretch them across nice and tight.. it'll make scooping your Bubble that much easier ! i learned this from the many "Frenchy" videos I have watched :)
Picture 35
Here in lays the problem for most people.. drying your hash without loosing vast amounts of "Terpenes" whilst also stay ever vigilant against mold !
Thanks to all those videos I've watched on youtube.. id like to think this was one of my most successful parts of this process..
Things to Note; Terpenes start to seriously evaporate at temperatures 68F or 20C
you need to stay as cold as possible whilst bringing the Relative Humidity in the space down into the 40-30% to stay away from that nasty mold !
I used my cold storage room in the basement.. with a dehumidifier running to keep the space at 45% RH & staying at a constant 15c.
All while spreading the hash as thin as possible across parchment paper, on top of the white screens with a fan moving air across both sides of the paper.
Pictures 36-38
These are some macros i took in the middle of my drying session I fell in love with the colour.
Yes i know the black spots are plant material but they will get caught when i bag the hash & squish the oil out.
Thing to Note; at this stage it is important to ensure you 'micro plane" the hash down as fine as you can whilst staying weary of the temperature... any "chunks" will hold pockets of moisture.. that lead to potential problems..ie; mold ...
Picture/Video 39-41
Successfully planed bubble hash ready to be bagged and Squished !
Picture 42
Ive decided to follow Pedro.. from Pedros Grow Room and double bag to be on the safe side so i don't have any blow outs.
So thats One 25u bag inside one 160u bag ! :)
Pictures 43
This is almost 3 grams of the bubble hash from above, already melting in the bag.. this is where i ran into trouble again lol things started getting to warm in the house and i was only able to get one of the three squish's i did on video :( things started getting sticky.
Picture 44
This is basically just a photo of the equipment I'm using; 3x5 LowTemp Cage in the frame I built myself, with a 20Ton bottle jack.
Something to note here is this is an older Lowtemp model with only a single heating zone which is which i have it closed here heating Both sides of the press :)
As well as the importance of having adequate pressure on your plates.. my rig is very overkill for the size of hash bags..lol
Video 45
Here is the lovely press video.. its didn't quite work the way i wanted either lol my directional folding wasn't quite tight enough for a big "drip" :)
&the Press was set to 65°c
Photo's 46-50 are pretty self explanatory :) I had a blow out.. but still managed to pull an 80% return from the hash once squished...& yes it tasted amazing :)
Was it worth it in the end... that could be debated.. for some..i understand..its not your thing, but for those of us that are interested in making our own concentrates.. free from Solvents...
I wouldn't make it any other way :)
If even ONE of you reading this diary finds it helpful to reference for ANYTHING.....even if its "what not to do" ill consider it a success !
Thanks again for tagging along on this garden adventure.. its been one heck of a journey !
Much Love from B.C. Canada,
Until Next time,
Cariboo
shorts_status_processing


@Andres
Follow
she grows healthy ... she is in her last weeks outdoor ... the days are cloudy most of the day ... with the substrate top crop mix .. she feeds every 10 days


@NSCanna
Follow
The Black Devil's OG is trucking along without issue, while the Northern light is a tad on the droopy side at night and is likely expecting earlier night hours. I will likely adjust my light schedule to reduce the stress.
The videos posted came out pretty well, considering they came out of a cell phone camera. 400x ends up being really blurry as the phone can't focus properly to compensate, but you can still see all the bacteria dancing around. Some nematodes and ciliates there too.

shorts_status_processing


@MrJones
Follow
These ladies were heavy yielding - just wish the PK booster did not stunt them, I feel they could have even been larger, the buds are sweet and sticky, they smell amazing, they are hard and resinous - they have a beautiful mix of dark and light shades of green with bright orange hairs, very pretty, my friends are already in love with this weed, hits you like a Sativa and as the high lingers mellows like an Indica, I can't, wait to grow this again! The is an urban legend that occasionally a purple strain emerges, and when it does the outcome is legendary, just another reason to try this strain!


@DogDoctorOfficial
Follow
Her green still not were i want so i am keeping the nutrispray for a few days more at least until i like the colors better, apart from that she is growing great actually, wen looking at last week defoliation and now , i mean lol
Sorry so short update i will keep updating among this week <3 <3 <3
Decided to connect my spider-farmer to increase my PPFD, i love this MARSHYDRO TSW2000 but in my humble opinion a 4x4 needs a bit more PPFD Power wen in flower mode bringing up my average PPFD to 1000 umol/m2/s lets see if she likes the idea or not.
And like i suspected she did like more light and the color is changing bringing her green colors back to normal, did a leaf inspection just in case and posted some photos of my under leaf microscopic view, all good by the way lol , with this meaning that next week i will provably stop Nutrispray since i don't like so very much to apply any type of foliar during flower.
And As i suspected i have an bug infection lol freaking trips found them way in to my closets, them a i dont know if mites, but i have something in this closet that webs and i cant find it RRR, i guess its part of the game, just been long long long time since i encounter any situations like this, and that is why its happening, i got way to comfortable and lazy on my IPM.
This is one of the reasons why is so important to checking in a microscopic way under leafs etc
Im ordering a bunch of beneficial insects , traps etc and going in from all sides lol non so ever she is looking great, not the best color leafs i know , but she is moving fast and furious .
I will keep you all posted as for what i am doing and how i will deal with this situation so stay tuned since this can go one way or the other lol <3 <3 <3
As always thank you all for stoping by, for checking my journey , for the love support and for it all, i am blessed and humble with you all.
Just a reminder , all i grow is medicine for myself, for me and for my best friend with is me nothing to sell, so don’t even ask.
All info and full product details can be find in can find @
https://ganjafarmer.com
https://aptus-holland.com/
https://marshydro.eu/
#aptus #aptusplanttech #aptusgang #aptusfamily #aptustrueplantscience #inbalancewithnature #trueplantscience #Ganjafarmer #growerslove
With true love comes happiness 💚🙏 Always believe in your self and always do things expecting
nothing and with an open heart , be a giver and the universe will give back to you in ways you could not even imagine so 💚💚💚
More info and updates @
https://growdiaries.com/grower/dogdoctor
https://instagram.com/dogdoctorofficial
https://youtube.com/channel/UCR7ta4DKLFMg2xxTMr2cpIg
💚💚💚Growers love to you all 💚💚💚


@Herbman420
Follow
Hello everybody nice to see you all on here hope everyone is doing good. This week whent very well .plant seems to look healthy and happy. But there is a slight defects on the first serrated leaves I can't figure out whether it's a birth defects or it's something else. I will probably post a picture on questions later . I personally think it's a birth deffect . But may be rong . We'll see what next week brings I appreciate you all looking at the diary. thank you so much and always remember it's 420 something 🌱👍



@Gembel94
Follow
Grow-Report – Blütewoche 1 (Tag 1–7)
Strain: Neon Runtz (Wizard Trees)
Medium: Coco, 15 L Stofftöpfe
Lichtsystem: Spider Farmer G4500 + UV/IR-Supplement Bars
Steuerung: Spider Farmer Controller + Meross WLAN-Steckdosenleiste
Lichtzyklus: 12/12 (18:00 – 06:00 Uhr)
Grow-Philosophie:
• Die ersten 2 Wochen der Blüte werden als Stretch-Phase betrachtet
• Trichomen-Beurteilung ab Woche 10
• Ab Woche 8 kein Dünger mehr bzw. nur noch in minimaler Dosierung
⸻
Düngung
Basisdünger:
• Emerald Harvest Grow/Bloom + Cal-Mag
• Dosierung: +0,25 ml/L über Schema
Zusätze:
• PowerZym (Hesi, enzymatisch): Unterstützt Wurzelhygiene & Substratabbau
Gießverhalten:
• Tägliches Gießen mit ca. 30 % Drain
• pH Gießwasser: 5,8 / Drain: 6,1
• EC Gießwasser: 2,0 / Drain EC: konstant bei 1,3 → sehr gute Aufnahme
⸻
Lichtsteuerung – Supplement Bars
IR-Licht (Spider Farmer Bar):
• Aktiv: täglich 06:00–06:30 Uhr (30 Min nach Hauptlicht-Aus)
• Funktion: End-of-Day-Treatment zur Unterstützung der Phytochrom-Umstellung → gezielter Stretch
• Beobachtung: Erste Anzeichen von Internodienstreckung ab Tag 4, keine Überdehnung
UVB-Licht:
• Aktuell deaktiviert
• Geplanter Einsatz ab Blütewoche 6 zur Steigerung der Trichomenproduktion
• Steuerung erfolgt getrennt über Steckplatz mit Zeitschaltung (z. B. 20:00–22:00 Uhr später)
⸻
Pflanzenzustand & Entwicklung
• Pflanzen zeigen aktives Wachstum, Aufrichtung nach Lichtstart
• Keine Mängel oder Blockaden erkennbar
• Drainwasser ist klar, Wurzeln vital (unterstützt durch PowerZym)
• Geruchsentwicklung gering, aber sichtbar beginnender hormoneller Umschwung
⸻
Ausblick auf Woche 2
• IR-Licht leicht reduziert (z. B. auf 15 Min gegen Ende der Woche)
• Vorblütenentwicklung und Struktur der Seitentriebe im Fokus
• Düngeschema bleibt stabil
• UVB bleibt weiter deaktiviert
• Beginnende Wuchsberuhigung wird beobachtet → Übergang zur generativen Phase


@CapybaraProbioticTeam
Follow
Hola!
Antes que nada, quería pedir disculpas por no poder continuar las semanas de vegetación como correspondía, pero por cuestiones personales se me hizo imposible.
Las fotos corresponden al ultimo dia de la semana 13 de la planta, el día 6/02/2021. En todo este periodo de crecimiento vegetativo realice mainlining, como muestro en la semana 5 subida, y luego deje que las dos ramas se desarrollen hasta tener 5 nudos cada una y realice en ambos extremos una poda apical, o topping. Luego, con tecnicas de LST fui torciendo las ramas para que vayan creciendo mas o menos parejas, pero al ser un cultivo outdoor obviamente esto no sucede tan prolijamente como en un indoor. Mas alla de eso, estoy contenta con el resultado: 10 ramas principales y muchas pequeñas en la vegetación. Fui haciendo defoliaciones suaves, y ahora le tocará la ultima antes de que empiece a florecer. Con respecto a esto, la planta sexó finales de enero, pero recién ahora esta comenzando a mostrar signos de que esta por empezar a florar, así que la semana que viene será la primera de flora. Esto por mas que parezca raro suele ser común por lo menos en esta region, muchas veces las plantas sexan antes y no muestran signos de comenzar a florecer hasta unas cuantas semanas después, nada que ver a como ocurre cuando uno controla el fotoperiodo.
Por suerte la temporada viene siendo mas seca de lo normal, y poco lluviosa, por lo que tuve problemas con trips pocos días. En general cuando tocan veranos lluviosos se vuelve muy complicado tratar las plagas. En particular en mi patio suelo tener problemas con trips, pero no de otras plagas ya que las plantas de acompañamiento son suficiente para espantarlas.
En las fotos notaran que el tronco principal esta partido en dos, esto sucedió cuando se le cayo un peso importante encima hace 4 semanas, pero con unas rápidas ataduras y la correcta nutrición la planta sano al 100%.
Esto ha sido todo. Cualquier sugerencia es bienvenida. 💪
Saludos!! 😘
