
Likes
Comments
Share


@Wicked_Stix
Follow
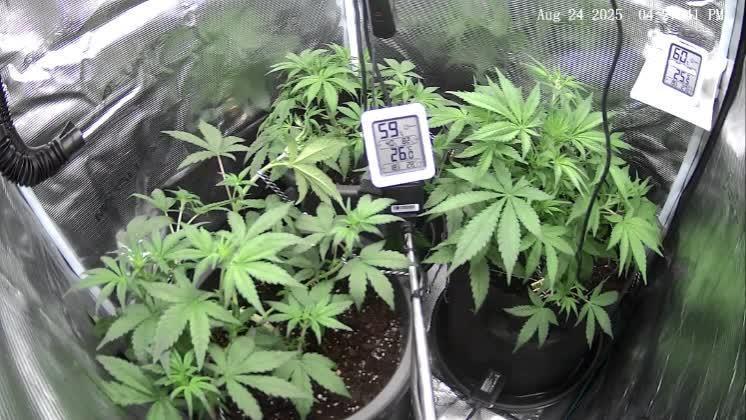
Was a pretty smooth week for most the girls. Showing some steady growth. I topped all of the plants around day 12 other than the slurricane 7. Ph got a little high since the nutrient level was too low to buffer it at the beginning of the week. Slurricane 7 and sugar cane are the ones that took some damage. I think they will be ok though. I upped the nutrients to 1/4 tsp per gallon and the ph has held stable since then. Should be able to start some training the middle of next week and looks like we might be going 2 more weeks on veg before flipping them to flower depending on how this upcoming week goes. Guess you will have to show up next week to find out...

Likes
14
Share


@TherealNICOGREEN
Follow
Jeg har set så meget frem til at kunne STARTE KANNABIA FRØ OP OG SOM ER BASERET TIL AT FLYTTE UDEN DØRS OM CA4-5 uger:) !jeg GLÆDER MIG ISÆR TIL AT FÅ mine cbd frø i jorden også:) DA DET ER MIN Kones medicin :-) 💚☮️ . Jeg har fået en masse gode gødninger og jord sorter hjem og , 12 14 liter potter KUN TIL MINE KANNABIA PIGER 😉😇🖤🧡💚

Likes
3
Share


@GoodTimesOrganics
Follow
Die regenerative Phase neigt sich langsam dem Ende zu. Es ist zu beobachten, dass der Pflanzentyp sehr hell in Erscheinung Tritt.
Die Pflanze ist sehr stark von Trichomen überzogen, was dem Namen Ice Cream Haze alle Ehre macht.
Das Aroma einfach überwältigend.💚🍭🍦🐇

Likes
376
Share


@Metatronix
Follow
Hello to all my friends and visitors here on GD
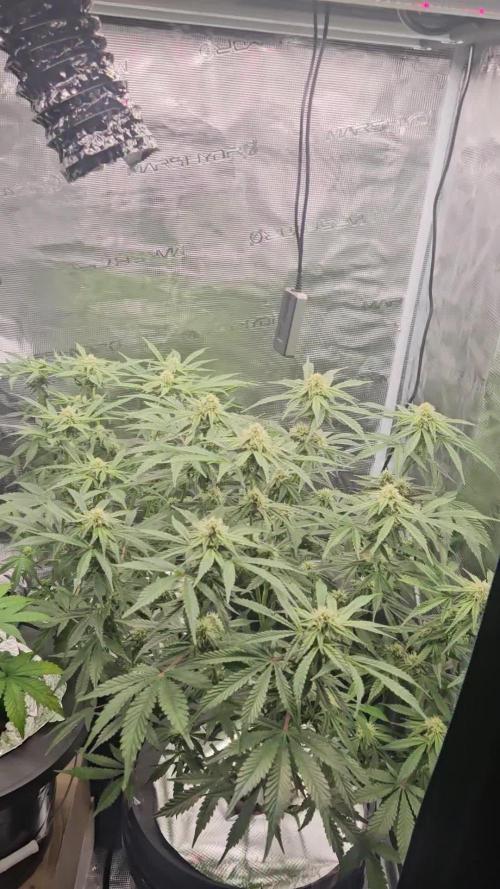
As you can see on the photographs from this week growth that after the raw cold days, the girls did get better and recovered, but they also spread out in development, the difference is about two to three weeks between the plants...it's manageable though :)
The SE7000 runs at 520 Watt and about 32cm from the canopy.
I added nutriants at 03.04. the EC is at 2.7 EC I also performed some LST on them, all goes well except the dehumidifier will not come for yet another week.
That's it, I hope to see y'all next week growmies.

Likes
Comments
Share

@Albinius
Follow
🌱 GROW LOG: Gorilla Cookies Auto (x3)
╭────────────────────────────────────╮
🗓️ MONDAY 18/08/25 - DAY 26
╰────────────────────────────────────╯
→ All stats in range, no attention needed
→ Picture data gone so only webcam pictures this week
🌡️Temp (Day/Night): 24°C / 23°C
💦 Humidity (RH): 63%
🔁 VPD (Vapor Pressure Deficit):1.1
⚡ Soil EC mS/cm: 0.3
💧 Soil Water Content (WC): 21%
💡 Light: 40% @ 25cm from canopy
🔆 PPFD (μmol/m²/s): 490
🌬️ CO₂ (ppm): 580
╭────────────────────────────────────╮
🗓️ TUESDAY 19/08/25 - 💧BATCH & WATERING - DAY 27
╰────────────────────────────────────╯
→ WC Dropped to 20%
→ Prepared batch 10L (3L Deminiralized + 7L tap feeding: 1.2 EC / 590PPM / 6.6 PH / 24C
→ Stats within range
→ Fed plant with fabric pot 3L: Runoff: 4.2 EC / 2140 PPM / 6.0 PH -- High Again
→ 2 plastic pot plants WC still in range, no watering
→ 2 plants in fabric pot seem a bit behind
🌡️Temp (Day/Night): 27°C / 25°C
💦 Humidity (RH): 68%
🔁 VPD (Vapor Pressure Deficit):1.2
⚡ Soil EC mS/cm: 0.5
💧 Soil Water Content (WC): 28%
💡 Light: 45% @ 30cm from canopy
🔆 PPFD (μmol/m²/s): 480
🌬️ CO₂ (ppm): 700
╭────────────────────────────────────╮
🗓️ WEDNESDAY 20/08/25 - DAY 28
╰────────────────────────────────────╯
→ No Action Taken
🌡️Temp (Day/Night): 23°C / 20°C
💦 Humidity (RH): 55%
🔁 VPD (Vapor Pressure Deficit):1.4
⚡ Soil EC mS/cm: 0.4
💧 Soil Water Content (WC): 26%
💡 Light: 65% @ 30cm from canopy
🔆 PPFD (μmol/m²/s): 480
🌬️ CO₂ (ppm): 500
╭────────────────────────────────────╮
🗓️ THURSDAY 21/08/25 - DAY 29
╰────────────────────────────────────╯
→ No Action Taken
🌡️Temp (Day/Night): 23°C / 20°C
💦 Humidity (RH): 55%
🔁 VPD (Vapor Pressure Deficit):1.4
⚡ Soil EC mS/cm: 0.4
💧 Soil Water Content (WC): 22%
💡 Light: 65% @ 30cm from canopy
🔆 PPFD (μmol/m²/s): 480
🌬️ CO₂ (ppm): 500
╭────────────────────────────────────╮
🗓️ FRIDAY 22/08/25 - DAY 30
╰────────────────────────────────────╯
→ No Action Taken
🌡️Temp (Day/Night): 23°C / 20°C
💦 Humidity (RH): 60%
🔁 VPD (Vapor Pressure Deficit):1.3
⚡ Soil EC mS/cm: 0.4
💧 Soil Water Content (WC): 20%
💡 Light: 65% @ 30cm from canopy
🔆 PPFD (μmol/m²/s): 480
🌬️ CO₂ (ppm): 500
╭────────────────────────────────────╮
🗓️ SATURDAY 23/08/25 - DAY 31
╰────────────────────────────────────╯
→ No Action Taken
→ Got back after a few days, plants seem to halted growing due lack of attention.
🌡️Temp (Day/Night): 23°C / 20°C
💦 Humidity (RH): 60%
🔁 VPD (Vapor Pressure Deficit):1.3
⚡ Soil EC mS/cm: 0.4
💧 Soil Water Content (WC): 16%
💡 Light: 65% @ 30cm from canopy
🔆 PPFD (μmol/m²/s): 480
🌬️ CO₂ (ppm): 500
╭────────────────────────────────────╮
🗓️ SUNDAY 24/08/25 - DAY 32 💧WATERING
╰────────────────────────────────────╯
→ Prepared batch 10L (3L Deminiralized + 7L tap feeding: 1.6 EC / 800PPM / 6.5 PH / 23C
→ Stats within range
→ Fed plants 3L: Runoff: 1.5 EC / 800 PPM / 6.5 PH -- Much better
🌡️ Temp (Day/Night): 27°C / 26°C
💦 Humidity (RH): 68%
🔁 VPD (Vapor Pressure Deficit):1.2
⚡ Soil EC mS/cm: 0.5
💧 Soil Water Content (WC): 28%
💡 Light: 50% @ 30cm from canopy
🔆 PPFD (μmol/m²/s): 480
🌬️ CO₂ (ppm): 550
╭────────────────────────────────────╮
🌿 OVERVIEW
╰────────────────────────────────────╯
The Gorilla Cookies Auto trio hit a rough patch but pulled through! 🌿 Monday was smooth sailing, but Tuesday’s 3L feed to the fabric pot plant went overboard—runoff screamed 4.2 EC / 2140 PPM, way too spicy! 🔥 Plastic pot plants chilled, no water needed. Fabric pot plants still trailed their plastic pals. Midweek (Wed–Sat) was a ghost town, and by Saturday, growth stalled hard—soil water crashed to 16%. Sunday’s 3L feed (1.6 EC) saved the day, with runoff at a happy 1.5 EC / 800 PPM. Conditions stayed decent, but a high VPD (1.4) midweek and low CO₂ (500 ppm) didn’t help. Light bumped to 65% but dropped to 50% Sunday. 😅
Lessons:
→Nutrient Alert: Overfeeding keeps haunting the fabric pot—use lighter feeds (1.0–1.2 EC) for autos.
→Don’t Ghost: Midweek neglect killed momentum. Set reminders or automate watering to avoid stalling. ⏰
→VPD Matters: High VPD (1.4) stressed plants. Boost humidity to keep it 1.0–1.2. 💨
Fabric Pot Woes: Dries faster than plastic—check soil daily to keep it consistent. 👀
Takeaway: Overfeeding and a hands-off midweek slowed things down, but Sunday’s fix got ‘em back on track. Stay on top of feeds and water! 🚀😉

Likes
8
Share


@romeoromeo
Follow
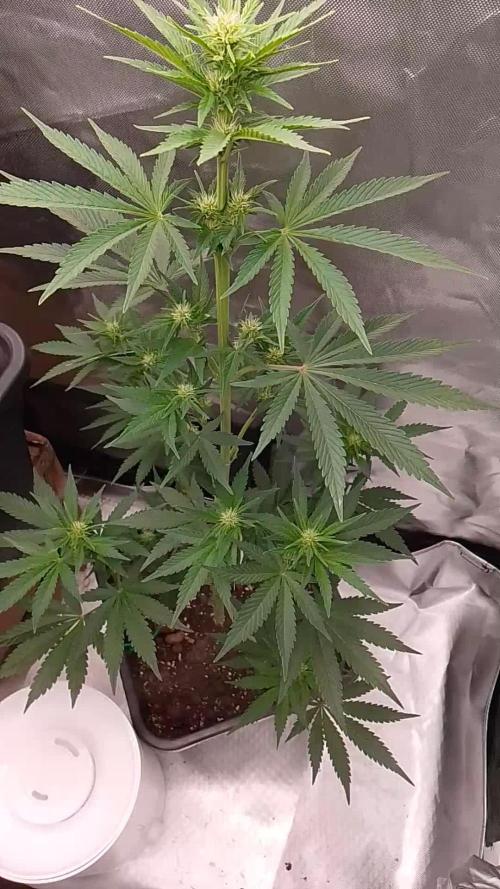
Week 2 going strooong 💪🏼
Started some LST on it, watering with water and root booster 2-2 💧
You can see how the damaged two leaves are developing, but looks like it didn’t affect the growing. Hoping for good results 💚
Day 13, watering her once in two days (250ml) 2 times with plain water and 2 times with molasses water+root/growth booster and there is dry organic fertiliser in the soil (NPK 8-5-1) 🌱 growing good, took her further away from light (now 50cm) hoping for some stretch 😉
Day 14, finally got the bio-bizz nutrients, starting to add those, transplanted to bigger textile pot, gave her water + bio grow today 🌱

Likes
8
Share


@Hiroots420
Follow
14-05-2021 (DAY 59)
Se realizó el cambio de solución.
Las plantas vienen espléndidas y con el Safe roots de Hydrotek ya no tuve mas problemas de raíces.
Está entrando la flora mas potente y formándose los Buds.
Likes
8
Share


@420DeepGrow
Follow
Semana 6
El buen tiempo al fin se asienta ☀️, con días luminosos y temperaturas suaves que invitan a crecer. La planta, aunque venía de semanas complicadas por la falta de sol, sigue manteniéndose sana, con buena coloración y sin señales de carencias ni estrés. El crecimiento sigue siendo moderado, pero constante, y los nudos se forman con buena estructura.
Esta semana se ha realizado el trasplante a su lugar definitivo, con el objetivo de darle más espacio, mejor drenaje y aprovechar al máximo las condiciones favorables.
¡Seguimos creciendo fuerte! 💪
Likes
12
Share

@NuclearPyro
Follow
Forgot to upload week 7. After res change, next day that polka dot pattern came on top leaf. Cut off with a bud (another location) that dried up prematurely. The 650 nutes got sucked up a lil bit compared to these sativas water intake. Every day 1-1.5 gallons. That in an 9 hr spand when im at work. Struggling with rh bc of blizzard than warm, then rain, then cold, then repeat. Put a dehumidifier that does my whole basement in the room to suck out the moisture so the new air intake can pump dryer air
Likes
4
Share


@KrazyK
Follow
Solo cups to spread canopy. Flushing with bud additive for terpenes and flavonoids. Continuing only water and bud additive until it needs nutrients or until harvest to flush soil and plant of nutrients.


Processing
Likes
13
Share


@Cheesefarmer420
Follow
This plant has a solid stench of pure ripe lemons. So much aroma and color in every bud, purples, to dark green, to lime green, to solid frost. This one definitely a fun strain to watch grow and tend too for the last few months. She’s definitely a hungry girl, seemed to be the only strain out of the three that accepted and thrived with full feed nutrients. Would definitely recommend this Strain to someone For a nice uplifting day smoke, also seems to do me good for some pain and stress relief.
Likes
9
Share


@GrowerGaz
Follow
Striped feeding completely day 60 , stacking hard in the dwc and I'm excited to see the yield. Smell is lemon sweets , cough sweets lots of hazey aroma. Mars ts1000 is so big a great job and I think will hit over a gram a watt.

Likes
2
Share


@eldruida_lamota
Follow
Vamos familia segunda semana de estás Pink Runtz de RoyalQueenSeeds.
Que ganas tengo de ver el progreso de esta variedad, las plantas están sanas, se ven con buen color.
La cantidad de agua cada 48h entre riegos.
Esta segunda semana ya añadimos nutrientes, estas próximas semanas veremos cómo avanzan.
Agrobeta:
https://www.agrobeta.com/agrobetatiendaonline/36-abonos-canamo
Hasta aquí todo, Buenos humos 💨💨💨

Likes
39
Share


@Mrs_Larimar
Follow
March, 19th
Second Week of Vegetation breaks
Seedlings have established, hardest Part is done
She gets sprayed daily with "Fast Plants Spray", and water with beneficals if she needs it
Smooth running
I was setting up this Tent new and they got a new Light too.
Iam very happy with the Light
Its a bright, good quality Quantumboard
The corpus is built solid, and has cooling fins, so the Board and the Tent stays quite cool
No issues
It runs on 60 Percent
The Light was released on March, 15th.
here are some codes
Amazon US:
XS1000 10% off: it10mlarimar http://yx-8.cn/0y-6
XS1500 5% off: it15mlarimar http://yx-8.cn/0yA
XS2000 5% off: it20mlarimar http://yx-8.cn/0y2Y
XS4000 5% off: it40mlarimar http://yx-8.cn/0y5k
Amazon Canada
XS1000 10% off: it10mlarimar https://amzn.to/38udUVe
XS1500 5% off: it15mlarimar https://amzn.to/3esVUyr
XS2000 5% off: it20mlarimar https://amzn.to/3l5zAfg
XS4000 5% off: it40mlarimar https://amzn.to/3l7k5Uj


Likes
74
Share


@Mr_Maes
Follow
We are officially in full bloom. The have been enjoying 6-7 hours of sun light per day for about 4 days now, then brought back in under the cobs. The girls are all exploding with growth and stacking what I expect to be huge buds.

Likes
28
Share


@Kirsten
Follow
Blackberry Moon Rocks has done really well this week.
She has grown a little bit. I think that was the final stretch.
The buds are looking very nice. There is tight internal stacking, and the buds probably will be quite dense.
Overall, this week, I'm very happy with the progress that we have made, and I'm excited to see what comes next!
Here's what I did this week.
19.8.25:
I watered with 4L of dechlorinated water PH'd to 6.0 with;
💜 1ml Trace
PH: 6.0
PPM: 340
Thanks for checking out my diary for this week and hanging out in the comments 😁💚✌️🌱🤞

Likes
4
Share


@420Germany
Follow
UPGRADE: got a new 4x4 tent, dwc in the back.
How ever back to the strain.
It is still a Salad, no stretch in sight. I have no clue why, but what ever I schwazzed the shit out of the plant in the hopes for some more length, if not its okay, it will perform in the End and it needed to get rid of the leaves anyway.
welp lets see
Likes
86
Share


@Tropicannibis_Todd
Follow
Alright Then
We just hit week 1 and all is well , have to admit she's got some, nice Growth in just 7 days .......
Middle of week I decided to start a little training by pulling her over to the side 👌
Very little water given ,so far and rain water to be used entire growth
Lights being readjusted
👉I WISH GD HAD DISCORD SERVER SO GROWMIES COULD HAVE A PLACE TO HELP AND TALK THINGS RELATED TO GROWING .....👈
👉SO I CREATED ONE ALL YOU NEED IS TO JOIN THE GROWDIARIES DISCORD SERVER !!!!!!!!!!!👈
LINK IS 👉
https://discord.gg/zQmTHkbejs
AND SEE HOW IT PLAYS OUT !!!!!!!
Likes
3
Share


@Mr_nugs_lover_David
Follow
She's looking super gorgeous,I forced her with her sisters on August 3rd into flowering due to the street lights that surround my house,let's see how she how this pheno of Black cherry punch performs! And what type of terpenes we can get 🇺🇲🍒👊💚✌️

Likes
19
Share


@RFarm21
Follow
Boas growmies.
Foi alimentada dia 12 Dezembro. Nutrientes misturados com 2l de água.
Runoff pH: 6.3/ EC: 2.0
Esta strain está a virar roxa, muito linda 😍