The Grow Awards 2026 🏆 


Likes
Comments
Share
@Jorge420
Follow
Some of the 100 Green Poison Mothers are so big already its time for 12/12 and before i will select 10 great Mothers to take Clones and see how they getting, hope all of them are Ladys.
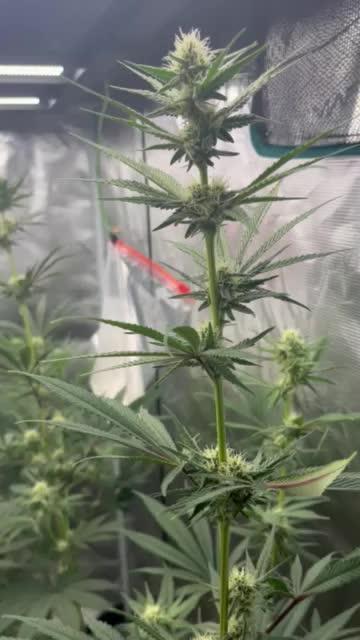
The Automatics are just insane in flowering week 4, big terpenes and strong bud structure

Likes
6
Share
@HandsomeTerpz
Follow
ChatGPT:
🇺🇸 Week 11
--------------------
Humboldt California Haze: This week, she has adapted well to the new light, and you can tell the conditions and temperature suit her perfectly. It’s still a bit of a shame that the nodes have stretched so much, but the flowering is coming along nicely. The scent is truly pleasantly delicious.
🇩🇪 Woche 11
-------------------
Humboldt California Haze: Diese Woche hat sie sich gut an die neue Lampe angepasst, und man merkt, dass ihr die Bedingungen und die Temperatur sehr zusagen. Schade ist nach wie vor, dass die Nodien so extrem in die Höhe gegangen sind, aber die Blüte entwickelt sich wirklich gut. Der Duft ist angenehm lecker.


Likes
Comments
Share
@SchwiftyGenetics
Follow
Update to come later today, but at the moment I just want to save this so I don’t lose it.
Likes
92
Share
@DogDoctorOfficial
Follow
Week 9 - First Week of Flowering 🌸
The dark period has ended, and these ladies came back into the light fully energized and ready for action! It’s just the first week of flower, and they’re all praying, stretching, and absolutely thriving—filling up every inch of the tent. This grow space is officially packed from wall to wall, with each plant competing for its share of light and showing off some of the biggest, healthiest leaves I’ve seen yet! 🌱
A few strategic plucks here and there have kept airflow smooth and light penetration balanced. Those big leaves? They’re a sign of happy, healthy growth. Large leaves help the plant capture maximum light energy, essential during this stage, especially as they start focusing on developing those flowers. When plants grow huge, vibrant leaves like these, it means they’re well-nourished and content in their environment—a true testament to the well-balanced conditions we’ve got going in the tent!
Flowering Parameters 🌡️
Room Environment:
• Temperature: 26.7°C
• Humidity: 63.3%
• CO2: 960 ppm
• VPD: 1.29 kPa (prime zone for flowering health!)
Lighting:
• Light Intensity: 835 PPFD (ideal for boosting flower growth)
• Solution: pH 5.96, TDS 460 ppm, temp 21.1°C
• Medium: Moisture: 100%, TDS: 520 ppm, Temp: 21.6°C
Carbon Filter Installation & Smell Management 🌬️🌱
With the transition to flower, the scent profile is already starting to kick in—crazy for the first week, right? 🌸 To keep everything fresh and under wraps, I’ve set up a carbon filter system. Here’s how it’s working: I’ve connected the filter to my Aerofan, which pulls air directly from the tent. This air is cleaned by the filter and released into the main room, where it then passes through another filter before exiting my space. This dual-filter setup means no scent escapes into the wild, keeping things stealthy and the grow room a peaceful, scent-contained environment. Perfect for anyone concerned about keeping their home free from that telltale aroma! 🕶️🌬️
Enhanced Lighting with Emerson Effect 🌞
This week, I’ve introduced an extra 15 minutes of red light at the beginning and end of each light cycle. Why? Well, this red boost taps into the Emerson effect, enhancing photosynthesis efficiency, especially during the flowering stage. By stimulating a little extra wake-up and wind-down light, we’re mimicking the natural sunrise and sunset experience for these plants, which can help reduce flowering time. Not only does it encourage smoother transitions into day and night, but in theory, it’ll help these ladies finish a bit faster, while giving them a little nudge to build more substantial, quality flowers. 🌇
Nutrient Adjustments 🌱
Now that we’re in flower, I’ve swapped out the Start Booster for P-Boost and TopBooster to specifically support flowering needs. Here’s why:
• P-Boost brings in additional phosphorus, vital for energy transfer and cell division as the plant channels more resources into budding sites.
• TopBooster supports the flowering phase by improving flower quality and density, helping to build those big, aromatic buds we’re after.
These changes bring the nutrient mix in line with what’s most beneficial at this stage. All this precise dialing in is easy to manage thanks to the TrolMaster system. From pH to nutrient scheduling, the TrolMaster ecosystem and ThinkGrow LEDs have been the ultimate teammates in this grow journey, giving me real-time data, fine control, and peace of mind. 💯
(Not introducing UV light just yet, but stay tuned as that’s coming soon for an added boost!)
Looking Forward 🌟
Next week, we’ll be upping the reds, giving us an even greater chance of activating those flowering signals for a smoother, faster transition through the cycle. I’ll keep tweaking and fine-tuning every parameter to make sure these ladies get exactly what they need to thrive.
Big thanks to the TrolMaster system for keeping everything in balance and optimized, along with the supportive Grow Fam following this journey! Your enthusiasm, advice, and support are a huge part of this grow’s success. Keep following for more updates, and stay tuned for what’s next! 🌿✨
P.S. Deep Dive: TrolMaster’s MBS-S8 CO₂ Sensor & Smoke Detector 🚨
The MBS-S8 CO₂ Sensor from TrolMaster is a powerhouse for growers, especially when it comes to optimizing plant growth and efficiency in a controlled environment. This sensor continuously monitors CO₂ levels and integrates directly with the TrolMaster ecosystem, giving you real-time data on CO₂ concentration. Ideal levels of CO₂ can significantly boost growth and yield during certain stages, so understanding and managing CO₂ is key. With the MBS-S8, I can control CO₂ levels precisely, keeping them within the optimal range for photosynthesis. This sensor is a game-changer because it adjusts CO₂ delivery automatically, giving plants exactly what they need without any extra monitoring from me.
Meanwhile, TrolMaster’s Smoke Detector is an essential safety device, especially in spaces with electrical equipment, lights, and heat-generating components. This detector can be set up to alert me instantly via the TrolMaster app if any smoke is detected, allowing me to respond immediately to any potential issues. Fires and smoke are rare in controlled grow setups but having this safety measure provides peace of mind and lets me focus on the plants without constant worry. It’s an incredible tool for any grower prioritizing safety and proactive monitoring.
Discount Codes so you can save big on your next check out 💚💚💚
Kannabia - DOGDOCTOR 30% off
SeedsmanSeeds - DOGDOCTOR 10% off
CannaKan- DOGDOCTOR 15% off
terpyz.eu - DOCTOR 15% off
The Neutralizer - PORKIT5-DOG 15% off
As always thank you all for stopping by, for the love and for it all , this journey of mine wold just not be the same without you guys, the love and support is very much appreciated and i fell honored and so joyful with you all in my life 🙏
With true love comes happiness 💚🙏 Always believe in your self and always do things expecting nothing and with an open heart , be a giver and the universe will give back to you in ways you could not even imagine so 💚
Friendly reminder all you see here is pure research and for educational purposes only
Growers Love to you all 💚💚💚


Likes
4
Share
@XxDetermined100
Follow
The plant was easy to grow overall .. it grew fast and a little on the tall side which had me nervous but I was able to raise the lights up just enough to finish, so it all worked out in the end. buds came out hard and frosty no complaints . This was a freebie seed too! didn’t expect it to come out as fire as it did man was i wrong. Straight fire 🔥
Ran into root rot in the beginning of veg but the great white and hydroguard saved my ass.🙏


Likes
37
Share
@masterofsmeagol
Follow
8/26 FED TODAY. 2 GALLONS TO THE GARDEN. THE WATERING CAN I USE IS ABOUT A HALF GALLON SO THAT'S WHAT A NORMAL PLANT HAS BEEN GETTING. Wow. What a week I had last week. I'm hoping things are going up from here. It's overcast but we have a 90% chance of rain. Thunderstorms. I'm wondering if I should put my back tarp up. The wind doesnt seem too bad so I'll play it by ear. The remaining plants seem to be doing good to me. I wanted to let the soil dry out but I NEEDED to feed. Buds are popping up everywhere and increasing in size. Earwigs still seemed to lollipop the interior branches (mostly larfy stuff but still). I attached a picture so people can see what I mean. I'm getting hit on all fronts but I'm still kicking! I'll update as I go. Some pictures won't upload. I'll have to do it later. Oh and my ph is on point for once. I tested all plants a bunch of different places and readings were 6.6 to 7.3 at the highest.
8/27 Rained last night but not as bad as I thought it would. We are supposed to have some good weather coming up so I'm hoping my medium will get a chance to dry put. Still liking the liquid kool bloom. I'll up the dose next feed. I'm going to need to do another application of plant doctor this week too. It's about time for a BT application as well. I see moths flying off when I check early in the morning and I've observed some pillar damage. I'm slightly worried about soul going anaerobic. The color of the gdps are too lime green for my liking but our weather has been horrid. I never remember having to deal with shit like this. The branch that was all drooped with fusarium wilt has one (the closest to the stalk) shoot that has repaired itself. That gives me hope but I really should just amputate that branch. I guess I'm just nervous because of the reaction I had last time. Granted I've cut tons and tons of branches off in the past and prune things they didn't have whatever pathogen these do. Septoria is still there on one of the GDPs but it seems to be doing okay. I'm SLIGHTLY worried about the change in color on my big NYCSA. It's lost some of its vibrancy. I think it's kinda normal. I'm sure it has some PM (which I'm hoping plant doctor and the silica will help repress) but I think it will be a heavy yielding plant. Sun's poking out. The little clones I took are exploding in growth. They might not yield much but I'm glad I didn't just chuck them like I was going too.
8/28 Things are still looking good! We got some sunshine yesterday and the sunshine out today. Buds are really starting to form and colas are taking their shape. I'm slightly concerned with the coloring of my NYCSA but it started flowering later than the others so senescence may be behind. I may have lost half this year but looking at other diaries and attitudes of soms others I'm pretty fucking lucky. I didn't have much time this morning so I'll update later. I need to keep up with my IPM and do BT treatment and follow up with a second dose of plant doctor.
8/29 Super rushed morning. Only had time to shake the dew off the plants and snap a couple quick pictures. I lowered the growbig this week. I think that was a mistake. Plants are flowering like crazy. My NYCSA doesn't seem as vibrant green as it was. I may up feeding to twice a week or at least give them a little growbig if I need to water. I want tge medium to stay dry for a while. I also needcto cut that dead branch. I'm just afraid of a situation line before where the whole plant died. My anxiety disorder really hampers my growing ability. I qorry far too much. I should just cut it off right now. I've also seen pillar damage so I'm going to need to do a BT spray. I have the other organocide that's the 3 in 1 but I can't use it in flower. I'll just have to stagger applications. Either that or do another root drench or "sprench" and a foliar with the BT on another day. I have WPM on the garden and I'm pretty sure septoria. This plant was perfect though. I'm afraid it might be getting sick. Either way it'd an extremely resilient strain. The little 9lb kush I have in a 3 gallon is flowering the fastest. It really fuckihgcsucks I lost those massive plants. Judging by this "clone" I took off the other clone (I know) this strain wouldve been the first to finish. EDIT: Went back over to check the medium and do some slight defoliation. I inspected the stalks and the dead branch. The dead branch has a small indent (from breakage, insects or rot) where the branch connects to the stalk. I've seen this before but had no problems. However THIS branch seems to he coming out of the stalk RIGHT where the rot is. I cut the other one off that ENORMOUS 9lb Kush and it was dead a few hours later. I talked to my father who has degrees in biology and forestry (among other things) and he said he couldn't really see the harm in leaving it. I am worried that a cutworm mightve gotten in bit I don't see any evidence of any borer insect. Under that stem there is more "bark" and other stuff but nothing like a borer makes. I'm going back over tonight to treat with either BT or Plant Doctor. Haven't decided which. Probably the plant doctor.
8/30 Didn't have time for pictures. Large NYCSA NOW has fusarium wilt. Either I'm the most unlucky grower in our area or my plants got dosed with fusarium. After the research I've done I've cone to the conclusion that this season will be a complete loss. Maybe the two small separate cuttings will make it through flower. The rest is just a waiting game to see if fusarium kills it before they finish flowering. Even if it doesn't then I don't know if I would want to smoke the flowers. I'm shopping online for grow equipment. I'm going to do some indoor this winter. Wow this feels like a kick in the nuts. I'm a good dude. Like I said I'm just either the unluckily grower around or my plants had a little help. Who knows. EDIT: I treated everything with Pkant Doctor again. I'll feed tomorrow and see if some miracle happens and I actually get something
8/31 I added a few pictures so folks can see what fusarium looks like and how it progresses. As you can see it killed a branch and is progressing to the next and so on until the plant is typically dead. No need to get too scientific on the mechanism of action. I FED 2 gallons today. Still kept growbig low dosing.


Likes
7
Share
@WeedleyScott
Follow
Die Pflanzen erholen sich sichtlich von den Strapazen der letzten Woche und zeigen nun eine gesunde Farbe sowie zahlreiche neue Blätter.. Ich gieße Aktuell mit 1L Wasser pro Pflanze und treibe sie nach Außen via Low Stress. Wenn diese am Rand sind lasse ich die Pflanzen an höhe gewinnen um eine schöne Krone zu erhalten.

Likes
60
Share
@I_and_I
Follow
Start of week 6 flower, banners going strong, massive sativa pheno is starting to fatten up, still a long way to go with it
Smaller more indica bushy pheno you can see will be finished sooner, she's starting to glisten from the trichomes forming
Hadn't really got a proper whiff of the banner smell till now, damn it smells superb
😎💪
Likes
Comments
Share


Likes
42
Share
@noodle
Follow
Week 5 already? Plant is struggling to catch up after such that two week lag period where it didn't do a thing. Still, things are starting to get encouraging so now watering every day at 2 hours after lights on.
Added a webcam to the tent to watch what is happening. Noticed that at 12 hours after lights on, the leaves would start to wilt. Flooding at that time didn't have any noticeable effect before lights out, so I added a flood at 9 hours in (half the period). Pushed the wilting back to 14-15 hours after lights on, and just a little now, but still not completely solved.
Grew from 2 inches to 7 inches this week!

Likes
7
Share
@SzkolaZiola
Follow
Fifth week completed. They are showing more and more deficiencies, so I starded feeding more.
I also got Bluelab soil pH meter - currently they are around 6.2 - not bad - week ago runoff was adound 5 so I was worried - but 2 waterings of pH 7.2 did the trick. They are back on track.
I hope they will eat fast enough to save more leaves till the end - I want to keep them 3 or 4 more weeks.
Buds are bulking nicely - they get fatter by the day. And they smell amazing - even with my horrid temperatures - the heat wave is real - AC does not help much though without AC it would be like 40*C in the tent 😵
Till next week! Happy growing everyone! 💪
Likes
7
Share
@SB1993Cannabis
Follow
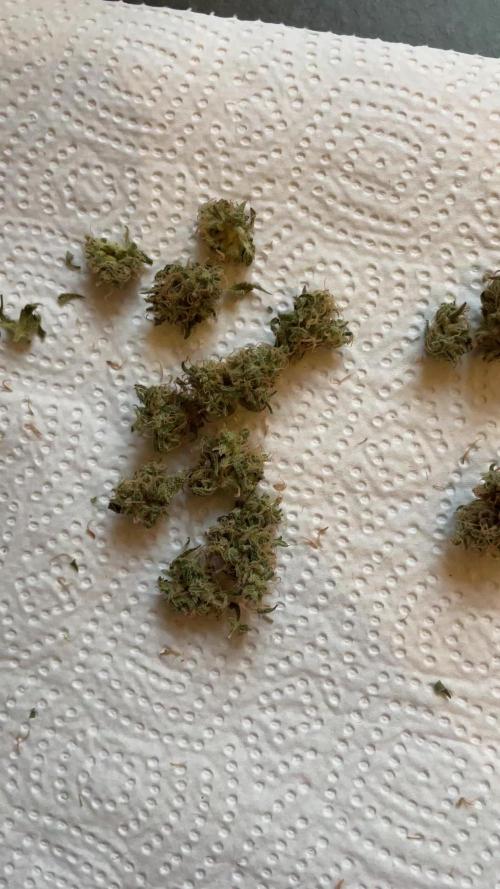
Week 10, and Syrian is the first plant to be harvested. Just gave her a trim, and now she's on to drying.
Likes
12
Share
@GrowGuy97
Follow
Day 14 - 3 out of 5 are growing a little slow/weird, all 5 seem to be growing kinda slow compared to my first run of autos but hopefully everything does good🤞🏼 Happy growing friends🌱✌️🏼
Day 17 - Still have 2 extremely weird looking ones, really hoping they bounce back🙏🏼🤞🏼
Day 18 - 3 out of 5 still going strong, the other 2 havnt changed much!
Likes
53
Share
@MistaOC
Follow
**************
25.03. Day 58
Flower Day 18
**************
Got some issues with thrips and one plant have some Problems with Calcium deficit. she now gets 0.5 more calmag than before.
And all ladies get some neem oil.
// RO Water // TEMP 20C // PH 6,4 // CalMag 2ml // 0,1ml Regulator // 0,6 ph- //
**************
28.03. Day 61
Flower Day 21
**************
// RO Water // TEMP 20C // PH 6,4 // CalMag 2ml // 0,1ml Regulator // 0,6 ph- // Neem Oil

Likes
Comments
Share


Likes
18
Share
@Borndlkramer
Follow
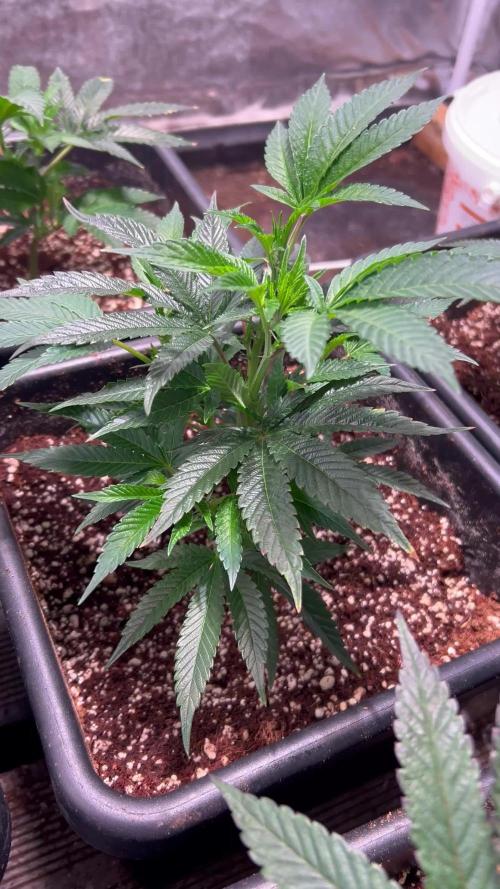
Die Pflanzen fühlen sich pudelwohl in den 15 Liter Töpfen. Jetzt habe ich alle vier Planzen getoppt.