


Likes
Comments
Share


@MadeInGermany
Follow
Flowering day 42
since time change
to 12/12 h .
Hey guys :-)
A lot happened this week :-).
The buds develop really nicely .
The scent wafts through the whole room when I open the tent 💚.
This week was poured 3 times with 1 l each (nutrients see table above) This week there was the maximum amount of fertilizer, which will be slowly reduced from next week :-) .
Have fun with the update and stay healthy 🙏🏻
👇🏼👇🏼👇🏼👇🏼👇🏼👇🏼👇🏼👇🏼👇🏼👇🏼👇🏼👇🏼
You can buy this Nutrients at :
https://greenbuzzliquids.com/en/shop/
With the discount code: Made_in_Germany you get a discount of 15% on all products from an order value of 100 euros.
👇🏼👇🏼👇🏼👇🏼👇🏼👇🏼👇🏼👇🏼👇🏼👇🏼👇🏼👇🏼
You can buy this strain at :
Clearwater Seeds
Water 💧 💧💧
Osmosis water mixed with normal water (24 hours stale that the chlorine evaporates) to 0.2 EC. Add Cal / Mag to 0.4 Ec Ph with Organic Ph - to 5.8 - 6.5
MadeInGermany

Likes
17
Share

@DE_BW
Follow
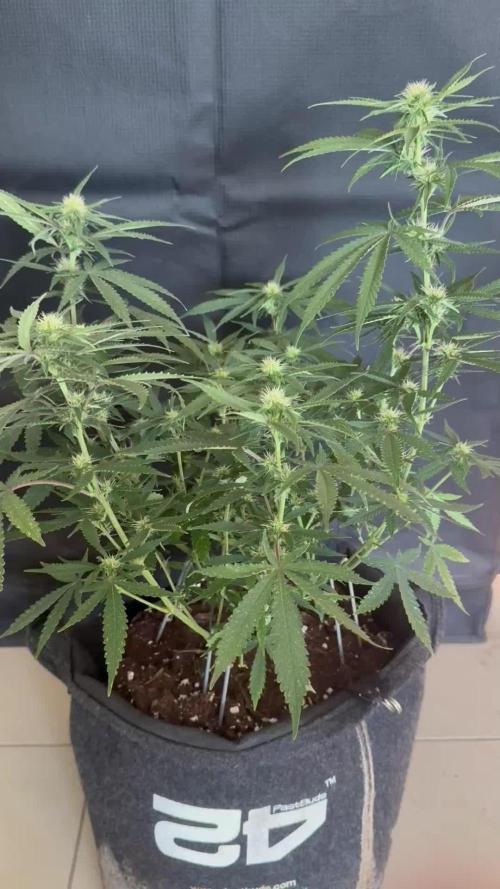
Flower Week 2 – Bud Sites Everywhere
Overall, the Pineapple Kush continues to develop really well. Unfortunately, the pest problem has exploded this week, and the feeding damage is becoming increasingly visible. I really hope it won’t affect her development too much.
Apart from that, she is looking great. She has developed a beautiful number of flowering sites across the entire plant, and the first buds are forming nicely. Her stretch also seems to be coming to an end, leaving me with a nicely branched structure and plenty of promising tops.
Now I’m hoping she can simply focus on building flowers despite the ongoing pest pressure.

Likes
7
Share


@BigUncGotGaz
Follow
(Day 36veg) - (Jan7)
On this week I prepared my feed mix with 8L of distilled water & officially started my AutoPot system
I lost one side of my top on pheno #1
So I decided to top my “to be cloned” branches & just go with toppings only
for this Grow.
Pheno #2 Performed a topping on each top layer.
Expecting 8 new tops
Pheno #3 sent away to another growbud

Likes
3
Share


@Meds4MeNotYou
Follow
Heavy defoliation to get some light and air in to developing buds. Currently feed every 3 hours during light on with 1 feed just before lights on because they dry out to much if I don’t feed once overnight. Tricombs showed up as well as more smell.
Also got a new batch in from seedsman. With some going in paper towels tonight.

Processing
Likes
141
Share


@Eyeduno
Follow
Flushing the one plant this week and the others next week two week flush then


Likes
53
Share

@TruTraTri
Follow
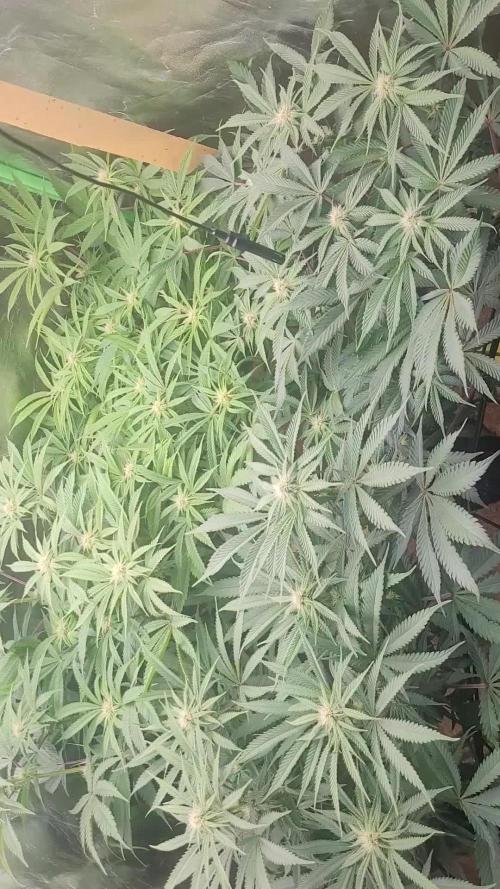
Defoliation. Took 2 small branches of Lexx and some more of Stanley.
Lexx and Kai are very similar.
Zev is a little bit "lighter".
Stanley is smaller with more branches. Well, I don't have the best access to Stan.
Canopy is not perfect but more or less even. Not too good visible with lights on, but they are slighty too green for my taste.. also fine.
Still got some height left to adjust. Final distance to lamp will be 35 cm, so they can grow a little - then I'll keep distance, still 15-20 cm left to raise the lamp. But I think stretch is more or less over.
Wattage 200W until BW 6-7 (😂😂😂😂).
Likewise to photography I am not too good with video. 😎
“I am still unable to locate the Stripper crew, Stan.” — Lexx
“Perhaps in the Dark Zone, I will be light.” — Kai
“I should be captain because I am the captain.” — Stanley Tweedle
“I used to want to die, but now I want to live.” — Zev Bellringer

Likes
1
Share

@Cannabinatek
Follow
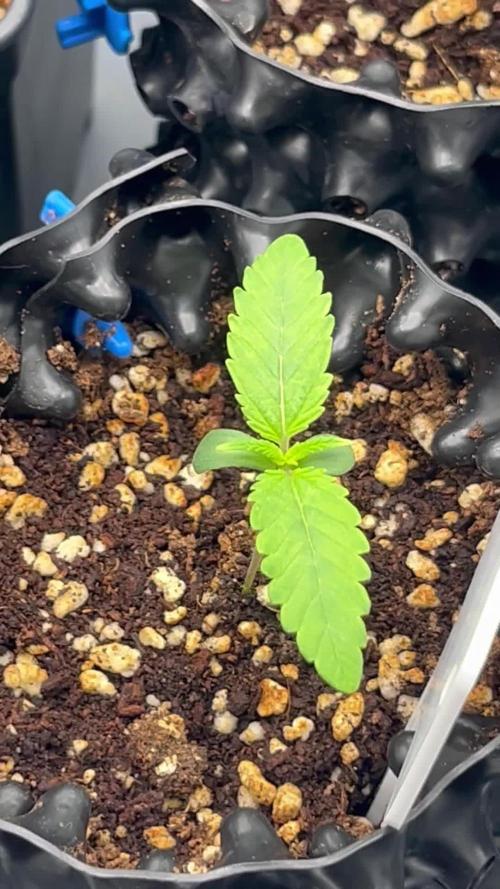
Uma das sementes atrofiou nos primeiros dias e já foi substituída por outra blue skunk… Aguardemos novos desenvolvimentos 💚💚💚. Tudo a andar


Likes
3
Share


@Lazuli
Follow
Im not a soil guy but im happy this plant got such huge rockhard buds i didnt expect result like this in just soil, i fed her maybe 4 times during flower only.


Likes
4
Share


@Alejangrow
Follow
Took well too last weeks flush. 💧
Did some defoliating to allow light deeper into the canopy. ☀️
Putting back on recommended strength nutes.💉

Likes
3
Share

@skipakz
Follow
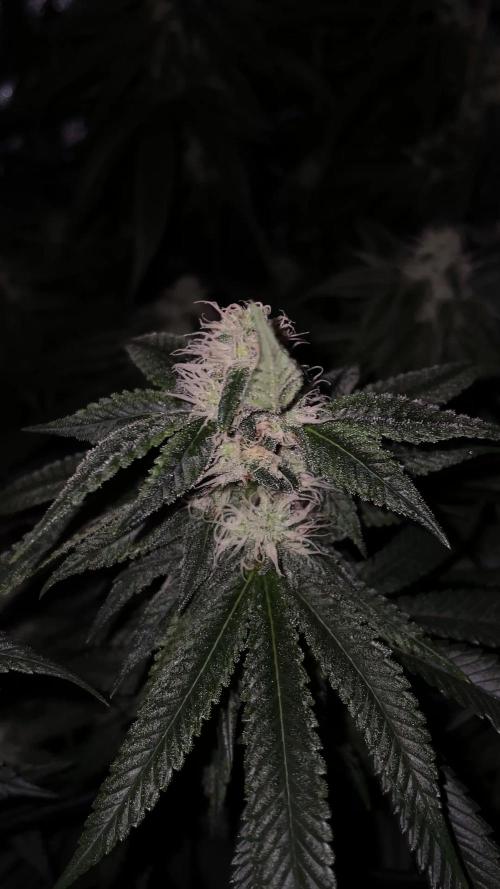
Eine Pflanze Mitte der 11. Woche teilweise weggeschnitten (Pflnaze hing in der Blüte stark hinterher, war seit Steckling heller als alle anderen trotz gleichem cut, sah ungesund aus, wenig trichombildung etc.
- man siehts auf manchen Bildern an den Blättern) so kann ich den freigeschnittenen Platz für untere Triebe nutzen… seit letzter Woche nun Athena PK und Calmag dran. Habe nochmal ordentlich entlaubt + nutzlose Blüten weggeschnitten das die unteren Triebe nochmal richtig Gas geben können.
Processing
Likes
16
Share


@Andres
Follow
waiting to see if it has any trait of a seed of sweet seed ... just wait...


Likes
5
Share


@Jumbotron
Follow
I didn’t expect this strain to show this much color looks amazing almost done.
Processing
Likes
3
Share


@macrocefalo
Follow
The ladies were flushed on the 68th and will be flushed again on the 71st. Analyzing the resin with a magnifying glass, I think we will not have a harvest before the 75th. B3 this blooming I think she will be looked after with more than 80 or 83 days.
Likes
19
Share


@GoldenWeedGrower
Follow
Legend
Timestamp: 📅
Measures: 🛠️
Water: 🌊
Actions: 💼
Thoughts: 🧠
Events: 🚀
________________________________
📅 D36/V34 - 28/09/23
🛠️
🌊
💼 New LST - Made Timelapse of the grow
🧠
🚀
________________________________
📅 D37/V35 - 29/09/23 -
🛠️
🌊
💼 LST on the younger lady.
🧠
🚀 Marlene Senior is pre-flowering
________________________________
📅 D38/V36 - 30/09/23
🛠️ EC raised to 1.2 pH is stable to 6
🌊 Added 5L and nutes
💼
🧠
🚀
________________________________
📅 D39/V37 - 01/10/23
🛠️
🌊
💼 LST again on the younger and HST on her main bud
🧠 The bigger one is ok for now, I'm going to let her grow normally a little bit
🚀
________________________________
📅 D40/F01 - 02/10/23
🛠️
🌊 Added 2L water and nutes
💼 LST on Marlene Junior and a little bit on the older as well
🧠
🚀
________________________________
📅 D41/F02 - 03/10/23
🛠️ EC and pH are both stable
🌊 Added water 2L
💼 Made timelapse of the last nights
🧠 She's drinking a lot, I need to understand how to manage the flowering stage
🚀
________________________________
📅 D42/F03 - 04/10/23 -
🛠️
🌊
💼 Big Defolation and strong LST
🧠 Maybe the last training before full flowering stage
🚀
Likes
19
Share


@Drtomb
Follow
Temps have go a tad higher as the ambient temp outside has increased a little. Should start to see perfect temps again in the next week as temps outside begin to drop beow freezing. According to my previous grow pictures i should start to double and triple the colas in size over the next 2 weeks. Stay tuned!

Processing
Likes
84
Share


@Silverback_Guerilla
Follow
SATURDAY:
Today I mixed up 5g of nutes for my bloomers and douched them. I'll let them dry completely for 2-3 days, then flush them a bit with a little boomerang and calmag.
I ordered a Gorilla lite-Line High CFM kit last week and received it today...fits my tent poles perfectly. This really works to keep the tent walls from collapsing in too far, and I was able to use one pole to rig a shelf to put the fan. That freed up a good bit more floor space.
Yesterday, I ordered a 4 x 4 Vivosun tent and inline fan, and a 1500w (5 x 300w COBs)..this tent will be for vegging autos to put
into the flowering tent as others are harvested, as well as a place to veg photos that I encounter before they are moved outdoors. I'll probably end up ordering another of the same lights, but for now I have a few supplemental lights I can use...blues and daylights.
I'll drop a few WW's or CC's as soon as that stuff arrives so they are big enough to occupy flowering tent space in a few weeks.
SUNDAY:
I spun everybody around and misted with spring water a couple times throughout the day and formulated my plan for ventilation of the new tent which should be here Tuesday. I plan to hook the exhaust from my 4' x 5' tent as fresh air intake in the top of my 4' x 4'.
By doing so, all that good CO2 that is exhausted from the flowering tent will rain down over the veg tent inhabitants before being exhausted from the bottom of the tent. I don't think heat will be a problem in the new tent with so much less light, so I'm optimistic that it will work just fine.
I may even route the exhausted veg tent air back into the bottom of the flower tent, giving the girls another shot at the CO2 enriched air....we'll see...
MONDAY:
Got the room ready for the new tent which will arrive tomorrow, misted, rearranged, and whispered sweet nothings to all the girls. Tried out my new macro lens...need practice..
TUESDAY:
Mixed up 7.5 gallons of nutes for the bloomers...ceased open sesame and began beastie bloomz.
Assembled my new 4' x 4' Vivosun tent and set up its ventilation and lights.
I implemented my idea of exhausting the semi-cool/CO2-rich air from my flowering tent into the top of the veg tent. Only needed 5' of flex duct, so it's got great airflow..no need for another intake fan...yay!
Tomorrow I'll get the 6" x 6" x 6" 'Y' duct and connect my 6" booster fan to it. The booster fan will still be sticking into the flower tent, drawing 70 degree a/c air into the tent via direct flex duct connection, but will now be mixed with the exhausted air from the veg tent. I'm probably gonna keep the ventilation in both tents running once I've got a fully closed-loop system. The only reason I was shutting down the ventilation was so that CO2 would build up for 4 hours, but even if it gets exhausted from the flower tent, whatever the veg tent inhabitants don't consume will find it's way back to the flower tent in under a minute...and so on, and so on..
I spent a while putting together a lighting schedule that will allow me to decrease temperatures while still keeping optimal color spectrums and maintaining good light intensity. Had to empty the tent so I could get to everything...what a pain!
---------------------------------------------------
FLOWERING TENT
Timer #1 --- exhaust, intake (digital timer)
on - 6:15am
off - 2:15am
Timer #2 -- primary blurple light (manual timer)
on - 6:30am
off - 10:30am
on - 11:30am
off - 3:30pm
on - 4:30pm
off - 6:00pm
on - 6:30pm
off - 8:30pm
on - 9:30pm
off - 2:00am
Timer #3 -- all 4 daylight cobs (manual timer + power strip)
on - 6:00am
off - 12:00pm
on - 12:30pm
off - 6:00pm
on - 6:30pm
off - 2:00am
Timer #4 -- all 4 overhead reds, sub-canopy tubes, side strip lights (manual timer + power strip)
on - 1:00am
off - 6:30am
on - 10:30am
off - 11:30am
on - 3:30pm
off - 4:30pm
on - 8:30pm
off - 9:30pm
Timer #5 -- all 4 miracle LED (flowering) in corners, corner, daylight supplemental
(manual timer + power strip)
on - 6:00am
off - 10:30am
on - 11:30am
off - 3:30pm
on - 4:30pm
off - 8:30pm
on - 9:30pm
off - 2:00am
----------------------------------------------
VEGETATIVE TENT
Timer #1 --- primary light and exhaust (manual timer + 3-way splitter)
on - 6:00am
off - 2:00am
Timer #2 --- blue supplementals (manual timer + power strip)
on - 2:00am
off - 6:00am
on - 10:00am
off - 2:00pm
on - 4:00pm
off - 8:00pm
Watching temps closely....
------------------------------------------
WEDNESDAY:
My new lighting schedule seems to be working..high was 87 today, and it dropped into the upper 70's last night...schweet!
I'm pretty confident that when I get my ducting in on Friday and have the closed-loop ventilation for the two tents completed, that it will drop the temp even further and I'll not be wasting so much precious CO2...and then I can ADD MORE LIGHTS and begin with renewed heat mitigation efforts!!! I'm really wanting to pump up the deep reds and maybe far reds during their 4-hour "nighttime" ...maybe more low-wattage sub-canopy tube lights, too.
I guess that the girls really loved the Beastie Bloomz...much fattening happening...
It was so nice being able to move Kushpialidocious into the new veg tent...more space, better canopy penetration.
THURSDAY:
Spun everybody around and misted with spring water..soil still moist.
Temps held pretty much...86-87 all day..i changed the overhead light timer a bit so it kicks on a half hour earlier and as a result temp climbed to 89-90 for about 15 minutes, but quickly dropped to 85 when the 4 COBs turned off... when the big blurple and 4 miracle leds in the corners ( + the extra 40w daylight supplemental in my darkest corner) turned off 15 minutes later, it quickly dropped to 79.....15 minutes later...74...15 minutes later...72!!!
"By Jove, I think he's got it!"
I might actually be able to harvest these fuckers with all terpenes intact.👍
On second thought.😎..I'm gonna dial back the reds a half hour again (and maybe the 4 COBs), because I'm going to try switching out the 40w Sansi bulb for my extra 100w Bridgelux/Epistar 3500k COB light. (MORE POWER!) I really don't think it gets very much, if any, hotter than the Sansi 40w. I'm really hoping to keep it below 90 at all times and as close to 70 as possible at night (red zone).. new temperature test will be tomorrow.
It will also be the first run with the closed-loop ventilation system in place...all ventilation will remain on at all times in both tents, and based on my rudimentary calculations, my 2 x 6" inline fans and the 6" duct booster can move enough air to circulate through both tents about 240 times per hour. I figured that like this:
The 3 fans move 1,010 cfm. The two grow spaces total 252 cu ft (4 x 5 and 4 x 4) There is just over 12 feet of ducting involved in the loop, which is about 6 additional cubic feet. Correct me if I'm wrong...I'm not an HVAC guy..
The A/C kicks on, on average, every 12 minutes, so there will be a regular supply of cool fresh air injected into the mix as well.
My hopes are high! (and so am I)
One other interesting thing is that the addition of the 4-5 gallons of frozen water in jugs makes the substrate temp stay in the lower 70's all day long..I'm hoping the roots at least get the signal that "Winter is coming."
FRIDAY:
Well, shit. My closed-loop ventilation system didn't work quite right...evidently, I should have studied up on calculus.
Rather than the negative pressure in both tents that I expected, both tents swole up like they were snakebit..(positive pressure?)..and temperatures in both tents started to rise...no pinche bueno.
I'm sure it's my math that's off..., for example, I didn't account for the fact that the flowering tent has a carbon filter which decreases the cfm's considerably, and the intermittent flow of central air is a variable that I am also uncertain how to factor.
So....I scrapped the idea until I can achieve truly equivalent intake and exhaust in both tents.
HOWEVER...I did discover a trick that I will dub a "heat siphon," which is a definite improvement, but only in the veg tent.
When I disconnected the flex duct from the 6" inline fan(exhaust) in the veg tent, I had intended to stub it off for now. I noticed that there was considerable "back-flow" caused by the duct booster intake fan in the flowering tent. So, the duct booster draws air from the a/c register, AND from duct which I've placed in the veg tent immediately above the light. I moved the 6" inline fan in the veg tent to to top of the tent and connected a 3' piece of duct to it that is also placed immediately above the one side of the light, so heat from the veg light is ejected into the room and partially drawn into the flower tent where it is mixed with cool a/c air, carbon scrubbed, and sent to the veg tent raining the unused CO2 down over them at about 85 degrees, which is considerably cooler than the normal tent temp.
It's still not perfect..
Because the flowering tent is absorbing some of the heat drawn of the veg tent light, I'm up 3-4 degrees on average in the flowering tent, which is not what I was hoping for at all...it's now hitting 92 degrees in the flowering tent at some points during the day, and hovering at 79-80 at night, so I'm gonna have to revise the lighting schedule again..

Processing
Likes
1
Share


@Ferenc
Follow
Day 57 : 600W LED, 18 hours on 6 hours off light schedule, the same with ventilation. Water intake 200 ml per day per plant, fertilization remains the same on Monday, Wednesday and Friday Biobizz Family and on Tuesday Thursday Saturday bat guano and Epsom salt. Humidity approx 50%.
Day 58: I removed all the LST stuff so no more elastic bands and hooks.
Day 62: Plants are fine Critical Orange Punch and Sour Stomper will be the quickest in this group. Lemon Zkittle' buds started getting thick...


Likes
29
Share


@TightNugs
Follow
Starting to pack a bit of weight now,no problems,steadily feeding.She was only 7 days in veg so happy with the progress.All good 🤞🍁