The Grow Awards 2026 🏆 


Likes
7
Share
@OwlGang_Uk
Follow
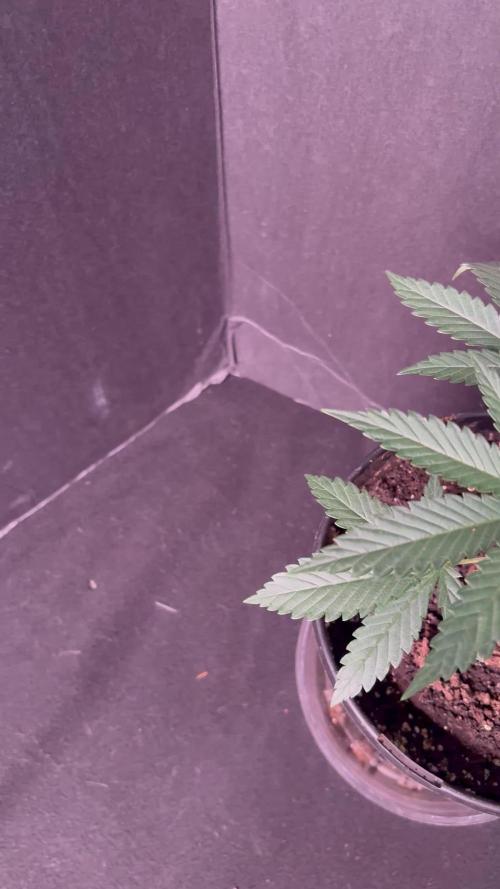
Week 8 - Defoliating - I Know You May Be Thinking I’m Overdoing It But When The Stems On The Leaf Turns Purple That’s An Indication That For Some/Most Plate That It Can Be Plucked Off.

Likes
2
Share
@Ninjabuds
Follow
It’s day 27 from seed for all the plants in the photo sea of green. Let’s call it the battle of the strains summer 2025. All of the plants are starting to have visible differences. I’m already starting to tell witch plants are more sensitive than others.

Likes
12
Share
@CheeRz
Follow
We finally made it ladies and gentlemen. It is an honor to introduce you to the beautiful Lady Wedding Cake and the beautiful Cookies Kush twins. Even though I'm pretty sure cookies kush #1 would have needed another week, she had to go under the knife,too. The ladies finished just in time for the super bowl 🏈. We need the space in the tent asap because of the Eternity Grow Cup. Next Stop Zami Runtz and Blue Gelato 41
Likes
3
Share
@BLAZED
Follow
Week 4 (8-7 to 14-7)
8-7
Temps: 20.7 to 26.1 degrees
Humidity: 49% to 57%
9-7
Temps: 22.2 to 27.5 degrees
Humidity: 52% to 65%
10-7
Temps: 22.8 to 27.4 degrees
Humidity: 51% to 65%
11-7
Temps: 22.2 to 25.9 degrees
Humidity: 47% to 56%
12-7
Temps: 19.9 to 25.9 degrees
Humidity: 47% to 62%
Watering: Both 1000 ml.
13-7
Temps: 19.9 to 25.1 degrees
Humidity: 47% to 60%
14-7
Temps: 19.9 to 26.6 degrees
Humidity: 45% to 60%
Watering: Both 1000 ml.
Today i topped both plants!
Light set to 60% strength with a distance of 60 cm.

Likes
33
Share
@Belverde
Follow
Welcome growers & co.
I have grown two specimens of this genetics.
One grew it maintaining its original structure, where a long central top prevailed .... but quite loaded even below ..
The other one I decided instead to cut the tip, making a simple topping, thus creating seven / eight main peaks
I highly recommend topping or LST with this strain as she responds very well to training and is a great producer
The aroma is also definitely 100% Blueberry

Likes
22
Share
@valiotoro
Follow
Sooooo impressed with the size & quality of the buds😳
Super dense & sticky✂️
The smell is sweet fruity mix berries🤤🍓
Likes
21
Share
@darb35
Follow
Day 22 - The girls are very healthy and very green, they have huge fan leaves
Hopefully no trimming, just leaf tucking, and they should be good 🌱
Likes
16
Share
@Dunk_Junk
Follow
Wow she's took to the skies this week!
Grown another 27cm vertically!
💪
Absolutely marching through flowering! Very fast!
Buds are developing well.


Likes
23
Share
@HideAndFly420
Follow
Great réaction to stress.
Flow exactly started thé 28th day.
Let’s see.
Started bio bloom too.
Likes
3
Share
@stolen_cheese
Follow
Leicht den Überblick verloren. Wurde krank, dann viel Arbeit und keine Zeit gehabt. Die Pflanze hatte zwischendurch mal Probleme, weil ich ihr viel zu viel Wasser gegeben habe und das hat sie locker eine Woche gekostet. Egal, jetzt sieht sie fit aus und geht in die Blüte.
Sie hat 1x 100 ml FertiPlus 5-1-5+ bekommen und eine hohe Dosis Pflanzengeflüster, das hat sie wieder auf Kurs gebracht.
Trainiert wurde nur durch gezieltes Entlauben einzelner Sonnensegel und mit LST Clips
Tag 34: Insgesamt sieht die Pflanze wieder super aus, vielleicht etwas klein fürs Alter. Heute wurde auch stark trainiert.
Likes
30
Share
@WeWantItToGrow
Follow
This week has been such a gift! I have learned so much about proper care for a plant I had no idea how little I knew sitting down and observing these majestic trees produce such a potent flower has really humbled me. Premium cultivars strain has shown resilient and self sustaining easy to grow traits that it is hard to mess up. (Which I’ve done a few times lol) Notice the trichomes (I put the zoom lens on and got up in there so they could be better seen the bud itself is slathered in them ! This is going to be an amazing smoke! Also looking at the structure of the bud it’s self it has volume very full bodied bracts with pistils throughout It’s just an all-around beautiful thing to observe

Likes
2
Share
@fabialien
Follow
Hidratamos por 24 hrs y pasamos a papel para continuar con la germinación.


Likes
11
Share
@Chubbs
Follow
Blue Dream Auto
Week 2 of Veg
The 2 of these girls are handling the heat wave we've had this week like Champs. I have upped the water feeding to 32oz per day so they seem to be liking it. I have noticed a little curl in the bigger fan leafs but should be fine.
All in all Happy Growing everyone.
Likes
19
Share
@Sublyme_ness
Follow
week end. 26/2 - day42 technically this week has seen the plant definitely start to turn its effort to flowrring. the bb plants have interesting lookong pistils inasmuch as they are almost plumper and stockier it seems than other strains ive seen. the leaves of both my bbs are almost a mint green with the slight red tinge to the stems; at first i thought it was a cause for concern but apparently not... gave a half strength feed followed by more plain water a couple days later.. next time imma hit it hard..
Likes
23
Share
@Zuppler
Follow
🦆**Grow Report by Zuppler - Week 6 Flowering Phase**🏆🏻
Ayo, what’s poppin’, fam? Zuppler back with that Week 6 flowering update, straight from the heat. We hittin’ the late stages of flower, and the girls are still stackin’ up them buds, but I had to make a few adjustments this week. Caught a little leaf burn – nothin’ major, just a sign the nutes were hittin’ too hard. So I dialed it back a bit, gave ‘em a lighter mix to keep things in check.
I also switched things up with the feed – swapped out Big Bud for Overdrive. Figured it’s time to really push these girls through the finish line, and Overdrive’s gonna help bring out that extra weight and resin in these last weeks. So far, they’re takin' it well, no stress.
The buds are still thickening up nice, and trichs are gettin’ cloudier by the day. The whole grow room’s smellin' loud now, like someone cracked open a stash. Temps and humidity still locked in, keepin' everything balanced while they finish out strong.
We’re cruisin’ towards the end, just lettin’ these ladies do their thing. With the nutes adjusted, I’m expecting them to bounce back from that slight burn and finish up real clean. A few more weeks, and we’re lookin’ at a solid harvest.
Zuppler out. Almost there, JoeNimbal!

Likes
6
Share
@GanjaFarmer101
Follow
Smooth week - final harvest. Plant 5 was a surprisingly quick trim :)
Likes
Comments
Share
@BeggarsBelief
Follow
Ultimately I want to go full organic but time is life's richest commodity, so it will probably be a few seasons before I get their. Also I don't have a drying setup which is a problem for this next run which is in week-1 rn (I go week one staring veg in my calendar). For drying / curing, I'm looking at fitting out a second hand wine fridge as I cant spend heavy on the Cure Puck or any of those auto fridge setups. Who knows maybe they come down in price. Peace out, happy growing to all.
Likes
39
Share
@Rodamis_Prime
Follow
Started to remove a few leaves here and there . This tent is really impressing me and really putting a lot of size on the buds . So many tops that are just killing it , buds all the way down the stems . Tent is starting to smell pretty fruity . I was pulling leaves off that were covering other bud sites and my hand was sticky from reaching into the canopy and it smelled alot like blueberries. These girls are loving the Innovating plant products nutrient line up I have been feeding them , red sun helped to flip them super fast and I had bud formation 7 days after going to 12/12 schedule. 👍 Thanks for taking a look at my girls .
