


Likes
Comments
Share


@Rabidreject
Follow
Thursday
this week has been good so far, I pulled each plant out yesterday and tidied everything up. I got rid of all the tiny lateral branches that didn’t make the cut and I got Rid of everything that was below about half way down the plant. Obviously the lateral branches that grew to the same height as the canopy are staying it’s just all the non starter stuff below.
I annoyingly had my in take fan die on me. We’ll sort of, it just keeps tripping the fuse on my electric so I assume it’s from when I had my res flood onto the floor - I forgot it was there on the floor because it was hidden behind the res

Likes
28
Share

@GreenHobbit
Follow
The Hobbit Hole Outdoor Grow 2026
Woche 3 – Die Sonne kehrt zurück
Nach zwei Wochen voller Regen, Wind und kleiner Rückschläge hat sich das Wetter endlich auf die Seite des Hobbit Hole geschlagen.
Die vergangenen Tage brachten genau das, worauf die vier kleinen Damen gewartet hatten: Sonne, Wärme und deutlich bessere Bedingungen für Wachstum. Und auch wenn die Pflanzen noch weit von ihrer späteren Größe entfernt sind, war der Unterschied innerhalb weniger Tage deutlich sichtbar.
Zum ersten Mal seit dem Einsetzen ins Freiland konnte man morgens tatsächlich erkennen, dass sie über Nacht gewachsen waren.
Die schwierige Anfangsphase scheint damit überstanden zu sein. Die Wurzeln haben inzwischen genug Zeit gehabt, sich im Boden des ehemaligen Fichtenhangs auszubreiten, und nun beginnt das Wachstum oberhalb der Erde spürbar anzuziehen.
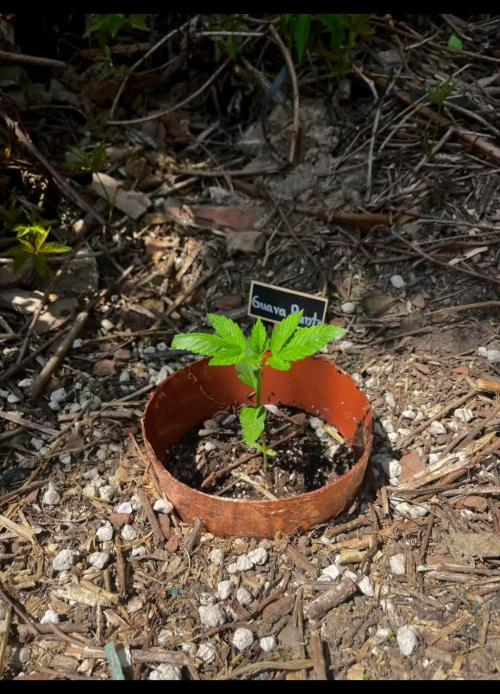
Besonders die Cinderella hat in dieser Woche einen kleinen Zwischensprint eingelegt. Das erste dreifingrige Blattpaar ist inzwischen deutlich stärker ausgeprägt als bei den anderen Pflanzen und sie übernimmt aktuell die Führung im Hobbit Hole.
Direkt dahinter folgt die Guava Runtz, die weiterhin sehr vital wirkt und sich zu einer ernsthaften Konkurrentin entwickelt.
Gelato zeigt sich wie gewohnt ausgeglichen und gesund. Kein hektisches Wachstum, aber eine sehr saubere und stabile Entwicklung.
Die Purple Punch bildet momentan zwar noch das Schlusslicht, macht aber ebenfalls sichtbare Fortschritte. Nach ihrem ungewollten Bodenkontakt in der vergangenen Woche wirkt sie inzwischen deutlich erholt und schiebt neues Wachstum nach.
Auch die Schutzmaßnahmen scheinen ihren Zweck zu erfüllen. Die Kupferringe halten weiterhin stand und bisher konnten weder Schnecken noch andere Gartenbewohner ernsthaften Schaden anrichten.
Was mich in dieser Woche besonders gefreut hat, war die Entwicklung des gesamten Platzes. Vor wenigen Tagen standen hier noch vier kleine Sämlinge, die gegen Regen und Wind kämpfen mussten. Inzwischen beginnt das Hobbit Hole langsam genau das zu werden, was ich mir vorgestellt habe: ein kleiner versteckter Outdoor-Grow mitten zwischen Brombeeren, Holunder und jeder Menge Natur.
Noch ist es nur der Anfang.
Aber zum ersten Mal habe ich das Gefühl, dass die Pflanzen nicht mehr einfach nur überleben, sondern anfangen zu wachsen.
Und genau darauf habe ich gewartet.
Aktuelle Reihenfolge:
🥇 Cinderella
🥈 Guava Runtz
🥉 Gelato
🏅 Purple Punch
Der Sommer hat das Hobbit Hole endlich erreicht. ☀️🌱🏡

Likes
22
Share
@SpunkyTerps4200
Follow
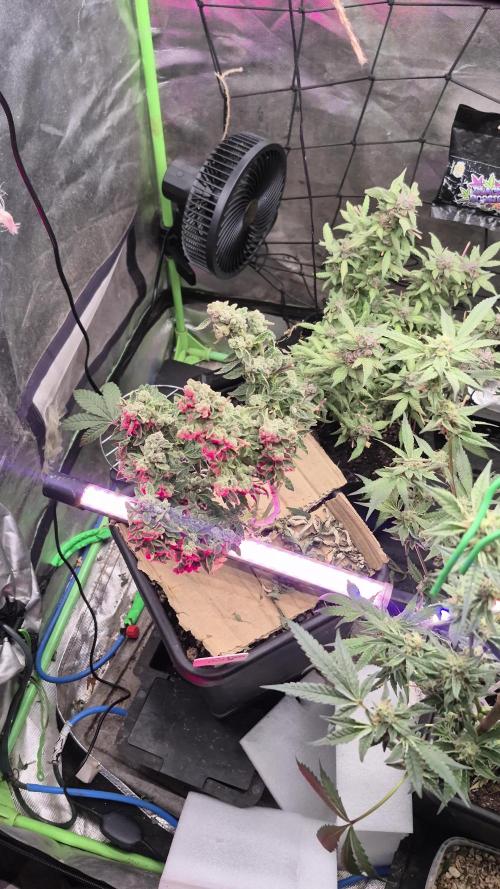
Check this shit out guysss!!
🌿 ONLY_DANKZZ4200 🌿
Welcome to the channel! Here you'll find cannabis grow diaries, strain reviews, cultivation tips, harvest updates, genetics spotlights, harvests, and everything related to the cannabis growing lifestyle. Follow along as we document the journey from seed to harvest and share our passion for quality cannabis cultivation.
🔥 Indoor Growing
🌱 Grow Diaries
✂️ Plant Training & Techniques
Nutrient Guides & Grow Tips
🏆 Harvest Updates & Smoke Reports
💨 Strain Reviews & Genetics
📸 Instagram: @only_dankzz4200
🌱 Grow Diary: @spunkyterps4200
https://youtube.com/@th3_dankzz420dk?si=HSioyHRv-cGwh5LX
🎟️ Support the Channel with These Promo Codes:
DEBO
SPUNKY
SPUNKY4200
DKREW
⚠️ DISCLAIMER – 18+ ONLY ⚠️
This channel is intended for viewers 18 years of age or older. All content is provided for educational, informational, documentary, and entertainment purposes only.
Viewers are responsible for understanding and complying with all local laws and regulations regarding cannabis in their jurisdiction. This channel does not encourage or promote illegal activity, substance abuse, or unsafe practices.
By viewing this content, you confirm that you are 18 years of age or older.
🌿 Stay Lifted • Stay Learning • Stay Growing 🌿
#OnlyDankzz4200 #SpunkyTerps4200 #CannabisCommunity #GrowDiary #HomeGrow #IndoorGrowing #CannabisCultivation #420Life #GrowersNetwork 💚🔥🌱💨https://youtube.com/@th3_dankzz420dk?si=HSioyHRv-cGwh5LX


Likes
37
Share


@Master_weeda
Follow
Bonjour à tous les padawans et les maîtres jedis
La semaine 4 va être décisive pour cette demoiselle car je vais pratiquer sur elle un main-lining et un LST
Je précise que le main-lining n'est pas recommandé pour les autofloraisons car son cycle de vie prédéfinie ne lui permet pas de ce remettre pleinement. Cela aura forcément un impact sur son rendement, pour des raisons esthétiques et un espace de culture restreint je n'ai pas d'autre choix.
Pour ce main-lining j'ai attendu le jour 24 et l'apparition du septième noeuds.
Une fois le main-linning terminé je pratiquerai la technique du LST ce qui me permettra d'avoir une canopé plus homogène donc une meilleure pénétration lumineuse et par conséquent un meilleur rendement.
Vous pouvez voir une vidéo de mon main-lining qui détaille la manière dont je procède pour réaliser cette technique.
Petit rappel et explications sur cette technique:
Le main-lining a toujours été une technique très populaire parmi les cultivateurs, puisqu'avec des ajustements simples pendant la première étape de croissance, vous vous garantissez des récoltes plus que productives. Il s'agit de faire pousser la plante de façon verticale et symétrique afin de profiter au maximum de la lumière et de l'espace, des aspects très recherchés dans les cultures d'intérieur. En guidant les branches avec des cordes et une série de tailles initiales, vous établirez des patrons de croissances vigoureux pour vos plantes.
COMMENT METTRE EN PLACE LE MAIN-LINING
En partant de la graine, attendez que votre plante ait au moins développé 5 nœuds. Lorsqu’ils seront formés, taillez la plante au niveau du troisième nœud. Retirez tout ce qui s’est développé en dessous du troisième nœud(Moi j'enlève que le premier et garde le deuxième et troisième). Cela formera le Y ou le T initial que vous recherchez. Permettez à votre plante de se remettre de ce stress imposé durant quelques jours avant de passer à l’étape suivante.
Votre plante comporte désormais deux pousses principales(ou 4 si vous gardez le deuxième noeud). Ces dernières devraient être attachées avec du fil ou de la ficelle(ou du fil de fer). Cela dirigera la croissance de manière horizontale. Faites bien attention en attachant les branches, ne les brisez surtout pas. Soyez doux.
Une fois que la plante s’est un peu développée, vous vous retrouverez avec 4 tiges principales. Vous pourrez répéter ce processus autant de fois que vous le souhaiterez, accédant ainsi à de plus gros rendements. Rappelez-vous tout de même que plus vous répéterez ce processus, plus la période de croissance sera longue.
Sauf pour les autofloraisons car étant donné le temps additionnel qu’il lui faut, le main-lining n’est pas compatible avec les variétés à autofloraison. Les autofloraisons ont des cycles de croissance très rapides, et d’ici à ce que la technique soit mise en place, la moitié de leur développement sera déjà passé. Cela pourrait potentiellement endommager les récoltes et cela influe sur le rendement
Dès que vous aurez produit la quantité désirée de séparations, il ne sera plus qu’une question de temps avant que des têtes uniformes commencent à apparaître. Une légère défoliation régulière durant le cycle de croissance vous permettra également de vous assurer d’une distribution égale de la lumière, et empêchera votre plante de gâcher de l’énergie avec de grandes feuilles superflues. Retirez ces feuilles dès qu’elles commencent à prendre trop de place.
Que la force soit avec vous 💪


Likes
346
Share


@Canna96
Follow
This week went pretty well, other than she stretched like crazy and I am now getting worried about running out of vertical space. I also had a few of my bottom leaves get a few brown and yellow spots on them. I did post some pics and asked a question, thank you for the responses, much appreciated! I am thinking about adding my Spyder Farmer LED 100 Watt light into the tent for the nebula auto because it is about 23 inches shorter than the sour diesel. I believe it would only raise my temp about 2 degrees, and possibly lower the humidity by one or two percent. I must say my dehumidifier has been a freaking stud, running 24X7 and not complaining. I should look into adding another unit, it has been in the mid 90's and muggy for about a week. So far I have to say I am super impressed and excited with this setup, the genetics, and with growing this wonderful plant in general. Already planning ahead to my next grow, and what I can do better. I have been enjoying myself and I really appreciate everyone who has taken the time to answer my questions! I am having a blast and am excited to see what this lady will give up in a few weeks!

Likes
29
Share


@Zurban_Poison
Follow
if you smell the buds and inhale deeply, then the head is dizzy from the aromas. you don't even need to smoke. the smell smokes already !!🔥

Likes
11
Share


@PanGrower
Follow
The leaves continue to turn yellow from the bottom.
It seems that I started fertilizing too quickly and the tips of the leaves burned a little
Likes
3
Share

@Fyno_TH
Follow
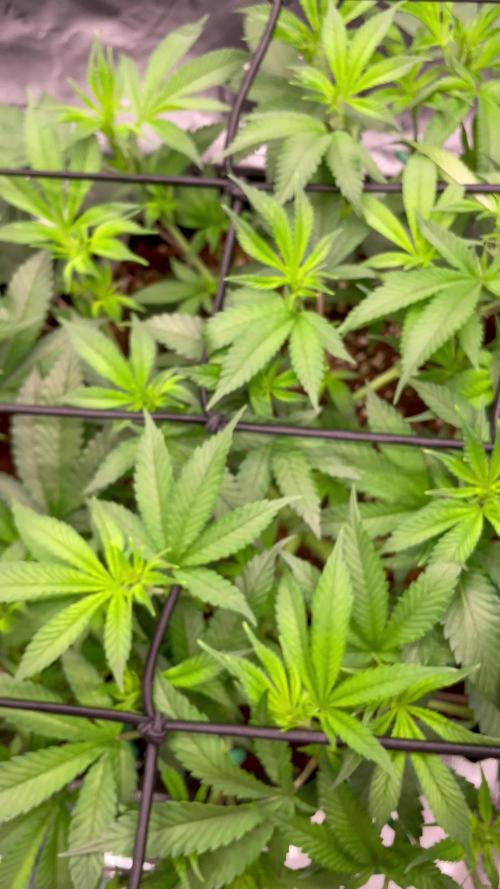
Week 4 update 🌱✨ — the tent is filling out fast! The main plant is spreading beautifully under the trellis after topping + LST. Side branches are shooting up and filling the grid nicely 👀🔥.
Second plant is still smaller but showing strong recovery — fresh green growth and stronger branching since the 5-gal transplant 💪.
Feeding Corex + Eldex + Terra + CalMag + Mira (~1,400 ppm @ pH 6.0) always to 10–20% runoff. Both are drinking heavy now and responding well.
Temps holding around 27 °C with RH 60–70% 🌬️ — leaves are praying all day. Trellis training continues this week as I prep them for a strong stretch before flip. Flowering is getting closer 🚀🌿.”
Likes
24
Share


@nonick123
Follow
Día 44 (15/07) Wow! No hay shock de trasplante! 😍💥😁
Todas las ramas se han estirado hacia arriba tras el ajuste de LST y se están formando nuevos nodos rápidamente
Esta combinación de nutrientes de Lurpe + substrato de PRO-MIX HP es una maravilla 😍
Día 45 (16/07) Ayer tuvimos ola de calor (37 ºC) y han aguantado muy bien!
A última hora de la tarde (cuando ya no había sol directo) les apliqué H2O en spray foliarmente para refrescar los estomas
Hoy parece que vuelven las temperaturas estándar para esta época del año: 29 - 30 ºC en las horas centrales del día
Riego con 1 litro de H20 pH 6,5
Día 46 (17/07) Pequeños ajustes de LST
Hay algunas ramas inferiores que no se han formado / estirado mucho
Lo más probable es que haga una buena limpieza este domingo, 7 días después del trasplante, para dejar solo los brotes por encima del 4º nudo
Día 47 (18/07) Riego con 0,5 litro de H20 pH 6,5
Este domingo (día 50) haré limpieza de partes bajas y tal vez también de nuevo topping en las 4-6 ramas principales 😁
Día 48 (19/07) Día de muchísimo calor con 37 ºC. A ver como lo llevan!
Riego con 0,5 litro de H20 pH 6,5
Día 49 (20/07) Para ayudarles a llevar mejor el calor de las horas centrales del día, coloca una malla de sombreo (70%) sobre el invernadero
Lo cierto es que se nota que baja mucho la temperatura debajo de la malla! Van a estar más fresquitas! 😍
Riego con 0,5 litro de H20 pH 6,5
Día 50 (21/07) Training session!
Hago limpieza del tercio inferior de la planta, de todas las ramas y nudos que no superan la línea del dosel marcada por el 4º nudo (1er topping)
También hago topping (2º) a todas las ramas principales
La idea es tener 12 ó 14 colas principales para que no se hagan muy altas
De paso saco unos cuantos clones de las ramas inferiores eliminadas 😁💥
Para superar el estrés, hago las siguientes aplicaciones y riego:
- Riego con 1 Litro de Té Vegetativo de Lurpe Solutions. Preparación: 24 horas con bomba de aire (oxigenación) con ingredientes:
Green Sunrise 8 ml/L + Insect Frass 16 ml/L + Hummus Lombriz 8 ml/L + Melaza 1 ml/L + Kelp Hidrolizado 0,25 g/L
- Aplicación foliar Kelp hidrolizado de Lurpe Solutions a 0,25 ml/l
💦Nutrients by Lurpe Solutions - www.lurpenaturalsolutions.com
🌱Substrate PRO-MIX HP BACILLUS + MYCORRHIZAE - www.pthorticulture.com/en/products/pro-mix-hp-biostimulant-plus-mycorrhizae

Likes
59
Share
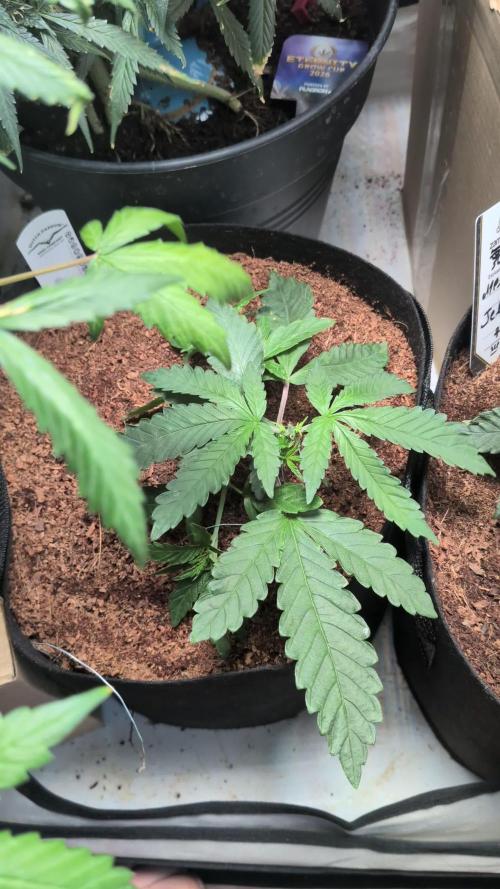

@wolfvb
Follow
🐞 Week 4 Update: LST, A Little Helper, and a Funky Mutation!
🌿 Week Update: Shaping her up! 🐞
Welcome to Week 4! The plant is growing nicely and we are officially starting to shape her up. I had a little ladybug patrolling the coco and hanging out on the leaves always nice to have some natural pest control on duty! But the most interesting thing this week is a strange little leaf mutation on one of the new growths.
The Details:
Development:
She is vegging well and taking to the substrate nicely. The roots must be getting well established because the top growth is really starting to push out. There is a really funky leaf mutation happening on one side (check the close-up pics!) where the leaf looks twisted and almost double-layered. It doesn't seem to be slowing her down though, just a cool genetic quirk!
Structure:
I started some LST (Low Stress Training) this week! Using some wire ties to gently bend the main stem down and expose those lower nodes to the light. The goal is to keep the canopy nice and even before she gets too tall. She took the bending like a champ and is already turning her top back up towards the light.
Health:
Overall health is great! The leaves are holding a beautiful deep green, no signs of nutrient burn or deficiencies so far. The ladybug friend 🐞 is a very welcome sight to keep any unwanted pests away from the tent. I'm keeping a close eye on the mutated leaf to see what it does, but otherwise, she's perfectly healthy and happy.
Next Steps:
I'll continue to adjust the LST ties as she stretches and keep monitoring the moisture levels. I'll probably up the feed slightly next week if she keeps responding this well. Let's see how this mutation develops!
Happy Growing !!! 🥦☀️
Likes
4
Share


@AustinRon
Follow
OG 4Q24 Flower Week 9
Orangegasm (Fem) [ IRIE Genetics ]
12/12 @ Bolt (Day 21)
Germination: 20 November 2024
#3A Earliest Harvest Date: 9 February 2025
#3B Latest Harvest Date: 19 February 2025
_________________________________________
Start of Week: [Wed Feb 5, 2024 CR2 4Q24 57:F:8:1]
End of Week: [Tue Feb 11, 2024 CR2 4Q24 63:F:8:7]
OrangeGasm Fertigation:
- MAX: EC: [ 2.4, mS] #Ramping Down
- LightIntensity MAX: [ 850, µMol/m2/s]
______________________________________
OBJECTIVES
- Ramp EC from 2.4 - 1.0
- Start rolling off Primer A&B/Silica Skin to Resin Bloom . . .
__
Wed Feb 5, 2025
OG 4Q24 57:F:8:1
EC: 2.3
Notes:
#5 looks like a 60 day plant, if so - consider Saturday Harvest …
Runoff
- [x] Amount: [ 0.125 , gal]
- [x] EC: [ 4.4 , mS/cm]
- [x] EC∆: [ 2.5 , mS/cm] # Fried Yet? ;-}
Harvest Dehu
- [x] Amount: [ 1.5 , g]
__
Thu Feb 6, 2025
OG 4Q24 58:F:8:2
EC: 2.3
Refresh Reservoir
- [x] Amount: [ 2 , g]
- [x] EC: [ 2.3, mS/cm]
- [x] Primer A&B: [ 31, ml]
- [x] Silica Skin: [ 15 , ml]
__
Fri Feb 7, 2025
OG 4Q24 59:F:8:3
EC: 2.3
__
Sat Feb 8, 2025
OG 4Q24 60:F:8:4
- [x] Disassemble, Clean Reservoir and Pumps, Reassemble
Refresh Reservoir
- [ ] Silica Skin: [ 15 , ml]
- Dropping Silica Skin due to (sparse to medium) granular precipitate
- [x] Amount: [ 6 , g]
- [x] EC: [ 2.1, mS/cm]
- [x] Primer A&B: [ 100, ml]
EC: 2.1
@1900 - Clear Manifold Filter. (Mainline should be cleared on 1845 feed
__
Sun Feb 9, 2025
OG 4Q24 61:F:8:5
- [x] Dilute to EC 2.0
- Flooded Tent, 2 Gallons PLUS of Runoff. Happy Plants.
- Shout Out Shop-vac. ;-}
EC: 2.0
__
Mon Feb 10, 2025
OG 4Q24 62:F:8:6
EC: 1.8
HAND APPLICATION
Prepped One Gallon of 12-8-7-5 @ 1.8 mS/cm w/ PhotoSynthesis Plus, SLF-100
Reclaimed Dehu Water, ~2 Gallons
Refreshed Reservoir, 2 Gallons Rooted Leaf Hydro no Silica Skin, EC: 1.8 mS/cm
Reduced watering to 5 min, then 1 - 1 -1 -1 -1 -1 -1 -1
(It’s not like they’ve been under-fertigated)
__
Tue Feb 11, 2025
OG 4Q24 63:F:8:7
EC: 1.7
- [x] EC: [ 1.7, mS/cm2]
- [x] Refresh Reservoir
- [x] amount: [ 2.5, gal]
Runoff
- [x] Amount: [ 0.5, gal]
- [x] EC: [ 3.6, mS/cm2]
- [x] EC∆: [ 0.9, mS/cm2] # Better than 2.5!
PLANT POSITIONS
3 5 1 7
4 2 6 8

Likes
4
Share


@Edelkraut
Follow
Komme jetzt in die 4te Woche blüte bis jetzt lief alles gut! Sie wachsen sehr schön und riechen richtig lecker




Likes
5
Share


@Pureleelove
Follow
So just a quickie for ya, Maria is two weeks into flowering and she has slowly started to show the signs of the tentacles (le-tenticle'). She has also shot up about 15 cm taller than she was (WOW!).
Using LST to try keep all the branches a little further apart from each other- just gentle bending.

Likes
11
Share


@Heregrowsnothing
Follow
The time for this beautiful girl to be chopped and dried, I flushed her for 4 days then shut the light off for the last 48hrs before she came down. Smelling amazing, I must also say she doesn't look too bad either 😍😍 the other 3 plants managed a total of 300 grams which I am delighted with and that's curing nicely with a few 62% boved packs 😎😎😎 ✌️🏻
Processing
Likes
9
Share


@CannabisRelated
Follow
One of the plants has a slight pie dough smell, but still very minimal smell when I open the tent. EDIT: the smell is actually making it passed my carbon filter, and I am not sure why
it is only 1 of the 2 plants giving off the heavy smell as well. The chunkier/darker colour one is the one that smells real heavy, smells really creamy/doughy.
UV/IR has been on for the past few weeks, and will stay on until the end.
The plants have gone through a bunch of issues so far, and are still going strong.
Gave a tablespoon of power bloom to each, on day 31.

Likes
13
Share


@SwabianMadness
Follow
Last Week i did in my Opinion the last Defoliation and clean up the Bottom. But after a Week there are no light Penetration under the Canopy. So i decided to take a few more Leaves
Deep Red runs all the 12 hours. Infrared 15 mins before light goes on and off. And UV Light every Hour for 10 Mins


Likes
34
Share


@BOMbolenath
Follow
Buds are getting bigger. It's developing well. This strain have a nice structure.

Likes
15
Share


@Plugged_Inn
Follow
This has got to be one of the best Plants i have ever grown. The Taste and Sweet smell is like A Starburst . Cherry , ice cream . Buzz is Smooth And very high but mellow . 10/10 👌
