




Processing
Likes
5
Share


@GaiaGreenGiant
Follow
New weekly uploads for a glimpse of what’s happening in the Cabbage Patch!
She’s loving life!
Day 38 - Wanted to rid her of some lower growth so I decided to make a lil video. Cheers 🍻

Likes
2
Share

@OGTerps
Follow
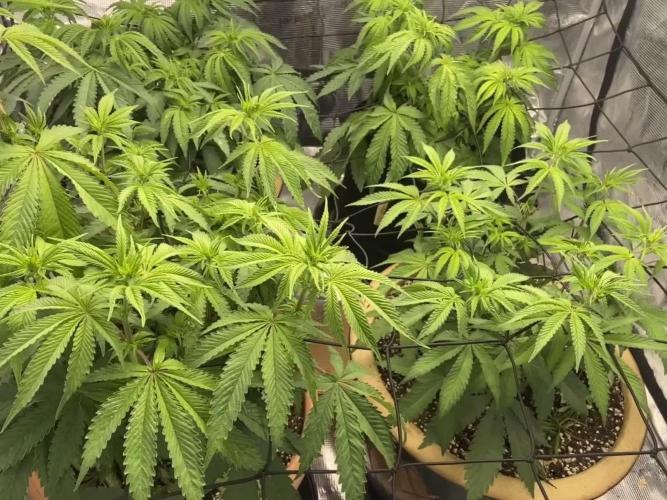
Noticed some yellowing on a few leaves, likely due to a nutrient block or overwatering. I think it's a nutrient issue, maybe a lockout, preventing the plants from absorbing nutrients properly. I’ll check the pH and runoff tomorrow to make sure everything’s in balance. Also, I might be overwatering a bit, so I’ll make sure the soil dries out more between feeds. Hopefully, that’ll help correct it. EC at ~1,6.

Likes
3
Share


@JeyGanesha
Follow
Quarta settimana di fioritura anche queste runz layer cake sta venendo very strong 😂🙏💪

Likes
4
Share


@EileanDonanCastle
Follow
It’s been a long day potting these girls into there new home.
All is looking well. Little bit of heat stress but ime sure they will cope 🤞

Likes
5
Share

@Bread_n_Buds
Follow
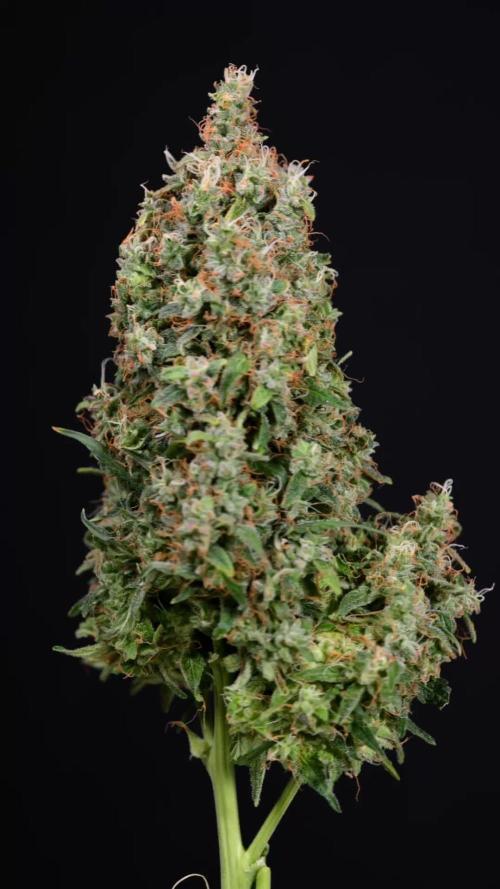
Our Critical Cheese Automatic #1 from Zamnesia Seeds is ready and is a pure spectacle of nature.
It's truly grown with love. I really liked how I cleaned up the lower parts of the plant, eliminating unnecessary growth but giving the top buds plenty of strength, which turned out really well, aligned, and very uniform. The main cola is truly large and majestic.
Maturity Levels - The resin content is excellent. The trichomes are mostly white and milky, with some clear and quite amber hues. Some very beautiful red-headed trichomes are quite common. The pistils are almost all red.
The overall shape of the plant is truly beautiful.
Techniques Chosen: As mentioned, here we only did pruning, lollipopping, and defoliation. Basically, we just cleaned up the lower parts, which, as mentioned, helps us achieve better results at the top. We have another plant processed using LST, which you can find in recent diaries.
We're 100% organic and 1000% Plagron, as always.
The soil we've chosen is the recently launched Plagron Bio LightMix, which will allow us to start with smoother and more reliable watering, without the sudden changes that liquid fertilizers can cause. A week's worth of soil is enough, so don't overdo it.
Choose your preferred style and calculate your results on the website:
www.plagron.com
Visit the new Growshop area on the Zamnesia website:
Z - https://www.zamnesia.io/it/531-growshop
A fantastic strain, not too tall but very bushy! Give it a try!
Z - https://www.zamnesia.io/en/3329-zamnesia-seeds-critical-automatic-feminized.html
Z - Not happy with what they already had in their hands, the expert breeders at Zamnesia Seeds wanted to embark on a journey into the world of autoflowering genetics, aiming to improve a great British classic... the Cheese cannabis strain. They crossed Critical with a high-quality Cheese specimen, enriched with a significant amount of Ruderalis. The result is an extremely potent, therapeutic, and easy-to-grow autoflowering version. This new improved strain has been named Critical Cheese Automatic. Critical Cheese Automatic embodies everything that made the original Cheese so famous, acclaimed, and beloved around the world. We're talking, of course, about the skunky flavors and pungent aromas this strain unleashes, not to mention the overwhelming effects it induces. Lovers of the original Cheese will surely appreciate this feminized reincarnation. Smoking Critical Cheese Automatic produces exceptionally powerful sensations for an autoflowering strain. Its effects are quite strong and highly physical, both in intensity and duration. With these properties (or "body") in mind, it's no wonder so many medical users are the first to want to get their hands on this "skunky" plant. Those suffering from chronic pain, inflammation, stress, anxiety, and migraines (to name just a few of the ailments it can alleviate) will notice their symptoms diminish, if not disappear completely, thanks to this strain's potency. With this autoflowering "upgrade" of Cheese, even novice growers can achieve excellent results. It's a vigorous plant, incredibly easy to grow, and requires little maintenance.
Commercial growers looking to generate income will appreciate Critical Cheese Automatic primarily for its life cycle: from germination to harvest in just 10 weeks. When grown correctly, it can produce harvests of 120-150g per plant. In addition to its excellent yields, Critical Cheese Automatic reaches a rather compact size (1 m), making it highly suitable for any type of grow. That said, Critical Cheese Automatic only thrives when grown outdoors in warm climates (like those of Spain or Italy).
So, in conclusion, whether you're a beginner, veteran, or commercial grower, Critical Cheese Automatic offers great satisfaction to everyone.
You know it, but I recommend it. You'll find so much beauty here, essentially "the best nature has to offer."
Z - www.zamnesia.com
Music // www.radionula.com
+ Feng Shui Music
+ Frequency 432Hz

Likes
23
Share


@Ctrellis90
Follow
Welcome back to week 3 of my strawberry Cheesecake diary from seedsman seeds.
This week past was quite the week for this little lady to say the least! Loom at all that explosive growth! It's amazing, and I hope she doesn't slow down anytime soon, thats for sure.
Anyway, I put down a light top dress of craft blend and all purpose just to give her a little hand transitioning into bloom in these next few weeks coming up.
I relationship want her to get the most out of her veg as possible so we have some nice flowers come bloom.
Thanks for stopping by. See ya next week!


Likes
21
Share


@BLAZED
Follow
W19 (Harvest)
6-6
Last day before harvest.
7-6
Harvest day!
Installed a humidifier outside the tent, set to 55% aiming for a 60% humidity inside the dry tent.
21-6
After 14 days of slow drying she is ready to be trimmed.
While posting this a couple of months later i found out that i totally forgot to make pictures and video's of the trimmed buds 😅
It was a very nice daytime smoke, tasted sweet-sour.
End results:
74.26 Grams of bud
57.90 Grams of small buds and trim, in the freezer for bubble hash.
I have some trim and small buds saved up from different strains and i will be posting a diary of the full process making hash of them!
If you are interested in me making bubble hash feel free to follow me as i will make some in the next month, this way you keep notified!
Likes
10
Share


@Reaper
Follow
i think this is actually day 28 flower here. the buds are not looking like 5 weeks
Likes
7
Share

@Suemchen
Follow
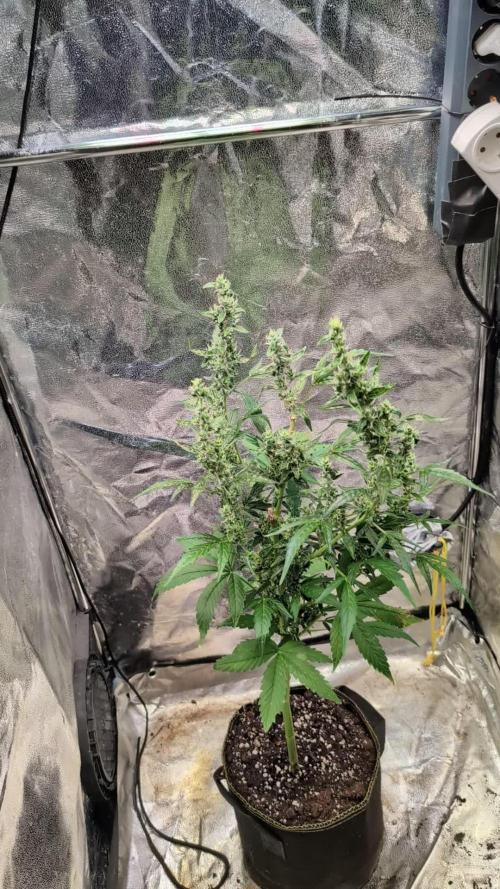
Sanlight EVO 3-60 at 80%
Day 71: did nothing today 👌🏻
Day 72: looking good and watered again🌊. Watered with rain water, 1 ml/l Cal Mag, and 1 ml/l Green Sensation.
Day 74: looking good and watered again. Watered with rain water and 1ml/l Powerzyme, 1 ml/l Hesi Boost, 1 ml/l Cal Mag, 1 ml/l Bloom Complex and 1 ml/l Green Sensation. EC at 1.0 and a pH of 6.4.


Likes
1
Share


@Cannerd
Follow
How ya doing mates?? Awesome week last week - all photos and logs have been added so be sure to check it out! This week is going great so far! I've switched to an early vegetative state nutrient system. As you'll see in the daily logs early this week, this bumps up the micro and grow nutes, and keeps the bloom at 0.6ml/gal. A quick note about last week - I'm unable to update the measurements, but please note that those nutrient amounts are measured in ml/gal, NOT ml/l.
Anyhow, this week I'm just waiting to get my order of diatomaceous earth so that I can make up another batch of soil. I'm still debating between topping this week before repotting or letting them take root in the new pots first. Decisions decisions lol. I think at the very least I'll clean up some of the lower growth to make sure the energy is being spent at the right places. I've been switching back and forth between just LST and mainlining in the past - but I think I really like the ease and cleanliness of mainlining. The draw back is the recovery time they take in the process haha.
UPDATE:
The D.E. has come in, and I repotted the girls this week. I mixed in about 1.5-2 cups D.E. for the whole pot, as well as some Bat Guano and Kelp Meal for micro and macro nutrients to use on dry cycles.
I've also included some photos of the mother plant to give an idea of what's to come! I've just started to flower it, which is the first time for this strain - so I'm pumped!
Day 15:
M.C. 01-21 After reviewing the last set of photos from last week, I figured I'd play it safe and dimmed the light back down to 25% strength. The mother plant is almost ready for flower, and I'm down some tents so she'll be taking this one over shortly. These photos were taken shortly after the lights went off, and they look quite happy! You can see some of the side branch developement in today's photo for MC-01. The pots are fairly dry now, and I've decided to move to the next stage in the nutrient regime. This kicks up the Micro and Grow nutes, while maintaining the Bloom amounts.
M.C. 02-21 A nice top photo for MC-02, you can really see the lighter green in this photo. Not to worry though, as these will darken back to a vibrant green as long as I give her what she needs shortly! The pots are fairly dry now, and I've decided to move to the next stage in the nutrient regime. This kicks up the Micro and Grow nutes, while maintaining the Bloom amounts.
M.C. 03-21 Look at that little leaf poking out from the 2nd node! Some slight yellowing you can see too, but again, not to worry. The new mix should rectify that. I've decided to move to the next stage in the nutrient regime. This kicks up the Micro and Grow nutes, while maintaining the Bloom amounts.
Day 16:
M.C. 01-21 Today is the day - for the mother! I've cleared out some space and moved plants around. So back out to the grow room these girls go! MC-01 seems much better today with the reduction in light. The 5th node is almost flattened out and the 6th coming through still. Most notably though, you can really see the work she's put into the side branches! The branches at nodes 2 and 3 are starting to produce more leaves - great sign! The new growth at the top is also a nice dark green. Added 500ml water to the tray.
M.C. 02-21 MC-02 seems to have liked the adjustment of light as well. She's got nice dark green growth at the top, and the little branches at the 2nd node seem to have a full leaf! Added 500ml water to the tray.
M.C. 03-21 The photo from today is cool, because you can see how close MC-01 & 03 are, even though there's almost a full node difference. MC-03 is stretch out a bit to compete with her sister for the light haha. She's also put some more effort into the side branches that you can see. Added 500 ml water to the tray.
Day 17:
M.C. 01-21 I figured a video would be the best way to illustrate the changes today! They've been back in the grow room under the Veg dedicated light for a day now and seem to be loving it! MC-01 has its' 5th node out, splitting the 6th node, and I can JUST see the 7th node coming in. I don't think they'll get too much more height, as you can see that the side branches are starting to stretch now! She's definitely going to be well tangled in the roots by the end of the week when I hope to repot her.
M.C. 02-21 MC-02 is doing great despite the difference in height! You'll notice the side branches stretching out at nodes 2 & 3. The pots are also still fairly wet at their center, so I'll hold off on water most likely. At least this clone will have time to root more while we wait for the supplies!
M.C. 03-21 MC-03 also has great side branching! If you take a look at the group photo from today, you'll see that both MC-01 & 03 are practically the same height, but MC-03 snuck in there by the stretch haha.
Day 18:
M.C. 01-21 My order of D.E. came in last night, perfect timing! As you can see, her roots have fully reached the bottom, and have started to migrate upwards with the water that's absorbed. The soil was a little dry for my liking, which made things a little difficult/dusty but still no mishaps! Watered around the root-zone before covering with more soil to keep the gnats down.
M.C. 02-21 Not quite as much lateral root growth as MC-01, but still plenty enough for a repotting! Her soil was a little dry as well. Ideally I should have given them a light misting from the top of the soil and let is drip down to keep the dusty bits together haha.
M.C. 03-21 Nice and thick root growth, no issues with repotting, and strong stalk. The extra spacing in the nodes may prove to be helpful during the training phase.
Day 19:
M.C. 01-21 Some nice top shots today as they slowly get acclimated to their new homes. Once I see them push out a new node, I'll probably top them. This is to make sure that they're taking to the new pot without causing any extra stress before they can take it. Today I watered them with an early veg nutrient. I like to stay cautious with nutrient boosts since they're in soil - not to mention the added nutrients from the repotting.
M.C. 02-21 Top shots for the girls today. Not much change, but also no immediate signs of shock either, so I'll take it.
M.C. 03-21 You can't really see it in this angled shot, but the small branch at the second node is coming along nicely! I think the girls are happy that they each have their own tray not haha.
Day 20:
M.C. 01-21 Definitely noticing some slow changes to the top nodes when comparing the pictures from the previous day. The leaves are slowly starting to separate, and I'm not noticing too much yellowing yet which is good. Watered with 500ml water to keep water migrating upwards to meet the roots.
M.C. 02-21 Not noticing much change in this girl today, but that's okay. She's most likely focusing on the root developement instead which I can't complain about! Watered from the bottom.
M.C. 03-21 Maybe seeing some separation in the top leaves, however more notably are the small branches at the 2nd node that you can see better here. Still a bit of stretching with them as they get longer. I might even keep them on for clones later on. Watered from the bottom.
Day 21:
M.C. 01-21 Looks like she gained some distance last night, as the top node is now above the fan leaves, unlike 2 days ago. I'm really getting eager to top them, as I don't want them to waste too much time and energy growing tissue that I'll just end up cutting off. I'll be bumping the nutrients up starting next week to keep the progress going, moving to a mid-veg stage shortly. I'm going to let things dry up tonight for a fresh boost of water tomorrow to give it a dry cycle as the pot is still a bit heavy.
M.C. 02-21 MC-02 really worked hard last night it seems, as she almost completely flatted out her top leaves! I think she's ready for a topping, but I'll let her benefit from the headstart and let the other two catch up and root before. dry cycle for her tonight as well.
M.C. 03-21 MC-03 was busy last night too and is now slowly flattening out the top node as well! Maybe tonight they'll have enough progress to go topless afterall haha. Dry cycle in prep for watering tomorrow.
Likes
4
Share

@Fyno_TH
Follow
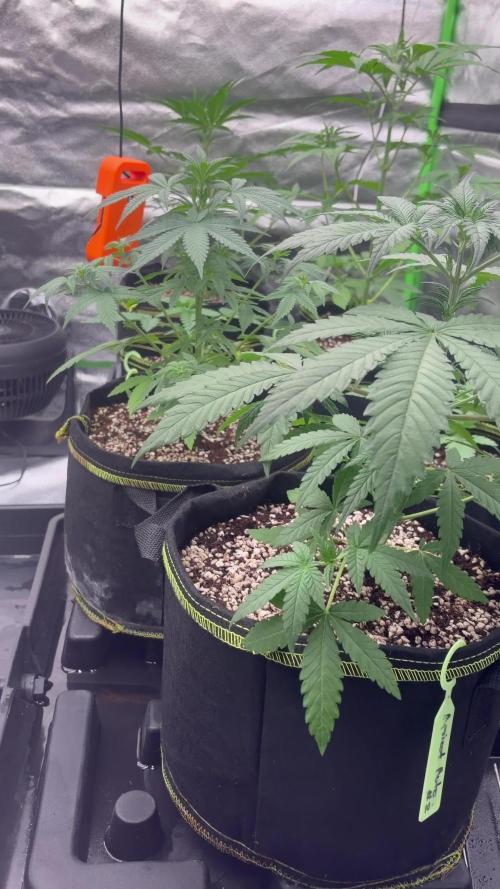
Noticed Magnesium deficiency on lower leaves. Increased dosage in this week’s feeding and monitoring pH to ensure recovery. New growth looks stable.

Likes
73
Share


@Rwein93
Follow
Ciao ragazzi e bentornati qui per i nuovi aggiornamenti della Mimorange 🍊
Settimana fantastica!💪
Le sorelle all arancia mi sorpendono giorno per giorno. Oltre alla super altezza di 160 cm, ormai raggiunta da quasi tutte e tre, i buds sono sempre più grassi ora misurano 2,5 cm quelli secondari e le apicali 3/3,5 cm.
Questa settimana si saranno allargati di 1 cm abbondante. Sbalorditivo😍
L odore è buonissimo. Un forte profumo dolce di mandarino pervade il naso appena apro il loro lato della tenda.🤤
Ho defogliato loro nel giorno 67 e ho allargato la numero 1 con un po di Lst nel giorno 70. I nuts rimangono invatiati.👍
Eh niente! Anche questa settimana è giunta al termine ragazzi.🤙
Grazie a tutti per aver guardato e restate sintonizzati per nuovi aggiornamenti.🙏
Buona settimana e felice crescita 🌱 🌱 🌱
Likes
31
Share


@Dunk_Junk
Follow
She grew 13cm this week. Not bad. She's looking good. Tent is a little bit too overcrowded for her at the moment but in a few days the situation will be better.

Likes
9
Share


@Kushizlez
Follow
Day 69 (March 6th)
Just gave everyone their last watering. I’m going to harvest and wash everything tomorrow night on day 70. I‘m not going to do that whole 48 hours of darkness thing because I didn’t see a difference last time I did it. In fact, it made my plant under watered before drying which caused it to dry too fast. Slurricane and cheese will be washed with h2o2 and the rest will just be rinsed off in warm RO water and hung up. Before and after washing I’m going to go over each branch with a flashlight and make sure there is no dog hair or debris in or on the buds. I will be drying in my spare bathroom (that no one uses!) from hangers. Aiming to keep it around 60-62F and 50-60 RH. Hoping for that 10-12 day dry. I wanted to do a full plant hang but the tent got pretty dirty and I would feel more comfortable just cutting and rinsing everything off branch by branch. I’m going to try my best to keep the full plant intact. Got my humidifier hooked up and running RO water because with tap water it deposits calcium and lime all over the buds and walls. For air flow I’m just indirectly running a small usb fan. I’m not worried about air flow in the bathroom honestly. It stays nice and breezy down there anyway.
Got the food grade peroxide and RO water to wash up the slurricane and cheese. Everything except for the cheese and garlic#1 is looking more than done. Trichomes all look pretty well done. Some of them have even burst open. Smells are all super ripe and mature too. Can’t wait to smell each individually in jars.
Next week I will recap what went wrong and what I will do differently next time to keep it from happening again.
(Day 70F) Just got everything chopped, washed and hanging. The vast majority of the PM was washed out but I can still see very small amounts. When they dry out I can shake the branches a bit to get the rest off. At very least it’s sterile now. There is no question I lost some potency while washing but the amount is negligible for a much cleaner product.
I could see lots of dirt and other debris float to the surface of the water after being washed. And no those are not trichomes, those sink to the bottom. I could put that nasty water through a bubble bag and wouldn’t get all that much. Although it probably does remove a lot of the actual trichomes heads. I’ll have to check with the microscope.
Everything is rigged up for a nice slow dry. Temp is sitting at 64 and RH is at a nice 60%.


Likes
8
Share


@CecilioJardinero
Follow
Ya comenzamos con la sexta semana y ya algunos días más 🤭🤠
Aplicamos big one en el primer día de paso a 12 y 12. 💡
Ahora hicimos la primera aplicación de Top Bloom que es la base de floración de #Topcrop 🌍🏞️
También realizamos podas de las ras bajas y de las hojas que hacen sombra a nuestras futuras flores 🍒🐷 toda la fe en nuestras #kriticalbilbo de @genehtik_seeds.
Atento a sus comentarios, sugerencias y Lonquén quieran comentar.

Likes
22
Share


@OutdoorRookie
Follow
I estimate another 2 to 3 weeks. Then I can harvest.
I'm really looking forward to my 2 ladies 🤩😎

Likes
37
Share


@nonick123
Follow
Día 35 (26/05) Velocidad de crucero ON! Pequeñas pero preciosas! 😍
Día 36 (27/05) Riego con 500 ml H2O RO
Las señoritas siguen teniendo un color vibrante!
Día 37 (28/05) Se empieza a extender el color morado por las incipientes flores y las hojas 😍
Día 38 (29/05) Riego con 500 ml H2O RO
Empezamos a regar cada 2 días. Hace bastante calor por aquí! 30 - 32 ºC en la horas centrales del día
Día 39 (30/05) N/A
Día 40 (31/05) Riego con 500 ml H2O RO
Día 41 (01/06) Riego con 750 ml H2O RO solo la planta grande!
Hace muchísimo calor!
🚀 FastBuds 15% DISCOUNT code "NONICK" 2fast4buds.com @fastbuds.official
💦 BioTabs 15% DISCOUNT code "GDBT420" biotabs.nl/en/shop/ @biotabs_official
🌱Substrate PRO-MIX HP BACILLUS + MYCORRHIZAE @promixmitch @promixgrowers_unfiltered