
Likes
Comments
Share


@DrewbieDoobieNoobie
Follow
hello, the time-lapse was good got to see the real time PK boost I let the girls go till dry i think i will keep them moist as the roots are all down to the bottom and the sides. I want the plant to drink as much as possible for the flowering stage. top dressed in worm castings last week and flower girl dry amendments along with the pk boost on the 17th it looks like it might of been a little heavy handed but nothing to serious with this so far. just water and mammoth p till the end the last blast of cal mag to free up the PK.


Likes
15
Share


@Korinthius
Follow
So this plant is phenomenal with her recovery abilities. At this point, she recovered from her previous topping only 7 days ago, and grown the final 2 inches I was waiting for. As of 4/26, she is now on 12/12. Additional nutrients will be added to her for her flower period.
Time-lapse again had an error, this time, I swear, it was not me. Looks like the camera and server stopped communicating until both were restarted.
So as a reference, this plant is now 10 weeks from seed. She has been topped 3 times for a total of 8 crowns. I expect harvest to be approximately 10 weeks from now. But we all know how far expectations can take us.
Likes
28
Share


@TheHighentist
Follow
Week 6 of to a good start!
They look happy and healthy. Time to flip to flower soon!
👽👉3/10
Climate is automated and working accordingly to my adjusted VPD settings.
Happy and healthy, actually surprised they've grown so much lately.
👽👉4/10 Waiting for their complete recovery, so they can be flipped to flower (Defoliation the 30/9, im giving them about a week)
👽👉5/10 Water day* Plain ph balanced water.
Need Runoff PH and EC down a little bit.
👽👉6/10 I applied the SCROG net.
👽👉7/10 Doing some minor tweaks to the setup + VPD settings(from 1.0 to 1.1). Approaching the flip to flower, so VPD
Did a bit of defoliation before the flip next week
👽👉8/10
Today, i learned from research on biobizz nutrients https://www.thcfarmer.com/threads/biobizz-nutrients-answers-from-biobizz.78899/ (Direct answer from biobizz)
With the answers, my view on feeding biobizz changed a bit, and i was luckily about to switch up the nutes. Good timing.
Waterday*
PH6.2
Introducing Biobizz CalMag(0.5ml/l) + BioBloom(0.25ml/l)+Topmax(0.25ml/l)+Rootjuice(0.25ml/l)
Still 2ml/L Fishmix+BioHeaven(Fishmix will be switched out with BioGrow)
👽👉 9/10 Last day of the week for my plants and last day in veg! They look fantastic and well recovered at lights on! (Look at the before/after lights vids/pics)
Raised VPD by 0.1: VPD settings(from 1.1 to 1.2)
Likes
Comments
Share

@Ensign420
Follow
|»» LOG DISCLAIMER: Not intended as a grow guide. Grow log entries are usually posted 3 weeks later and are for my learning reference. ««|
Introduction - Week 15 Summary -
Ensign's log, stardate 17711.1,
Been a great week in the garden!
Wow the 4x4 tent is thriving and the canopy is full of tops! By the end of the week, all phenos have begun to show signs of flowering! Growth has continued to stretch so added the second scrog frame and netting. By the end of the week, the canopy has stretched through the second layer and looking green and healthy!
In the veg tent, been tending to solo cup waterings as needed. Also up-potted Chill Out OG into a 3-gal pot (with BluMat watering). Took more veg cuttings and now have them in Coco Coins rooting and looking healthy!
Onwards to next week!
[START OF WEEK 15]
==========================================================
---------- [ 3x3 VEG TENT - GR7 / GR3 ] ----------
TKO #2 - WEEK 07 - Full Veg
Gorilla Goat #1 - WEEK 07 - Full Veg
Chill Out OG #3 - WEEK 04 - Full Veg
Chill Out OG #2 - WEEK 00 - Transplant
---------- [ 4x4 MAIN TENT - GR30 ] ----------
Chill Out OG #2 - WEEK 15 - Full Bloom Wk1
TKO #2-2 - WEEK 09 - Full Bloom Wk1
Heady OG BX1 #1 - WEEK 11 - Full Bloom Wk1
02/09/26 → 02/15/26 [WEEK 15]
This Week's Estimated Goals
----------------------------------------------------------------------------------------------
DLI: ~13 mol/m²/d
PPFD: ~300 μmol/m²/s
VPD: ~1.2 kPa
This Week's Meter Readings & Averages
----------------------------------------------------------------------------------------------
Light On/Off: 16:00 - 10:00 | Wattage: ~386.3W [LV05]
Distance From Canopy: ~[22”, 13”, 13”]
Plant Height: ~[30”, 39”, 39”]
Max Plant Height: ~52” [Lamp-to-Soil Distance]
DLI: ~16.80 mol/m²/d
PPFD: ~389 μmol/m²/s
VPD: ~0.89 kPa
Soil %: ~[47.9, 47.1, 43.3, 53.0, 48.3, 63.4, 47.1, 61.9, 48.6, 72.3]
==========================================================
Day 01 - Monday - 02/09/26 - Total Days: 096
-----------------------------------
Daily Averages ~[+01:00]
- Temps: 81.1°F [27.3°C]
- Humidity: 74.4%
- VPD: 0.92 kPa
- Soil %: [48, 47, 44, 51, 49, 66, 48, 65, 50, 75]
-----------------------------------
- [22:14]: Night check on the 4x4 tent.
--- Garden is full of tops and the canopy is getting taller!
--- Chill Out OG #2 is getting taller, but is staying shorter than Heady OG BX1 #1 and TKO #2.
--- The under canopy is looking clean and all pots are clean and no signs of flooding.
- [22:17]: Checked on the BluMat soil moisture sensors:
------ Chill Out OG #2 » 46mbars
------ Heady OG BX1 #1 » 42mbars
------ TKO #2 » 49mbars
--------- Watering Range: [Too Wet] ~25mbars «| [Ideal Target] ~40-80mbars |» ~125mbars [Too Dry]
--------- BluMat Max Values: [10mbars «||» 750mbars]
- [22:24]: Checked the Ecowitt soil moisture sensor data:
------------------ [ 3x3 VEG TENT – GR7 / GR3 ] ----------------
------ 45% - [CH01 » M1 » VBL – TKO #2]
------ 46% - [CH02 » M2 » VBR – Gorilla Goat #1]
------ 44% - [CH03 » M3 » VFL – Chill Out OG #3]
------ 51% - [CH04 » M4 » VFR – Dry Soil]
----------------- [ 4x4 MAIN TENT – GR30 ] ---------------
------ 49% - [CH05 » P1 » FLT – Chill Out OG #2]
------ 66% - [CH06 » P1 » FLB – Chill Out OG #2]
------ 47% - [CH07 » P2 » BLT – TKO #2-2]
------ 64% - [CH08 » P2 » BLB – TKO #2-2]
------ 51% - [CH09 » P3 » FRT – Heady OG BX1 #1]
------ 75% - [CH10 » P3 » FRB – Heady OG BX1 #1]
--------- Veg: ~38%-45% | Flower: ~45%-55%
--------- General: ~30% [Dry] «| ~45-60% [Moist] |» ~70% [Wet]
- [22:27]: Checked the 3x3 veg tent.
--- Wow the veg garden is blowing up with growth!
--- All mothers and clones are perky and getting tall! Definitely need to top soon, but not today!
--- A Chill Out OG #2 clones needs watering!
- [22:33]: Here is the starting initial watering range:
------ Chill Out OG #2 » 267.3g → 301.0g
--------- General Weight Range: [Dry] ~275g «| [Dryback] ~300g |» ~325g-400g [Wet]
--- Been 2 days since the last watering.
--- Took the starting weight before watering,
------ Chill Out OG #2 » 289.2g
--- While on a scale,
--- Evenly misted the top of the cup with RO water.
--- Did not spray the top growth.
--- Misted 10-20 sprays. Waited a moment, then misted again.
--- Repeated this process until the cup weighted at least 300g.
--- There was no runoff.
- [22:44]: Took the saturated weight after watering,
------ Chill Out OG #2 » 390.7g
--- Updated the wet weight and watering date.
--- Placed the cup back into the tent.
--- All veg clones in the propagation tray look great and no need to water!
- [22:53]: Checked the humidifiers.
--- Tanks are still full and no leaks found.
Day 02 - Tuesday - 02/10/26 - Total Days: 097
-----------------------------------
Daily Averages ~[+01:00]
- Temps: 81.0°F [27.2°C]
- Humidity: 76.9%
- VPD: 0.83 kPa
- Soil %: [50, 47, 44, 51, 49, 64, 47, 63, 50, 74]
-----------------------------------
- [21:06]: Night check on the 4x4 tent.
--- Ca-Caw! Wow the garden soaring upwards with healthy tops!
--- Heady OG and TKO are stretching up at equal heights and are almost tall enough to begin the second level or netting. Nice!
--- Chill Out OG is chilling and staying squat, but looking perking!
- [21:12]: Checked on the BluMat soil moisture sensors:
------ Chill Out OG #2 » 48mbars
------ Heady OG BX1 #1 » 44mbars
------ TKO #2 » 56mbars
--------- Watering Range: [Too Wet] ~25mbars «| [Ideal Target] ~40-80mbars |» ~125mbars [Too Dry]
--------- BluMat Max Values: [10mbars «||» 750mbars]
- [21:16]: Checked the Ecowitt soil moisture sensor data:
------------------ [ 3x3 VEG TENT – GR7 / GR3 ] ----------------
------ 47% - [CH01 » M1 » VBL – TKO #2]
------ 49% - [CH02 » M2 » VBR – Gorilla Goat #1]
------ 43% - [CH03 » M3 » VFL – Chill Out OG #3]
------ 51% - [CH04 » M4 » VFR – Dry Soil]
----------------- [ 4x4 MAIN TENT – GR30 ] ---------------
------ 48% - [CH05 » P1 » FLT – Chill Out OG #2]
------ 64% - [CH06 » P1 » FLB – Chill Out OG #2]
------ 47% - [CH07 » P2 » BLT – TKO #2-2]
------ 63% - [CH08 » P2 » BLB – TKO #2-2]
------ 51% - [CH09 » P3 » FRT – Heady OG BX1 #1]
------ 74% - [CH10 » P3 » FRB – Heady OG BX1 #1]
--------- Veg: ~38%-45% | Flower: ~45%-55%
--------- General: ~30% [Dry] «| ~45-60% [Moist] |» ~70% [Wet]
- [21:21]: Checked the 3x3 veg tent.
--- Woah! The veg garden is stretching upwards and has reached the grow light!
--- Time to top!
--- Also going to take more Gorilla Goat clones. Not too sure on the current one in the tray, so cutting a couple more just in case.
- [21:33]: Filled a measuring cup with 2 cups of RO water.
------ Added 1/8tsp of Horticultural Aloe
--- Mixed the solution and poured it straight into a clear solo cup.
--- Made sure the PVC tube on the rig had the correct names marked.
--- Placed the rig into the cup just above the aloe water.
--- Okay! Time to take the cuttings!
--- Using a pair of clean trimmers,
- [22:05]: Topped and defoliated each mother plant.
--- Removed a decent amount of growth (a good 7-8 inches of top growth).
--- Mulched the trimmings.
- [22:07]: Also cut several Gorilla Goat #1 clonal cuttings.
--- Made sure to trim most of the branches leaving a top node or two.
--- Did not cut any leaf fingers and made sure to cut the tip of the stalk (about 45-degree) before placing each cutting into the cup of aloe solution.
- [22:09]: Placed the cup into the veg tent.
--- Have the cup resting on top of the drip tray (front left pot).
--- Okay! Let the soaking begin!
- [22:10]: Decided to cull the Gorilla Goat #1-2 clone in the propagation tray.
--- Mulched the entire cup.
- [22:18]: Checked the humidifiers.
--- Tanks are still full and no leaks found.
Day 03 - Wednesday - 02/11/26 - Total Days: 098
-----------------------------------
Daily Averages ~[+01:00]
- Temps: 81.7°F [27.6°C]
- Humidity: 76.9%
- VPD: 0.85 kPa
- Soil %: [47, 47, 43, 50, 48, 64, 47, 62, 50, 74]
-----------------------------------
- [16:09]: Evening check on the 3x3 veg tent.
--- Veg garden is looking nice and clean!
--- The growth is still recovering from the topping, but all mothers and clones look great!
- [16:22]: Okay! Time to transplant Chill Out OG #2 into a 3-gal pot!
--- The 3-gallon pot has been already pre-amended and prepped for a fresh transplant.
--- Will also be installing the BluMat watering carrot before connecting it to the water source loop.
- [16:46]: Took a 3-gallon pot out of the veg tent and set it on a drip tray.
------ Removed the drip tray and Ecowitt soil sensor.
--- Loosened the soil and made a hole in the center of the pot.
------ Set a clear cup into the center of the pot.
--- Tucked the sides of the cup in snug with the surrounding soil.
--- Gently removed the clear cup from the fabric pot leaving a perfect hole.
------ Sprinkled 1/16tsp of Great White
------ Sprinkled 1/32tsp of Beauveria Bassiana Plus
- [17:06]: Dusted the sides of the hole.
--- Also sprinkled a bit around the top soil.
--- Great! Time to transplant!
--- Chill Out OG #2 weighed 291.2g and was watered 2 days ago.
--- To loosen and unstick the rootball from the cup, I gently squeezed the sides before pressing the bottom upwards.
- [17:14]: Once fully loosened, I simply Vulcan-gripped the base of the plant before flipping her upside down.
--- Ooo yea! Nice pearly white roots!
--- She’s more than ready for a larger pot!
--- Did not break up the rootball.
- [17:16]: Gently set her straight into the pre-inoculated hole.
--- Pressed and evened out the top soil.
- [17:22]: Using fresh BuildASoil Organic Straw Mulch,
--- Covered the top soil with straw.
- [17:35]: Then using a fully filled 5" BluMat watering carrot (pre-soaked and set to gold for gravity feed) along with a 5" drip ring,
--- Placed the drip ring around the base of the plant.
--- Then gently inserted the BluMat carrot into the soil near the drip ring's fill tube before connecting it with a 3mm connector.
- [17:58]: Also set the Ecowitt soil sensor back.
--- Placed the fabric pot back into the Veg tent.
--- Shut off all flow-valves and made sure the (8mm) water source loop had no water pressure.
--- Then cut the tubing and installed an RO valve-rig (with 3mm T-fitting).
- [18:12]: Finally connected the watering carrot's 3mm fill tube to the valve-rig before turning all flow-valves back on.
--- Ca-Caw! Done with the transplant!
--- The soil moisture was pretty wet so decided to not water.
--- Will continue to check and will water if needed.
- [18:20]: Decided to also cull the extra Heady OG BX1 clones.
--- Mulched the trimmings and soil.
- [18:54]: Checked the Ecowitt soil moisture sensor data:
------------------ [ 3x3 VEG TENT – GR7 / GR3 ] ----------------
------ 52% - [CH01 » M1 » VBL – TKO #2]
------ 50% - [CH02 » M2 » VBR – Gorilla Goat #1]
------ 43% - [CH03 » M3 » VFL – Chill Out OG #3]
------ 56% - [CH04 » M4 » VFR – Chill Out OG #2]
----------------- [ 4x4 MAIN TENT – GR30 ] ---------------
------ 48% - [CH05 » P1 » FLT – Chill Out OG #2]
------ 64% - [CH06 » P1 » FLB – Chill Out OG #2]
------ 47% - [CH07 » P2 » BLT – TKO #2-2]
------ 62% - [CH08 » P2 » BLB – TKO #2-2]
------ 51% - [CH09 » P3 » FRT – Heady OG BX1 #1]
------ 74% - [CH10 » P3 » FRB – Heady OG BX1 #1]
--------- Veg: ~38%-45% | Flower: ~45%-55%
--------- General: ~30% [Dry] «| ~45-60% [Moist] |» ~70% [Wet]
--- Also updated the soil sensor names a bit.
- [19:07]: Checked the 4x4 tent.
--- Ooo yea! The garden is thriving and the canopy is still stretching upwards!
--- All phenos are looking great and will need to set the second scrog frame layer soon. Nice!
--- Not too sure if Chill Out OG will make it to the second netting, but she’s looking healthy and perky so not a big deal.
--- Stoked that the under canopy is clean and looking healthy!
- [19:17]: Checked on the BluMat soil moisture sensors:
------ Chill Out OG #2 » 51mbars
------ Heady OG BX1 #1 » 46mbars
------ TKO #2 » 53mbars
--------- Watering Range: [Too Wet] ~25mbars «| [Ideal Target] ~40-80mbars |» ~125mbars [Too Dry]
--------- BluMat Max Values: [10mbars «||» 750mbars]
--- All veg clones and cuttings are looking great!
--- Need to change the Gorilla Goat cutting’s aloe water out. Also a couple clones need watering.
--- Filled a clear cup with fresh RO water (1.5cups).
- [20:21]: Gently lifted the PVC rig out of the cup of aloe water and set it gently into the RO cup.
--- Going to let these soak for another day before transplanting into Coco Coins for rooting.
--- Two clones need watering!
- [20:34]: Here are the starting initial watering ranges:
------ TKO #2-1 » 290.7g → 340.5g
------ Gorilla Goat #1-1 » 279.9g → 340.6g
--------- General Weight Range: [Dry] ~275g «| [Dryback] ~300g |» ~325g-400g [Wet]
--- Both cups were last watered 8 days ago.
--- Took the starting weight of both clones before watering,
------ TKO #2-1 » 289.8g
------ Gorilla Goat #1-1 » 295.6g
--- While on a scale,
--- Evenly misted the top of both cups with RO water.
--- Did not spray the top growth.
--- Misted 10-20 sprays. Waited a moment, then misted again.
--- Repeated this process until both cups weighted at least 300g.
--- There was no runoff.
- [21:06]: Took the saturated weight of both cups after watering,
------ TKO #2-1 » 355.5g
------ Gorilla Goat #1-1 » 355.4g
--- Updated the wet weight and watering dates for both cups.
--- Placed both cups back into the tent.
- [21:36]: Checked the humidifiers.
--- Tanks are still full and no leaks found.
Day 04 - Thursday - 02/12/26 - Total Days: 099
-----------------------------------
Daily Averages ~[+01:00]
- Temps: 81.5°F [27.5°C]
- Humidity: 75.3%
- VPD: 0.91 kPa
- Soil %: [49, 48, 43, 56, 47, 63, 46, 62, 50, 73]
-----------------------------------
- [16:01]: Evening check on the 3x3 veg tent.
--- Veg garden is looking incredible and growth is recovering nicely!
--- Also veg clones and cuttings are looking good!
- [17:03]: Okay! Time to start the rooting process!
--- Filled a measuring cup with 1.5 cups of RO water.
------ Added a pinch of Quillaja Saponaria Extract [60]
------ Added 1/64tsp of Horticultural Aloe
------ Added 1/32tsp of Mycrobe Complete
--- Mixed the solution thoroughly.
- [17:04]: Dropped 2 Coco Coins into the measuring cup.
--- The coins immediately started to expand.
------ [» ~5 MINUTES LATER «]
--- Placed each fully saturated Coco Coin into half-cut solo cups.
- [17:25]: Using a squeeze bottle filled with Clonex,
--- Gently filled each pre-made hole with Clonex rooting gel.
- [17:38]: Time to plant the cuttings!
--- Using a pair of clean trimmers, made a final 45° cut.
--- Also stripped and scrapped some of the stem’s outer membrane.
--- To help with planting, gave each Coco Coin a squeeze to loosen the coco.
--- Made sure to insert each stem straight and snug with the tip about a 1/4 inch from the bottom of the Coco Coin.
--- Also secured the stem by pinching and pressing in the top of the Coco Coin.
--- Once each cutting was planted,
- [18:11]: Placed each Coco Coin into the propagation dome’s tray.
--- Made sure to keep each cutting properly tagged.
--- Did not spray the top growth with any water, but did fill the bottom of the tray with RO water.
--- As far as PPFD,
--- At the lowest light intensity (and raised ~14 above the tray), the PPFD is around 42 μmol/m²/s which gives a DLI of 2.72 mol/m²/d under an 18/6 light cycle
- [18:18]: Decide to cull TKO #2-2 along with the spare Gorilla Goat cutting.
--- Going to mulch the trimmings, but going to add something more to the mulch pot.
- [18:23]: Since I also make and drink my own F1 kombucha (helps to maintain healthy gut bacteria along with a great way to lose weight), I have a decent amount of spare scobys.
--- Placed a few spare scoby pellicles into a plastic bin.
--- Using scissors, chopped up the scoby pellicles into smaller chunks and added the soil and trimmings from the culled clone and cutting.
--- Set the container aside. Will top dress the mulch bin in the main tent later.
--- Might move the mulch bit to the front of the tent for the next cycle and am thinking about turning it into a potential worm bin.
--- Anyways!
- [18:41]: Checked the Ecowitt soil moisture sensor data:
------------------ [ 3x3 VEG TENT – GR7 / GR3 ] ----------------
------ 49% - [CH01 » M1 » VBL – TKO #2]
------ 45% - [CH02 » M2 » VBR – Gorilla Goat #1]
------ 43% - [CH03 » M3 » VFL – Chill Out OG #3]
------ 55% - [CH04 » M4 » VFR – Dry Soil]
----------------- [ 4x4 MAIN TENT – GR30 ] ---------------
------ 47% - [CH05 » P1 » FLT – Chill Out OG #2]
------ 63% - [CH06 » P1 » FLB – Chill Out OG #2]
------ 46% - [CH07 » P2 » BLT – TKO #2-2]
------ 62% - [CH08 » P2 » BLB – TKO #2-2]
------ 50% - [CH09 » P3 » FRT – Heady OG BX1 #1]
------ 72% - [CH10 » P3 » FRB – Heady OG BX1 #1]
--------- Veg: ~38%-45% | Flower: ~45%-55%
--------- General: ~30% [Dry] «| ~45-60% [Moist] |» ~70% [Wet]
- [19:05]: Checked the 4x4 tent.
--- Ca-Caw! Let’s go ladies! Wow the garden is looking incredible!
--- Growth is ramping up and the canopy is definitely in full stretch!
--- The under canopy is looking clean and pots all look great!
- [19:09]: Nice! All phenos are showing clear signs of bud crowning!
--- Chill Out OG seems to be further along than the rest of the cultivars, flower has officially begun!
--- Heady OG and TKO has slight signs of crowning, but will continue to stretch for a few more days. I think.
--- Anyways!
- [19:17]: Quickly checked on the RO reservoir and auto-watering system.
--- Reservoir looked good and no leaks detected.
- [20:14]: Took the kombucha top dressing from earlier and spread the mix top of the mulch bin (in the back right of the tent).
--- Spread the top dressing out evenly. Since kombucha is naturally and acidic ferment, going to let the top dressing dry out a bit (smells great too).
--- Will continue to add leaves and trimming on top after defoliation and toppings.
- [20:21]: Okay time to build the second scrog frame layer and re-string the second level of netting!
--- Prepped and built the PVC scrog frame outside of the tent.
--- Using mason string, restrung the netting and double-looping each screw.
--- Once the frame was fully assembled and re-strung,
- [22:21]: Placed the PVC riser poles and installed the second scrog frame into the 4x4 tent.
--- The first scrog layer is currently about 18.5" from the top soil.
--- The second scrog layer is currently about 35" from the top soil.
--- Done!
- [22:59]: Checked the humidifiers.
--- Tanks are still full and no leaks found.
Day 05 - Friday - 02/13/26 - Total Days: 100
-----------------------------------
Daily Averages ~[+01:00]
- Temps: 82.2°F [27.9°C]
- Humidity: 75.7%
- VPD: 0.91 kPa
- Soil %: [46, 47, 43, 55, 47, 63, 46, 61, 48, 71]
-----------------------------------
- [21:16]: Night check on the 4x4 tent.
--- Wow the garden is raging with growth!
--- The second layer is almost pretty much already full!
--- Chill Out OG is chilling in between the netting and looking healthy with signs of bud crowning starting to swell up!
--- Both Heady OG and TKO are also continuing to stretch with slight signs of crowning. Nice!
--- Let’s go my girls!
- [21:24]: Checked the Ecowitt soil moisture sensor data:
------------------ [ 3x3 VEG TENT – GR7 / GR3 ] ----------------
------ 46% - [CH01 » M1 » VBL – TKO #2]
------ 50% - [CH02 » M2 » VBR – Gorilla Goat #1]
------ 43% - [CH03 » M3 » VFL – Chill Out OG #3]
------ 55% - [CH04 » M4 » VFR – Chill Out OG #2]
----------------- [ 4x4 MAIN TENT – GR30 ] ---------------
------ 47% - [CH05 » P1 » FLT – Chill Out OG #2]
------ 62% - [CH06 » P1 » FLB – Chill Out OG #2]
------ 46% - [CH07 » P2 » BLT – TKO #2-2]
------ 60% - [CH08 » P2 » BLB – TKO #2-2]
------ 48% - [CH09 » P3 » FRT – Heady OG BX1 #1]
------ 71% - [CH10 » P3 » FRB – Heady OG BX1 #1]
--------- Veg: ~38%-45% | Flower: ~45%-55%
--------- General: ~30% [Dry] «| ~45-60% [Moist] |» ~70% [Wet]
- [21:26]: Checked the 3x3 veg tent.
--- The veg garden is looking nice and perky with healthy growth!
--- A Garlic Budder clone needs watering. Let’s go Ensign!
- [21:37]: Here is the starting initial watering range:
------ Garlic Budder OG#1-1 » 299.1g → 340.6g
--------- General Weight Range: [Dry] ~275g «| [Dryback] ~300g |» ~325g-400g [Wet]
--- Been 8 days since the last watering.
--- Took the starting weight before watering,
------ Garlic Budder OG#1-1 » 298.5g
--- While on a scale,
--- Evenly misted the top of the cup with RO water.
--- Did not spray the top growth.
--- Misted 10-20 sprays. Waited a moment, then misted again.
--- Repeated this process until the cup weighted at least 300g.
--- There was no runoff.
- [21:43]: Took the saturated weight after watering,
------ Garlic Budder OG#1-1 » 355.6g
--- Updated the wet weight and watering date.
--- Placed the cup back into the tent.
--- Gorilla Goat cuttings are looking great in the propagation tray! No need to spray or water. Great!
- [22:04]: Checked the humidifiers.
--- Tanks are still full and no leaks found.
Day 06 - Saturday - 02/14/26 - Total Days: 101
-----------------------------------
Daily Averages ~[+01:00]
- Temps: 80.9°F [27.2°C]
- Humidity: 75.7%
- VPD: 0.88 kPa
- Soil %: [48, 47, 43, 54, 48, 62, 47, 60, 47, 70]
-----------------------------------
- [19:01]: Night check on the 4x4 tent.
--- Ooo yea! The garden is looking healthy and looking great!
--- Ca-Caw! Heady OG is still raging upwards and stretching through the netting
- [17:14]: Checked the Ecowitt soil moisture sensor data:
------------------ [ 3x3 VEG TENT – GR7 / GR3 ] ----------------
------ 52% - [CH01 » M1 » VBL – TKO #2]
------ 50% - [CH02 » M2 » VBR – Gorilla Goat #1]
------ 43% - [CH03 » M3 » VFL – Chill Out OG #3]
------ 54% - [CH04 » M4 » VFR – Chill Out OG #2]
----------------- [ 4x4 MAIN TENT – GR30 ] ---------------
------ 46% - [CH05 » P1 » FLT – Chill Out OG #2]
------ 61% - [CH06 » P1 » FLB – Chill Out OG #2]
------ 46% - [CH07 » P2 » BLT – TKO #2-2]
------ 60% - [CH08 » P2 » BLB – TKO #2-2]
------ 47% - [CH09 » P3 » FRT – Heady OG BX1 #1]
------ 70% - [CH10 » P3 » FRB – Heady OG BX1 #1]
--------- Veg: ~38%-45% | Flower: ~45%-55%
--------- General: ~30% [Dry] «| ~45-60% [Moist] |» ~70% [Wet]
- [19:18]: Checked the 3x3 veg tent.
--- Veg garden is looking great and growth is healthy and green!
--- A Garlic Budder clone needs watering!
- [19:25]: Here is the starting initial watering range:
------ Garlic Budder OG#1-2 » 279.2g → 340.3g
--------- General Weight Range: [Dry] ~275g «| [Dryback] ~300g |» ~325g-400g [Wet]
--- Been 9 days since the last watering.
--- Took the starting weight before watering,
------ Garlic Budder OG#1-2 » 297.3g
--- While on a scale,
--- Evenly misted the top of the cup with RO water.
--- Did not spray the top growth.
--- Misted 10-20 sprays. Waited a moment, then misted again.
--- Repeated this process until the cup weighted at least 300g.
--- There was no runoff.
- [19:40]: Took the saturated weight after watering,
------ Garlic Budder OG#1-2 » 355.5g
--- Updated the wet weight and watering date.
--- Placed the cup back into the tent.
- [20:01]: Checked the humidifiers.
--- Tanks are still full and no leaks found.
Day 07 - Sunday - 02/15/26 - Total Days: 102
-----------------------------------
Daily Averages ~[+01:00]
- Temps: 80.8°F [27.1°C]
- Humidity: 76.2%
- VPD: 0.85 kPa
- Soil %: [47, 47, 43, 54, 50, 62, 49, 60, 45, 69]
-----------------------------------
- [19:04]: Night check on the 4x4 tent.
--- Ooo yea! Let’s grow my ladies!!
--- The canopy is packed with bud top crowns and the mid canopy (in between the netting) is getting really dense!
--- Plan to do a deep defoliation soon, but going to let everything grow and stretch upwards for now.
--- Grow strong my girls!
- [19:11]: Checked on the BluMat soil moisture sensors:
------ Chill Out OG #2 » 38mbars
------ Heady OG BX1 #1 » 93mbars
------ TKO #2 » 43mbars
--------- Watering Range: [Too Wet] ~25mbars «| [Ideal Target] ~40-80mbars |» ~125mbars [Too Dry]
--------- BluMat Max Values: [10mbars «||» 750mbars]
- [19:14]: Decided to make a slight adjustment to Heady OG’s watering carrot.
--- Using the provided allen key, increased the water moisture by turning the BluMat’s tension cap slightly counter-clockwise.
- [19:18]: Checked the Ecowitt soil moisture sensor data:
------------------ [ 3x3 VEG TENT – GR7 / GR3 ] ----------------
------ 44% - [CH01 » M1 » VBL – TKO #2]
------ 47% - [CH02 » M2 » VBR – Gorilla Goat #1]
------ 43% - [CH03 » M3 » VFL – Chill Out OG #3]
------ 54% - [CH04 » M4 » VFR – Chill Out OG #2]
----------------- [ 4x4 MAIN TENT – GR30 ] ---------------
------ 51% - [CH05 » P1 » FLT – Chill Out OG #2]
------ 63% - [CH06 » P1 » FLB – Chill Out OG #2]
------ 50% - [CH07 » P2 » BLT – TKO #2-2]
------ 60% - [CH08 » P2 » BLB – TKO #2-2]
------ 45% - [CH09 » P3 » FRT – Heady OG BX1 #1]
------ 69% - [CH10 » P3 » FRB – Heady OG BX1 #1]
--------- Veg: ~38%-45% | Flower: ~45%-55%
--------- General: ~30% [Dry] «| ~45-60% [Moist] |» ~70% [Wet]
- [19:22]: Checked the 3x3 veg tent.
--- Veg garden is looking great and all top growth is green and perky!
--- Clones are also looking good and don’t need watering. Nice!
--- Gorilla Goat cutting in the propagation tray look green and healthy!
--- Easy night in the veg garden!
- [20:15]: Checked the humidifiers.
--- Tanks are still full and no leaks found.
--- Another grow week done!
--- The main tent has begun to flower and the stretch has started to slow down for the most part. Almost time for a top dressing!
--- Probably need to defoliate again soon. Just stoked that growth is all around healthier than ever!
--- As for the veg garden, there’s work to be done and plan to overhaul the veg garden to be able to better preserve my current (and future) genetics.
--- Anyways, onwards to next week Ensign!
[END OF WEEK 15]

Likes
3
Share

@Milky_way
Follow
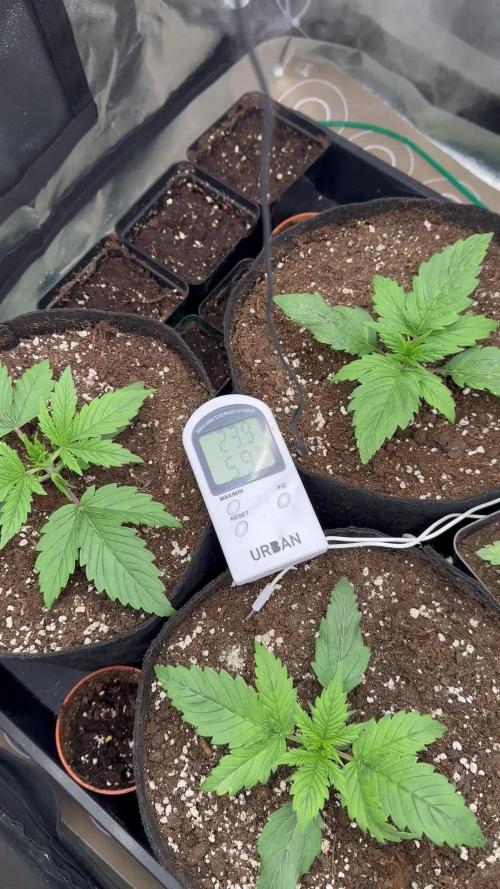
2.week - first day and other..
Nutrients are 3-4in1 products combo.
Watch and looking 🌱🤫
After days one stress one topping.
Likes
34
Share


@Bruno_The_Stoner
Follow
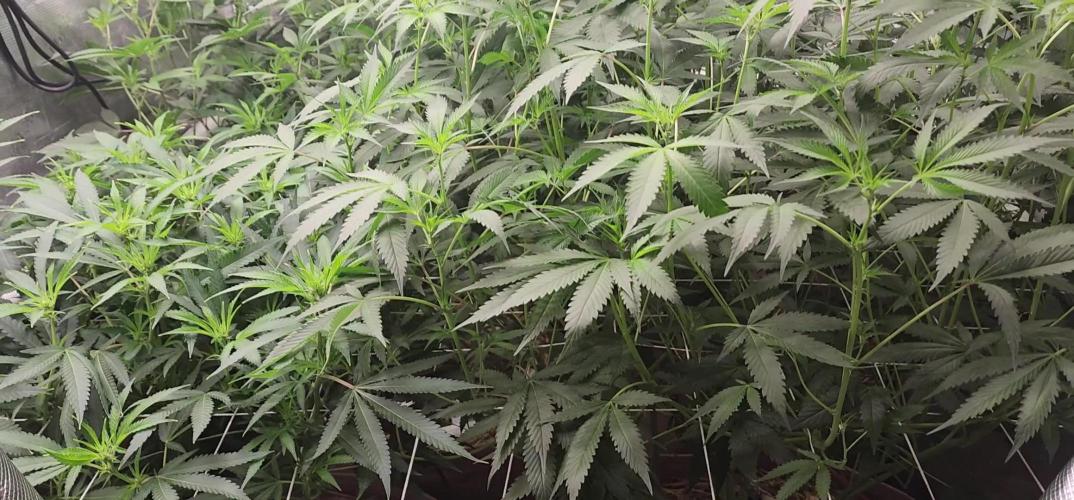
Hello there, it's just 70 days of girls' lives. As you can see the plants are doing well. They welcomed the extra HPS 250watt lamp, the overall temperature went up and the humidity dropped to 40% in the day. After rinsing the plants I intend to reduce the overall dose of BioBizz fertilizers and use the last time PK 13/14.

Likes
2
Share


@Comfrey
Follow
Drei Eiswasser Spülungen und etwas kühlere Nachttemperaturen haben zwar etwas an der FarbeRichtung bläulich geändert, allerdings blieb das erwartete Purple vollständig aus.
Die Blüten sind sehr klebrig und der Duft ist deutlich aber nicht besonders intensiv.
In der letzten Woche habe ich einige männliche Blüten heraus geknipst und mir sind auch ein paar Samen aufgefallen. Das selbe Problem hatte auch meine Hindu Kush.
An Tag 97 habe ich die Pflanze nach 48 Stunden Dunkelheit abgeschnitten und kopfüber aufgehängt.

Likes
18
Share


@BudMedic
Follow
Love love this strain!! Humboldt Seed Org is my top breeder choice right now. Keeping those California genetics alive and clean!


Likes
9
Share


@SSKNFbyHAZE
Follow
** COST **
TO RUN
- Used previous ⛺️ setup : 0.00USD
- Monthly electricity : 36.73USD <-- other ladies sharing ⛺️
- 3 Gallon Fabric pot : 0.15USD
- Bonsai wire : Apx. 0.03USD
- Reused soil from last run : 0.00USD
FOR NUTRIENTS
- Jadam Microbial Solution : 0.00USD
- Fermented Plant Juice : 0.00USD
APPLYING
- JMS : 30ml / 1 Litter
- FPJ : 30ml / 1 litter
TOTAL COST : 36.91USD
Throughout the week, I give compost tea, and fermented plant juice once each ^^
Its almost time!!
Trichrome are cloudy, but its hard to find amber Trichromes yet.
According to Fastbuds she will be ready in 4 days ^^;
Hope you guys have a wonderful day today ^^v
*** Please Like, comment & share ***
Highly appreciated -----/-----<@


Likes
10
Share


@ThatsmyGrow
Follow
I like how the buds get bigger and bigger.
Its a very special strain, need to grow the banana purple punch more.
Likes
18
Share


@balansa
Follow
she is starting to flower she has firs signs so i am starting an experiment. cutting off all the fan leaves she has lets see how will she respond wish me luck <3


Likes
2
Share


@NocturnalGardner44
Follow
Flipped 3 days ago...stretch has begun, I will keep it as even as possible... I lollipopped up the 3rd node and topdressed with endgame


Likes
38
Share


@BlackHatGenetics
Follow
A lb from 2 plants in 69 days from sprout. You literally CANNOT beat that. Not to mention the 9g of kief I got just from my trim box. This stuff smokes like a dream, burns slow and tastes pine on the inhale, citrus/lemon on the exhale. Mephisto you guys prove time and time again why you are the elite.

Likes
10
Share


@MG2009
Follow
11/24/2020
Seeing pre-flowers nice healthy new growth maybe add some h2o2 to clean up roots some, some brown algae? Maybe. Going to lower water level to 8 liters let roots stretch more an fill out bottom of bucket, also a serious defoliating is needed, But it can wait till next week. Her clone mom was harvested at day #50 in flower, not fully ripe and it's still pretty potent stuff, I think I can go to 63 days and still get an energetic high, mom still had, 30% clear trichomes with no amber at 50 days. So I will harvest 1-2 cuttings to keep them going as everyone that tried it liked the results, but this one should finish faster with Hydro, so we will see how it goes.
Likes
152
Share


@BioBuds
Follow
A week further and have started the flowering. I write this a couple of days later, with now more knowlegde about revegging and can conclude I started too flower too early. Especially the big plant, which was still not completely revegged. On the upside, I got to learn lots about revegging, also to know that it might take weeks for the plants to make the switch again and produce buds :(, should have waited few more weeks for revegging done. So wet on with defoliating, the left plant on the pictures I still have to do and trained budsites more sideways and some leaftucking, strategic defoliage on top.
We shall see. The plants are not happy and im going to feed them some Biobizz Alg-A-Mic to help them destress and ease the suffering, thankfully @styliaga gave me some. I will do another update after coming feed and recovery.
As a tip if you ever go re-veg a plant: let them finish the process.
I can see the monster growth of lots of micro budsites developping in the canopy. Hopefully with enough time they will develop into a sea of chunky danky goodness.
The lights I put a little higher, for saey, while Im adjusting the dimmer to full, to let them acclimatise to the full light. No light points yet after two days, not even the leafs curling up like in the beginning. Some things go well...

Likes
6
Share


@jaydee702
Follow
harvested two buds found 10 seeds they are very potent regardless the buds were about 8 inches each with 5 seeds could have been alot worse if i didnt see they turned hermi and worked really hard to find and destroy all male flowers i gave it hell tho.Wish i knew how they stressed to turn cloning is the most stress they got and some topping early on other than that they were well taken care of. will be harvesting by next week for sure tricombs are milky and there is alot of amber ones also they are ready and ripe

Likes
6
Share


@Spearfish
Follow
Water change day 51.
Too close to lights day 52. Used dimmer, prolly gunna buy a taller tent or modify this one.
Day 54. Dimming helped, glad i caught it early.

Likes
16
Share


@DeepRootsGrowTrees
Follow
Week 11 I though she was gonna be done this week only gave her RO water for the last 2 weeks but looking through the loop her trichomes are still mostly clear so I think I'll give her one more week. She looking great, smelling great, buds look amazing. Tried to get some good video so you can see how lovely she is!!
Likes
136
Share


@Kitties_and_Colas
Follow
~_~_~_~_~_~_~_~_~_~_~_~_~_~_~_~_~_~_~_~_~_~_~_~_~_~_~_~_~_~_~_~_~_~_~_~_~_~_~_~_~_~_~_~_~_~_~_~_~_~_~_~_~_~_~_~_~_~_~_~_~_~_~_~_~_~_~_~_~_~_~_~_~_~_~_~_~_~_~_~_~_~_~_
3/19/22
These girls are THICK!!..I think these Bangers are going to make some super dense buds...we noticed 2 of the 4 plants were starting to lighten up and draw color from lower growth so we gave them some "grow" solution while decreasing bloom..we'll probably do this for the next couple waterings before going back to our typical feeding regiment, all depends on color.. everyone is starting to get frosty around bud sites, some drastically more than others. They all seem very happy and pray to the MarsHydro 12hrs a day...our Big Bud and Green Crack cross is growing very fast too, 12/12 from seed and no sign of hermies or abnormal growth in the batch 🐱👌.. its been a stellar week ❤️🌱, thanks as for dropping by and happy harvests everyone!!
⚡Mars Hydro/SP-3000⚡ Specifications ⚙️:
Diodes: Samsung LM301B / Osram 660nm (960 total!)
Driver: Meanwell 300watt 🔌 (300W±5% @AC120V-277V)
PPF: 824umol/S ☢️
PPE: 2.8 µmol/j 〰️〰️
Lifespan: 50k+ hrs ⌛
Weight: 10.1 lbs (4.6kg)
Veg Coverage: 3 x 5 ft 🌱
Flowering Coverage: 2 x 4 ft 🌼
-The SP-3000 uses an aluminum heatsink (no fan) and the driver can be placed outside the tent 🌡️⬇️
-IP65 waterproof ratings, tolerant to high humidity grow environments 💦 ..
-Up to 15 can be daisy-chained together and all controlled from a single light! 💡~💡~💡~💡
~_~_~_~_~_~_~_~_~_~_~_~_~_~_~_~_~_~_~_~_~_~_~_~_~_~_~_~_~_~_~_~_~_~_~_~_~_~_~_~_~_~_~_~_~_~_~_~_~_~_~_~_~_~_~_~_~_~_~_~_~_~_~_~_~_~_~_~_~_~_~_~_~_~_~_~_~_~_~_~_~_~_~
03/22
Idk if it's the change in the weather but these plants are drying out fast..we've been watering almost every other day for the last week and a half, this is strangefor us.. but temps seem good, plants look happy enough I guess we'll be watering more lol