


Likes
Comments
Share


@CaptGrow
Follow
Mistakes..
* I switched from Advenced Nuts to TopCrop and didn't realize the second one is not balancing ph of the substance so you need to do it yourself.
* After realizing that I had a ph imbalance I didn't act fast, somehow I thought I would be a good idea to wait till the autoflovers would finish the cycle and I would take care of this one after, but I lost time and the desiese became stronger.
* After I fixed the ph problem, I switched the light schedule to 12/12. I had to let it vegetate for more time to be fully fixed and switch after, but I was in a hurry..
So the results are not so good. But believe me, its some strong ass weed :D
Anyway I've learned a lot from this grow. Next one will be a lot better

Likes
4
Share


@knnabisgrower
Follow
En la 4ta semana aumentamos la dosis del fertilizante para crecimiento, regulamos su p.h en 6.0 e hicimos una poda apical en el 4to nodo de cada una de las plantas.


Likes
15
Share


@38PLAN
Follow
Stiamo ancora raccogliendo,ancora nessuna pianta é morta,sto rimuovendo piano piano le cime più mature,così facendo evitiamo le cime popcorn e diamo il tempo alla pianta di riempire anche le cime inferiori,per adesso levando quella fumata e venduta siamo all'incirca sui 780g,però aspettiamo anche il nuovo stendino,alla fine del raccolto dovremmo arrivare a quasi 2 Kili con 7 piante e 6 vasi,con una media di 333g a pianta,ho pubblicato tutto quello che potevo,ogni procedimento,spero vi piaccia e mi seguiate
Likes
44
Share


@Cogollo_eu
Follow
**Encontrarás la traducción a español al final de la descripción**
From/Desde: 10/05/19 || To/Hasta: 16/05/19
From day/Desde día: 78 || To day/Hasta día: 84
You can find the Money Maker Diary here:
** Podéis encontrar el diario de las Money Maker aquí:**
https://growdiaries.com/diaries/25667-gorillamakingmoney-gorilla-vs-money-m
-----IMAGES & VIDEOS-----
5 - HomeMade Organic & Cheap CO2 generator (more info in week summary)
9, 10, 11 & 12: The bud on the right is a Gorilla one, the buds in the left or/and in the middle are Money Maker ones.
15 - Same Gorilla plant buds, one affected by CO2 in the roots and the other not.
-----WEEK SUMMARY-----
The smell is more sweet and intense every day, friends that came home turned them eyes into crystals when they see this little babys. The size isn't awesome, but the high ammount of buds full of crystals plus the strong sweet aroma makes them awesome. Buds are growing and fattenning very very well.
This week i added a boost of HomeMade CO2, i never measured the results of this invention so i can't give CO2 measurements. This method is widely used in home aquariums and there is where it comes from. For those interested i'm going to write here more detailed instructions. The 4 liters i've made will last for about 2 weeks.
---NEEDINGS---
- 250 ml Bottle
- 6~10 l Bottle
- 400 g Sugar / l water
- 1 Envelope of organic baker's yeast / l water (CHEMICAL WILL NOT WORK)
- 3 mid plastic tubes 40~50 cm
- 1 short plastic tube 5~6 cm
- 4 tube adapters
- Hot glue to seal adapters
The process of creating CO2 is simple, mix water, organic yeast and sugar in a bottle, and the sugar will free CO2 in the process of fermenting to alcohol due to the yeast.
1. Make a hole in the center of the big bottle cap, insert an adapter and secure it with hot glue
2. Make 3 holes in the small bottle cap and glue the other 3 adapters
3. Link both caps with one of the mid tubes and insert the other tubes on free adapters
4. Insert a short tube in the bottom of the small cap in the adapter that came from the big cap
5. Watch the Video!!
-----WATERING CALENDAR-----
Plants are beginning to drain the pots a bit faster so from now on i will raise the water ammount on each watering day 0.25 l.
11/05/19 - 1,5 l with All week nutrients -(Nirvana & Blombastic) also Big Bud half dosed @ PH6.4 & 2 E.C.
14/05/19 - 1,5 l with Bud Candy, Big Bud, Nirvana, B52, Bud Factor-X, Sensizym & Blombastic @ PH6.4 & 1.5 E.C.
*****ESPAÑOL*****
-----IMÁGENES Y VÍDEOS-----
5: Generador de CO2 casero, barato y orgánico (más info en el sumario semanal)
9, 10, 11 & 12: El cogollo que sale a la derecha es de una Gorila, el de la izquierda y/o el de en medio son de una Money Maker
15: Dos cogollos de la misma planta, uno afectado por CO2 en las raíces y el otro no
-----SUMARIO SEMANAL-----
El olor es más dulce e intenso día a día, los amigos que vienen a casa a verlas se quedan ojipláticos al verlas. El tamaño no es una maravilla, pero la gran cantidad de cogollos llenos de cristales añadido al aroma que entra por las fosas nasales las hacen increíbles. Los cogollos crecen y engordan de maravilla.
Esta semana he añadido un boost de CO2 casero, nunca he hecho mediciones de los resultados por lo que no puedo darlas. Este método es ampliamente usado en peceras caseras y de ahí saqué la idea. Para aquellos interesados dejo aquí instrucciones más detalladas. Con los 4 litros de agua que he preparado yo da para unas 2 semanas.
---NECESITAMOS---
- Botella de 250 ml
- Botella de 5 a 10 litros
- 400 g de azúcar por litro de agua
- 1 sobre de levadura de postre orgánica (LA QUÍMICA NO FUNCIONARÁ)
- 3 tubos de plástico de tamaño medio 40~50 cm
- 1 tubo de plástico de tamaño pequeño 5~6 cm
- 4 adaptadores para los tubos
- Cola caliente para pegar y sellar los adaptadores
El proceso de generar CO2 es simple, mezcla agua, levadura orgánica y azúcar en una botella, y el azúcar liberará CO2 en el proceso de fermentación a alcohol.
1. Haz un agujero en la tapa de la botella grande, inserta un adaptador y séllalo con cola caliente
2. Haz 3 agujeros en el tapón pequeño y haz lo mismo con los otros 3 adaptadores
3. Conecta los 2 tapones con uno de los tubos y conecta los otros 2 tubos a los adaptadores restantes
4. Conecta el tubo pequeño en la parte libre del adaptador del tapón pequeño que viene del tapón grande
5. Mira el vídeo
-----CALENDARIO DE RIEGO-----
Las platas comienzan a secar los tiestos un poco más rápido, asi que de ahora en adelante incrementaré 250 ml de agua adicionales en cada riego.
11/05/19 - 1,5 l con todos los nutrientes semanales -(Nirvana & Blombastic) BigBud mitad de dosis @ PH6,4 & 2 E.C.
14/05/19 - 1,5 l con Bud Candy, Big Bud, Nirvana, B52, Bud Factor-X, Sensizym y Blombastic @ PH6,4 & 1,5 E.C.


Likes
12
Share


@Northern_Ent
Follow
June 29: should start growing quickly here soon.
July 1: last 30 days has been 1.5 C cooler than historic average, and is more than 3 C cooler than last year. Big heat wave in eastern Canada, but not here this year (so far).
July 4: some growth going on above ground but she should pick up speed here now with nice weather and Week 4.
Likes
10
Share


@CanadianFillmore
Follow
End of week 9 flush week, cut the blueberry ladies and put them in the mesh drying rack. Will update in 2 weeks with first smoke and dry weight, assuming she's dry in 2 weeks.
Flush week for the Super Lemon Haze, she'll get chopped this coming Sunday.


Likes
9
Share


@Hazebuster888
Follow
In der sechsten Blütewoche haben sich die Blüten weiter verdichtet und an Größe zugenommen. Die Pflanze profitiert sichtbar von der erhöhten Lichtintensität und den zusätzlichen Netzen, die für Stabilität sorgen. Das Scrogging hat sich als äußerst effektiv erwiesen, da alle Blüten gleichmäßig Lichlt erhalten und sich prächtig entwickeln. Die Pflanze wirkt insgesamt sehr vital, und die Blütenstände zeigen eine schöne Harzbildung, was auf eine erfolgreiche Ernte hoffen lässt.
Likes
4
Share


@TegridyCal
Follow
Now we are at exceptional levels. The plant is very florid, healthy with large leaves and large and resistant branches, the trunk is really scary, I hope everything promises super branches. In my opinion the topping is true that slows down the harvest but because it slows down the forging and the plant manages to grow very well when it starts. We are using for the protection of Neem oil + potassium soap at the right doses plus a nutritious foliar Lord Grow that protects, nourishes from from Co2 via leaf.

Likes
2
Share

@Skynets_Growing
Follow
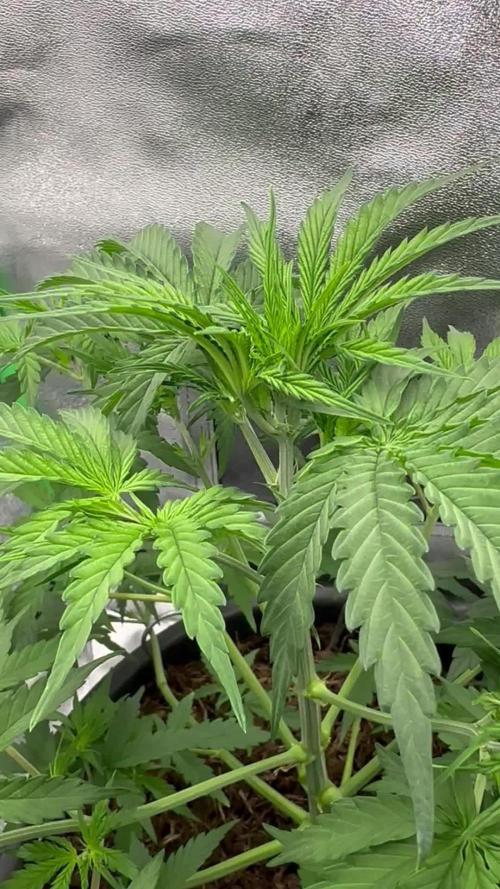
Elsa my Community Grow Plant went in her 6 Week of Growing and her First Week of pre flowering. In my eyes she do it slowly and when I look at her „flowers“ she has an other plan then me… but shevis the boss and I will learn how she grow. Maybe next week I will see more what she do… and so ends Week 6
Likes
9
Share


@Colo420
Follow
Triste día hoy, luego de regar y hacer el seguimiento de las feminizadas continúe con la flora.... Fancy ok, colombian ok.... Y al salir afuera me encuentro con la triste noticia de que me robaron la planta de exterior. Esto es algo que estaba dentro de las posibilidades pero no me lo imaginaba tan pronto (planta a mitad de floro sin tricomar).
está plaga llamada humano solo demuestra su estupidez al cortar en el tallo una planta sin tricomas. Pero esto es así, ahora queda mejorar, meter más seguridad y darle para adelante, cómo siempre 💪


Likes
29
Share


@DaddyPrime
Follow
7/17 so she went through a massive stretch in the past week. Lots of beautiful side branches.
7/21 shes hungry for nitrogen. Thats one of my biggest issues with autos is they get low on nitrogen at the begining of flower and then im cautious of adding nitrogen during flower. Well lets see how she grows. Shes lookong pretty good and happy and strong so far. Those pistils are crazy for being only the first week of flower. I cant wait to see the final result🤞💚


Likes
60
Share


@Professor_Chaos
Follow
Beginning of week..
I went up a tad on the nutes today.. And went down on the light power last week.. It was about 65% - 70% power which was quite a bit, I guess.. I put it at 50% power and she is finally starting to get some height to her.. I noticed more pistils toward the very top. I really hope she doesn't start flowering too soon.. I'd like to get some LST done on her. But she is happy and healthy!
Next day...
Even more pistils! Its been awhile since I grew an auto.. So I kinda forgot how early pistils can start poppin out but still be in veg (preflower). I just really wanna turn this girl into a flat bush!
10 mins later...
Ok.. So looking back at my other autos.. This is pretty typical for them to start showing preflower this early.. She should still have 2 or 3 more weeks of veg with preflower!
Mid week..
This is a day early.. But close enough.. 3rd week and growth is beginning to explode! The very first node's branches aren't really doing much.. Plus they are damn near to the ground.. I'm wondering if I should just remove them.. Maybe not yet.. But soon.. Or when I finally apply some LST. She is doing great!... No deficiencies.. No excesses.. Autoflowers are a trip! Can't wait to see what she looks like in another 7 days! I wanna try to do the entire grow without removing much, if anything.. But if this bottom branch doesnt start doing something.. I'm gonna have to remove it.. Its just bothering me way too much lol.
Actually mid week..
SoI have been noticing a little bit of clawing and darkness.. BUT ONLY on the new growth.. As the leaves get older they seem to straighten out and lighten up a bit.. But I'm pretty sure it's nitrogen toxicity.. So I went down from .66mL/L to .33mL/L.. I use 3L to water daily.. So basically 1mL per feeding of all the base nutrients and the CalMag.. The Floralicious Plus has a bit of nitrogen too so I went down a tad on that as well. I read someone else's grow that says these girls are a bit sensitive to nitrogen.. So that's where I'm at now. Flushed this morning, and now for a small feed tomorrow morning. Will be updating with pics at the end of this week.
Later that night..
Went ahead and flushed with just 2L of pH'd water.. Going in - pH: 6.3 PPM: 240.. Runoff - pH: 6.1 PPM: 640... So the PPM is still a bit high, but during the feed tomorrow, it should go down some still.. I should have ALOT of runoff tomorrow. I had the same amount I normally do when I use 3L just from these 2L.. Just cuz its 12 hours early.. The medium was still nice and moist.. And will still be in the AM for the next fertigation.
Next day...
Waking up this morning, I found that the oldest set of leaves that had been clawed cleared up.. For the most part.. Still dark asf.. But not as much clawing..the newest set were still clawed tho.. Which is understandable.. I made 3L of nutes.. Only used 2L in the AM.. Going in pH: 6.3.. PPM: 420... Runoff pH: 6.2.. PPM: 480... Not bad.. And I still have 1L left over which I am going to have to give her later today.. And will update with the runoff info also. Some say not to worry about the runoff pH.. But I think that is only because when people see it really low, they tend to give make the nutes waaay too high in order to combat the low runoff.. I just make my nutes 6.5 till ai see the runoff coming out at the area that works best for my grows.. Which is 6.2 or 6.3.. Let me explain why I use 6.2 to 6.3... My first 2 grows in coco I was using 5.8 to 6.0.. It worked well in veg but it was only during the transition and beginning of flower that I had calcium defeciency.. GWE website said that in hydroponics/coco that calcium is best absorbed at 6.3 or so.. So ever since I've just ran my girls at 6.2 or 6.3.. No lower, no higher.. The entire grow.. And haven't had any issues with deficiencies since! So that is MY sweet spot.. I may let it drift to 6.1 or 6.4.. But I try not to, for the most part.
Later that night...
I went ahead and did 1L of pH'd water first.. Then did the 1L of nutrient water.. Runoff came out at 420 PPM 6.2 pH... Nice... Also, I went ahead and ponytailed the top and pulled some of the longer branches on top of the fan leaves.. I'm only going to keep it ponytailed for the rest of the day (6 hours left of lights on).. Never tried this before, but with these super fat indica leaves blocking literally every branch.. I figured it couldn't hurt to give it a try. I may do it for another 6 hours tomorrow.. But I havent thought that far into it yet. I just want her and her branches to be long enough to begin some LST by the beginning of next week.. And already more than halfway through this week. Happy with the way things are going, for the most part...
Almost end of week..
Ponytailed her again for another 6 hours this morning.. Just trying to give the side branches a little head start before the LST next week.
End of week..
Welp.. I couldn't wait one more day to apply some LST.. I went ahead and did it today.. I also removed the bottom node, leaves and branches.. They were weak branches and I figured I could get them to take root and breed some seeds with them using Collidail Silver method! I really like how these branches have grown on this girl! It's like they already grew into a lollipop!!! Still only using the light at 50% power.. Which is helping keep the temps down a bit... Niceeee... I haven't defoliated anything (except the bottom node due to very weak branches and horrible looking leaves.. Which I'm guessing is because they were so low, possibly getting nutrient water on them during watering) but again, cloning those to breed with! She has completely exploded this week! Very happy with this girl! On to the next week!!!...
Likes
224
Share

@yan402
Follow
This two were part of another diary and got moved out due to space reasons at VW8 and moved back indoors at VW20
https://growdiaries.com/diaries/218151-auto-god-s-glue-grow-journal-by-yan402
13.09.25 VW21 Both are looking good and are developing tighter nodes than when they were outside, I'm going to have to keep cutting them back every once and a while I also applied nematodes against thrips and fungus gnats.
20.09.25 VW22 some spots and some yellow leafs, I think it's a root problem, probably root bound, but both seem healthy and are getting thicker so maybe just top up with Coco coir and give a slight different nutrient schedule less Tri Part Bloom could do the trick MAYBE lol.
27.09.25 VW23 Topped up the pots with extra coco coir and trimmed the side roots a bit, both plants were root bound 📹
03.10.25 VW23 did a HST/LST session 📹
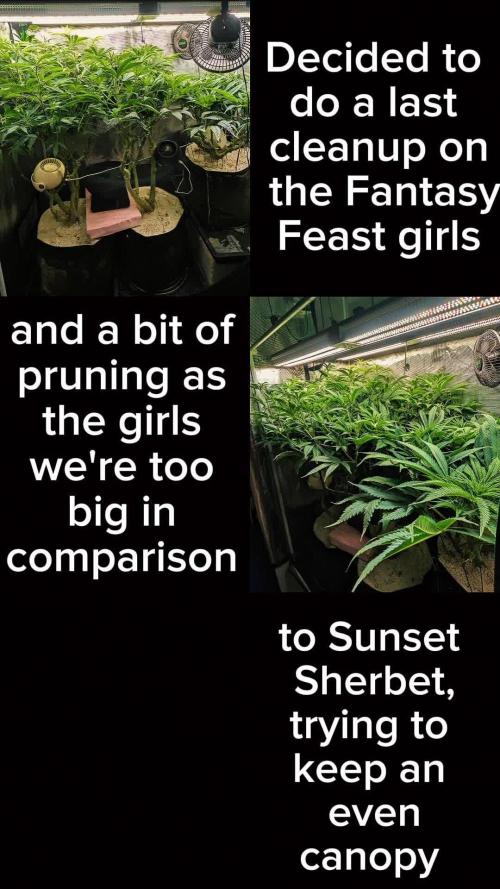
12.10.25 VW25 Done a major HST session to try and keep them in line with the Sunset Sherbet GF I have going in the same tent, rest in the video 📹
17.10.25 VW25 ffj/fpj/fish 30 → 60 ml
19.10.25 VW26 it just became a one plant diary, keeping #5, #6 gets it's own diary for testing nutrients.
20.10.25 VW26(?) Feed tweak: added 3 g Calcium Nitrate/ 30 L (≈ 15 ppm N + 10 ppm Ca)
24.10.25 VW26 did a defoliation and trimming session 📹
25.10.25 VW26 I'll be repoting tomorrow, 26.10.25 VW27 rest in the video📹
27.10.25 VW27 Epsom Salt 0 → 2.5, Calcium Nitrate 3 → 9 g
01.11.25 VW28 CalMag 60 → 30ml, TriPartBloom 20 → 30ml, Magnesium 2.5 → 3.5g
04.11.25 VW28 no more yellowing between the veins and no new spots, the changes to the schedule worked, rest in the video 📸
09.11.25 VW29 Did what I'm hoping is a last cleanup 🎥
12.11.25 VW13 Did another cleanup in the tent 🎥, also switched to the FERMAKOR PK Micro schedule, (10.11.25) added Phosphoric acid as a pH down in preparation for flowering
🌱💦🌱💦🌱💦🌱💦🌱💦🌱
Day to day tasks & actions 🌿
🌱💦🌱💦🌱💦🌱💦🌱💦🌱
08.11.25 VW28 – no feed no water
09.11.25 VW29 – Fed 5l of FERMAKOR PK → 2l runoff
10.11.25 VW29 – Fed 5l of FERMAKOR PK → 2l runoff
11.11.25 VW29 – Fed 5l of FERMAKOR PK → 2l runoff
12.11.25 VW29 – Fed 5l of FERMAKOR PK → 2l runoff
13.11.25 VW29 – Fed 5l of FERMAKOR PK → 2l runoff
14.11.25 VW29 – Fed 5l of FERMAKOR PK → 2l runoff
15.11.25 VW29 – no feed no water
(*RUNOFF reused for indoor house plants)
🍶💧🍶💧🍶💧🍶💧🍶
💧 Nutrients in 30 L #1 Veg — FERMAKOR
🍶💧🍶💧🍶💧🍶💧🍶
💧 Calcium Nitrate (Calcinit / Nitcal): 45 → 40 g
= 1.33 g/L → 207 ppm N + 253 ppm Ca
🍶 PK Concentrate (FERMAKOR Base): 30 → 40 ml
= 1.00 → 1.33 ml/L → balanced 1:1 P:K + light micros (from extract)
💧 Home-made FFJ/FPJ (Fish + Veg): 30 ml
= 1.00 ml/L
🍶 Epsom Salt (MgSO₄·7H₂O): 8 g
= 0.27 g/L → 26 ppm Mg + 35 ppm S
💧 Fetrilon Combi 1 (Micros): 0.5 g
= 0.017 g/L → Fe 0.7 ppm • Mn 0.7 ppm • Zn 0.3 ppm • Cu 0.3 ppm • B 0.1 ppm • Mo 0.02 ppm
🍶Phosphoric Acid (pH down) + Citric Acid (chelation): as needed
→ First set pH with phosphoric acid, then add a little citric only if you want extra chelation
💧 Target pH: 5.8 – 6.0 (drop test yellow-green)
📦 TOTAL: 60 → 70 ml / 48.5 g inputs per 30 L
= 2.00 → 2.33 ml/L + 1.62 g/L
⚙️✂️⚙️✂️⚙️✂️⚙️✂️⚙️
✂️ Tools & equipment ✂️
⚙️✂️⚙️✂️⚙️✂️⚙️✂️⚙️
✂️ 2× MarsHydro SP3000
⚙️ MarsHydro 150mm ACF Ventilator
✂️ Trotec dehumidifier (big unit)
⚙️ Mini no-name dehumidifier
✂️ Kebab skewers (LST – stainless)
⚙️ Wire + roast skewers (LST assist)
✂️ Scissors (HST)
⚙️ Vacuum (for spills & cleanup)
✂️⚙️✂️⚙️✂️⚙️⚙️✂️⚙️✂️⚙️✂️⚙️
🍒🍭🍬🌈🍒🍭🍬🌈🍒🍭🍬🌈🍒
🦄Fantasy Feast ( Seeds)🦄
🌈🍒🍭🍬🌈🍒🍭🍬🌈🍒🍭🍬🌈🍒
Species: Hybrid (Regular)
Genetics: The mother is Unicorn Whip by Dirty Bird Genetics. The father is Charcuterie by Cannarado Genetics.
Effect: Unknown Mixed effect body and head high
Flavor: Some phenos are Skunky gassy fruity, some are fruity sour citrus with a chemical touch and a touch of skunk
Flowering: Estimated 8–10 weeks
Resistance: Strong — Testing phase done
YouTube Link: https://youtube.com/-m8h?si=A7x4Zlr2kj-_ga31
Likes
14
Share


@Snickelfritters
Follow
10/21- Flower has begun!! I've been gradually removing growth from under the canopy that I dont anticipate will become sizeable buds. Now we wait for the stretch. Took a few clones to try my hand at that.
Air is drying out big time lately. I'm probably going to have to give in and buy a humidifier because it's going to be essential to keep my buds from drying out too fast and keeping these plants in healthy rh range.
Despite humidity swings, plants seem to be doing well across the board so I already have a leg up on my last grow. I sprayed for bugs as a precaution. Neem and peppermint Castille soap diluted in water was the choice. Left a residue on my plants though so live been keeping my light between 30-40% and gradually turning up the intensity each day until I reach where I was(70) I dont want to burn my leaves because I have treating for bugs before.
I will add pictures this weekend. This is posted on Day one so there's really not too much change to show in the plants. Really excited to see how they develop over the next 2 weeks.
10/24
Added pics of two plants. I accidently deleted my shoot of GZ 2 and I don't feel like taking them out of the tent again because it's a bit of a pain with the net. It's much taller than it's sister and maybe the healthier plant at this point. Moby dick is a bush, very healthy even still.
No real signs of flower yet. They do seem to be stretching a bit but when you look everyday it's hard to tell. I'm hoping to have a really nice canopy in a week.


Likes
6
Share


@GoldenWeedGrower
Follow
Legend
Timestamp: 📅
EC - pH: ⚗️
Temp - Hum: 🌡️
Water: 🌊
Food: 🍗
pH Correction: 💧
Actions: 💼
Thoughts: 🧠
Events: 🚀
Media: 🎬
D: DAY, G: GERMINATION, V: VEGETATIVE, B: BLOOMING, R: RIPENING, D: DRYING, C: CURING
______________
📅 D64/B27 - 18/06/24
⚗️ EC: 1.0 pH: 5.2
🌡️ T: 26°C H: 80%
🌊 FLUSH
🍗
💧
💼 FLUSH first day
🧠
🚀
🎬 1 TL video
______________
📅 D65/B28 - 19/06/24
⚗️ EC: 0.2 pH: 7
🌡️ T: 26°C H: 80%
🌊 FLUSH
🍗
💧
💼 FLUSH second day
🧠
🚀
🎬 1 TL video
______________
📅 D66/B29 - 20/06/24
⚗️ EC: 1 pH: 6.2
🌡️ T: 26°C H: 80%
🌊 15 L
🍗 CalMag - Bloom A-B - Bud Candy - B52 - Overdrive
💧
💼
🧠
🚀
🎬 1 TL video
______________
📅 D67/B30 - 21/06/24
⚗️ EC: 1 pH: 6
🌡️ T: 26°C H: 70%
🌊
🍗
💧
💼
🧠
🚀
🎬 1 TL video
______________
📅 D68/B31 - 22/06/24
⚗️ EC: 1 pH: 6
🌡️ T: 26°C H: 70%
🌊 15 L
🍗 CalMag - Bloom A-B - Bud Candy - B52 - Overdrive
💧
💼
🧠
🚀
🎬 1 TL video
______________
📅 D69/B32 - 23/06/24
⚗️ EC: 1 pH: 6
🌡️ T: 26°C H: 70%
🌊
🍗
💧
💼
🧠
🚀
🎬 1 TL video
______________
📅 D70/B33 - 24/06/24
⚗️ EC: 1 pH: 6
🌡️ T: 26°C H: 70%
🌊
🍗
💧
💼
🧠
🚀
🎬 1 TL video

Likes
6
Share


@Reidy_B
Follow
Things are looking great! I started some backup seeds when things were looking really rough. Just in case. 😉 I also FIM’d my bigger plants because they were looking so much better! I have also removed the drip irrigation, just to make it more of a personable experience with my ladies. ☀️💦