
Likes
Comments
Share


Likes
10
Share


@JohnnyGrower
Follow
Esta semana los nutrientes siguen de la misma manera, es notorio el exceso de Nitrogeno por ende se disminuira en los próximos riegos, se realizaron podas apicales en los clones que no les hice anteriormente para que alcanzaran más altura. Dentro de esta semana instalare la malla scrog Kanovi para guiar los vigorosos brotes.
Además esta semana ya esta retomando el crecimiento la planta madre variedad Tangie la cual cumplió su ciclo de propagación por esquejes y porfin florecerá.
Leo comentarios, opiniones y recomendaciones


Likes
50
Share


@AsNoriu
Follow
Day 43. Queen is reaching sky, had to move lamp one more time. Margaret is getting fatter, loads of mini colas and buds, really compact version of that strain.
Today - plain water, next watering they will get molasses tea. Then plain water and at the end of week - full blast of nutes !
To me it looked like top leaves of Queen getting bleached lightly, think i have just 30 cm left of height, let's hope she will be massive , while staying low ;))) Her structure is very stretch out, a bit too big distance between nodes compared to what i like or would want to see from perfect plant.
Day 46. Queen still has obvious light bleach, quantum boards makes your plants hungry for cal mag. Hope it and later silica feed will bring all to normal.
Both girls pack like crazy, really fun to observe.
Both looks to be not so far from 1g/W ;))) No third needed !!! Hopefully ... ;)))
Tomorrow they will get only third feed in theirs life ... Nutes companies would hate me ;)))
Day 48. Queen is super sensitive to Mag, second Cap-Mag feed and she burns again ...
Will go water, water, silica, water now. Will see how they look after this.
Girls still drink fast, there is no lockouts, but rusty spots tells everything.
I noticed that this strain don't need big feed, she grows nice when hungry.
Happy Growing !


Likes
2
Share


@theicyeffect
Follow
A diary dedicated to the rest of my special girls. Check out my profile to see the Gorilla Glue up close (she will still appear here from time to time).
Germinated them directly in the soil with natural sunlight, achieving a 100% success rate.
All came out the soil with remarkably thick stems already, excited to see how these old school genetics will behave.
Lots of growth during their first week of life, reaching the end of it with 2 pairs of leaves each. We surely got some sturdy girls here.
Sunset Sherbet had some damage from struggling to hatch and is now slowly recovering, I’m sure she’ll catch up with time. Nothing good nutrition and proper lighting won’t fix.
Bruce Banner turned out to be incredibly big for her age, never grown a seedling like her! You can tell she’s already finding her germination vase too small. Making a statement with her presence.
Biscotti Mintz also looking big and very healthy.
Let’s watch them grow and see what they’ve got 🌱💪
Likes
100
Share


@MadeInGermany
Follow
the 3 Victory Kush F1 are in bloom for 12 days.
The Zkittlez and Orange Sherbert have been in bloom for 6 days.
the Zkittlez * 2, Orange Sherbert * 2 Blue Gelato # 41 * 1 and Sour Diesel have been in bloom since today.
the Blue Gelato * 2, Her Majesty F1, Gelato and Blue Gelato # 41 * 3 will bloom approximately in 2 weeks.
maybe the Blue Gelato # 41 * 3 also stays as a mom in the vegi chamber, because she is the mom of the Blue Gelato genetic, which is in the aero system.


Processing
Likes
5
Share


@Ensign420
Follow
Week 02 Introduction
This week has been a bit of a struggle. Had my first experience dealing with slime and brown algae. But I think adding enzymes and increasing the beneficial bacteria helped to fix the issue. Also experienced nutrient burn for the first time. My nutrient solution strength got as high as 671 PPMs. So backed it down to about 430 PPMs during the end-of-week reservoir change. Also cut Hydroguard (expired?), CaliMagic, and Superthrive from this grow. Now she's still stunted, but is starting to recover. Hopefully...
[START OF WEEK 02]
Day 01 - Monday - 08/10/20 - Total Days: 008
-----------------------------------
- [0830]: Still looks a bit yellow. But getting larger!
--- Solution strength was at 248 PPMs.
--- Just topped off with a bit of distilled water
--- PH went up to 6.1 so PH'd down to 5.8
--- Ran the top feed for a bit to wet the hydroton.
- [2130]: She's looking even more yellow now.
--- Even the new leaves are really yellow.
--- Decided to add more base nutes.
--- Added 4ml of Sensi A
--- Added 4ml of Sensi B
--- Now at about
--- Solution Strength went up to 304 PPM.
--- PH was at 6,
--- Also raised the water level a bit more.
--- I really hope it's a nutrient deficiency and not an over-watering issue.
--- Please live!
Day 02 - Tuesday - 08/11/20 - Total Days: 009
-----------------------------------
- [0830]: Looking less droopy. But still yellow.
--- Decided to do a reservoir change.
--- 4.5gal of distilled water
--- 8ml of Sensi Grow A
--- 8ml of Sensi Grow B
--- 8ml of Voodoo Juice
--- 4ml of B-52
--- 4ml of CaliMagic
--- 4ml of Hydroguard
--- 4 drops of Superthrive
--- PH'd down to 5.8
--- Solution strength: 302 PPM
--- Since I didn't want to risk over-watering the rockwool, I did not to do a top feed, may do one tonight after the sleep cycle (lights are still set to go off at 10am and back on at 4pm).
--- As I was doing a reservoir change, I noticed that the tubes and bucket were a bit slimy. Didn't really stink or anything. Is this normal? Maybe due to the Hydroguard and Voodoo Juice?
--- I hope she gets better soon!
- [2215]: Getting larger! But still yellow.
--- Also can see a root growing through the net pot! Tiny little thing but it's there! Will have to start dropping water once more appear.
--- After looking over a few DWC diaries using AN nutes, seems like my solution strength is still too low. Most around this stage average around 500 PPMs with about 4ml per gallon.
--- Top fed for a minute to wet the top of the hydroton.
--- Solution strength went down to 263 PPM.
--- Added 8ml more of Sensi A
--- Added 8ml more of Sensi B
--- Now base nutes are at 16ml for 4.5 gal of water.
--- PPMs went up to 411.
--- Still lower than 500 PPMs, but that's okay.
--- PH was at 6. Not sure if I should adjust PH using AN nutes. So going to not ajdust unless PH goes above 6.1.
Day 03 - Wednesday - 08/12/20 - Total Days: 010
-----------------------------------
- [0830]: Looks like more root growth!
--- She still looks yellow. But leaves are perky.
--- PH was at 6.2 so lowered down to 5.8.
--- Solution strength was at 394 PPMs
--- Since roots are still growing, I decide to lower the water level a bit. Now water level is a bit below the net pot.
- [2200]: Root is getting longer!
--- Slime is returning. Not sure why.
--- Solution strength: 357 PPMs
--- PH: 6.1
--- Decided to add an enzyme along with more beneficial bacteria to hopefully cure the slime.
--- Added 16ml of Sensizym
--- Added 5ml of Hydroguard
--- Added 8ml of Voodoo Juice
--- New solution strength: 430 PPMs
--- New PH: 6.1
--- Top fed for a minute.
--- This slimy residue is really freaking me out! I hope the added enzymes will help eliminate the slime.
--- Going to do a full reservoir sterilization/nutrient change over the weekend. Please survive until then girl!
Day 04 - Thursday - 08/13/20 - Total Days: 011
-----------------------------------
- [0930]: I think the enzymes worked! There is little to no slime now!
--- Although I think the root was also dissolved in the process. It's now just a little stub sticking just below the net pot. The enzyme is also suppose to dissolved dead roots too but guess that root was too weak? Not sure what happened there. But I think the slime is cured!
--- Solution strength went down to 395 PPMs. Decided to add more base nutrients.
--- Added 8ml of Sensi A
--- Added 8ml of Sensi B
--- Added 4ml of B-52
--- Solution strength went up to 598 PPMs.
--- PH was at 6.1
--- As long as the PH is between 5.5 and 6.3, I'm not going to use PH Up or Down. But still will monitor PH levels.
- [1715]: Checked up on her after her nap and shes looking alive but stunted. But no slime!
--- Decided to add some sugars to help maintain the enzymes and beneficial bacteria.
--- Solution strength was at 587 PPMs.
--- PH was at 6.2
--- Added 8ml of Bud Candy
--- Solution strength went up to 671 PPMs.
--- PH also went up to 6.3
--- Lowered water level a bit to hopefully promote more root growth.
--- Top fed for a minute.
--- She is getting bigger, but still looks yellow.
Day 05 - Friday - 08/14/20 - Total Days: 012
-----------------------------------
- [0915]: Leaves look a little burnt on the tips. Still no slime.
--- Going to back off on the PPMs to hopefully fix the nutrient toxicity.
--- Solution strength was at 632 PPMs
--- PH was at 6.3
--- Added/Removed water until PPMs were at 536.
--- PH was still at 6.3
--- Raised water up a bit, then top fed for a minute.
- [2200]: Looking better. Still yellow though.
--- Solution strength: 514 PPMs
--- PH: 6.5
--- Added PH down.
--- New solution strength: 518 PPMs
--- New PH: 5.2
--- PH was kind of high. So decided to PH down. Had to use quite a bit to bring it down. But eventually got it to drop down to 5.3. A little low, but so far, the PH has always gone up so wanted to start it really low.
--- Ran the top feed for a minute to re-saturate the top of the hydroton.
Day 06 - Saturday - 08/15/20 - Total Days: 013
-----------------------------------
- [0830]: She looks stunted. leaves are still yellow.
--- Solution strength: 514 PPMs
--- PH: 5.6
--- Top fed for a minute.
--- Not sure what to do at this point. Going to do another reservoir change soon. Hoping she lives until then.
- [2145]: Looking pretty much the same.
--- A bit of slime has returned. Since I've been diluting the nutrient solution, the enzyme ratio has dropped. So I guess this is expected.
--- Also noticed that slime build up was on the air-stones. Never really checked the stones so not sure how long that has been there. Looks brown too, which can't be good.
--- Going to do an H202 sterilization of the system (minus the net pot) tomorrow so did not add anything.
--- Lowered the water level to below the net pot.
--- Then top fed for a minute.
Day 07 - Sunday - 08/16/20 - Total Days: 014
-----------------------------------
- [0900]: STERILIZATION DAY!
--- Decided to skip today's night cycle for a deep clean.
--- I'm hoping that skipping a night cycle won't be too stressful.
--- Temporarily moved her to a new bucket.
--- Used about a half of gallon of straight distilled water to flush out the net pot.
--- Drained the system and wiped up all the brown sludge. Also removed the air stones and cleaned up all the goo.
--- Filled the system with 2 gallons of distilled water and at least 30ml of food grade hydrogen peroxide (35% strength).
--- Yea its a lot, but since I'm not going to sterilize the system overnight, I went with a really high doseage. Basically I kept adding until I started to see little bubbles start to form.
--- Then I ran the water pump.
- [0915]: Boiled the air stones in tap water for about 10 min. Then reconnected them to the airlines.
--- I let the air stones and hose soak in the sterilization solution for about 5 minutes so the peroxide can absorb into the stones. Then ran the air stone to help mix and agitate the solution.
--- Occasionally, I'd repeat the process of turning the air pump off for a few minutes to let the stones soak.
- [1000]: Covered the top two row of holes of the net pot with some aluminum tape. Hopefully this solves the light leaking in through the hydroton.
- [1200]: Used an old toothbrush and scrubbed the pump clean. Then drained the system.
--- Refilled with more distilled water and peroxide. Again added a lot.
--- Ran system again to sterilize even more.
- [1530]: Drained the system and refilled with distilled water to rinse.
--- Ran the system for a few minutes, then drained and rinsed again.
--- Did this a few more times over about an hour.
- [1630]: Added 4 gallons of fresh distilled water.
--- Added 15ml Sensi Grow A
--- Added 15ml Sensi Grow B
--- Added 12ml of B-52
--- Added 16ml of Voodoo Juice
--- Added 16ml Sensizym
--- Solution strength was at 430 PPMs
--- PH was at 5.6
--- I was going to add Hydroguard, but I think the bottle is expired. Since 2017 or 2018!? I think Hydroguard is good for up to 2 years from the date on the bottle or 6 months after opening. So not going to use from now on. I wonder if this could have contributed to the slime build up.
--- Also removed the CaliMagic and Superthrive too. Going to only use AN products to eliminate the chance of incompatible nutrients.
--- Placed her back in the bucket and top fed for a minute.
--- Here's hoping for the best. Going to let it ride until morning! Please feel better!
[END OF WEEK 02]

Likes
18
Share


@DogDoctorOfficial
Follow
Week 3 Report: The White OG – Reaching New Heights 🌟
Another week, another milestone for our beautiful White OG! She’s pushing through her veg stage, now proudly showing off her fourth node and growing strong. While she’s looking amazing, I’ve noticed a touch of light green creeping in—nothing to worry about, but it’s a little nudge that a pot upgrade is coming soon. For now, we’re holding steady with the same great conditions and feedings, letting her shine her way.
Growth Highlights: Pushing the 4th Node
This week, she’s been focusing on steady vertical growth and spreading out her gorgeous leaves. The emergence of her fourth node is a sign she’s gearing up for even bigger things ahead. Though that lighter green coloring hints at her wanting a little more room to stretch her roots, it’s not slowing her down. Next week, she’ll get a new home in a bigger pot, plus a boost from Aptus All-in-One Pellets to power her progress.
Environment: Consistency Is Everything
The environment remains the key to her success:
• Temperature: Keeping it steady and warm to promote healthy, vigorous growth.
• Humidity: Still riding that high RH wave, which keeps her roots happy and hydrated.
• Lighting: The Future of Grow (FOG) LED at 200 PPFD continues to provide just the right amount of energy for strong, compact growth.
Feeding Routine: Keeping It Balanced
She’s thriving under the care of Aptus Holland nutrients, and this week, the focus has been on maintaining her steady growth with:
• Regulator (0.15 ml/L): Supporting her structure and keeping stress levels at bay.
• CalMag Boost (0.25 ml/L): Ensuring those cell walls are strong and chlorophyll production stays on point.
• Start Booster (0.25 ml/L): Powering her roots with essential nutrients and beneficial microbes.
• All-in-One Liquid (1 ml/L): Providing a complete nutrient blend to fuel her vegetative stage.
These products have been keeping her strong and resilient, preparing her for the next phase of her journey.
Looking Ahead: Pot Upgrade Incoming!
As we move into Week 4, it’ll be time for her first transplant into a bigger pot. This will give her roots room to expand and allow her to take full advantage of the nutrients from Aptus All-in-One Pellets. For now, though, she’s holding her own and looking every bit the resilient beauty she is. 🌱✨
Shoutouts and Love
Big thanks to the amazing team behind this journey:
• Future of Grow for providing stellar lighting.
• Aptus Holland for their incredible nutrient line.
• Grow Diaries, for being the platform where we all share and learn.
• And to all of YOU, the growers, followers, and friends—thank you for your inspiration and support! 🌟
Oh and last but not least huge thanks to SeedsmanSeeds 💚
Stay tuned for next week’s update—our White OG is just getting started. 💚
Growers Love! 🌱✨
DISCOUNT CODE - SeedsmanSeeds - DOGDOCTOR 10% off
As always thank you all for stopping by, for the love and for it all , this journey of mine wold just not be the same without you guys, the love and support is very much appreciated and i fell honored and so joyful with you all in my life 🙏
With true love comes happiness 💚🙏 Always believe in your self and always do things expecting nothing and with an open heart , be a giver and the universe will give back to you in ways you could not even imagine so 💚
Friendly reminder all you see here is pure research and for educational purposes only
💚Growers Love To you All and remember to keep that smile big and alive 💚

Likes
10
Share


@Skinnytalls420
Follow
Day 16-27/12/21 doing very well!! Day 20-31/12/21 all looking good just waiting for space in my other tent so I can move half of them!!!!
Likes
2
Share


@Gnrlymsntrp81
Follow
Hy Growmies,
The stretch is over, so I switched to CANNA Aqua Flores. Almost screwed up since I Had a light leak through some Styropor and had some white slime on the roots under the leak. Removed the water and sprayed them directly with some 3% hydrogen peroxide. Worked great now we are on track again.

Likes
21
Share


@GRow_M8s
Follow
- Drying for 3 days, the 2 airports-plants chopped and dried in the dehumidifier and the other 2 hanged upside down as they were.
- Humidity -> 40-50% and temps -> 21-24C°.
Processing
Likes
7
Share


@KonstantinUKR
Follow
Результат недели видно на фото
Честно говоря, удивлён результатом роста в 4л горшке.
Рипен лить закончил, неделя воды теперь.
Likes
182
Share


@Bloombuster
Follow
На этой неделе поработал с ветками в неперспективных местах, удалив все лишнее, что могло бы вытягиваться, вместо генерации цветов. За неделю растение выросло на 10 сантиметров. Проверил натяжение, центральный ствол туго натянул шнур растяжки, пытаясь выпрямиться после освобождения всех веток от натяжения. Пока ещё рано отпускать растяжку ствола, сделаю это после остановки вертикального роста. Ещё одна неделя "вытягивания" впереди, но цветы уже довольно быстро набирают массу.
После обрезки неперспективных веток внизу растения, у меня чесалась рука, которую я запускал в гущу листвы. Это словно крапива, жжет, вызывает раздражение и пока не вымоешь руку с мылом в теплой воде, жжение не уходит. Девочка достаточно липкая, чтоб стать в одну линию с уже выращенными девочками и посоревноваться с ними в эффекте и урожае.
Запах изменился до неузнаваемости, теперь она не пахнет кошкой, скунсом.... то, как она пахнет, невозможно описать обычными словами...это похоже на запах разнотравья в одном букете. Кажется что тут смесь запахов: чебрец, мята, мать-и-мачеха, плакун-трава и чертополох. Запах сладкий, медовый, с небольшим пряным горьковатым шлейфом. Внешне цветы начали становиться похожими на молодые одуванчики, слегка подкрасив свои стигмы в желтый цвет.
После обрезки слаборазвитых мест я попил чай, заварив на свежую в кипятке несколько молодых цветов и листьев. Замечательное пойло, очень полезное для внутренних органов, особенно для пищевода, желудка и двенадцатиперстной кишки.
Поднял лампу на 10 сантиметров, сохраняя расстояние между лампой и верхушкой растения - 60 сантиметров.
Чуть поднял мощность лампы - 75%, от растения 60 сантиметров, 35000lux, лампа слегка теплая.
https://www.viparspectra.com/products/xs-series-xs2000
при покупке примени код и получи скидку 😀👌
код: GDVIP
Замечательный опыт, шикарный рост и необыкновенная генетика, подаренная природой!
Спасибо всем за комментарии и оценки, друзья! Пихаем воз дальше, выше, в гору. 👍😁👌
Likes
8
Share


@Gardens_of_Of
Follow
7th week of Flowering is over. Buds are gaining mass. Smell is pretty heavy and frosting continues. Mimosa Evo can not carry her buds weight.
Target VPD is still set to 1,5 with 23 Celcius Target Temp.
Top Left: Wonder Pie (GHSC)
Top Right: Lemon Orange (GHSC)
Middle: Mimosa Evo (Barney’s - Clone)
Bottom Left: Runtz (Barney’s - Clone)
Bottom Right: Exotic Runtz (Exotic Seed)

Likes
37
Share


@TheIceCreamParlour
Follow
Hey guys, it's been a great journey but I've finally hung my Stardawg out to dry! Yesterday was their last day totalling 8 weeks on flower. Realistically they could have benefited from a further week because the lower buds are somewhat underdeveloped but then I would risk losing the preferred sweet high smoke of the top buds. With this being my first attempt it's been a great learner not only for how to care for the plants but also the environment. As soon as these went into flower and started stretching I knew that putting 6 in a 2.4 x 1.2m tent was a bad idea. They just got so big which is the cause of the lower sites not being as good as the top colas. Despite that I'm really happy with the outcome and I'm hoping ive got 30oz+ of real good quality nugs. All of the top colas have turned a gorgeous violet colour too which you can see on the pictures and I absolutely love.
For my next grow I've gone with 6 fastbuds strains which hopefully will go under a scrog.
Check back next week for the harvest and weigh in!

Likes
17
Share


@HowtoBubatz
Follow
The Banana Purple Punch is looking fantastic as it enters its 7th week of flowering!
After checking the trichomes, it’s clear this plant needed a bit more time to mature compared to others, but the wait has been worth it.🌱
This week, I’ve started flushing to prepare for harvest. If all goes as planned, it’ll be ready to cut and hang by the week after next.
The buds are looking dense and frosty, and I’m excited to see the final result!😊
So far, everything is progressing beautifully, and I’m really happy with how this plant is finishing up.
Likes
51
Share

@MadeInGermany
Follow
Info:
Unfortunately, I had to find out that my account is used for fake pages in social media.
I am only active here on growdiaries.
I am not on facebook instagram twitter etc All accounts except this one are fake.
Flowering day 44
since time change
to 12/12 h.
Hey guys :-) .
The lady is developing very well.
The buds keep getting thicker and smell better and better :-).
This week it was poured twice with 1.2 l each (sewing materials, see table above).
The tent was cleaned and everything checked.
Stay healthy 🙏🏻
A thank you for this wonderful strain goes out to
Herzog
https://instagram.com/herzog030?utm_medium=copy_link
and the Exotic Seeds team
You can buy this Nutrients at :
https://greenbuzzliquids.com/en/shop/
With the discount code: Made_in_Germany you get a discount of 15% on all products from an order value of 100 euros.
You can buy this Strain at :
https://www.exoticseed.eu/
Type:
Herz Og
☝️🏼
Genetics:
Larry OG X Kosher Kush
Indica 60 % / Sativa 40 %
👍
Vega lamp:
2 x Todogrow Led
Quantum Board 100 W
💡
Bloom Lamp :
2 x Todogrow Led
Cxb 3590 COB 3500 K 205W
💡💡☝️🏼
Soil :
Canna Coco Professional +
☝️🏼
Nutrients :
Green Buzz Liquids :
Organic Grow Liquid
Organic Bloom Liquid
Organic more PK
More Roots
Fast Buds
Humic Acid Plus
Growzyme Big Fruits
Clean Fruits
Cal / Mag
Organic Ph - Pulver
☝️🏼🌱
Water: Osmosis water mixed with normal water (24 hours stale that the chlorine evaporates) to 0.2 EC. Add Cal / Mag to 0.4 Ec Ph with Organic Ph - to 5.8 - 6.4


Likes
12
Share


@Lenlen
Follow
All going good for my first grow. Not entirely sure how long left, maybe a week or 2?

Likes
9
Share


@JakeTheButcher
Follow
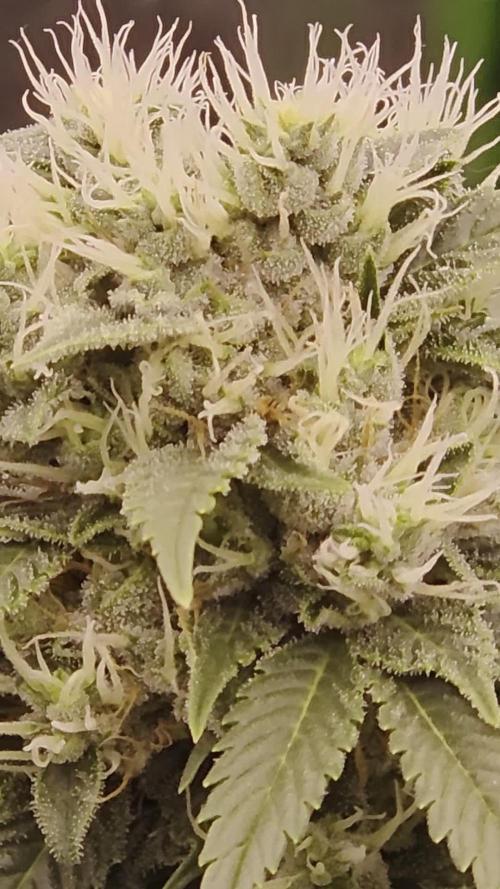
Frosty...the stretch came to a halt thankfully. I've got a few top buds that show some bleaching from being so close to my lights. The buds, fan leaves and sugar leaves are looking very frosty and feel super sticky. The humidity finally became uncontrollable with just the dehumidifier and I kicked on the 8,000btu air conditioner. I was going to start to bring the temps down anyway so timing was great as spring sets upon the midwest United States.

Likes
13
Share


@Bryankush
Follow
Molto contento e soddisfatto adesso vediamo la fioritura
Giorno 2 ho fatto una leggera defogliazione e lollipopping nel suo interno per fare passare più luce e più aria
Giorno 3 viene annaffiata con 1,5L di acqua
Giorno 5 leggera defogliazione
Giorno 7 la sera viene annaffiata con 1L di acqua
