




Likes
6
Share


@SecretC8keSociety
Follow
Today will be Day 64. Getting close to Harvest Day. Let me tell you. The smell was unexpected stink up the place and outside the grow tent as I come home. I also clean the bottom up little more and removed the dead 🍁. I use Cha Ching on Week 9 and on Week 10 will be the flushing week. Stay tune!

Processing
Likes
1
Share


@Mgn20xx
Follow
Start the week with nutrients and beastie blooms. End the week with semi flush. Repeat for a few more weeks

Likes
9
Share


@WakeAndBake
Follow
The ladies are going on 12 hours from today and Ready for massive buds can't wait to see them flowering 😍 🙌 🥦🥦🥦🥦🍀🛫👽💪


Likes
24
Share


@LittleBigTrees
Follow
Still only giving them water at ph6. 5
The soil I started them in is a full strength soil. House and garden bat special 🦇💪👍
Some people say I shouldn't plant seeds direct into full strength soil, I've been doing it for 20 years and never had any issues . Each to there own I say 👍
Likes
5
Share


@WooderIce
Follow
flush week! plants looking beautiful. Ill continue to flush for another 4-5 days, harvest mid next week. buds are so heavy, had to do some major tie ups to keep them upright for these last few days.

Likes
16
Share


@MadeInGermany
Follow
Flowering day 15
since time change
to 12 / 12 h
Hey guys :-)
This week the ladies developed beautifully 👍.
The stretch has started very strongly :-) .
Watering was done twice this week with 1.2 l (see table above for nutrients).
The heating mat does exactly what it is supposed to do, you can see that the ladies are doing perfectly again 😃.
Fresh osmosis water was mixed with tap water in a 100 liter tank so that I would have enough stale water for the coming week 👍.
Otherwise everything was cleaned and checked.
During the check, I noticed that after spraying neem oil 3 times, there were still a few damn trips to see.
I have ordered nematodes for leaf and substrate against tripse.
Then they should finally be gone again 🙏🏻
have fun and stay healthy 💚
👇🏼👇🏼👇🏼👇🏼👇🏼👇🏼👇🏼👇🏼👇🏼👇🏼👇🏼👇🏼
You can buy this Nutrients at :
https://greenbuzzliquids.com/en/shop/
With the discount code: Made_in_Germany you get a discount of 15% on all products from an order value of 100 euros.
👇🏼👇🏼👇🏼👇🏼👇🏼👇🏼👇🏼👇🏼👇🏼👇🏼👇🏼👇🏼
You can buy this strain at :
https://www.ripperseeds.com/en/feminized/kmintz-feminized-cannabis-seeds
Water 💧 💧💧
Osmosis water mixed with normal water (24 hours stale that the chlorine evaporates) to 0.2 EC. Add Cal / Mag to 0.4 Ec Ph with Organic Ph - to 5.8 - 6.5
MadeInGermany

Likes
27
Share


@LockDownGrow
Follow
ok so everything has gone fantastic , no nutrient burns at all , and have been slowly creeping up the base nutrients , i have stopped the cal mag and now adding house and gardens bud XL at full strength these girls are now in full swing of flower and i bought a new ph stick this week ,
i have found when PHing the feed bucket that its best too have air stones in the bucket , add all nuts and then ph but do not use the feed that day as if you check the next day the ph is off again so i left it 24 hours after i add more ph down , and it seems too make the measurements alot easier and stable , i have bent down the main stems " without damaging them onto my netting too A keep the canopy all the same high so my lighting is covering all plants at the same distance and also it allowed the side stems too reach up too ,
i also was sponsored another new led light by kingbo this week so have added another 600watt led too the grow , so now have two 600's and one 900watt , and temps are still fine sitting at 24c lights on and 19-20 off , so am pleased with that , this lady is nice and compact and tight lots of leaves that I had too remove too open up her bud sites , stretch was also minimal ,
Likes
25
Share

@DogDoctorOfficial
Follow
Ghost Train Haze — Harvest / Trim / Cure
Part 2 — Trimming, Resin & First Cure
First of all, once again, sorry for dividing this harvest into three different parts. But honestly… there was just no way to fit this entire experience into one single update without rushing it.
This run became something special for us.
So instead of throwing everything into one giant report, we wanted to slow things down and give each phase the attention it deserves.
Part 1 was about harvest day itself — especially the frozen plant and the preparation for the future ice water hash runs.
Now in Part 2, we focus on the monster of the room.
The big Ghost Train Haze girl.
The giant.
And damn… she was beautiful.
⸻
The Giant Finally Ready
After drying slowly and patiently, she finally reached that moment every grower waits for:
the stem click.
Not bending anymore.
Not soft anymore.
That perfect dry snap telling us she was finally ready for trimming.
And honestly, seeing this massive plant hanging there fully dried was already rewarding by itself.
Huge flowers. Dense structure. Long spears everywhere. Frost absolutely covering the plant from top to bottom.
At this point, we brought out the Trim Bin, got comfortable, and of course…
Mr. Baggy joined the session too.
Because trimming alone is trimming.
But trimming with the homies becomes part of the memory.
⸻
Trimming This Beast
Once we started separating the branches and working through the flowers properly, one thing became immediately obvious:
This plant was ridiculously frosty.
And I mean ridiculously.
Possibly the frostiest plant in the entire room.
Every touch released resin.
Every nug felt sticky.
Scissors getting glued together constantly.
Gloves turning darker and shinier minute after minute.
The flowers themselves came out incredibly dense and compact too. Heavy in the hand. Proper weight to them. Not airy at all despite the sativa influence from Ghost Train Haze.
And visually?
Beautiful.
Silver-covered calyxes.
Orange hairs fading perfectly into the resin layer.
Chunky flowers with that classic “don’t squeeze too hard or you’ll ruin the trichomes” feeling.
This girl truly felt like a reward after the full cycle.
⸻
The Trim Bin Surprise
One thing we absolutely loved during this trimming session was watching how much resin naturally collected inside the Trim Bin.
By the end of the session, the amount of loose trichome heads sitting underneath the screen was honestly crazy.
No dry sift machine.
No mechanical shaker.
Just trimming.
And still…
A beautiful golden layer of resin waiting for us underneath.
Of course, finger hash also started building up naturally while trimming. Sticky gloves. Sticky fingers. Sticky scissors. The classic signs of a happy trimming session.
Then came one of our favorite moments of the day.
⸻
Playing The Drums — Moroccan Style
At the end, we decided to have some fun with the trim itself.
Using the dry material almost like traditional Moroccan drum-sifting techniques, we gently worked the trim leaves and remaining material to knock off even more trichomes.
Simple. Relaxed. Traditional-inspired.
And honestly?
It worked beautifully.
What we collected afterward turned into a gorgeous little hash bar that looked and smelled incredible.
We didn’t even bother weighing it.
Sometimes not everything needs numbers.
Some things are simply for the experience.
For the ritual.
For the future session.
For curiosity.
For enjoyment.
And this one definitely earned its place for later tasting sessions.
⸻
Final Dry Weight
After everything was trimmed, cleaned, and separated, the final dry flower weight from this single plant came to:
294.9 grams dry
Honestly?
We’re extremely happy with that.
Almost 300 grams from a single plant in this run is something we can absolutely appreciate.
Especially considering this entire project was:
* 12/12 from seed
* Minimal training
* Minimal intervention
* Natural structure
* Mostly observation and guidance
Just letting the plant express herself while giving her the right environment.
And she rewarded us massively.
⸻
Storage & Cure — Different Approaches
Once trimming was done, we started organizing the curing process using different storage methods.
This time we decided to split the flower between:
* Glass jars
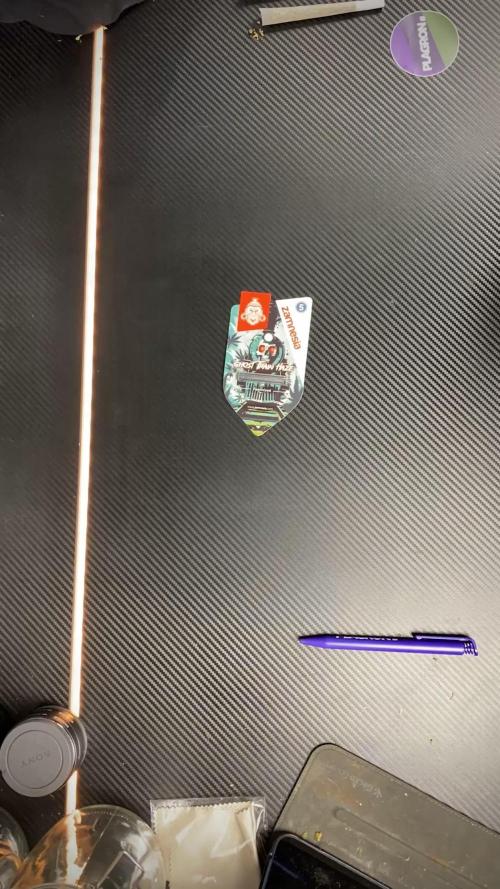
* Metal Zamnesia containers
* Grove Bags
Each one has its own purpose and philosophy.
Glass Jars
The classic.
Simple, reliable, proven for decades.
Perfect for manual burping and personally controlling the curing environment yourself. They also allow us to visually inspect the flowers easily during cure.
⸻
Metal Containers
The Zamnesia metal containers feel more protective physically and also help reduce light exposure completely.
They feel solid. Clean. Almost laboratory-like.
A very nice option for preserving flower while keeping things discreet and protected.
⸻
Grove Bags
These are probably the most modern approach we tested in this run.
The idea behind Grove Bags is that their “TerpLoc” technology supposedly regulates humidity internally while allowing gas exchange in a controlled way.
The theory is that they naturally maintain flower within the ideal curing range around:
58–62% RH
without constant burping.
So now we’re extremely curious to compare all three methods later during the smoke review phase:
* Does one preserve terpenes better?
* Does one keep the flower softer?
* Does aroma evolve differently?
* Does cure quality actually change?
We’ll definitely revisit this in Part 3.
⸻
The Frozen Plant — Flower Comparison
After finishing the main giant plant, we also trimmed and cured the material that came from the frozen/hash-focused plant from Part 1.
This was important for us because we wanted to compare:
* Flower from the “normal dried” plant
vs
* Flower from the plant intended mainly for extraction
And surprisingly?
The terpene profiles feel extremely similar.
Same family. Same identity. Same Ghost Train Haze soul.
Maybe slight differences in intensity or texture, but overall the profile remained very recognizable between both plants.
Which honestly gives us a very good feeling about the future hash quality too.
The frozen plant itself ended up giving:
58.5 grams dry
Plus whatever was already separated and reserved through the frozen material process itself.
So overall, absolutely worth it.
⸻
Macro Photography & Focus Stacking
During all this, we also continued working on our macro photography experiments.
Some of the photos shared in this update were actually focus-stacked images made from:
* 112 photos
* 96 photos
* 33 photos
For people unfamiliar with focus stacking:
Macro photography has extremely shallow depth of field. When you photograph trichomes closely, only tiny portions stay in focus at once.
So instead, we take dozens — sometimes over a hundred — separate images with different focus points and merge them together afterward in software.
The result is a final image where the entire flower or trichome field becomes sharp at the same time.
It takes time.
It takes patience.
But honestly, we love the process.
Because cannabis truly deserves to be appreciated up close.
⸻
Trimming Timelapses
We also recorded trimming timelapses so people can better see the workflow behind everything.
Not just the glamorous final nug shots.
But the actual process:
* separating branches
* cleaning flowers
* resin building up
* trim collecting
* the mess
* the rhythm
* the work itself
Because behind every beautiful cured flower, there are hours of patience nobody usually sees.
⸻
What Comes Next — Part 3
The next and final report will focus on:
* Full smoke review
* Cure evolution
* Drying process explained deeper
* Flavor profile
* Terpene expression
* Effects
* Overall experience with Ghost Train Haze
* Personal reflections after living with this cultivar
That final report will close the entire Ghost Train Haze journey properly.
⸻
Thank You
And as always…
Huge thanks to everybody who stopped by this journey.
To the breeders behind these genetics.
To the companies making nutrients, LEDs, gear, and tools possible.
To the platforms that allow growers to share their passion openly.
To the community members constantly supporting each other.
To the OG followers.
To the new followers.
To the silent viewers.
To the growers.
To the curious people.
To the skeptics.
To the lovers.
To the haters too.
If this grow made somebody stop scrolling for even a few seconds and appreciate the plant differently…
that already means something to us.
From grower to growers.
See you all in Part 3.
📡 DELETED @ 1K Please stay tuned.we never quit https://www.youtube.com/@TheDogDoctorOfficial NEW 🙏 Thank you for your patience and continued support.
FOR DISCOUNT CODES AND MORE JUST FOLLOW THE LINK https://website.beacons.ai/dogdoctorofficial
📲 Don’t forget to Subscribe and follow me on Instagram and YouTube @DogDoctorOfficial for exclusive content, real-time updates, and behind-the-scenes magic. We’ve got so much more coming, including transplanting and all the amazing techniques that go along with it. You won’t want to miss it.
GrowDiaries Journal: https://growdiaries.com/grower/dogdoctorofficial
Instagram: https://www.instagram.com/dogdoctorofficial/
YouTube: https://www.youtube.com/@dogdoctorofficial Deleted by Youtube - https://www.youtube.com/@TheDogDoctorOfficial NEW
Vimeo : https://vimeo.com/dogdoctorofficial Under construction stay tuned ⸻
Explore the Gear that Powers My Grow
If you’re curious about the tech I’m using, check out these links:
🔆 Lighting & Environmental Control
• Future of Grow — Advanced LED lighting technology
https://www.futureofgrow.com/
DISCOUNT CODE: DOG20
• Lumiflora — Under-canopy LED lighting
https://lumiflorade.com/
• TrollMaster — Environmental controllers and automation gear (past collaboration)
⸻
Genetics
• Zamnesia Seeds — Genetics used in this project
https://www.zamnesia.com/
⸻
🌱 Soil, Substrates, Boosters & Root Support
• Plagron — Substrates, bio mixes, and supportive products
https://plagron.com/en/
⸻
🎒 Storage, Curing & Preservation
• Grove Bags — Curing and storage solutions
https://grovebags.com/
⸻
📸 Photography Equipment & Tools
(Not sponsors, but part of my creative toolkit)
• Sony A6700
• Sony full-frame macro lens + few more
• Stacking photography workflow - learning
• iPhone (for behind-the-scenes shots)
We’ve got much more coming as we move through the grow cycles. Trust me, you won’t want to miss the next steps, let’s push the boundaries of indoor horticulture together!
As always, this is shared for educational purposes, aiming to spread understanding and appreciation for this plant. Let’s celebrate it responsibly and continue to learn and grow together.
With true love comes happiness. Always believe in yourself, and always do things expecting nothing and with an open heart. Be a giver, and the universe will give back in ways you could never imagine.
💚 Growers love to all 💚
📸 P.S. – The Eye Behind the Lens
All photos in this diary (for now — except for the ones showing the camera, which I took with an iPhone) are taken with a Sony A6700 paired with a Sony full-frame macro lens and a few more.
Photography is part of the story — it’s how we share the fine textures, the glow, and the quiet details that words can’t always capture.
I’ve also started experimenting with photo stacking — a technique where multiple images, each taken at a slightly different focus point, are layered together to create one perfectly sharp image from front to back.
It’s not digital enhancement or AI; it’s pure photography — a way to reveal the plant’s beauty in microscopic depth, from trichome to petal.
You’ll even see a few shots of "ghost me" capturing the shots — camera, lens, setup — because every grow deserves not just to be cultivated, but documented like art.
FOR DISCOUNT CODES AND MORE JUST FOLLOW THE LINK https://website.beacons.ai/dogdoctorofficial
NEW DISCORD - Official Server Invite Link : https://discord.gg/ksjAkA5T74


Likes
54
Share


@TheCannaProphet
Follow
~ AirCube Active Oxygen Ebb/Flow System sponsored by GrowAce, featuring Strawberry Gorilla Auto by FastBuds ~
Well guy's and gal's here we go again on another exciting Autoflower run together! This time will be different as I will be doing a 'Hydroponic' run utilizing the AirCube Active Oxygen Ebb/Flow System by GrowAce, who were kind enough to sponsor me for this run, so it should be interesting to see what results I get and have some fun along the way!
•Let me first tell you about this 6 Pot Ebb/Flow system from GrowAce:
"The AirCube system is the one and only Ebb & Flow grow system on the market that combines the benefits of air pruning with a fully automated Ebb+Flow system! With the AirCube's proprietary fabric pot in bucket design, this system is guaranteed to outgrow any other Ebb + Flow system on the market. The results speak for themselves- grow MASSIVE roots that result in MASSIVE fruits!
Air Pruning- Air Pruning only happens with fabric pots. As the roots reach the fabric walls of the pot, they penetrate and grow into the breathable fabric. Once penetrated, the roots are exposed to air, which causes the tips of the root to dehydrate and naturally prune themselves. This natural pruning process forces the roots to grow tons of lateral fibrous feeder roots. This results in a plant that utilizes the entire root zone and fills the entire pot with tons of roots. These fibrous feeder roots are incredibly effective in uptaking water and nutrients, resulting in a plant that grows healthier and more vigorously!
Oxygen Benefits- Without oxygen, nutrient absorption cannot occur. On a molecular level, oxygen is needed to transmit nutrients across the cell walls and into the roots of a plant. With the AirCube's proprietary bottom lifted draining design, the system actively draws all of the water out of the bucket pulls vital oxygen into the root zone.
Maximum Versatility with Any Grow Medium: The AirCube System is the only system on the market that allows you to use any growing medium you like. Use coco coir, soil, peat moss, perlite, vermiculite, hydroton, rockwool or any other medium you wish! This system is the most versatile Ebb and Flow bucket system in today's hydroponics industry.
Temperature Control- with the fabric pots constructed with highly porous polypropylene fabric, heat dissipates easily and effectively. Unlike standard plastic pots, heat isn't trapped in the root zone. Heat in standard plastic containers can reach temperatures of up to 125 degrees. When this type of heat is trapped and unable to escape, it can damage your plant's health and limit the potential of your harvest. Growing in the AirCube System, plant roots grow cooler, healthier, and more vigorous.
Largest Pots in its Class- this system features 5 Gallon grow buckets, the largest pot size of any other ebb and flow hydroponic system in the market.
Modular and Expandable- start with 6 grow buckets and expand up to 36 grow buckets with the optional 105 gallons PopTank reservoir!"
For my medium and nutrients I decided to also switch things up from my regular Organic runs, going with Plagron Nutrients and Root Royale 70/30 Coco/Perlite. When filling the fabric pots with medium, I first added just under a gallon of horticulture perlite from Nor-Cal as a base layer to ensure good drainage and then filled the remainder with the Root Royale.
•Now for one of my favorites, and award winning strain from my friends at FastBuds... Strawberry Gorilla Auto:
I'll be running Strawberry Gorilla Autoflower which is a 55/45 Sativa/Indica Hybrid. "ATTENTION ALL! Due to our continuous efforts in evolving our breeding process, we are proud to confirm that our Strawberry Gorilla Auto has now become one of the most potent autoflowers in the world! Paving the way to our recent success where she ranked on top & brought home the gold at the very first American Autoflower Cup in California. Moreover, she proved that not only modern autoflowers can compete with photoperiods, but they can even beat them in their field. At the most recent edition of the Farmer’s Cup and competing against various photoperiodic strains, Strawberry Gorilla Auto took home the title of 'Highest Combined Terpenes' in the highly sought-after 'Home Grow Hash' category, with an impressive 97.163 mg/g total terpene content! Our exceptional genetic selection's crowning Strawberry Gorilla Auto strain is a spectacular hybrid known for producing yields of up to 600 gr/m2 in 70 days. This is a very manageable grow that can reach heights of up to 150 cm - due to its magnitude we recommend it for more experienced growers, as a huge plant may be a little overwhelming for first-timers. This show stopping sativa heavy hybrid is perfect as an all day smoke, producing a taste bud tingling, pungent berry and diesel terpene-rich flavor combo that leaves you with a grin from ear to ear, a perfect choice for those looking for a day-and-night autoflower! "*
*References: GrowAce.com, 2fast4buds.com
______________________________________________________________________________________________________________________________________________________________________________________________________________________________________________________________________________________________________________________________________________________________________________________________________________________
The Setup:
• AC Infinity 4x4 tent
•AC Infinity Cloudline T6 Exhaust Fan w/ Controller 67
•HLG 650R w/UVA Bar *** For some reason GD does NOT have a listing for the USA version of the 650R so I selected the closest match to it.
•AirCube Active Oxygen Ebb/Flow 6 pot System
•TrolMaster Hydro-X Controller for light
•AutoPilot APC8200 co2 controller fed by a 50# tank
•16" Hurricane oscillating fan and 8" floor fan
•Tent cooling via filtered outside air delivered by AC Infinity Cloudline T6 fan
•BlueLab instruments: PH Pen and Truncheon Nutrient Meter
______________________________________________________________________________________________________________________________________________________________________________________________________________________________________________________________________________________________________________________________________________________________________________________________________________________
Weekly Updates:
10/25- Here we go into the third week from breaking ground for the FastBuds Strawberry Gorilla's and they are all looking healthy!
I am continuing the feedings of Plagron nutrients three times daily, and I'm monitoring the reservoir before each, adjusting the nutrient level to 650-700ppm @ 5.9-6.2 ph. The solution temperature is maintaining a steady 73-75℉. As a side note; as the weather gets colder I may install a heat mat, controlled by a thermostat, under the reservoir to ensure proper temp's in it.
10/27- Our weather has warmed up the past couple of days. Because of this I've had to lower the light output to 55% in order to keep the tent temp's below 82℉. The Strawberry Gorilla's are showing zero sign of heat stress so I'm not terribly concerned, especially as the weather will be dramatically cooling off in a day or two.
I upped the nutrient ppm level to 800 with the addition of Plagron's Royal Rush 8-0-0 which will continue in their feeding through flower. I'll also be adding Plagron Green Sensation in another 7-10 days which will also continue through flowering. I'm continuing to tuck shade leaves daily on all three girls, and have been gently bending down their side branches as well.
10/29- Today I adjusted the feeding schedule for the Strawberry Gorilla's to six feeds a day. The first feed begins two hours after 'lights on', then every three hours until 'lights off' which the girls should enjoy! I am currently keeping the nutrient level to 800ppm, and have begun to introduce Plagron's Green Sensation @ 2ml/g
10/31- 👻 HAPPY HALLOWEED! 🎃
💚 Thank you for checking out my passion in life! Please visit as often as you wish and I hope you enjoy this journey as much as I know I will! Grow what you love, Love what you grow!💚
Likes
8
Share


@sativa_thc
Follow
hoy lunes actulizo solo he regado ayer con bloom de atami. voy a estar regando solo con agua nada mas durante unos dias hasta q vuelva actualizar, como vemos ya esta comenzando a sacar resina poco a poco y ese engorde ya va dando sus frutos.
Likes
1
Share


@GrowMoSapien
Follow
Stems are getting top heavy, more weight packed on and they are starting to lean, I don't have room for a scrog net. Pistils are turning amber, only about 10% so far on day one. I hand plucked off the small larfy, sucker buds. I let some go too long and the large majority are worth keeping. Next time I will have the courage to defoliate properly! I get so scared after weeks or months of growing and then removing growth.
Final day of week and these colas are stacking on so much weight they are bending over. Noticed nutrient deficiencies and tried to adjust accordingly. Hoping the problem doesn't get exacerbated.



Likes
14
Share


@MG2009
Follow
03/10/2021
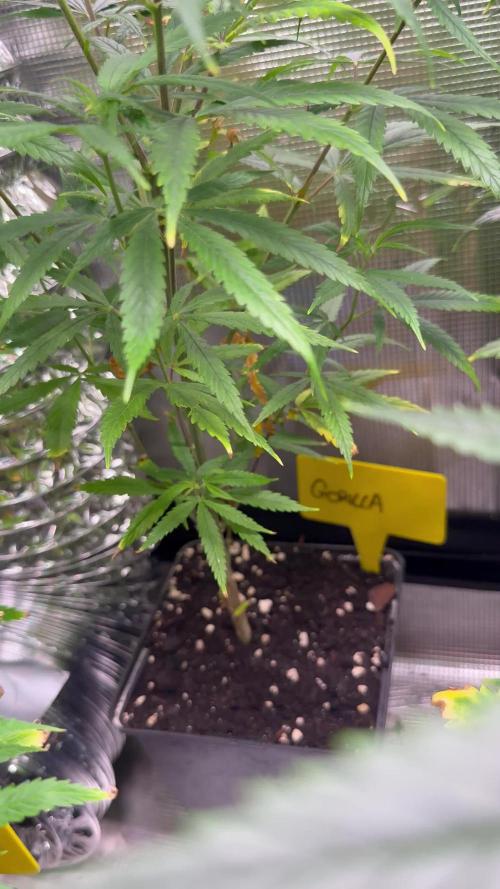
Drastically clipped, and cracked two tops to train as a type of manifold, she will be reppotted next week and then flower.
Second picture shows what I'm going for


Likes
23
Share


@NuttyYeti
Follow
She seems ready! Smells so good like pineapple and diesel but also fruit punch. I'm excited to try it! 💚🌱✌️
Likes
Comments
Share


@BIYEI
Follow
Vegetativo 22-11-2024 a 28-11-2024
Semana 1
22-11-2024 La plantula esta lo suficientemente desarrollada para colocar un timer y empezar el periodo vegetativo.
23-11-2024 Se realiza cambio de Solucion nutritiva con valores ajustados.
25-11-2024 Se mantiene en observacion, el primer par de hojas se ve quemado, deduje que fue por la potencia de la lampara los primeros dias, el calor emitido ocaciono esa lesion.
28-11-2024 Se ve un buen desarrollo y crecimiento de la planta.
Parametros Utilizados
Temperatura del ambiente 24 C°
Extraccion de aire 4 pulgadas
Humedad 70%
Potencia de la lampara 75%
Ec Original 0.4
Ec Nutriente 1.1
Ph 6.0
Horas de Luz 18/6


Processing
Likes
15
Share


@ElegantBuds
Follow
Hello
This week was a ideal week for temperature and humidity.
Perfectly balanced.
I looked at the trichomes with a scope and I saw some amber pistols already.
I saw alot of clear trichomes to so I do know i am right on track.
This week they got their first pk 13/14. Finally the buds/cola’s can start getting fatter!
I think I will give a week pk 13/14.
After that normal nutrition week again. One or two and after I start flushing!
See you growers next week!
