
Likes
Comments
Share


@EileanDonanCastle
Follow
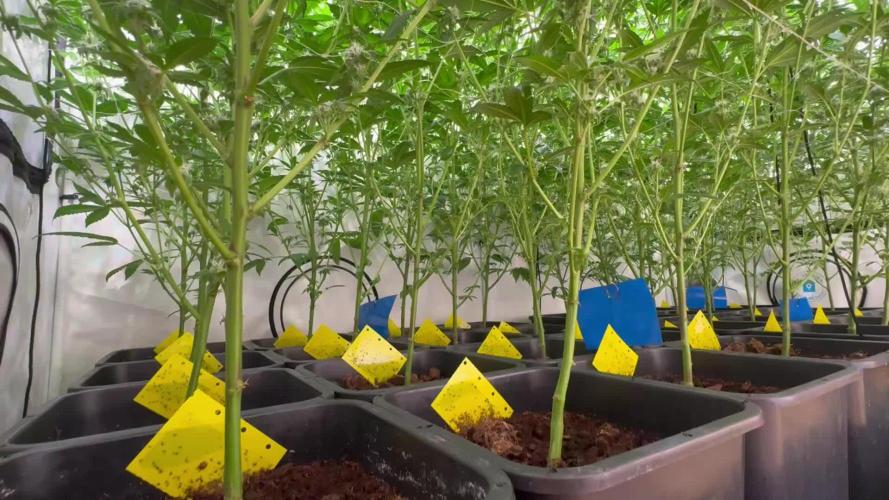
It’s been a long day potting these girls into there new home.
All is looking well. Little bit of heat stress but ime sure they will cope 🤞

Likes
6
Share


@GoodTimesOrganics
Follow
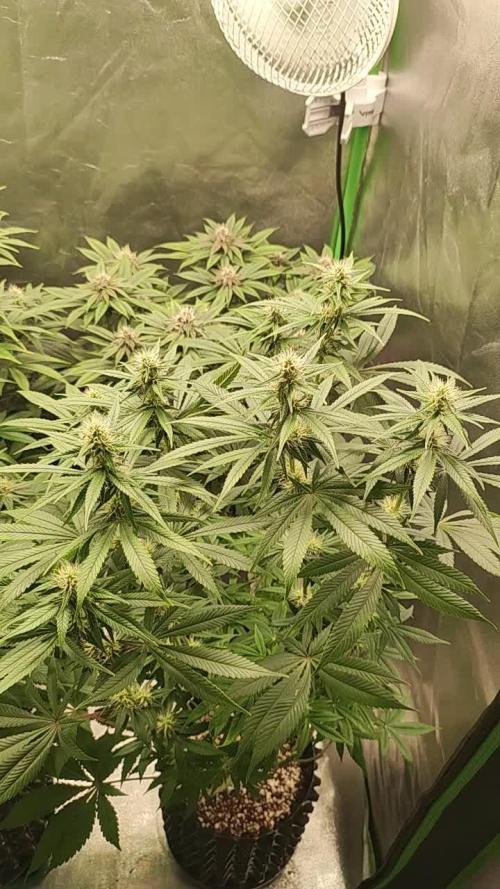
Hi liebe Community! 💚 In den letzten fünf Wochen hat sich die Pflanze schön weiterentwickelt.
Der Wuchs ist sehr kräftig und allmählich bekomme ich eine homogene Wachstumsstruktur hin.
Die Triebe bekommen langsam ihre relative angepasste höhe und ich denke in der kommenden Woche wird die Blüte eingeleitet.
Außerdem habe ich nun nochmal die Sonnensegel zurückgeschnitten, damit die Pflanze ihre kompaktere Wuchsform beibehält.
Insgesamt ist die Pflanze sehr Vital und hat eine sehr schöne Wuchsform😉
Die Wachstumsbedingungen im Growschrank sind weiterhin am Optimum und Stabil:
———————
🌞 Temp: 26°C
🌚 Temp: 20 °C
💨 RH: 68%
VPD: 0,7 kPa
———————


Likes
14
Share


@grower1212
Follow
Comenzando la semana 6
Usando full co2 para el engorde final.
Con el hit de calor en el que estamos, lo aprovecharé para preparar un input KNF, el FFJ de cherries, beetroot y damascos para entregarle el potasio que necesita para estas últimas semanas.


Likes
12
Share


@Siriuz
Follow
Sorry for the delay on the updates guys
I am a daddy of a newborn baby boy and it's really time consuming plus the Mary ladies but we keep on the great work nothing wont stop us we go all the way up!
Alright here you go
Day 87 Starting week 13
Day 88 Gorgeous grapefruit smells like heaven
Day 89
Again sorry for the late update but being a first time daddy leaves you without time
Day 90
She's gorgeous isn't she?
(alright guys so what happened here was that I started flushing too early and took advise from other canngrower and instantly added again all nutes, that's why I left her a lil longer until week 14 when I started to flush again, we are going to show you very well what we did, since it was our first time we were unsure if flushing at week 11 was alright but then we decided at week 12 that she could stay longer and she did)
You might say we wasted some nutes but in terms of reality we did not, because we have a full bottle of 3.7gal mix with flora nova grow and flora nova bloom in the other, measuring ppm always to make sure we got the correct amount, otherwise we add more water or more nutes depending on the plant needs but we never waste away all precious nutes are precious resources, in this part of Latin America is really hard to find anything good, so we got to bring everything from Europe or United States that's why we doing the best we can with the money we got. Hey any donations are more than welcome if you guys like what we do, yeah it's risky around here but we don't give a F.
You know that patients need their medical cannabis and Id say I'm one of them
And by the way very proud
Peace and love canna growers
We will continue to fill the grow diaries
Likes
3
Share

@PigBearMan
Follow
Hey there,
Everything‘s fine so far.
EC is 1.6, pH is ~6.
SanLights are now at 100% and ~40cm above the plants.
Since Flower Day 25 I give Green Sensation.
How do you like the field?
See you.

Likes
11
Share

@Bncgrower
Follow
Following the plan, the girls are beautiful and were already quite big during this stretching phase. I hope everything continues as it is now during this growth and weight gain phase. For the rest, just wait for time to pass. 🌱🌿✌️✌️

Likes
6
Share


@KushClicks
Follow
Week 7 Update
I really love these Autos! They smell amazing 😍. So I think the purple pheno is have is a banana purple punch, it looks very much like one. You guys can let me know what you think.
My Groilla Cookies is growing nicely, I can see she's fattening up. My other 2 to the back are starting to fatten up as well. They are about a week and some days behind. They started to flower late so I'm looking forward to seeing them fatten up.
The Purple pheno will probably be the first to harvest. She's showing some fast growth compared to the others.
See yall next week!
Don't for get to use my code STLVDXW for an extra 15% off your next order at fast buds
#fastbuds
Likes
13
Share

@JuanHaze_Arg
Follow
Miércoles 27/08 día 23 se riega con 4 litros de agua para medir la escorrentia o el drenaje,
Valores de entrada EC:0.4 PH: 6.4
Salida EC:2.2 PH: 7
Próximos riegos con fertilizantes a toda máquina
31/08 día 27 se riega con 3 litros de agua.
1ml x L de big one.
1ml x L de pure zyn.
1ml x L de sugar royal.
1ml x L de power roots.
1 ml x L de solotek grow.
No hay drenaje. EC:1.8 PH: 6.3
Likes
27
Share


@w33dhawk
Follow
Moin moin meine lieben growmies endlich ich hab auf 12/12 umgestellt und ich darf endlich was machen hab mich schon mega gelangweilt durch das Bio tabs Prinzip ist aber auch bis jetzt durchweg positiv der run Langeweile ja da ich nicht wirklich was zu Tuen hatte in der vegi Phase was ich jetzt nicht schlimm finde die Ergebnisse im vegetativen Wachstum sind enorm das freut mich und jetzt seid dieser Woche ist der stretch endlich da das netzt ist drauf und ich darf endlich mit den Ladys arbeiten die woche verlief eigendlich ganz gut das netzt füllt sich echt rasant hab nur hinten rechts ein kleines Loch was noch mit trieben gefüllt werden muss das wird aber sicherlich noch passieren da ich ja noch mindestens 2 wochen stretch vor mir habe... Anfang der woche haben die Ladys noch reines wasser bekommen und zum ende der woche gab es dann den letzten Mix aus orgatrex und bactrex für die Ladys bis zur blüte woche 4 gibt es jetzt wieder nur noch wasser (ohne Ph Regelung) und ab woche 4 wird compost Tee gebraut 👌👍🤗 ich freue mich schon darauf endlich wieder was interessantes zu machen, etwas neues für mich selber compost Tee ansetzen die woche war ansonsten nicht viel los wie gesagt hier und da mal ein Blatt entfernen was den unteren trieben Licht klaut und alle 2 tage Triebe weben euch allen eine schöne woche cu
Likes
26
Share


@Nistnov
Follow
Did some high stress training on the painkiller and honey cream maybe it was a bit late for that but I wanted to really make sure that they have a the space they need.
Autumn is here and it did start with a lot of rain, I'm a little worried about mold if it's raining non stop. The temperatures dropped down to 10c° in the night and humidity is high, so fingers crossed that no mold will appear.
The honey cream finally started to flower properly but she's still around 3 weeks behind the other two strains.
The painkiller is getting closer to the finish line, she still has around 2/3weeks to go though.
All plants received a lot of thining out removed some branches and leaves, lolipopping style hope this help increase the airflow and prevent mold.
Pictures made while it raining.

Likes
19
Share


@eldruida_lamota
Follow
Bueno, empezamos por el final familia.
Gorilla girl, me parece una cepa BRU-TAL , ya partiendo de esa base, mi error, creo que e cometido , es poner estos ejemplares en macetas de 5L, que tonto... mínimo recomendado 7L y a ser posible 11L
Otro error fue no dejarlas una semana más. pero, escasez. (intentaremos curarla un par de semanas).
Cepa con flores muy compactas, hay bastante separación entre nudos pero compensa las flores de verdad.
Sabor muy dulzón a mi me recuerda a melón , es un pepino recomendado para amantes de la hierba que llevan tiempo en esto, un colocón muy fuerte, ahora mismo estoy bajo los efectos de esta vaina, aseguro que con cada frase, leo varias veces y detenidamente por que válgame.
Likes
6
Share


@Lordviper28
Follow
This week went by good plant have some very good bud sites developing on them this strain has done very good and overall happy with the way they are growing

Likes
11
Share


@Mr_nugs_lover_David
Follow
She's looking very healthy and happy and strong, she has developed perfectly during this last 3 weeks since she was planted and I cannot wait to transplant this lady and start giving her the bushy discreet shape that I need! Let's get to work! 💚❤️💛

Likes
1
Share


@burnout
Follow
Caterpillars and storms destroyed these buds, probably got an ounce of each plant. Let it dry for two weeks, froze and pressed flower rosin. Rosin has a very strong fruity flavor, gets me high for about an hour, cut too soon

Likes
17
Share


@Foggedaboudit
Follow
My oh my the bouquet on these cherries! Absolutely pumped for these!
Likes
22
Share


@SlyNJen15
Follow
Wow these girls have fatten up nicely over the last week. I am giving them at least 10 more days. They have some golden hairs and they are starting to get milky. I can't wait to try this strain out.
4/28 they each have grown an inch in a day and a half. Lightly defoliated a few large fan leaves to get light to the smaller buds underneath. This grow has been so easy. They have loved the coco and clay 50/50 mix and my nutes. I haven't increased anything in a few weeks. They have only had a few spots that may have been sun burns from a few light leaks that I noticed and covered with black crayon to fill the spaces, mainly around the zipper seam. Next grow I will increase from 6" pots to 8" self watering pots. They work like hydroponic without the bubbles. Watering twice daily keeps the buildup flushed out and with fresh nute water in the bottom of the pots, I have huge root balls under the inner pot. One or two weeks to go. Pink seems like she will be done first, followed by blue and purple. Green is huge so far but hasn't started to turn golden at all.
5/1 Had a friend stop by who actually works at a grow center and she told me that my babies were ripe and ready to pick. I'm not sure how everyone does it but she told me to pluck as many leaves as I could get to before turning the light off for 24 hours and then chop. She also said to hang the whole plant since they are small autos so I didn't harm the buds in the trimming and drying process. She said once they are dry to trim the remaining leaves for butter and oil for edibles then collect the buds from the stems. Pics will be added tomorrow of the drying setup. Last grow until September because we will be traveling for summer!!
Processing
Likes
Comments
Share


@Grownewgenetics
Follow
We have two rainbows from b.s.f.seeds and one san Fernando valley, the oldest of the rainbow is on week 5 day 35 under 250 watts and the other is on day 28 week 4 and 150 watts hps , p.h. 5.5


Likes
11
Share


@sweetkaya
Follow
This was my first grow that I'm really happy about. I harvested more than the last run with 2 plants only with this plant. But we always can do better. Keep growing and learning 🙏🏻💜💚🕉️