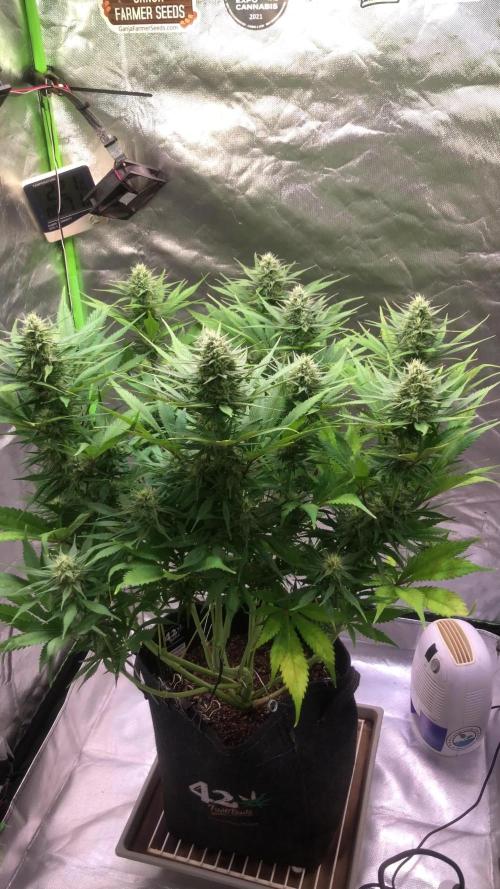
Processing
Likes
10
Share
@BodyByVio
Follow
After 21 days in turbo cloner I transplanted 4 Sweet seeds Green Poison into 1 gallon plastic pots filled with Cana coco. Few days later I transplanted another 4 clones into DWC! Stay tuned! Coco feed at 700ppm Dwc feed at 480ppm
Likes
63
Share
@Wastent91
Follow
Eccoci qua all ultima settimana di questa esperienza grandiosa! La mia prima volta in coltura DWC per me è stato fenomenale! Sono uscite due ragazze stupende! La papaya sherbert è davvero quella uscita meglio con dei bei fiori compatti e pieni di resina! L unica cosa negativa è che devo aver sbagliato qualcosa, anche se nn so cosa, dato che i fiori sono rimasti piccoli, numerosi ma molto piccoli rispetto alle coltivazioni fatte in precedenza.. Xo davvero a livello terpenico queste due piante sono spettacolari! Il loro odore penetra tutta la mia abitazione, uscendo anche fuori sopratutto la mattina presto, nonostante il filtro a carboni, in tutto il mio giardino si sente odore di frutta "molto speziata" in inverno, quindi quando tutti gli altri odori sono assenti, apparte l odore della combustione della legna della stufa... L unuca cosa che mi protegge dai miei vicini che potrebbero sospettare che di fianco a loro succede qualcosa di strano! 😂Grazie a tutti voi che mi avete seguito fino ad ora, vi terrò aggiornati per l. Imminente raccolta, ora ho cambiato l acqua per l ultima volta e ho messo acqua normale con il finale clean di Terra Aquatica, che nel giro di 3 max 4 giorni dovrebbe pulire a dovere la ragazza da tutti i nutrienti in eccesso, speriamo esca Dell ottima erba, con una combustione ottimale e un fumo pulito! Un abbraccio e buone fumate 420 a tutti! 🤞🍀💪😸🌱🌿🌲🧑‍🌾❄️❄️❄️😽💨💣💥💚💚💚
Likes
1
Share
She is a stinky, sticky beauty! Not doing much other than watering ✌️🏻💚🤣💨
Likes
20
Share
@m0use
Follow
Not a bad week, nothing much happening, topped the plants and made some more dry PH down as I don't like using the liquid Phosphoric acid down as I don't use it fast enough and its going bad. Starting to discolor and tun yellow from clear. The acorbic acid is also ageing and going yellow, will need to replace it soon. ran the ph down mix through and sieve to grind it all down to around the same particle size for the chucks. Also added in a desiccate packet into the container to help with moisture issues. Over all the plants are good. Some issues with the transplant but not going to react to it. just going to let it sort its self out. defiantly some N tox, seems to always happen with Gaia Green 4-4-4 the N content is just too available while the rest is slower release. Would like it if their N in the formula was a bit more slow release over all. most of it is fast. Some of them showing some other issues as well but just have to wait it out. they are also going back into veg from my mess up on the lights. Thought they where on 16/8 but was really 12/12 from a week or so ago. the CBG seeds from GTR are doing the best. handling the extra N with good strides and nice growth on them. Topping plants was fine, took some pics of their tops. tried to get em all around the same height. looks good to me. Herbs doing well too. the basil is getting nice and deep rich green. can smell it heavy if the plant is brushed at all. Will need to keep pinching off their tops to make a tasty little plant. The catnip is going to explode in size I have a feeling. Its only one seed in that whole pot. Taste so good crushed into some cola. Nice minty flavor but not too offensive/sharp like other common mints such as pepermint or spearmint, its softer and almost creamy. highly recommend. fresh not dired.
Likes
21
Share
Flower Week 1 Day 0 to 6 - 4/22 to 4/28 Flip week and same day extreme defoliation to encourage top stretch. (flip day was actually 4/24) The defoliation of everything below the bottom two nodes really shows the difference of breakage on these. I'm glad I ran these through to the end as you can see the difference more directly on the same plants rather than 2 separate plants. (although Im sure you can gather the same information that way too) Feed this week was an auto pot reservoir feed at 600ppm total before add-ins. I used 450ppm Veg concentrate mix (recipe week 2) and increased to 150ppm Bloom concentrate mix (recipe week 5). I also added 1ml/gal of CaliMagic (General Hydroponics 1-0-0) and ph balance this week was for 5.8 as it will be for the rest of the grow Videos Defoliation before and after Next week I plan to train the stretch and lowest branches for Schwazze defoliation on day 21 of flower. Feed next week will increase to 650ppm and it will be the first reduction of Veg Mix.
Likes
10
Share
@Shefman93
Follow
Top dressed at the start of week 10 of veg in preparation to start flower this week. Defoliated and lollipop the bottom and also switched using recharge at every watering to tribus bloom at 1/2 strength to add microbes. Dropped ph to 6.3. The pics and videos this week is from 3 days after flipping the light schedule.the tent took longer to arrive than expected, I honestly would’ve flipped at the end of week 8 if I had the means, hopefully the flower stretchy isn’t massive, the plant sits at 42 inches and the plant pot is 1 1/2 feet so I am running out of space in the tent quickly.
Likes
43
Share
@MrGrow
Follow
10.03.2023 🍃 59 giorni dal seme 💧0.5 litri/48h 6.1 ph 1.3 ec 59 giorno di vegetativa ho effettuato il travaso nei vasi da 18 litri. finalmente il box grande è stato liberato dalle ultime piante che hanno finito la fioritura, è stato pulito, disinfettato, e preparato per accogliere queste bellezze fino alla fine della fioritura. Lascerò le piante che si abituino ai loro vasi e superino lo shock del trapianto, la luce è impostata al 50%, in modo da non bruciare le piantine nel loro passaggio, e poi comincerò nuovamente con il training. Attualmente continuo con il piano nutrizionale di CANNA, sto dando loro un po di silicio in modo da rinforzaremlepareti cellulari dei gambi. Sono ancora indeciso se applicare la rete scrog o lasciare che crescano libere e cercare di uniformare il baldacchino con il cropping. Prossimi giorni deciderò..
Likes
9
Share
Die Candyland hat sich kaum in dieser Woche verändert, es wird Zeit für die Ernte. Die sich stapelnden Blüten wachsen zwar immer noch weiter aber viele der Blätter vergilben und können herausgezuft werden. Schimmel ist jedoch keiner zu sehen. Wenn ich etwas daraus mache, wird es wohl Bubble Hash sein. Vielen Dank für euren Besuch, ich wünsche eine angenehme Grow-Woche!
Likes
35
Share
Venga familia que ya viene la cosecha de estas Cereal Milk de RoyalQueenSeeds, que ganas que tenia ya de darles machetazo. No veas que pinta que tienen estas plantas. Las flores aparte de prietas se ven bien resinosas, con 70 dias de floración. a sido una genética con la que disfruté mucho cultivarla, es resistente , y no es para nada complicado cultivarla por lo menos en interior. Agrobeta: https://www.agrobeta.com/agrobetatiendaonline/36-abonos-canamo Mars hydro: Code discount: EL420 https://www.mars-hydro.com/ Hasta aquí es todo , espero que lo disfrutéis, buenos humos 💨💨.
Likes
8
Share
2nd week of the mimosas and they are going quite good, im not expecting massive buds considering that we doing a SOG under this 150w marshydro TS1000, excited to see the outcome and to compare the results with previous grows 😁 at the moment i must say that its going into the right direction
Likes
12
Share
Der Harvest war erfolgreich, alle bis zum maximalen Ende stehen lassen. Alles gleichzeitig zu ernten war ein bisschen unentspannt, da der Indoorgrow gleichzeitig zum trocknen hängt! Dennoch mega glücklich!!! Jetzt beginnt das Aushärten, die meisten Behälter sind zwischen 67-73% bleiben aber noch 1-2Tage offen.☮️
Likes
Comments
Share
@MrGanjah
Follow
This week I did LST (low stress testing) on ​​the plants, pulling the branches downwards using bud clips. Some petals on the leaves of one of the plants curled slightly upwards. I'm on alert; I believe it's due to the light being too close. I raised their lamp to about 400 ppfd (light pressure per square inch).
Likes
43
Share
~ Seedsman Zkittlez Auto ~ Zkittlez (Grape x Grape Apple) Auto x Auto Fruit (Auto Fruit Cheese x Auto Blueberry) Zkittlez Auto is one of the very sweetest-tasting auto strains available anywhere. It is a sativa-dominant (60%) strain that was bred from Zkittlez (Grape x Grape Apple) Auto crossed with a male Fruit Kush Auto, the latter a remarkable fruity strain bred from Fruit Cheese Auto and Blueberry Auto. Growers can expect to harvest some good yields of high-THC buds. Zkittlez Auto remains a fairly short plant, rarely exceeding 120 cm. in height wherever it is grown. This is a vigorous plant which is able to metabolize a high level of nutrients and she's a thirsty girl too! If growing indoors close to neighbors it is strongly advised to ensure good and effective carbon air-filtration in order to neutralize powerful odors. This strain's life-cycle is approximately 90 days from seed to harvest. The leaves on this plant are big and wide serving to convert every lumen available into Zkittlez goodness. Indoor growers should obtain between 400 - 500 gr/m2 while plants cultivated outdoors will produce slightly more at 500 - 600 gr/m2. Lateral branching is very good and it is recommended to use supports/ties to prevent snapping and keep buds close to the light source. This strain's scent is sweet and fruity with candy and berry notes. Its high-THC has been measured at between 21 - 24% with less than 1% CBD. The effect is well-balanced, cerebral and euphoric, and is very good for social situations as well as for relaxing in front of the TV either alone or with company. It also has the added effect of helping to relieve chronic pain, helping with nausea, insomnia and depression as well as stimulating the appetite.** **Credit to Seedsman.com ________________________________________________________________________________________________________________________________________________________________________________________________________________________________________________________________________________________________________________________________________________________________________________________________________________________________________________________ ~ The Setup ~ ~ Grown in a 2qt plastic popcorn pot filled with Mother Earth Grow 70/30 Coco/Perlite with Xtreme Gardening Mykos added. ~ Seed was germinated directly in the medium without any 'pre-soak' ~ Feeding will be by Dutch Pro Nutrients ~ 24hr light cycle while germinating ~ 20/4 light cycle after first leaves appear. ~ 4x8 Gorilla Tent ~ HLG 650R w/ 30w Supplemental UVA Bar controlled by a Trolmaster Hydro X controller set for a 15min Sunrise/Sunset simulation. (also a HLG Blackbird for additional side lighting if necessary) ~ Supplemental co2 controlled by an AutoPilot APC 8200 co2 controller ~ AC Infinity Cloudline T6 with Controller 67 using a Terrabloom 6x24" carbon filter ~ De-Humidifier and Humidifier when needed. ~ 14k BTU IdealAir portable A/C unit plumbed into tent for temperature control. ~ BlueLab testing instruments ~ Two Hurricane 18" oscillating fans ~ Two 6" Clip-on fans ~ Two 10" floor mounted fans ________________________________________________________________________________________________________________________________________________________________________________________________________________________________________________________________________________________________________________________________________________________________________________________________________________________________________________________ Weekly Update: 11/1- Well here we go again fam! This one's going to be super fun with one of my favorite autoflower strains from Seedsman Seeds, growing in a little 2qt. popcorn pot and entered in the 'Best Rarest & Smallest Pot by Seedsman' contest, this one's gonna be a champ! 🤩 Today I went ahead and planted a seed directly into the medium which was pre-moistened with tap water from my well. After I placed the seed about 4-5mm deep, I gently covered it with medium and poured approx. 1oz of water on it. I'll keep the pot in the tent with a Solo cup over it to retain the moisture until it sprouts... Fingers crossed! 🤞🤞 11/3- When I checked on the Zkittlez this evening I was elated to see that it had broken ground sticking up about 4-5mm from the medium! I removed the red Solo cup from her and replaced it with a clear cup that has ventilation holes in it and which I misted the inside of with water to ensure adequate humidity for the seedling. 11/4- This morning I checked on her and she's already up to about 18mm tall but has not shed her shell yet. I'll make sure that the medium stays just moist for now until she's a little older. By late in the evening she had shed her shell and her cotyledon's began opening. I noticed, after taking a close look at her, that her first tiny set of leaves were brownish looking with light colored tips. I immediately thought back to when I was pee-moistening her medium and had a 'high moment' using my other plants nutrient solution which was around 800ppm in her pot instead of the straight well water I usually use. I thought that she was getting nutrient burn causing the funky color of her first leaf set but fortunately by the end of the 20 hour light cycle, she had her first leaf set out and the were a healthy green! 11/7- Well gromies this girl has a week behind her now and I'm elated to say that she's healthy and doing marvelously! Up until now all I've done is make sure that her medium didn't dry out using straight well water ph'd to 6.1 @ 75℉. Today I went ahead and watered/fed her with 0.6L of well water with Dutch Pro Grow 'A' & 'B' added @ 10ml/g, Dutch Pro Multi Total @ 7.6ml/g, Dutch Pro Take Root @ 3.8ml/g, Dutch Pro Silica Von Liebig Special @ 1.2ml/g and Earth Juice Oily Can @ 5ml/g which was then ph'd to 6.0 @ 74℉. The Seedsman Zkittlez Auto is doing great and now is at 2 inches tall with good color. Here we go into her second week since breaking ground and the beginning of a beautiful Seedsman cultivar....follow me! 😎👍❤️ ~ Thank you from the bottom of my heart for following my grows and for all the ❤️and support you give! May all your days and grows be Blessed! 😎🙏💚
Likes
47
Share
Aug 10: Blueberry Pie F1 Fast is doing great. Three weeks now moving her into the garage which is enough, and now I can just leave her in the yard which is easier and scores another couple hours of sunlight per day. Nice solid start to flowering, and I like the schedule used this year for the force flowering. This strain is delivering on the promise of being big and fast. Bright sunny day and I’ve got the UV lights on. About five hours today with the UV lights at mid-day. Buds are looking really good. The bud development after 3 weeks is amazing. The buds got visibly much fatter just today. Compared to some fast plants in previous years, this one is about 2-3 weeks ahead. Very well suited to short season outdoor growing, but partially due to full darkness in the garage rather than just phyto-forcing with the far red light as I did last year. I’m still using the far red light, but putting them in the garage provides more darkness and helps get strong flowering started. Aug 12: nice fat buds forming quickly, gotta like that. Aug 14: fast, fast, fast. Flowers are progressing quickly. Added three tablespoons of a 50:50 mix of Power Bloom and malted barley. Added as top dressing and then watered in. Aug 16: cool, overcast all day, a bit of rain and smoky so not a nice mid-August day. Rain should help but out some fires in northeast BC, Yukon, and northwest Alberta. maybe. BC needs rain to break their record drought. #seedsman420growoff #seedsmanseeds
Likes
3
Share
@Elemental
Follow
0.1) Observação Geral Todo o cultivo foi conduzido com monitoramento constante e ajustes precisos de intensidade luminosa (DLI e PPFD), temperatura e umidade, garantindo condições ideais em cada estágio do desenvolvimento. 1) Substrato e Nutrientes O cultivo foi realizado utilizando água mineral com pH balanceado durante todo o ciclo. Fase vegetativa: fertilização com BioGrow. Floração: alimentação com Flowermind. A mistura do solo foi composta por 50% de substrato reutilizado, rico em nutrientes do cultivo anterior, e 50% de novo solo (proporção 70/15/15), resultando em uma base equilibrada e fértil. 2) Germinação – 19 de agosto As sementes foram germinadas utilizando água mineral + peróxido de hidrogênio em copinhos de gelatina individuais. Permaneceram por 24 horas na solução líquida, seguidas de 24 horas no escuro total sobre papel toalha umedecido com a mesma água, dentro do mesmo recipiente. Os copos foram abertos apenas a cada 12 horas, em ambiente de baixa luminosidade. Todas as sementes germinaram com sucesso. As sementes com raízes de aproximadamente 2 cm foram transferidas para vasos de 1 litro, com adição gradual de substrato conforme o crescimento das plântulas, prevenindo o tombamento dos caules. 3) Fase de Plântula a) Conduzida sob lâmpadas de 35W e 50W dentro de uma caixa de papelão personalizada, equipada com coolers e exaustor para controle de temperatura. b) Aplicação de FORT (enraizador) em uma rega, após o aparecimento do primeiro conjunto de folhas com cinco pontas. 4) Topping – 10 de setembro Foi realizado o primeiro corte apical para incentivar maior ramificação e uma distribuição mais equilibrada de energia. 5) LST (Low Stress Training) – iniciado em 13 de setembro O treinamento começou três dias após o topping, com amarrações graduais dos ramos para promover a abertura do dossel e melhor penetração de luz. 6) Transplante – 27 de setembro Transplante realizado para vasos de 4 litros, com rega leve e adaptação gradual à nova base de substrato. 7) Início da Floração (Troca para 12/12) – 6 de outubro O fotoperíodo foi ajustado para 12 horas de luz e 12 horas de escuridão, marcando o início oficial da fase de floração. 8) Defoliação – 10 de outubro Remoção estratégica das folhas grandes de ventilador (fan leaves) para melhorar a circulação de ar, otimizar a distribuição de luz e estimular o desenvolvimento dos buds. pment.