The Grow Awards 2026 🏆 


Likes
Comments
Share
@TheBudWhisperer
Follow
Week 2 of veg is in the books. Despite making some changes and dropping back to a 300w fixture, also upping the nute ratios - growth has been pretty decent for a single first week of veg. Got some yellowing on the leaves which is somewhat concerning. Again, hopefully rectified now that we’ve regulated to more acceptable temps and humidity. All are fairly uniform to start and the new bucket system has been issue free which is a bonus. Figure another week to the fim and then another week of veg before the flip. All on pace to get em to flower as quick as possible👌. We’ll cull as soon as able - if we pick up 3/4 spaces after losing the males that would greatly assist to free up some more space elsewhere and move in some new fems that have been backlogged recently. Finally back to focusing on quality buds and it’s and great feeling👍.
Strain details
She’s a mix of a particularly strong Northern Lights, crossed with a Spicy Bitch sativa hybrid. The hope is that we’ll be able to combine the overtly narcotic effects in the NL and mellow it out somewhat with the quality daytime sativa effects found in the SB.
Both strains feature numerous grower qualities. Both parents possessed vigour and resiliency, the SB particularly colourful in late flower. These beans were the product of a shotgun breeding run that presented an unexpected opportunity so there’s quite a bit of testing that should flow from the various F1’s we’ve produced.
Likes
9
Share
@420DeepGrow
Follow
Gracias al equipo de Sweet Seeds, Marshydro, XpertNutrients y Trolmaster sin ellos esto no sería posible.
💐🍁 Cream Caramel:
Variedad sintética resultado del cruce de varias de nuestras mejores índicas, Blue Black x Maple Leaf Indica x White Rhino. Reconocida por la escena cannábica mundial, es la variedad más premiada de nuestro catálogo.
El sabor y aroma de esta variedad es muy intenso, dulce y acaramelado como de golosinas, fruto del cóctel molotov de índicas que contiene, con un fondo de matices terrosos procedentes de la genética Blue que interviene en el cruce. Ideal para el cultivo interior y una superplanta en el cultivo en exterior.
Su estructura es típica de las plantas índicas, con un robusto tallo de corta distancia internodal, desarrolla un gran cogollo central y multitud de ramas laterales.
La preferida por los usuarios de cannabis medicinal entre nuestras plantas ricas en THC. Relajante y antidepresiva.
🚀 Consigue aqui tus semillas:
https://sweetseeds.es/es/semillas-fotodependientes/35-cream-caramel.html
💡TS-3000 + TS-1000: se usaran dos de las lámparas de la serie TS de Marshydro, para cubrir todas las necesidades de las plantas durante el ciclo de cultivo, uso las dos lámparas en floracion para llegar a toda la carpa de 1.50 x 1.50 x 1.80.
https://marshydro.eu/products/mars-hydro-ts-3000-led-grow-light/
🏠 : Marshydro 1.50 x 1.50 x 1.80, carpa 100% estanca con ventanas laterales para llegar a todos los lugares durante el grow
https://marshydro.eu/products/diy-150x150x200cm-grow-tent-kit
🌬️💨 Marshydro 6inch + filtro carbon para evitar olores indeseables.
https://marshydro.eu/products/ifresh-smart-6inch-filter-kits/
💻 Trolmaster Tent-X TCS-1 como controlador de luz, optimiza tu cultivo con la última tecnología del mercado, desde donde puedes controlar todos los parametros.
https://www.trolmaster.com/Products/Details/TCS-
🍣🍦🌴 Xpert Nutrients es una empresa especializada en la producción y comercialización de fertilizantes líquidos y tierras, que garantizan excelentes cosechas y un crecimiento activo para sus plantas durante todas las fases de cultivo.
Consigue aqui tus Nutrientes:
https://xpertnutrients.com/es/shop/
📆 Semana 9:
El engorde de los cogollos está prácticamente terminado y solo falta que maduren un poco antes de ser cosechada.
Gran trabajo por parte de mis colaboradores, estoy bastante contento con este grow, el próximo tendré más atención en la etapa de crecimiento, la cual es muy importante si quiero obtener una cosecha de calidad.
A partir de ahora agua hasta el fin.

Likes
10
Share
@GloHoodlum
Follow
Slight nutrient burn on the super silver haze and the banana. I have backed them up in feed from 10ml per gallon back to 8, it seems to have done the trick the last couple days. Both banana and super silver haze are trucking along quite well I think otherwise. I have officially decided to start my flushing on the black domina x Scott's og, trichomes are about half milky half clear, not sure if I should be doing a full flush or continue feeding through week 7 and start flush on week 8 I'm not overly sure lol see how it goes anyway.
Cheers


Likes
14
Share
@concentrate_on_coco
Follow
12/19 - Plants stayed a little too damp, had to let them dry out a bit.
12/20 - RO water only @ 6.1ph
12/21 - Feeding nutrients today @ 6.2ph RO @ 6.1ph
12/22 - Feeding nutrients today @ 6.2ph RO @ 6.3ph
Performed a runoff test on the Critical, White Widow, and Wedding Cake 2. I need to bring the ph up. (i had a feeling)
12/23 - Feeding 1 gal of nutrients @ 6.7ph
12/24 - Feeding 2 gal nutrients @6.7/6.8ph and @6.4ph
12/25 -Feeding 2 gal nutrients @ 6.6ph and @6.3ph


Likes
43
Share
@Growbody
Follow
Hallo und herzlich willkommen zu meinem Growbericht Outdoor 2025 mit den Sorten Power Flower Feminized, Royal Medic Feminized und Special Kush #1 Feminized, alle 3 von Royal Queen Seeds. Es ist das erste Mal, das ich Töpfe für den Outdoor grow verwende, bisher waren alle Gorilla grows und direkt in die Erde gepflanzt.
Die URL der Power Flower Feminized: https://www.royalqueenseeds.de/feminisierte-hanfsamen/120-power-flower.html
Die URL der Royal Medic Feminized: https://www.royalqueenseeds.de/cbd-samen/148-royal-medic.html
Die URL der Special Kush #1 Feminized: https://www.royalqueenseeds.de/feminisierte-hanfsamen/138-special-kush-1.html
Die Planung für den Grow ist, die Samen in easyplug Anzuchtwürfeln keimen zu lassen und danach in 0,6L und 2,2L Plastiktöpfen, dann letztlich in die neuen komplett doppellagigen ROOTIES 15 Liter Wide Version Stofftöpfe umzutopfen. Sobald die Witterung es zuläßt, sollen die Pflanzen an die frische Luft.
Es ist schon eine Weile her, das der Grow losging, die Bilder sind jetzt aktuell.
Tag 218: Die Power Flower fem. und die Special Kush #1 fem. bekommen seit Sonntag kein Wasser mehr. Hab heute wieder eine ganze Menge Laub weggenommen. Die Royal Medic fem. bekommt noch weiter ihren Cocktail, sie wird noch nicht geerntet, da ist einfach noch zu wenig dran.
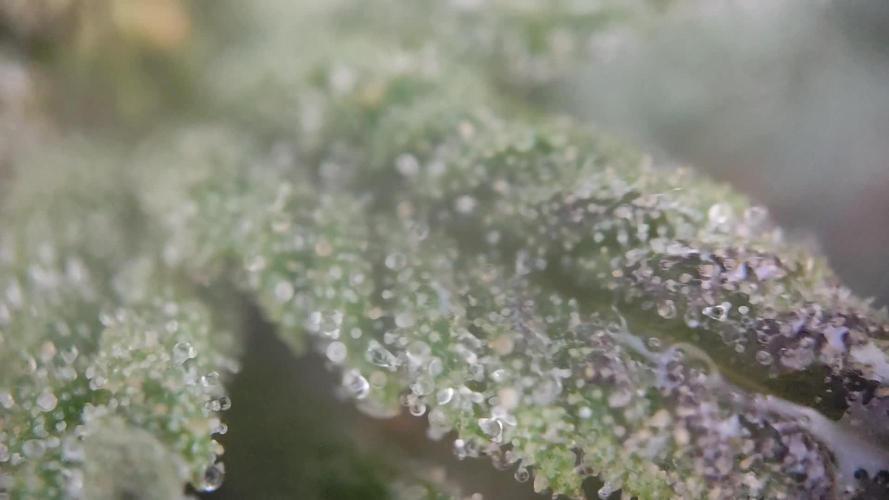
Tag 220: Heute ist wieder Mondhöchststand, nur 5 Tage nach Vollmond, Blütetag, letzter Erntetag und erster Aussaattag, ideal zum Ernten. Dieses Mal habe ich von jeder Dame einen Film der Trichome gemacht, deutlich zu sehen sind die vielen trüben Trichome und einige Bernsteinfarbene. Passt. Von der Power Flower fem. und von der Special Kush #1 fem. habe ich jeweils die 3 stärksten Äste geholt. Ich bin sehr froh, nur eine Teilernte gemacht zu haben, sonst würde ich noch den Rest der Woche schnibbeln. Es gibt Budtrimmmaschinen, vielleicht werde ich mir nächstes Jahr eine Zulegen, mal sehen. Bisher habe ich immer die ganze Pflanze geerntet und zum trocknen aufgehängt und dann trocken getrimmt. Dieses Mal verwende ich die DryFerm Bags, somit wurde zum ersten Mal Nass getrimmt. Das Ergebnis war eine Punklandung, 256 g bei der Power Flower und 257 g bei der Kush, nach dem Trimmen. Die Royal Medic bleibt wie sie ist. Jetzt bin ich neugierig, wie sich die Power und die Kush noch entwickeln.
Wenn's dir gefallen hat, schau wieder vorbei ✌️😎

Likes
13
Share
@710_Squish
Follow
There should be lots of growth this week before the stretch. I'm seeing the biggest growth from the growth tips on the 2nd and 3rd nodes but the 1st nodes are catching up. I will probably start some lst this week.


Likes
11
Share
@Skull
Follow
Good week my diesel glue is really starting to branch up after topping at the end of last week I have continued 4days ago and today moderate defoliation I need the Poppin Cherrys pheno to get growing lol, I had a cultivator mystery stain, not last grow the one before that had a decidely slow start but bloomed into an exceptional phenotype, hopefully more similarities than Early leaf structure
Likes
8
Share
@SherbGrows
Follow
Week 1 from germination!
Ganja Farmer Seeds - AK 2.0 XL
Light cycle: 18/6
Watering when dry
Light: ViparSpectra XS2000 at 50%
Everything is going well thus far! Excited to see how she grows!
See you all next week

Processing
Likes
46
Share
@Visions
Follow
Week 6 is here. Finally starting to see a little fade. Full force on her flowers. They are already rock hard beautiful bastards. Stripped some dead weight and bigger fans over sights. At this point in the game I'm giving a low grow feed and high pk for 2 more weeks then flushing. Should be a 9 to 10 weeker. Trichomes are massive.
Day 40 she is showing pink and purple hues. Man even the clone is showing pollen signs! She smells super strong with berries.
Day 41 more colors and denser buds. Expected harvest day, day 63. Next feed which I fed plain water today, will be a heavy pk boost. She can take so much at this point, she can take a half tsp of flower fuel. So week 6 flower start a heavier feed for a week 10 to 11 ending. If not expect week 9. Noted. Shes going to be an amazing mom. Let's see what colors we get our of her dense ass buds.
Likes
65
Share
@MadeInGermany
Follow
Flowering day 18
since time change
to 12 / 12 h
Hey guys :-)
The ladies have recovered well from the cold thanks to the heating mat and have developed beautifully 👍.
During the check today I saw that despite spraying neem oil 3 times, there are still a few trips :-( .
Now I've ordered nematodes again specifically against trips for leaf and substrate.
I will use that immediately 👍.
Watering was done twice this week, each time with 1.3 l (nutrients see table above)
Next week I will remove the lowermost shoots so that the energy goes into the upper buds.
Fresh osmosis water was mixed with tap water and put into the 100 liter tank so that the water can stand and I'll have enough next week :-)
Otherwise everything was cleaned.
Have fun and stay healthy 💚🙏🏻
👇🏼👇🏼👇🏼👇🏼👇🏼👇🏼👇🏼👇🏼👇🏼👇🏼👇🏼👇🏼
You can buy this Nutrients at :
https://greenbuzzliquids.com/en/shop/
With the discount code: Made_in_Germany you get a discount of 15% on all products from an order value of 100 euros.
👇🏼👇🏼👇🏼👇🏼👇🏼👇🏼👇🏼👇🏼👇🏼👇🏼👇🏼👇🏼
You can buy this strain at :
https://www.barneysfarm.com/dr-grinspoon-5
Water 💧 💧💧
Osmosis water mixed with normal water (24 hours stale that the chlorine evaporates) to 0.2 EC. Add Cal / Mag to 0.4 Ec Ph with Organic Ph - to 5.8 - 6.5
MadeInGermany

Likes
Comments
Share
@Daggstein
Follow
Not to bad for the first week of flower,
the excitement is definitely building, as they are starting to reach,
I changed bucket size to 25 lts from 20 due the the amount of water she's taking in.
last 17 lts before I will change the nutes to full flower ratio.
Likes
3
Share
@dwotTV
Follow
Getting settled into the tent and the 5 gallon pot. Getting used to tent settings, added a humidifier.

Likes
118
Share
@Roberts
Follow
Lemonade Haze grew great under the Spider Farmer SE3000 light. I did have a flowering delay due to wore out timer. So grow went a little long. The plant grew to the light within a few inches. So top foxtailing was inevitable. She smell like a sweet Lemonade. Super sticky. Thank you Ganja Farmer.🤜🤛🌱🌱🌱
Thank you grow diaries community for the 👇likes👇, follows, comments, and subscriptions on my YouTube channel👇. ❄️🌱🍻
Happy Growing 🌱🌱🌱
https://youtube.com/channel/UCAhN7yRzWLpcaRHhMIQ7X4g
Likes
4
Share
@GeminiCQC
Follow
Can't wait for each of them to finish out. Giving them hopefully their full amount of water, less with the auto as it was stunted by the 12/12.


Likes
17
Share

Likes
38
Share
@FrulaFrulaki
Follow
This week was a bit stressful. I was trying to identify the nutrient excess/deficiency. I think i narrowed it down to calcium deficiency, but these symptoms could also be a side effect of potassium excess (but what I gathered from my research, there is a very slim chance of this). Anyway I started to add CalMag to my regular waterings and they're showing some correction. I'll probablly water them with water, CalMag and lower than recommended amounts of nutrients for a day or two just to make sure. I had them on a 12/12 light cycle for 4-5 days, they've streched and risen up, which was what I wanted. They now on a 16/8 cycle.

Likes
12
Share
@DoDrugs420
Follow
Hypno Seeds knows what rules the world, so we created a strain to let everyone have their chance to try some Juicy Pussy Auto. An autoflowering cannabis cultivar that’s absolutely dripping in trichomes, potency, and flavor. It’s a Sativa-dominant strain due to its Thai Stick cross and is balanced out with some special Indica strains to give it its mellow, yet arousing effects and massive juicy yields of big hard nugs. Take a sip and enjoy!
Tech Specs
THC 19%-24%
CBD 0.50%
Flavor Orange Creamsicle, Pungent, Sweet
Type 35% Indica / 65% Sativa
Flowering 9 Weeks
Height 120-160 Cm
Effect Calming, Creative, Extra Sensual, Pleasant, Relaxation
Genetics Thai Stick X Indica Strains
---------------------------------------------------------------------------------------------------------------
Grow Sponsored by MARSHYDRO
HIGH EFFICIENCY WHITE LED LIGHT: Newest SMD LED technology provide highest PAR/LUMEN output(743umol@18"), designed to replace a single-ended 250watt HPS; MARS HYDRO TS 1000W Plants Growing lamp makes you get 30% higher yield compare OLD blurple led lights, Max 2.0g yield per wattage (power draw)
LOW ENERGY CONSUMPTION GROW LIGHTING : Consuming only 150W with 342 LEDS! It saves up to 50% energy than other led grow lights. Perfect for 2.5x2.5ft,Max coverage 3x3ft. Over 90% light energy can be absorbed by plants; higher intensity and more even coverage in a MARS HYDRO grow tent, reflective area, or by crossing over using multiple TS1000
SUNLIKE FULL SPECTRUM LED INDOOR GROWING: 660-665nm Red IR/3200-4200Knm/5200-6800Knm, infinite close to natural light, best for all plants all stages growing, rapid plant response from seed to flower and increase yield & crop quality
HIGH REFLECTIVE & NOISE FREE-Fanless LED GROW SYSTEM design will make your growing life easy and quiet, quickly heat dispersing material aluminum reducing light lost to aisles and walls, increase the light intensity up to 20%, allowing your plants receive more energy and without burning your plants for maximum headroom
Get your own at https://www.amazon.de/dp/B07ZVFBR34

Likes
38
Share
@LittleBigTrees
Follow
I've been pulling fan leaves this week .
1. To slow the top down .
2. To encourage side branch growth.
3. So they can remain in very small pots in a small space until I have space to let them grow properly.

Likes
62
Share
@SimpleGrow
Follow
Hello grow friends,
Today is the start of Week 7 and it‘s day 40 of groth for the plants. It‘s safe to say, they transitioned nicely into flower and spread evenly throughout the tent. It was pretty time consuming to get enough light to the lower branches but it seemes to be paying off. At the start of next week, I have a heavy defolition planed so at day 21 of flower most of the fanleaves will be cut off. This will help tremendously with the high humidity i‘m dealing with. Somehow I still manage to get it down but I still have a job to go to and not much time to devote. Anyways, c you soon guys and have a great start to the week. 🤟🏼
