The Grow Awards 2026 🏆 


Likes
Comments
Share
@Northern_Ent
Follow
July 14: the double skunk seems to be going well with one plant now on track to circle the rim of the pot nicely.
July 15: single skunk wasn’t doing much so I don’t want to top it and slow it down further. So, I just tied it down instead.

Likes
4
Share
@HeitorLeao
Follow
Day 39 of flowering.
Started raining a lot here, so is a little difficult to put fertilizer on them because the soil is always wet.
Gave them ascophyllum nodosum 0,75ml/l.


Likes
5
Share
@CWolcott1991
Follow
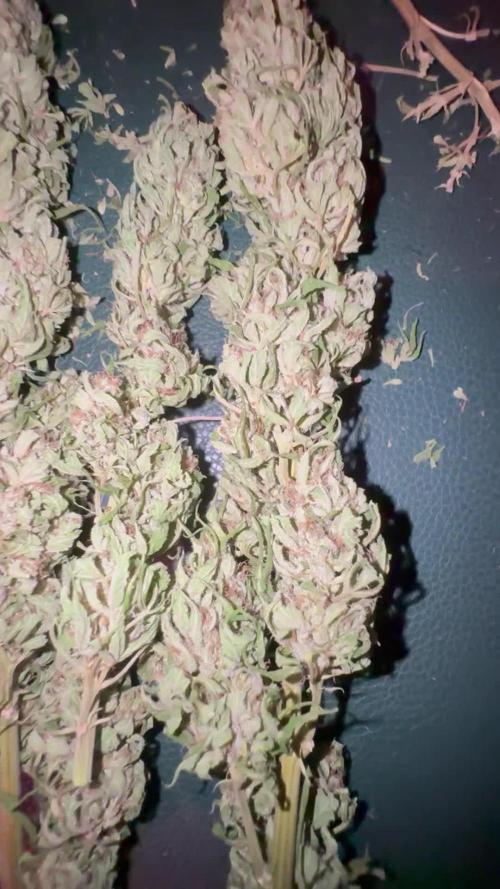
Harvest day!! Can't wait to try the smoke in a. Few weeks....
Wish I could have let them ride another 2 weeks but got to much rain in the future forecast starting today. All in all easy grow would have been easier if I used dry amended soil instead of bottle feeding. Strain is very restitant to light leak/stress and saw no issues with pm or rot. One plants the smaller one doesn't have a lot of nose to it just smells like weed. The other the bigger one smells like sour candy. Hope I didn't loose to much potency or weight harvesting early.Turned out great has a sour fruit dipped in diesel smell. On top of the flower I got 18.4 grams of dry sift from trim and 171.3 grams of trim that uses for making rso or infused oil/butter
Likes
2
Share
@MR_S_theGardener
Follow
Die Blattseneszens hat erst so langsam angefangen, so werde ich auch aufgrund der noch nicht reifen Trichome, noch eine weitere Woche flawless Finish geben
Das trockne Wetter spielt mir jetzt zwar in die Karten, aber es könnte gerne wieder kälter werden 😜 zuletzt hatte ich mal 30° im Zelt

Likes
25
Share
@Luna91
Follow
Hey Guys!
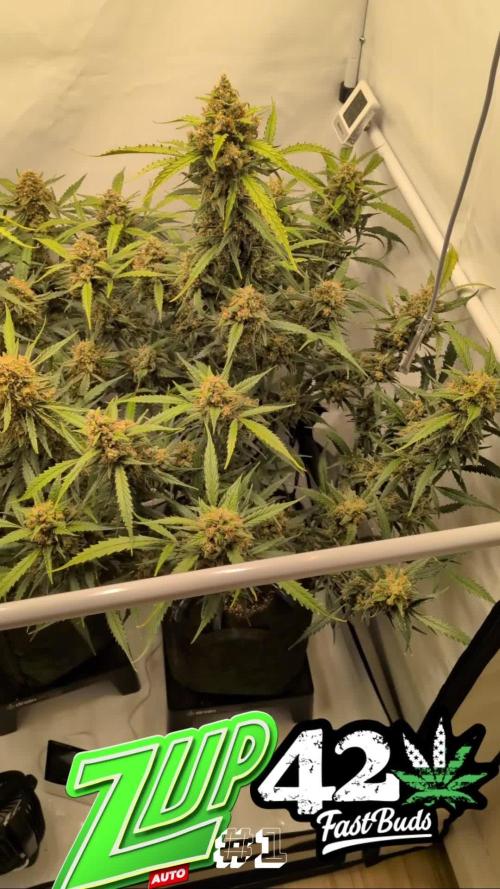
Pretty satisfied this week! I have watched over the tricomes and almost all are cloudy so I started to Flush them2 days ago. My guess is 5 more days to Harvest. I’m pretty excited to smoke my First Grow!!! Really waiting is the hardest part now.
The shape & Smell of pineapple 🍍 and passion fruit is killing me...so good! I’ve learned that this specific genetics reacts very well to wind stress and likes cooler temp for the best yield and odor, that’s why I’ve got a giant AC in summer for them and it really worked!!!
If you’ve seen the video, I’m growing 3 more beautiful seeds, I’m gunna add a diary for themand it’s very easier than growing for the first time, but I haven’t stopped learning. In General, Im in love with growing, makes me feel ALIVE.☺️
Thanks for keeping up with my girls.
Likes
294
Share
@StarLorr
Follow
Welcome to my Ðivine ØG Ķush diary.
In this diary:
Seeds: sponsored by Ðivine Șeeds
Media: Promix HP
Nutrients: Advanced Nutrients, Diablo Nutrients.
Light and Weather: Şun☀️and Mother Earth.🌎
___________________________
Feeding:
Mon 03Jun: 2L water not pH'd in bottom saucer only.
Tue 04Jun: 2L water not pH'd in bottom saucer only.
Wed 05Jun: 4L nutrients pH'd 6.5
Fri 07Jun: 2L water not pH'd in bottom saucer only.
Mon 10Jun: 2 L water not pH'd in bottom saucer only.
___________________________
We had very warm weather and by the end of the week rain pouring.
Did spray the girls with Safers insecticide after sunset for good measure after discovering spider mites nests on june 3rd.
___________________________
Thanks for stopping by, likes and comments are appreciated!👊🏻😎
Keep on growin!
Keep on tokin!!!
😙💨💨💨💨💨

Likes
9
Share
@Lennys_Laboratory
Follow
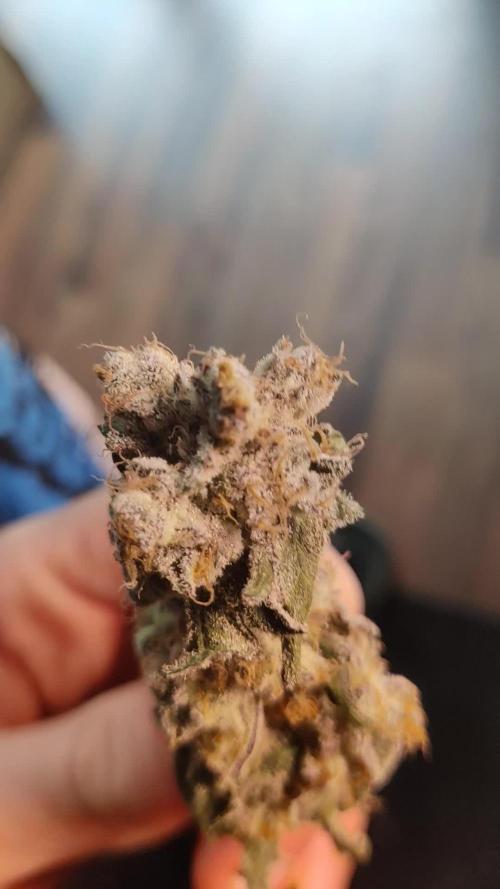
Lovely Dense Nugs, Very Sweet Smelling .. Very Nice ! Good Genes !

Likes
46
Share
@eldruida_lamota
Follow
Vamos familia que ya actualizamos la cosecha de estas Candy Rain de Zamnesia, para el concurso POWER BUDS Plagron x Zamnesia CONTEST.
Ya era hora de cosechar, estoy bastante contento con los resultados.
Vaya flores que se han marcado repletas de tricomas, y las flores se marcan aromas dulces y afrutados.
Es una variedad bastante fácil de cultivar y muy resistente, crecieron desde el principio bien vigorosas, sin problemas y al final de todo recompensó.
Las condiciones ambiéntales han sido máximas en 25 y mínimas en 20 y una humedad estable en torno al 36% al final de floración y en el secado.
Os comento que tengo un descuento y para que compréis en la web de Zamnesia de un 20%, el código es ZAMMIGD2023
The discount 20% and the code is ZAMMIGD2023
https://www.zamnesia.com/
Espero que disfruteis este diario, buenos humos 💨💨

Likes
26
Share
@Mrs_Larimar
Follow
2022-10-21
Soon i have to feed the Girl, she shows small Signs of N defiency
but until now she was growing lovely and without Problems
The only thing iam not sure with- is if the uploads of the Videos work
website for for my Fertilisers:
https://greenbuzzliquids.com/en/shop/
Code: mrs_larimar
Breeder Info:
👉Black Sugar is an indica dominant hybrid of Black Domina, L. A. OG and Critical.
It has kept the medicinal properties of L. A OG, a good flowering rate on the Black Domina lineage,
and the compact size of the classic Critical strain. With its small growth, the strain produces large yields
of up to 600gr/m2 on bushy branches. The buds are very dense and stinky.
Black Sugar has a high THC level. The variety has a fruity citrus aroma. Dense smoke gives the effect of relaxation and body buzz.
Good for Smoking before going to bed. It can become one of your favorite Seedsman strain
Genetics Black Domina x L.A OG x Critical
Harvest 450 - 500 g/m²
Flowering 50 - 55 days
THC 20.0%
CBD 1.0%

Likes
31
Share
@BigBadLion
Follow
Hey all!
Sorry for the delay!
And this is it, the last week! Pistachio was cut a little earlier than Matcha because I wanted to give her a little more extra time to allow her to mature a little more, but sadly I couldn't give her too much time since most of her trichomes were already starting to oxidise (which might sound appealing to some, but not so much for me). Still, I think the time given was enough!
Thanks to semi-flush I gave to my girls I also managed to see what was happening to Matcha! The poor girl was suffering for so long!
Anyway, my next update will contain the harvest information regarding my ladies!
Thanks!

Likes
6
Share
@Reidy_B
Follow
Things are looking great! I started some backup seeds when things were looking really rough. Just in case. 😉 I also FIM’d my bigger plants because they were looking so much better! I have also removed the drip irrigation, just to make it more of a personable experience with my ladies. ☀️💦
Likes
15
Share
@Kurow
Follow
Merry Christmas to everyone I’ve decided to hold off on harvesting but I’m not worried just even more excited to weigh them out!

Likes
42
Share
@Ganjagrandaddy
Follow
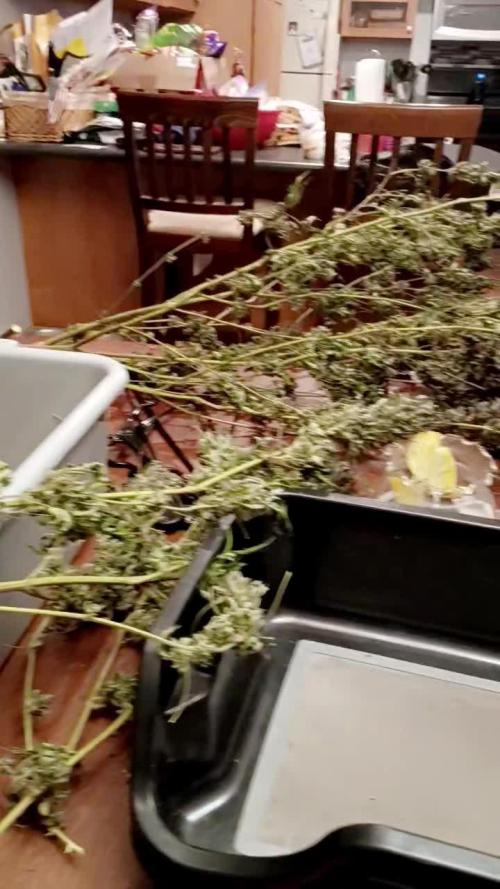
hi all. Here we are finally here with some of the ladies out and hanging to dry. It had been a fun week with trimming and hanging the Girl Scout cookie ladies. They finished so perfectly with a beautiful colour and terpenes oozing off them. Everytime I go up to the room , their sweet smell hits me before I get to see the other ladies. With about 6 days for #2 and 4 for #1 , I expect a few more days before they are even close to jar ready for a cure. Thankfully as they are organic and not needing to deal with leftover sodium based nutes, the terpenes should remain fairly intact with the very low 8°c and plenty of airflow keeping them rotating slowly. Rh is around 50% but not a mould risk thanks to the draughty eaves.
The remaining Amnesia Haze ladies are like wound springs now. They are still 2 weeks from their supposed harvest time but look ready now. If I didn't know that there is a second flush about to pop them wide open and swell them even more , it would be easy to pull them before their true ending . Still very smokable at this stage now but i am confident that they will have a second flush of fresh pistils any day now. There are signs of it starting on a couple of the mains so i will be using the Dragon force to support this for about 7 days , which is designed to boost them at their finishing stages. I rate this product and use it every grow. Well worth a look. The natural fading and the temperature drops at lights off are creating some amazing colours throughout the canopy now too. Thankfully experience allows me to enjoy this kaleidoscope of autumnal colours and not panic that I have a major deficiency going down. There are some nicely cannabalising leaves in the canopy too which is also a good sign that they are performing just as nature intended and gorging on the stored goodness from the big fans left on. They are a multi purpose leaf for the whole process from veg to finish , they change their role as the grow progresses and as soon as she notices that they are taking more to keep alive and become a sink instead of a gain , she will cannabalising the stores built up and shed the leaf herself. This is why I get stuck with the whole defoliation debate. With that said , I hope your weeks has been as much fun as mine and that you will be joining me in the upcoming tester strain runs of Fast Buds new 2022 unreleased strains to see what's in the pipeline for the autoflower world. Be lucky folks.
Processing
Likes
6
Share
@PoshGrow
Follow
Welcome to Auto Alaskan Purple Grow by PoshGrow!
🍀 Week #3 2020 August 6th - 13th.
General Info:
When planted: 2020 July 23th.
Week: 3
Days: 14 - 21
Last Update Day: 2020 August 10th.
Plants: 5 Alaskan Purple Auto.
Equipment:
Tent: MarsHydro 1mx1mx2m or 39"x39"x72".
Light: HLG 260w V2 Rspec QB Kit.
Exhaust: 4" 322 CFM fan + Viper Carbon Filter.
Intake: 4" 100 CFM Inline Fan.
Oscillating Fan:
Lower: 4" Ram Fan.
Upper: 16" Oscillating Ram Fan.
Humidifier: Taotronics TT-AH001.
Dehumidifier: Pavlit MD750.
Soil: NPK soil 40% Compost, 50% Peat Moss, 10% Agroperlite.
Pot: 7 gallon Fabric Pot x 5pcs.
Nutriens: Fox Farm Trio.
PH Correcton: Chemoform pH-Minus Granulat.
PH Pen: Cheap Chinese one, I callibrate it every time I use it.
Water pump:
Digital microscope:
Comment:
Likes
4
Share
@Growstopher
Follow
Fastbuds seeds
Gorilla zkittles auto
Only using spring water for first week and spraying with foop mist. Going to use foop nutrients with Humboldts secret cal/mag and nectar for the gods ph up and down!
Planted right into substrate. I’m using Mother Earth coco coir/perlite mix with hydroton at bottom of pot


Likes
Comments
Share
@DerEkstaseHase
Follow
Langsam am Ende angekommen, leider noch kaum farbliche Veränderungen aber die Trichome sind unglaublich!

Likes
9
Share
@Skunkiest_bender39
Follow
War ein Fest .Die dritte Dame ist ein mix aus beiden vom Knollen Typ leider war sie befallen noch nicht richtig getrimmt wird wahrscheinlich verarbeitet.
Alle kleben durchweg intensiv.
Haben alles gut vertragen kann man Nix gegen sagen!
Likes
16
Share
@GrowerGaz
Follow
Sadly th police came and took my harvest the day before harvest , so the journey ends here


Likes
21
Share
@NSABND
Follow
Hi there start of week 11 today 😏
today (Day 78) the weather is cold and very high humidity because of rain 😲😩😕
Day 79 same shit weather then yesterday with very high humidity and rain 😵😲😵😲😵
Day 80 autumn has arrived 😱😨😰 cold with rain and high humidity 😲😵😭
Day 82 there are no Updates sorry 😵


