Likes
Comments
Share
@DreamIT
Follow
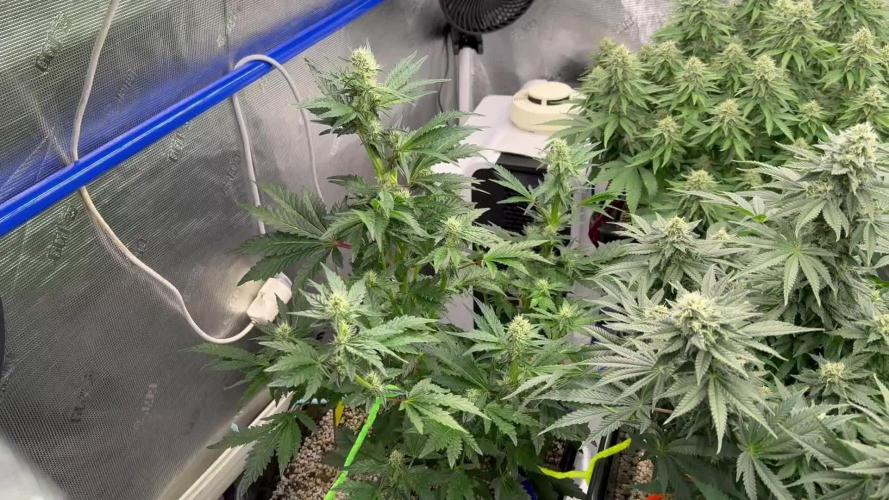
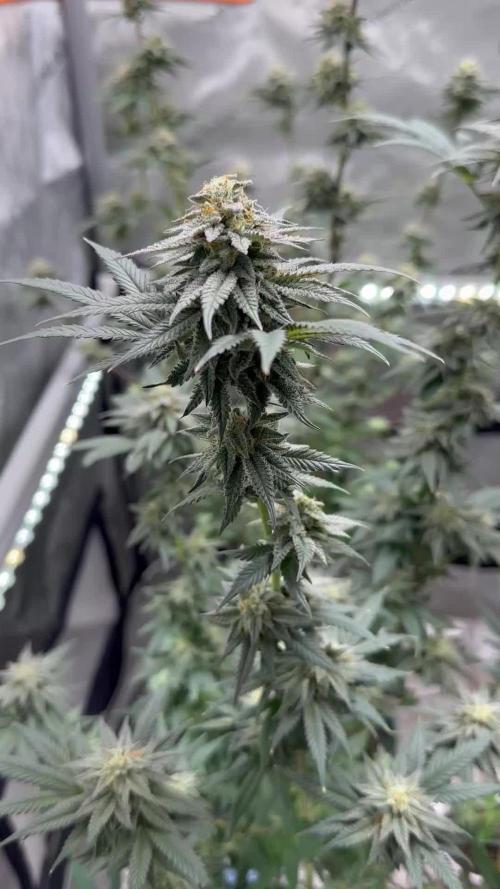
Sponsored by: 💫PARADISE SEEDS💫-💡VIPARSPECTRA💡-💐GREEN BUZZ LIQUIDS💐-🛠️WEDRYER🛠️ 15/8 Today I moved it into flowering in the small box that I haven't used in a while. 17/8 water 19/8 water __________________________________________ Personal advertising (contains affiliate links) __________________________________________ 🦄 winners and holders of the most prestigious awards, since 1994 they offer genetics of the highest quality! Anonymous shipping! ✅https: //bit.ly/Paradiseseeds_ __________________________________________ Did you know that Green Buzz Liquids fertilizers are 100% vegan? A complete line of products ready to give the best to each of your plants! Visit the site and see my journals to see how they work 🦄 🤯 And with the code "dreami t" you will immediately receive a 15% discount on your purchases ✅https: //bit.ly/GreenBuzzLiquidsPro __________________________________________ 👀 Are you looking for a good lamp to start with? 👀 🌞Viparspectra has something more than the others, take a look at their site. ⏩ Use "GDVIP" for an extra discount or "DREMIT3" for an extra 5 %% discount 👀 Search for it on Amazon ✅Amazon USA: https://amzn.to/30xSTVq ✅Amazon Canada: https://amzn.to/38udUVe ✅Viparspectra UE: bit.ly/ViparspectraUE ✅Viparspectra USA: bit.ly/ViparspectraUS ______________________________________________ 🌈 Tired of blowing on your weed hoping it dries quickly? Check out the Wedryer website! You will find a well-made accessory that will help your weed dry in just 8-10 days without the annoying risk of finding mold or other annoyances! (no affiliate links) ✅https: //bit.ly/Wedryer_ ______________________________________________ 📷🥇Follow the best photos on Instagram 🥇📷 https://www.instagram.com/dreamit420/ Backup https://www.instagram.com/dreamit4200/ 🔻🔻Leave a comment with your opinion if you pass by here🔻🔻 🤟🦄💚 Thank you and good growth 💚🦄🤟
Likes
11
Share
@Zipkoppie
Follow
The ladies are coming along beautifully. I did a flush last week and switched the nutrients. I also did a little defoliation and the heads are starting to develop nicely.
Likes
44
Share
@Aedaone
Follow
The temperatures, humidity, height, and watering volume(if measured) in grow conditions are all averaged for the week. The pH is soil pH. Any watering done by me is well water which is 7.6 pH and 50° F. Coop Poop, Feather Meal, and Soluble Kelp are ml/gallon of soil top dressed. Everything else listed in nutrients is ml/gallon of water fed to plants. Nutrient solution is not tested or adjusted for Ph. Day 1 we had a high temperature of 78°F. Skies were overcast with all day rain and mist. It's about as bad of weather as u can get for cannabis in flower. Let's see how these fastbuds hold up to 💯 fu weather. Day 2 we had a high temperature of 88°F with clear sunny skies. I watered about 5 gallons per pot with well water. I added 100 ml feather meal top dressed. Day 3 we had a high temperature of 74°F with sunny skies. I watered about 5 gallons. These girls were still a little hungry Day 4 we had a high temperature of 79°F with partly cloudy skies. Today I fed 5 gallons liquid feed mixture with 80ml of Agrothrive General Purpose 3-3-2 and 40ml of Biogreaux Molasses 1 - .5 - 5.. These are still a few days from mid flower so I didn't want to hit them with too much K. Day 5 we had a high temperature of 85°F with sunny skies. I watered about 5 gallons of well water per pot. Day 6 I didn't get photos but it was a normal day. Lots of sunshine highs about 80°F. I watered about 5 gallons. Day 7 we had a high temperature of 79° F with sunny skies. I fed each a 5 gallon bucket of 120ml AgroThrive General Purpose 3-3-2 mixed in it. I treated with Growers Ally fungicide. Overall this week was a success. Their growth height has been achieved. They are in full flower and kicking up a nice sweet floral smell.
Likes
13
Share
All quite steady overall. Would really like to have some internal ventilation going on in this cabinet. No nutrient lock in site so far. Mayme time to start adding a bit more nutrients, the leafs are looking a bit discolored and on the yellow side in some spots.
Processing
Likes
27
Share
@BudXs
Follow
Getting there... cant wait for Spring Walls are up and painted, floor is laid, electrical all done, exhaust outlets mounted. Ive started to install the trim - I decided to put a grey stain instead of boring paint on the floor trim boards. Looks really solid against the dark bamboo floors. I used two gallons and two coats of flat pure white paint for walls and ceiling. Should give me a reflectivity somewhere around 80%. Some may ask why not opt for mylar? I just dont like the look. I dont care too much for reflectivity, as I will be well above the required watts/sqft with the light setup I will be using. I mounted an electrical receptacle in the ceiling, I thought it may come in handy for cord management. Im going to mount the 3 x meanwell drivers outside of the grow room and run some extra long cables to them. This is to keep heat out of the room, any little bit helps. Will be running a 8inch fan with about 750 CFM in order to properly vent the room. Intake will be a door vent and the negative pressure the fan provides. Odor is not too much of a concern, but may as well add a carbon filter. Tables to be built this week after trim is installed Week 1 Spend - $2080 Week 2 Spend - $350 (mostly on hardware store visits) Total so far - $2430
Likes
100
Share
It’s so warm today! Of course I pulled all my plants out to spray with spinosad an feed/water. +++++++++++ I use a Hudson 2L sprayer. My partner used to work in the film industry and they found this brand of sprai gets the most thorough even coverage for makeup or whatever movie magic the use sprayers to create. It’s great. +++++++++++ I’m using some baking soda in water to combat some mild pmd, but it’s not bad. +++++++++++ These ICE BOMBS are troopers. They were definitely affected by the spider mites but hung in there three the various sprays which were hard on leaves even though I pulled them out and didn’t return them under the light until they dried. +++++++++++ Some fungal gnats come with the humidity so I topdressed with gnat nix. I don’t believe I overwater so I hope that’s the solution! I think I may wait another week or two and get things more stable before moving to flower.
Likes
70
Share
All feeds with nutes use either a whole ratio or combination of "Veg Mix" and "Bloom Mix"concentrates DILUTED in water until a total ppm of add in is reached using a (Total Dissolved Solids)TDS Meter measured in PPM (parts per million). The "Veg Mix" concentrate will eventually be added in smaller ratios and "Bloom Mix" concentrate what will eventually replace the "Veg Mix" concentrate entirely with the ppm and ratios listed when I feed. Veg mix recipe is on week 3. Bloom Mix recipe is on week 5. Day 56 Took some glamor pics with black background - not really for vanity (although there's a little) but for contrast. I see more of the lockout issue better in the pics this way. - on that note, the ph seems to be working as it's been two days since defoliation and knitting needle ph correction, and the progression is way slower than it was on the last leaves at 3rd day of identifying. So with that, room VPD of 1.07kpa seems stable enough with temps about 76F/65%RH/33%ILV I released the binds today to let her grow without them until they crowd each other too much and I need to restrain - so in a couple of days at max. Day 62 Transfer day. Although at first I didnt think I would be able to until Saturday, I got pots and plant saucers today, so I ended up going ahead and doing it. Started by calibrating/testing both meters. Double checked the soil mix from yesterday as the last time I used wood ash the ph rose the day after... however this time it was fully mixed to I wanted to know if there would be a higher ph - it was the same as yesterady - 5 reading avg of about 6.35 - the slurry of 1:1 soil and 7.7 ph water was tested at 6.3 also. Made about .75 gallon of 75/25 veg/bloom juice water at 500ppm feed water. Tried to ph read the soil in the pot and seen it go from 6.6 down to 6.35 (took video) in the dry soil, so I decided to use the 6.35 new soil reading and ph balanced the feed to that. Used the needles since it was 7 days since the last feed and I am using such a small amount. Poured over needles in 8 places and pulled each out to let water down. the vacuum pulls the water down when I lift the needles. Then I mixed 5tsp of Dynomyco to the 5 gallons of new soil and mixed really good. I placed a layer of perlite on the bottom of the 10 gallon pot and then layered in some soil. Then with the help of my wife we pulled the plant out of the pot and placed it in the 10 gallon. I place back in the tent and added about a quart of plain de-chlorinated water evenly over the new and older soil to help bind them. I reduced lights by 100ppfd to have about 505 and 500 at center colas and 430 lowest on outer ring with most at 450 and 470 highest. Soil to light is 35 inches and the plant is about 14 inches so about 21 inches from leaves to lights. I left the ring off today and will rebind as needed tomorrow after she rests. Today the leaves look wilted and limp. Also reduced humidity to 60% so 58 to 65% should be the range and the temps are 73F with the lights lower. PPFD was higher with the new growth - unbound and tucked in for better cola/light position, it reads 570 to 580 on outer colas and 590 at both center branches Day 57 Getting 1 more day out of free range growth before I tie her back against a ring. So in that time I decided to take a few vanity pics. Overall the ph block seems to have slowed or stopped and she's back to growing again. Will be thinking about flip at the end of this week or so. VPD same stats 76F/65%RH/33%ILV - ppfd right at max so I'll likely tie her off tomorrow. 605 600 in center and 580 to 590 at the outer ring. Day 58 VPD stats mostly steady again today - 76F/65%RH/33%ILV - ppfd was checked after LST, measured 600 at each center cola and the outer ring measured between 550 and 590 most at 580 So as I said, I did LST today to bind her more out while the 4 center 4 colas fill the middle. I had to bind to the pot base instead of the ring as the colas are still a little short to reach for binds at the ring just yet. There's a lot of space to fill and a few (about half) of the out colas are sideways for now. Had a break at the center cola when I tried to pull it back for bind. I knew to hold the branch at the node but forgot to do it here and heard a "snap" ... taped the crack and moved on - will monitor obviously Day 59 Did more light LST to ensure the branches are growing where I want. PPFD was mostly the same as yesterday only now there are more colas around 560 than 580 on the outer ring with the center colas at 610 and 590 (front cola was tied down to spread more away from the ring and fill center better. vpd same as past week or so 76F/65%RH/33%ILV Last feed was on day 54 and the soil still seems damp so I will check again tomorrow for the next day. (Day 61) The broken branch doesnt seem to have affected either side of the split as both sides seem to have grown a little with little to no wilt or drooping leaves. Im hoping it heals okay and doesnt delay flip to recover more; still monitoring. Day 60 Did some light LST today by releasing the lower binds to the pot and attached as couple to the outer ring now. So far I only have to bind a few as most are already holding where i want them to. Took the tape off the split and seen I didnt seel the gap closed when I taped it so now Im considering a drop of super glue to bind the branch back in hopes it grows onto the other side again. If not at least it would be more secure than it is now. And since it's a main split for 4 colas, I dont want too restrict it by binding at the split and potentially cutting off the nutrient pathways. ppfd after LST was 610 and 600 after more LST and the outer ring is still ranging 550 to 580 with more at 560 now. VPD same as I havent messing with any of the variables. 76F/65%RH/33%ILV Soil is a bit dry and it's been 5 days since the last feed flush, so I have about 3 gallons of tap burning of chlorine now for a feed tomorrow morning. Might still update again later if I find superglue... found some superglue - tried to take pictures but I cant hold, squeeze the applicator, and film with just two hands. So the idea gets through, I did both sides. On a side note I discovered a root popping out of the soil from the top. Covered it up but wasn't sure if I should be concerned. Day 61 VPD same as it's been for most of the last week - 74F/65%RH/33%ILV PPFD was recorded after I turn the plant a quarter turn for the smaller colas struggling to get over he ring's edge to have more light. Most colas at 580 with a couple at 600 and a couple more at 550 - center colas are hitting 615 and 620, but I have plancs to reduce in the next couple of days now On that note, the root growing out of the top tells me that she's hungry and needs more root space, even if that means growing through the top of the soil. So I plan to transplant to a 10 gallon and flip after the recovery. After reviewing more of NugBucket's journal I realized this is why he moves them when growing 16 colas. New pots should be here Friday so I should be able do it on Saturday. So I prepped soil (using more Happy frog with mycorrhizal fungi already growing in it for a few weeks) with de-chlorinated tap water Started by ph testing the soil and the water (4 readings on soil at 5.03 avg) - added about 1/2 cup total of wood ash to bring up the ph , mixed and tested again - added water at (about 7.7 ph) and tested again... last 5 readings in soil was 6.24,6.3,6.35,6.37,6.38 avg of 6.328 - covered and let rest until needed. Since I plan to transplant in a few days I felt it would be best to 'lightly' feed tomorrow, again on transplant day, and again 2 to 3 days later. Since my wife was taking pics at this time, I could only find this one to show the roots growing into the perlite then we planted it in the bigger pot. -------- (Day 62 root base picture from above) I have a hypothesis that says these are so short because I intentionally tried not to move the plant without the base stand to keep it from grinding these up and allowed them to grow in the last 2 weeks. This is that test picture/results. I like the idea of better/more drainage, but thinking I am doing more harm each time I hear those gravel pieces crunch as it cuts those and forces the plant to look somewhere else for root space. Notice how the small root lines have no finer pieces or laterals grow out from these - I believe that is because they are so new in growth and that the perlite chewed up the smaller laterals even with little to no movement over the last two weeks I would like to see a root ball experiment that exposed the roots throughout the grow but for now I can see these roots do grow into the base perlite and need to be handled carefully if you want them to grow more freely or with a standard pot size. As you can see Im not root bound but my plant thinks it is and is growing roots out the top.
Likes
4
Share
Finally decided to get the new tent and it arrived a day after! Meanwhile the ladies moved into my closet for a day, because some top buds and leaves were already getting damaged. Refilling almost 5 L daily! Lets see how they grow with a bit more space to spread out :)
Likes
4
Share
Lots of pretty colors :) Had some problems with the left lady. Yellow/light green leaves, gave it some N. appears to be solved. Noticed some light burn, reduced ppfd to 800 Slightly reduced nutes Kinda crazy to see how these plants grow so differently even tho they are the same strain and got the same treatment.
Likes
17
Share
@4chuk
Follow
Oct.16 - Week 2 begins. I need to stop editing my diaries high. Oct. 18 - Looks like a slight calcium deficiency on the oldest leaves, I'll watch the newer leaves for spots before I increase CaMg though. Oct. 20 - I have been watering with 20ml twice a day, growth rate seems to have increased, but still developing spots so I will increase CaMg today. Oct. 22 - It's growing pretty well considering how sick it seems. Time lapse uploaded.
Likes
127
Share
1 week done! Really impressed with how strong she is! Let’s gooo we will keep on pushing forward Time to start the plagron sauce
Likes
109
Share
Welcome to Green House Seeds Company Cup 🏆. Day 62 since time change to 12 / 12h The last week before the harvest has come 🎊. Hey everyone 🤗. The time has come. The last days and hours have struck for this great lady 😃. In the coming days she will move to the darkroom and spend another 48 hours there in complete darkness 😋. Of course, there will be an update before the big update after fermentation 👌. In the last update there is again a detailed description of the individual strain. I'm really looking forward to finally being able to try the strain 😄. It looks beautiful and smells extremely tasty 😍. It is a genetic perfection 👍 all shoots have grown up, it looks very symmetrical and has simply grown perfectly :-). I am also very enthusiastic about Green House fertilizers 😀👍 . @Greenhouse: Thank you so much for these genetics 😍👍. She will get a place in the mother's closet. I wish you all a lot of fun with the last update before the harvest, stay healthy 🙏🏻, and let it grow 🌱🍀 You can buy this Strain and Nutrients at : https://greenhouseseeds.nl/ ☝️🏼☝️🏼☝️🏼☝️🏼☝️🏼☝️🏼☝️🏼☝️🏼☝️🏼☝️🏼☝️🏼☝️🏼 Green House Seeds Company Cup 🏆 Type: Wonder Pie ☝️🏼 Genetics: Wedding Cake x OG Kush 👍😍 Vega lamp: 2 x Todogrow Led Quantum Board 100 W 💡 Flower Lamp : 2 x Todogrow Led Cxb 3590 COB 3500 K 205 W 💡💡☝️🏼 Earth: Canna Bio ☝️🏼 Fertilizer: Bio Grow Feeding ( GHSC ) , Enhancer ( GHSC ) , Bio Bloom ( GHSC) ☝️🏼🌱 Water: Osmosis water mixed with normal water (24 hours stale that the chlorine evaporates) to 0.2 EC. Add Cal / Mag to 0.4 Ec Ph with Organic Ph - to 6.0
Likes
8
Share
Week 3 The 2 first crucial weeks are over. Plants are healthy, vigorous 👌 Daylight 6h35 / 21h20 = 14h45 Sunny days - 26 °C Continue to stimulate the rooting system.
Likes
30
Share
Here we are to show you LSD by Seeds Mafia, one of the strongest strain I ever tried. I'm expecting a lot from this plant! ✅ VEGETATIVE week #2 📅this week goes from 12/12 to 18/12.📅 💡💡💡Viparspectra XS2000 is working at 50% power. 💉🔍Fertilization schedule:🔍💉 14/12 2g/lt eposom salts foliar and 1g/lt irrigation 17/12 2ml/l deeper underground WE ARE BACK!!! We are back after a little pause. We take a break because we were too busy to post high quality diaries. In the last diaries we tried to post as good as possible and we have to publish about 6 or 8 diaries (in addition to these that we will publish shortly). We opened also an educational Instagram page, we growed a lot in a short amount of time BUT, Instagram suspended our account and we lost all our posts, I was so sad and disappointed... a lot of work lost in a night.... Now we started a new grow with six awesome strains!!!!! In this diary you will see our journey with LSD by Seeds Mafia under the AWESOME XS2000 by Viparspectra 🤩 LSD Feminized is one of the most powerful marijuana varieties, reaching a 26% THC content. It produces a very strong and lasting effect. In addition, it is a highly adaptable variety that grows easily under almost any condition, it is very resistant to both mold and pests. DATA SHEET: Sex: Feminized Grows: Indoor, Outdoor, Greenhouse Height: ≈ 120 - 200 cm Yield: ≈ 600 - 700 gr m2 Flowering time: 8 - 9 weeks Complete life cycle: October Cannabis Genetics: Skunk #1 X Mazar THC: 26% Type: Indica 💸💸💸💸💸 Here you can buy seeds of this top shelf strain: https://seedsmafia.com/en/feminized-cannabis-seeds/lsd-feminized-.html 🔧💡OUR SET UP💡🔧 ✔️ 💲💲💲VIPARSPECTRA 🚀🚀🚀🌕🌕 ViparSpectra®️ XS2000 240W Infrared Full Spectrum LED Grow Light: Excellent ratio between wattage and ppfd, excellent light penetraton, perfect light spectrum (it also has IR 🤩) and it has the best build quality on the market. Until now, built quality is really awesome. You can touch that quality. Materials are really strong, excellent driver and the best leds on the market. Heat dissipation is perfect, the lamp is never too hot and it has a passive dissipator so you will have zero noise. It also has IP65 certification. I like that this lamp is bigger than others, so the 240w of power are well distribuited on the space. Viparspectra has an awesome customer service, and shipping was creazy fast! This awesome brand also offers 3 years warranty. This lamp has no rivals. A special thanks to Emily of Viparspectra ❤️❤️❤️❤️ HERE YOU CAN BUY THIS PROFESSIONAL LIGHT: https://www.viparspectra.com/products/xs-series-xs2000 or https://amzn.to/3dyUoJl and here you can buy other awesome stuff: https://www.viparspectra.com ✔️ 💲💲💲MARSHYDRO 🚀🚀🚀🌕🌕 📦120X120 GROW TENT: an awesome box, easy and fast to assembly. Made by strong materials, solid zips and it is totally lightproof. The position of holes is optimal and the two lateral windows will make easier the work inside the box. There is also a double end, so you are 100% sure that dirt or liquids will not spill out. You can find it here: https://www.mars-hydro.com/grow-tent/buy-mars-hydro-grow-tent-48x48x80-1680d-4-x-4-size-keeps-all-light-in-top-quality-1680d-canvas-is-tear-proof-and-double-stitched-light-blocking-fast-installation-for-sale 💡TS 600 FULL SPECTRUM 100W LED GROW LIGHT : with this light you will achieve excellent buds, you will not need anything more. This lamp replace a 150w HPS lamp, but, with this Led Light you will smoke bigger, harder and tastier buds because Led have a complete spectrum and a powerful light penetration, so your plants will work as much as possible to make you happy. Psssssss it it extremely cheap and it is only 100w, your bills will never be too high, YOU HAVE NO EXCUSES!! Here if you want this little beast: https://www.mars-hydro.com/led-grow-light/mars-ts-series-led-grow-light/mars-tsw-600-led-full-spectrum-hydroponic-led-grow-light Thank you Eleen of Marshydro❤️❤️❤️❤️ 💣Quantum board - 480w - 4x120w Boards by Zhoangshan Koray Opto-Electronic Ltd. Samsung LM301B 288 led/board 3000K 0dB noise +24led/board led Osram 660nm Efficiency 2.6 umol/J 220 lm/w Driver: Meanwell HLG-480H-36B 💣Quantum board - 240w - 2x120w Boards by Shenzen Yuanhui Led Ltd. Samsung LM301H 504 led 3500K 0dB noise +24led/board led Osram 660nm Efficiency 2.7 umol/J 220 lm/w Driver: Meanwell HLG-240H-48B -ESTRACTION FAN: Blauberg 125 Turbo Pro Series Maximum air flow: 430-560 m³ / h 50W 32-44 dBA -FANS: A)OSCILLATING FAN D.15cm 2 speeds 20w B) COMPUTER FAN Sunon DP200A – 230V 20w (Strong, reliable and quiet) C)Cornawall Electronics Multifan Turbo, three speeds, can be used both on support surfaces and mounted on the wall. High capacity, about 740 m3 / h. High silence and reliability. 💊💉💊FEEDINGS: We used BioBizz light Mix TOP CROP: -DEEPER UNDERGROUND: to stimulate roots system -TOP VEG: for a excellent growth in the vegetative phase -GREEN EXPLOSION: to promote creation of bud sites and to allow a faster growth -MICRO VITA: bacterias for equilibrate the soil and to make the plant healty -BIG ONE: to stimulate bud sites and to stimulate resin production -TOP BLOOM: to achieve excellent big and hard buds -TOP CANDY: to feed the buds with molasses for a tastier smoke and to gain weight -TOP BUD: to enlarge buds and to gain weight PLAGRON: PK 13-14 to have big and hard buds and to feed plants with lower effort ADVANCED NUTRIENTS: Sensi Cal-Mag Extra-> for cal mag deficiency GROTEK: CAL MAG for cal mag deficiency HESI: PowerZyme to clean and balance the soil. It feeds the plant cleaning the soil. GHE: - Final Part (ex Ripen) accelerate the final flowering phase, dissolves minerals in excess - Flash Clean to flush the plant and to be sure that all excesses are out from plant and pot These two products improve A LOT the smoke of our babies -PURPINATOR to stimulate flavonoids and to have a better taste and smell. ____________________________________________________________________________________________ 🙏❤️ THANK YOU FOR BEING HERE ❤️🙏 Please leave a comment with your opinions, it is very important to us to have a comparison. If you like our job, tap the weed button and follow us. It will be really appreciated.🙏 We want to thank again everyone that help us in our project. You support us to support our dream. ❤️ SPREAD THE LOVE OF THIS PLANT ALL AROUND THE WORLD 🌿Thank you again🌿 ❤️Sweet hugs❤️ 👨‍🌾CHILLING_RACOONS👩‍🌾
Likes
14
Share
Vamos familia quinta de vida de estás Tropical Zmoothie de SeedStockers. Que ganas tengo de ver el progreso de esta variedad, las plantas están sanas, se ven con buen color. La cantidad de agua cada 48h entre riegos. Esta semana añadimos nutrientes de la gama Agrobeta. Tuve problemas de trips en un indoor y tengo todas plagadas pero ya las e tratado con aceite de neem y un insecticida genéricoy jabón potásico también añadí tiras azules, trataré esta semana. Estas próximas semanas veremos cómo avanzan. Mars hydro: Code discount: EL420 https://www.mars-hydro.com/ Agrobeta: https://www.agrobeta.com/agrobetatiendaonline/36-abonos-canamo Hasta aquí todo, Buenos humos 💨💨.
Likes
37
Share
La primera semana a ido bien, destacar que la próxima vez, estresaré lo mínimo posible a las plantas, ya que si quieres una cosecha rápida y saludable lo mejor creo es no estresar a las plantas, nada de los stress ni mierdas, dejarla desarrollar como si estuviera solita. 📅 Día 8: 🔹Pulverizo las hojas con Rootbastic de Atami a 0,15 ml/litro. 📅 Día 9:🔹 Última pulverización con Acti Vera y Alg-A-Mic a 1 ml/litro respectivamente. A partir del día 11 no se le aplicarán más abonos vía foliar para controlar la humedad en el cuarto de cultivo y así evitar que se disparen estos niveles de humedad. 📅Día 10🔹Última pulverización con Special THC PLUS. 📅 Día 11🔹Riego según la tabla de nutrientes y bajo la dosis de agua ya que me he pasado con el riego. Aplico 350ml e iré subiendo cuando note que no dura 24h mojado. 🔹Cambio los platos de las macetas por una bandeja de 80 x 80para así poder hacer un mejor riego y no molestar a las plantas, ha entrado justa. La pongo sobre una mesa de metal de 60 x 60 cm. 📅Día 12:🔹 Low Stress 📅 Día 13:🔹Low Stress
Likes
33
Share
@Growbody
Follow
Day 103: It was a great pleasure growing the Kitsune Kush Automatic from Zamnesia Seeds. Only the main stem was bent and very few leaves were removed. The amount of work, if you can even call it work, is very minimal. Tag 103: Es war ein großes Vergnügen, die Kitsune Kush Automatic von Zamnesia Seeds anzubauen. Nur der Hauptstamm wurde gebogen und nur sehr wenige Blätter entfernt. Der Arbeitsaufwand, wenn man überhaupt von Arbeit sprechen kann, ist hier sehr gering.
Likes
12
Share
@PizzaBoy
Follow
Starting the week healthy after a week of recovering from nuit burn. Strong growth continues and added a 3000W LED in the middle. Lights as far up as possible and raised the reflective curtain to capture the escaping light. The tallest tops do not appreciate the speed two of the fans. Lowered to speed one and added an oscillating fan to move air below the canopy.
Likes
24
Share
@Hawkbo
Follow
These are actually doing really well it's a weird feeling growing something you created with the prospect that it could actually be some pretty solid quality. Aight so the other day I found another hermie in the very early stages. So I emptied the tent and sat in there in the pitch black for 15 minutes to let my eyes adjust looking for anywhere light could get in. Because I have 2 veg tents in the same room on 19 hr schedules it's impossible for me to have the room the tent is in be pitch black. There was no leaks in the fabric but the air vents at the bottom, even tho I only have 3 open a little bit, let in the slightest amount of light. I had to toss out a mandarin cookies R1V2, a bwiz x Rocberry and a gushers. I found a male flower on a Hawaiian snow x wc x g33 on a lower but instead of tossing it I removed all the lowers and am going to check daily to see if its aight or not. I ordered a ac infinity 4 inch fan, some light proof ducting and a intake carbon filter to be able to set up a intake and close the vents. Very little pollen may have dropped which could seed everything but I might have found it just in time we will see. I almost retired on the spot but I'll give the intake fan a shot as a last ditch effort. Otherwise I would have to remove the veg tents or have intake fans and no open vents for all tents. Use the code bangdang for 10% the following sponsors.. @greenbuzzliquids @rainscience_growbags @gorilla_grow_tent @growlightscience.led
Likes
10
Share
@Sickone
Follow
Auch für die Pfadfinder eröffnet sich die nächste Woche. Beide Ladys machen einen Hervorragenden Fortschritt sowohl die Abstände der "Nioden?" als auch das Wachstum und die Farbe der Ladys gefällt mir sehr gut. Bei einer Lady habe ich etwas nach geholfen die zukünftigen Triebe durch die Fächerblätter zu fummeln damit diese schon frühzeitig licht bekommen und ggf. auch auf einer höhe weiter wachsen so wie sie es bisher tun. Bei der anderen Lady experimentieren ich etwas herum wie es sich auf die Ernte auslegt wenn ich einige Triebe nach unten "Binde" um einen Größeren Lichteinfluss zu generieren was aber bei der Lady nicht so einfach ist da sie ein verdammt wildes Wachstum hat was für mich als Newbie nicht klar erkennbar ist dank ihrer Mutation. Weitere Infos / Bilder folgen im laufe der Woche da sich seit Gestern ( Sonntag ) auf Heute nicht viel getan hat.🌱 Update Montag Abend: Erste Anzeichen der blütephase entdeckt Let's do it!🍃💚
Processing
Likes
118
Share
@ghendrix
Follow
Okay guys, now this has been an eventful week. unfortunately, I can now only visit my plants on the weekend as I am sutying in another city and the plants are at my parents house. That has translated to the little tiny brown leaf I found last week turning into 3 - 4 semi-rotten buds. So yes, catterpillars. Little pesky green catterpillars were the ones eating the leafs and the ones that have now caused some bud rot on my autoflowers. To wich I have decided to do an emergency early harvest as you can see in the pictures above. Trichomes were more or less 10 - 20 % cloudy depending on the bud and some buds also had quite a few amber so they cound't have been that far from harvest anyway. I cut off the buds with rot and the buds nearst to them. luckily it was only 1 or 2 big buds on 2 of the 3 autos I have. The remaining auto is the foxtailing one witch I have not yet harvested and am now debating if I should just do it to not risk getting rot over this week I am away or let her ripen more. The process was cutting off the bad parts, discarding and then cutting off the buds with the stem off the plant. I have never harvested before so I dont know if it is useally done this way but anyway. After the early harvest wich I am sure many would frown upon I did something even morecontroversial and washed the buds in water+backing soda, water+hidrogen peroxide, just water rince and hung them to dry with a fan in front of them for about 2.5hrs. Now I'm a newb so I dont know if this works, but I read and saw a few posts and videos of people doing and explaining this process, and also asked outdoor growers of reddit to see if this is actually a thing, and yes it seems a few if not many people wash their outdoor buds in some way or another. I washed hoping that if there are any caterpillars in the buds that would kill or at least debilitate them.. none floated off while i was washing though.. so now im scared there are still some in my buds and will rot while im drying :( i checked each bud individually trying not to break them up but didnt find any caterpiullar. i only found one while washing the leafs I had trimmed off the plant before harvesting the buds. Anyway, I have bought anti caterpillar and anti fungal spray for tthe photoperiod plants wich seem to be doing okay. A part from some white powdery stuff on the leafs, maybe powdery mildew? Anyone know what can be done for PM ? Anyway, as usual, thanks for your support and comments! sorry for the long post hehe Edit: Totally forgot to mention this.. I think the foxtailing auto has gone hermaphrodite and polinated the other plants (?) I found a little dark ball at the bottom of one of the buds I have harvested, I picked it off because I didnt knoe if it was rot.. A SEED CAME OUT! Yeah.. So now Im thinking my plants have been pollinated by the foxtailer? Does this make sense? xD