


Processing
Likes
Comments
Share


@O_ABSOLUTELY
Follow
I have a few strains in my tent at the moment but as it's my first diary I will be sticking with the one strain which is sweet deep grapefruit by dinafem seeds. Into week 8 we go, last week before flipping to 12/12, plant looks healthy and seems to be thriving using remo nutrients at the exact dosage recommended, only issue is new growth seems to be a little skinny an twisted at first but then sorts itself out any ideas why this could be? Humidity has been a little low past week but as I'm flipping soon I'm not to bothered by that. Give plant a little defoliation last week doesn't look like I touched her thhe way she bounced back lol. So far so good happy with the progress she's making :)

Likes
3
Share


Likes
12
Share


@Mamoi
Follow
Hi! How are you? No much since last update here. A lot of trichomes and resin and smell.


Likes
47
Share


@KilgoreTrout
Follow
January 8th 2018
Growing out well, everything is stable and good. Planning on flipping to flower on Sunday. Can’t wait to see buds.


Likes
16
Share


@Northern_Ent
Follow
July 13: first heat wave of the year was last week, and there is another forecast for next week, but for now this is pretty ideal cannabis weather.
Added a third Scrog layer and tied it off to some weights (partly filled water bottles) to open up the canopy further. Works, simple, and easy to move around the yard as needed.
I really like this plant and how it’s going so far.
July 14: re-scrogged again to widen the canopy further. Supercropped the ends to maintain the same elevation at the various growth tips. Four stems in middle were topped to keep them from getting ahead of the others. Experimenting to see how it goes.
July 16: hot again. Increased water volume and sometimes misting air with garden hose water for the evaporative cooling. She looks great.
July 17: another 32 C day. Watered four times today so likely 7-8 L in the heat with the growing plant.
July 18: hot again. Mixed Power Bloom and malted Barley with some soil and added as a top dressing.Hit 34 C and 20% relative humidity which is far too hot and dry for cannabis. Lots of watering, and misting of leaves and air to provide some moisture and cooler temperatures.

Likes
46
Share


@Chubbs
Follow
420 Fastbuds Week 7
Gorilla Punch Auto
What up what up. Weekly update for these two is pretty much the same as I've kept the same routine. I did up the tds to about a 1000 for a boost. I'll dial it down on the up coming weeks as they start to finish up. The taller of the two does look a little further along but not by much. All in all Happy Growing
Likes
17
Share

@MyWetPussy
Follow
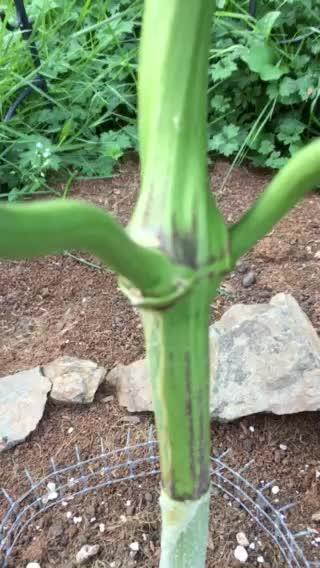
I have been busy and been off gd for a while. Time to finish up on this diary. Plant has done good all summer long. She is getting some good frost to her and is smelling amazing! She had 1 good watering this past week.😍
Processing
Likes
12
Share


@DudeGrowsWeed
Follow
March 20, 2019:
The first CBD Medi Kush has transitioned nicely into the flower room. I’m seeing her start to stretch out and all showing definite signs of femininity. The Jobe’s fertilizer spikes seems fine so far. No signs of deficiencies or issues after the first week. Watering with living water (tap water with a few ounces of fish tank water mixed in per gallon) or just straight tap water (well water).
The girl remaining in the veg tent is doing OK. She really need to be transplanted into a larger container. I’m going to go shopping this weekend looking for square nursery pots for transplanting into.

Likes
9
Share


@ThePifferyAndCo
Follow
Week 7 of Veg. 4x4 filled out very nicely. Added in a 2nd 500W light and spread the plants out a bit more to allow more airflow/light penetration. Now the fun begins :D


Likes
10
Share


@Kj_natureboy20
Follow
Everything’s going great lovely and green although doesn’t look that way on my camera,the two small ones may be males no big deal no such thing as 100%feminised seeds.il give them a good leaf strip tomorrow i usually defo quite heavy

Likes
15
Share


@RDWCGrowing
Follow
2/1/2024- Pre-Germination Activities Day 1
I have 21 weeks until final photo is do.. I took 3 seeds out of cold storage and will let them get to room temp for the next 48 hours before I go with Glass of water for germination. I have 3 beans because I will start from the very beginning helping ensure I present the best Pheno. This is going to be a fun one.. I am a few days away from being able to clear my tent out for this run.. I have a breeding run in right now and the Seeds are a few days away from being mature enough for me to take down the girls.
Once I get them down I will need to get my tent cleaned up and turned over right away. This is going to be close, I will have to time them to the water and into the tray at the right time.. because I will need to get lighting on them right away.. I have my 2X2 and my light ready incase I need to hold them in the cloning machine if the others are not done in the next few days.. Glad I have options that can stretch me out for a week or 2 to give me a little more time.
2/2/2024- Pre-Germination Activities Day 2
I checked on my breeding run to see how close the seeds are and if the tent is ready for me to clear and clean but alas I am still going to need a few days. I setup the emergency 2X2 and that should give me 2-3 weeks. The plan is to still wait one more day to allow the beans to warm up to room temp and then drop them in Water sometime tomorrow.
Form my Emergency 2X2 I have the following:
4" inline fan and carbon filter
Fan
VS-2000 light
2/3/2024- Germination Activities Day 0 - Dropped the Beans in.. Today is 0 day.. Go.. Go .. Go..
2/4/2024- Germination Activities Day 0-1 - Checked in on them this morning and no tap roots yet.. covered them back up and back in to the closet they went. I setup the Root Riots and the Seed tray for them. I Ensured my water that I was soaking the root riots in was PHed to 5.8 and I used RO water.
Afternoon Update: Checked on my Breeders and they are done. I started to harvest them, I took down the one I had reversed with STS and I took down the Black African Magic- All but one bud, I wanted to get some pics of that one today.
I was only able to get 2lbs into the Cannatrol because I had to be very careful to keep the bud from the plant that was treated with the STS separated from the other seeded bud that was pollenated from the plant I reversed.
Cannatrol could have held an additional 2oz of wet but not today. Ideally I need 1 more Cannatrol so I can take an entire Tent, but will figure that out. I put an additional 1.5lbs into the freezer to wait it's turn into the Cannatrol, I would have left it on the plant and taken it in 4 days when the dry cycle gets done but wasn't sure how much 2.2 lbs was equivalent to chopped and wet trimmed.
2/5/2024- Germination Activities Day 0-2 - Checked in on them this morning and 2 of them have very small tap roots out.. one still doesn't going to give them some more time. I will check in on them this evening and see if they are more open if so I will transfer the ones that are ready to their medium and seed tray.
2/6/2024- Planting Day TRUE Germination Day 0- Checked in on them this morning and all 3 of them have tap roots out. I broke the bottom of the tap root for #1 which was the biggest.. pretty sad.. I hope she survives.. I tried to be careful it just snapped off when I was trying to get it in the root riot right. Other than that all three are now in their in-between home in the 2X2 while if finish clearing and cleaning out their forever homes.
2/7/2024- Germination Day 1- Checked in on them and no surprise no sprouts yet. Sprayed the dome to moist it and light spray to the tops of the Root Riots.
2/8/2024- Germination Day 2- #3 is popped and it looks like #2 will be popped by this evening.. I got my second Cannatrol today so now I can take down the rest of the tent and get it into the dry/cure.
2/9/2024- Germination Day 3- #2 is popped as well.. so I have #2 and #3 up and still waiting to see on #1 but that might be a loss since I accidently broke off some of the Tap root when transplanting.
2/10/2024- Germination Day 4- #1 has Popped... We have ignition on all 3.. YAY!! I finished clean up and install of RDWC system, this time was unique the back left buckets 3 inch pipe wasn't seated correctly so I had to clean up about 12 gallons of water all of the floor. I also had two leaks coming from one of the Waterfall return junctions, this is why I do a full pressure test before I put anything in. I will continue to monitor it through tomorrow to ensure that I am good to go and then I will finish setting up the baskets and prepping the water to be ready for the ladies planting day!!!
2/11/2024- Germination Day 5- #1 Of course is going to be my trouble plant.. No matter what If she lives through planting in the system and making it, I think I might not cull her at all regardless, she has been such a problem, makes me wonder if she will be super worth it towards the end.. We will see as we go through this grow, but #1 has a piece of the shell on the leaves,
Other than that I set up a new thing I have been doing since last grow converting my Baskets into Sure plants so I can see exactly where the water is when I plant them and ensure I have the water up high enough that they are able to access it and grow but not too high were they are drowning.
2/12/2024- Germination Day 6- Everything seems to be going good.. will just keep them moist and let the roots grow for a few more days before I transplant to forever home.
2/13/2024 - Germination Day 7- Just keeping them Moist.
2/14/2024 - Germination Day 8 - Planting day.. they are now in the system.. :-)I had to fill the water to the bottom of the basket where I could see water on the bottom rocks and just coming up where I had created my whole/ sure plant.
2/15/2024 - Germination Day 9- Top fed just a little to keep them moist and encourage root growth towards the water. I ensured the PH is right at 5.98-6.02 range.
2/16/2024 - Germination Day 10- Top fed just a little to keep them moist and encourage root growth towards the water.
Likes
11
Share


@Fibro_Witch
Follow
She's still going! I have no idea what's going to happen, but I'll continue feeding her. She's nothing special to look at but that's fine.
I was removing a withered fan leaf and I ripped off one of the flowers with it so I feel horrible. I put her under the roof in the Cure's place since that got chopped.
I don't know what else to report. I'm still nursing her along, and I'll continue to do so until she says she's done.


Likes
Comments
Share

@Growfather1
Follow
Hello everyone!
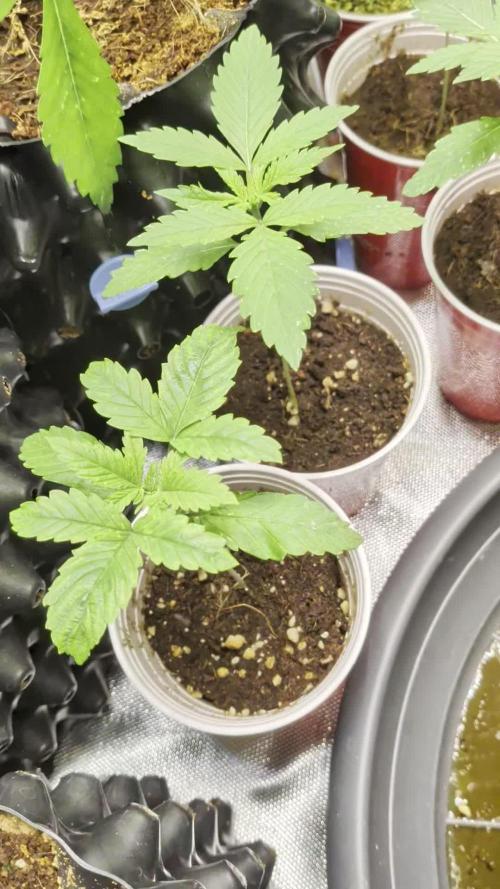
Everything is looking great as we officially enter week two of the Amnesia Grow Diary, Part One.
The young seedlings are currently sitting pretty directly under the LED light rather than being shaded under the canopy of a flowering plant.
They are absolutely soaking up the rays and enjoying their dedicated light.
They are still hanging out in their solo cups for now, but a transplant is definitely on the horizon.
I plan to move them into their permanent homes in about 10 days from now.
Everything is looking perfectly okay in the grow room.
The environment is dialled in nicely right now:
• Humidity: Holding steady at 65%
• Temperatures: Ranging comfortably between 21°C and 26°C
To keep everything protected, I will be giving them a preventative treatment with neem oil over the weekend.
Honestly, they look so comfortable in those solo cups right now, I think they’re convinced they’re at a college frat party. Let's hope they don't get too attached to the plastic lifestyle before moving day!
Let’s see how they look next week.
Thank you for stopping by and have a nice day!
Best regards,
Growfather


Likes
39
Share


@Silverback_Guerilla
Follow
Harvested on 11/6.
I let them cure for a month, and if I can keep my paws off them a while longer, I suspect they'll taste even better...gets more dank every day.
Plant A: 52g - the frostiest of the 3 plants, and also has the best flavor.. She had a few nanners that i left to do their thing. Hopefully I get some cool hybrids out of the closet.
Plant B: 73g - She seemed like the biggest plant but was a little less dense than the other bigger one. A little less pungent smelling than the others, but still tastes great.
Plant C: 73g - very dense and sticky buds...aroma is outstanding
Of the strains I grew this run, the SP comes in a close second to Wedding Cheesecake. Not only WILL I grow it again, I already have another one growing in my tent right now....good shit.👍
Final thoughts:
Aroma: 10/10
Flavor: 10/10
Potency: 8/10
Yield: 7/10
Bag-appeal: 8/10
Bud density: 7/10
Likes
10
Share


@ScottShelby
Follow
Just got back from vacation with lots of worries for the girl but she did fine , 6 days without watering :0
