
Likes
Comments
Share


@CanarianGrow92
Follow
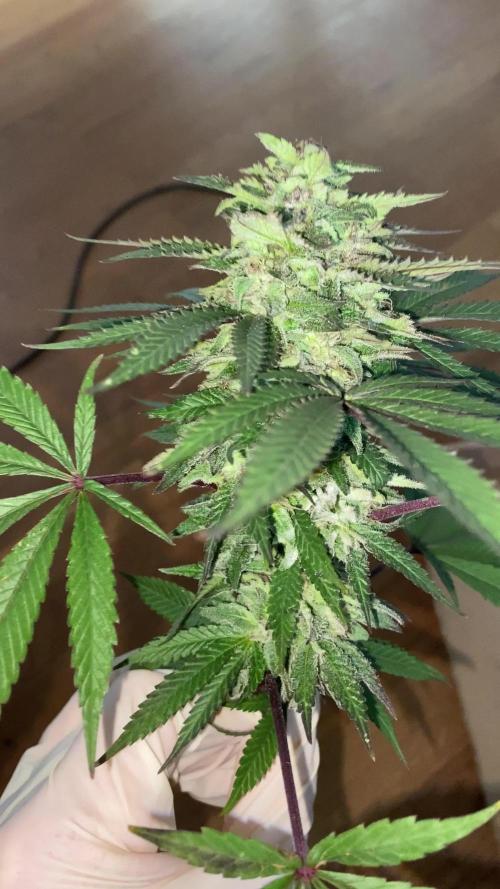
Week 6 already, we will add some extra PK until week 7 more or less as this strain has a little longer flowering, the buds are starting to look great, they are getting bigger and longer week by week!

Likes
1
Share


@Chris87
Follow
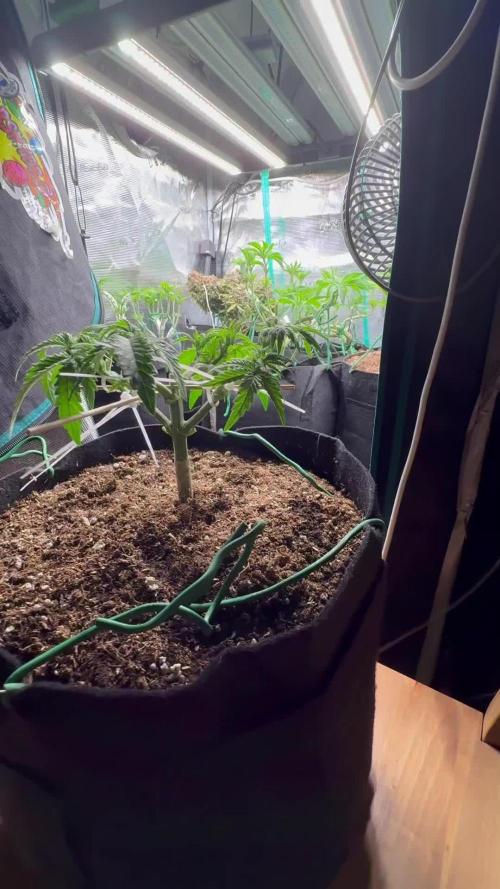
Forgot to mention that I topped them at some point a couple of weeks back and it worked wonders. Trimmed them for the first time and wow did they like it! That's about it. Too tired now to remember anything else. Oh yeah I installed one of those terrarium ceramic bulbs that just heat up without emitting light but it seems like it's not needed
Processing
Likes
4
Share


@Skillgrower
Follow
Estamos a meio da 2° semana a crescer bem ja cm boa ramificação mas a dar indicios de falta de magnezio, mais uma semana começa o lst
Afinal vai começou mais cedo q o esperado.. a crescer muito rápido, mais uns dias estamos no inicio da 3°semana

Likes
2
Share

@hassehujasse
Follow
Preparing for pre flowering stage
recovering after transplantation and got some LST
Likes
86
Share


@JuanHaze_Arg
Follow
Todo parece estar bien por el momento!
Lunes 18/4 a los 9 días de flora me di cuenta que por equivocación dejé el timmer activado en manual, lo que provocó un día de 7 horas más. No sabía si darle oscuridad por un día entero o continúar con una noche más corta. Opte por esta última, esperemos que no afecte
Se sube unos 5 cm la luz para que no queme la planta. Y se apagan 50w
19/04 Se encuentran pulgones negros en el piso de la carpa, muchos. Se pulverizan las plantas con aceite de neem y bioprotect ambos productos de Namaste Nutrientes.
Se riega con 2 litros de agua (50% grifo + 50% Osmosis) + 2ml de cal-mag de Top Crop PH: 6.4 con el nuevo medidor ya! EC:0.9
21/04/2022 se pulveriza ambas plantas con Big One 1ml x L PH: 6.4 antes que se apaguen las luces y empiece la noche
22/04/2022 se riega con 2,5 litros de agua (2000cm3 osmosis inversa + 3000cm3 de la red) + 3 ml de Cal-Mag para reforsar el calcio, se baja el PH del agua a 5 y se agrega BioEnhancer de Green House Feeding 1 Gr x Litro
Cómo la ven?

Likes
4
Share


@Stoner1419
Follow
All ladies doing well.👍
Bubblegum sherbet and Fat bastard seems around 1~2 weeks left,
so I start to give water without nutrients.
Some parts of buds chage color purple🍇
Permanent Marker needs more weeks.
bud size is not much bigger than last week but its gaining, very dense and smelly😍😍
Likes
24
Share


@3lementa1
Follow
This is the 8th week. Thursday will be 9 weeks of 12/12. Some trichs are amber. They just added a good bunch of girth over the past few days, but most of the pistils are red now. The rest of them have been dropping leaves consistenly but the canopy remains full so they must be putting out more leaves.
I just flushed to 80% runoff and found out that I had 1200ppm. I just got an ec meter but my last reading said closer to 600 so idk what happened there.
I flushed until I had runoff ppm of about 150. Now they're back in the grow tent. I don't want to keep assaulting them with my microscope. I think they're ready. Just gonna let them settle another day or two to dry out a bit.
I took one small branch off the small Wedding Cake plant on Thursday and I've just been watching it dry on my counter. It's been 5 days and the stem snaps but still leaves a fiber connecting. I put it into a small jar with a 64RH thing. I just want to try it. It already smells amazing.
The leaves on the big CBD Blue Shark plant are going really yellow and some other colours are starting to come out as well.
The buds all fattened up and got more frosty again. I was worried they were foxtailing but they got more calyxes underneath the peaks and have been making more of a pyramid shape. They're really close to peak. Harvest day will be March 17 or 18.
March 17 1023pm chopped and hung after lights off all day. RH was 65% before I chopped and 50% after I closed the window and cut the plants off the saturated pots. I did a wet trim to prevent mold. The buds are sticky af. Gonna hang them to dry for 7-9 days before curing in jars :)
March 18 : checked the RH when I woke up and it's chilling at 45% 😎
March 19 : just checked to see how they were drying. There are seeds in every plant. RIP
I'll update when I put them in jars and again a few weeks later for final review. Overall it was a good grow despite the rocky start and a good introduction to the mainline technique and my new grow space. Next grow I should have everything pretty well dialed in.
March 23
They were hanging for 3 days. Rh was around 45, then spiked to 65 overnight when I forgot to turn the fans back on. Temp was high at around 26.they felt wet after 2 days, and bone dry after 4 days. The stems still didn't snap but I put them in jars anyway. A day later, jar RH was 50%. I burped all the jars and there was a smell from the new jars. I took all the weed out, washed out the jars, and did a dry trim on the weed.
One of the Wedding Cake plants must have gone hermie. I didn't see any bananas and didn't even realize there were seeds until the very end. The seed pods looked just like calyxes while the plants were growing. Many of the nugs are unusable. Under the sugar leaves are just layers and layers of seeds. Some weren't hit that badly. The CBD Blue Shark is much better off but still has some seeds.
I'm trying to stay positive. It's a bit of a shock though. I'm anxious to try the finished product. If the flowers at least taste good and have a good effect, all is not lost.

Processing
Likes
5
Share


@EUPHORIC
Follow
Seeds all successfully sprouted, The first 2 seeds already emerged through the surface within a night. I used zero nutrient supplements or any additives in this germination phase. You'll notice in the beginning i had 5 seeds and end up with 3 plants, Basically one i gave away; but the other i fucked up somewhere planting them (never gonna do that high again).
EDIT: I forgot i received some Auto Lemon Haze in my package order, that will make up to 4 plants that completes the R-DWC.

Likes
46
Share

@German_GrowLab
Follow
Soooo, nach langem Warten (ich bitte um Entschuldigung, es kam immer irgendwas dazwischen), nun die Ernte! Nachdem ich jetzt alle Sorten verkostet habe, kann ich euch nun mein Fazit präsentieren.
Im Großen und Ganzen bin ich eigentlich ganz zufrieden mit dem Ergebnis, muss aber auch gestehen, dass ich bei der ein oder anderen Strain doch etwas mehr erwartet habe. Bei den nun folgenden Bewertungen möchte ich noch anmerken, dass sich diese rein auf den Outdoor-Anbau der jeweiligen Sorte und nur auf den einen bekannten Phäno beziehen. Man kann grundlegend behaupten, dass sich alle Sorten doch sehr solide geschlagen haben, und das bei diesem … naja, sagen wir mal wechselhaften Sommer. Allerdings merke ich einfach, dass sie lange nicht ihr volles Potenzial ausgeschöpft hatten, was ich immer etwas schade finde. Ich bin trotzdem froh, dieses Projekt durchgezogen zu haben, und gehe mit reichlich neuen Erkenntnissen sowie einem abwechslungsreichen Stash in die besinnliche Zeit.
Was hat mich grundlegend bei den meisten Sorten gestört?
Bei fast allen Sorten, mit Ausnahme der Hella Jelly und der Lemon Tree (wer hätt's gedacht), waren die Terps doch sehr flüchtig. Im Vape kamen sie wirklich gut zur Geltung, wenn man sie allerdings im Joint (pur, versteht sich) geraucht hatte, haben sie oft nach den ersten Zügen an Präsenz verloren, was wirklich schade ist. Dies ist aber wahrscheinlich auf die Anbaubedingungen zurückzuführen und soll den Breedern keinesfalls ihre Qualität absprechen. Wie schon in einem vorigen Kommentar erwähnt, haben sie einfach nicht ihr volles genetisches Potenzial erreichen können.
Ich bin mir des Weiteren auch nicht sicher, ob ich beim nächsten Mal wieder auf die Dryferm-Bags setzen werde. Es war doch ein ziemliches Gefummel, bis man die Blüten ohne Kontakt zueinander in die Beutel verfrachtet hatte. Außerdem hat es meiner Meinung nach die Trocknungszeit eher verkürzt, obwohl ich mich an die Temperatur- und Luftfeuchtigkeitsrange gehalten hatte, was ich auch nicht unbedingt begrüße. Und zu guter Letzt sind sie auch echt nicht billig, wenn man bedenkt, dass ich pro Pflanze teilweise über 4 Beutel benötigt hatte (pro 3 Stk. ca. 25 Euro) und sie laut Hersteller nur dreimal verwendet werden sollten. Das ist doch auf Dauer ein ganz schönes Investment. Aber das sind nur meine 2 Cent zu dem Thema :).
Nach und nach sollten jetzt hier die Erntereports eintrudeln. Ich hoffe, ich schaffe alles heute. Falls nein, seht es mir bitte nach. Falls ihr noch spezifische Fragen zu einer Sorte habt, lasst es mich einfach wissen, dann bekommt ihr noch eine ausführlichere Beschreibung.
PS: Die Filmore-Slim musste ich leider fast komplett entsorgen. Sie hatte die festesten Blüten, die ich je bei einer Outdoorpflanze gesehen habe, was ihr leider zum Verhängnis geworden ist (durchgeschimmelt). Von ihr hatte ich leider keine rauchbaren Blüten. Von der Optik war sie auf jeden Fall ein Champion!
Ich habe von allen Sorten Fresh Frozen in der Gefriertruhe, die ich in der kommenden Zeit wachsen möchte (auch von der Filmore Slim). Also kann ich sie hoffentlich als Konzentrat verkosten.
Das soll es gewesen sein. Ich wünsche euch viel Spaß mit den folgenden Ernteberichten und eine ruhige, besinnliche Weihnachtszeit mit euren Liebsten! Wir hören uns dann hoffentlich im nächsten Jahr wieder, mit vielen neuen spannenden Projekten.
Peace!


Likes
10
Share


@Mr_nugs_lover_David
Follow
This is another beautiful pheno of my beloved strain Do-si-dos OG I wasn't expecting to grow 3 plants this year, just wanted 2 however it was a doble root seed and I didn't want to throw her away so I'm gonna grow her anyways! I love how good she has developed in this 4 weeks since planted, she developed without any issues and has become a happy and strong lady!! Let's get to work for our beloved medicine, I hope you like my outdoor diaries this year!! 💛💚💓👨🌾

Likes
19
Share


@GuerillaSweed
Follow
Did some defoliation 3-4days earlyer 🤘🏾 looking good, no bugparty or any mold (yet)🤪
Waterd them with the good good n we out 🤘🏾


Likes
23
Share


@adam_pawloski87
Follow
Germination Week ~ it all started Sunday 9/26/21! Took the 5 Fastbuds Wedding Cheesecake Autos and placed them in a paper towel added a little bit of water then placed in a sandwich baggy, do not zip it closed, leave open it needs to breath and store in a dark room temp place ! Check once in a while make sure paper towel is still moist let it sit !! 9/28/21 The 5 Wedding Cheesecakes popped and were ready to be moved to permanent home! 3gallon AC Infinity bags for each of mine filled up with Fox Farms Ocean Forest to became their home sweet homes! 😍
Today Friday ~ 10/1/21 All 5 Wedding Cheesecakes have popped up in the soil! 😍 My HLG Scorpion Rspec is set at 51 1/2 inches to the floor at 3 clicks or 30% power , and 200-214 par ! What a great Successful Germination week it’s been , stay tuned for next week for week 1 of veg ! Have a great safe weekend, Peace, love an positive vibes to y’all Cheers

Likes
21
Share


@OGTrauma
Follow
Ok brothers and sisters i had a minor drawback regarding to external weather so conditions like ventilation and how much heat generates the lights itself were on check on this week, i peaked with 28°c and 30% humidity, so that explain also the increased ddistance between the lights and the plants , as temperatures are on the rise. Additional height control through some lst and changing positions at ones possibly where the stem and branches lignificated and the support plays no role anymore in order to control the new stems , thus avoid hitting top bulb or side bulb radiation , or ventilators or other plants - food scheme stays on the stimulant side with the exception of barrier as i'm spraying as long as i can during flowering . probably until end of month.
on the side note the autoflowering one is a bit behind compared to the others but is not that bad - for now. finishing result should be monitored if density and potency was affected by non optimal photoperiod for that one gal.
Kind regards :) .

Likes
11
Share


@Budking420
Follow
This ladies without a doubt one of the easiest growing strains for me. She has not wilted or showed even a little bit of fatigue despite the 20 hour light cycle. Her friend on the other hand seems to do that every few days. The smells wonderful already very strong & smells almost a lot like the classic strawnana. I'm so excited to see how she grows this next week!!!!! Her trichomes are really beginning to spread and thicken. I hope you enjoy! Check back next week to see just how fast she flowers & dont forget its 4:20 somewhere!
Likes
30
Share


Likes
4
Share


@SuperGluedGrow
Follow
Number 2 pheno might herm on me so I have to watch but I have limited plants and I really want to keep these genetics so I need atleast one female. Number 3 the mutant stopped growing before I topped, or maybe not stopped but it threw out pistils at the apical meristem and not producing leaves so I topped to see if I could promote side growth but it hasn't worked; I'm going to keep her around just for the fun of it. 4 is my hope of producing female and a good clone.
Likes
49
Share


@Wastent91
Follow
Ehi ragazzi come va?? La settimana della ragazza è trascorsa bene, si vede che la genetica e pregiata xké nonostante il poco spazio si sta sviluppando e acquistando spazio dalle altre piante ,quindi vuol dire che sta davvero bene, le foglie sono grandi a ventaglio corpose tipiche dei fenotipi principalmente indica , anche il fusto è davvero in espansione ,ad ogni internodo il volume aumenta esponenzialmente! Mi aspetto una weeda spaziale da questa ragazza vincitrice degli ultimissimi premi come migliore hibrido indica! Complimenti a Fastbuds! Tutto questo non sarebbe possibile se non ci fosse la luce Mars hydro che mi dà la possibilità di avere la stessa intensità di luce, e si vede con la crescita uniforme della ragazza ,nonostante la pianta sia relegata in un piccolo spazio di lato! Impressionante FC E3000 non smette mai di stupirmi!! Spero continui così! Buon 420 a tutti! 🐱😼😽❤️❤️🧙♂️✨🌿🌲💨💪
Likes
18
Share


@Thckaos
Follow
21-11-20 Se cambia la solución y se realiza un lavado de raíces. Para bajar la conductividad de las raíces de 1.95 a 0.2 ms para que la solución nueva sea más efectiva. Se corrige el PH de 6.5 a 5.6. La solución tiene 1.95 ms y 5.6 PH. Se añade una pastilla de CO2.
22-11-20 Se corrige el PH 5.90 a 5.60 Conductividad 1.40 ms.
23-11-20 Se corrige el PH 5.90 a 5.60 Conductividad 1.33 ms.
25-11-20 Se corrige el PH 5.60 Conductividad 1.40 ms.
Se queda sin agua, se echar una solución con 1.34 ms y PH 5.6
26-11-20 Se corrige el PH 5.80 Conductividad 1.40 ms.
27-11-20 Se corrige el PH 5.10 a 5.80 Conductividad 1.20 ms.
28-11-20 Se corrige el PH 5.40 a 5.80 Conductividad 1.25 ms.


