


Likes
Comments
Share


@DaBeers
Follow
9/6 - Looks like 6 of 6 germinated. They are now in the nursery. Going in the Organic direction with this grow. First time trying it but i like the fact that you can have a "living soil", reuse the soil, and a big thing thing for me is that you don't have to flush like you probably should if you use salt based synthetic nutrients. My 2 cents.
9/14 - progressing nicely. Installed a better light source for them.


Likes
21
Share


@Bluemels
Follow
Tag 74: Die letzte Stufe beim Dünger gezündet 😁
Tag 80: Die Runst hat seit ein paar Tagen eine rötliche Färbung an den Blattspitzen.


Likes
5
Share


@smoking_hills9
Follow
These cali genetics are blowing my mind 🤯 super sticky, very frosty rock dence buds with extra strong smells. All 3 strains are 10 out of 10, very impressed. Done last defoliation few days ago, preparing for the harvest so it's much easier. Stalks are super fat, same as buds.
Got big surprise from Atami, plant food, and many extras. Crazy. Thanks a lot guys. 💚 Start adding you Bloombastic food already. They love it. Smell is mad. I think most of plants ready in week or so.

Likes
4
Share


Likes
7
Share


@Mr_nugs_lover_David
Follow
This plant is looking absolutely stunning, she's happy, she's strong and she's ready to give her best this 2021 outdoor season, this is gonna be a beautiful year, let's see how this lady express herself, she's very close from being Transplanted, let's do it guys! 💛💚💓

Likes
8
Share


@Cowboy
Follow
I over water this past week but got back on track ,it took about 2 day for her to come back around,, but a great week

Likes
14
Share


@Dr1delaplante
Follow
La défoliation a fait du bien . Elle a une Belle couleur et sa croi

Processing
Likes
23
Share


@SativaSteve88
Follow
Another week down few more to go can't wait!! First ever attempt of growing my own so really impatient to see the final results now and get to the finish line, that said all has went well upto now other than the size they reached haha, really started putting on weight now it seems and they smell lovely, excited to see the buds fatten and progress over these last few weeks up until harvest now, started 5 liberty haze also they are just coming upto 3 weeks now so check that diary out to, any comments info tips for the final stages appreciated

Likes
2
Share


@Cysolja
Follow
She has really busted out this week! Especially since she was topped. The new budsites have reached the ScrOG net and they all on the same level so should flower nice and evenly! Loving the new grow sack! Super excited to see her starting to bud!


Likes
5
Share

@sunshinegroww
Follow
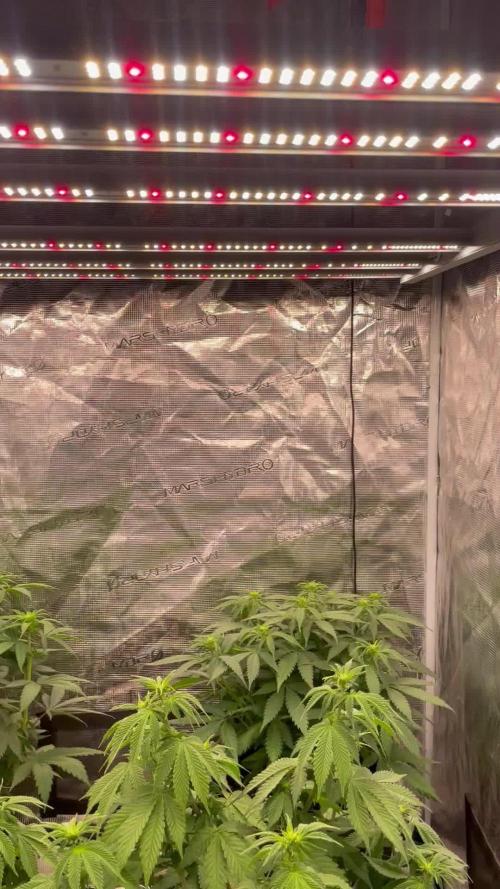
Flowers starting to appear now very happy indeed and thirsty currently 1.2l every 2 days i like it nice open structure leta goooooo
Likes
43
Share


@TheCannaProphet
Follow
~ GG4 SHERBET FAST FLOWER by FastBuds ~
Well fam, here we go again with another epic strain from FastBuds Fast Flowering stable. After having such tremendous success growing their Gorilla Cookies Fast Flower outdoors last year, I've decided to run another of their fast flowering strains outdoors this year... GG4 Sherbet Fast Flower!
The best description of this awesome cultivar comes directly from my friends at FastBuds which is as follows:
"Bred from extremely potent and flavorful Gorilla Glue and Orange Sherbet genetics, GG4 Sherbet FF (Fast-Flowering) takes all the best traits to the next level, offering a high-yielding strain that can produce up to 600 g/m2 in a 7-week flowering time. This super resilient Indica-leaning hybrid thrives indoors and outdoors, and in all types of climates while producing mouth-watering sweet, fruity, spicy and earthy terps that translate into a delicious sugary hazelnut aroma. Expect an extremely relaxing and overall happy effect that’ll leave you with a huge smile from ear to ear. It’s the perfect strain for growers of all levels of experience seeking low-maintenance yet highly productive photoperiod varieties that deliver quality and quantity without extra effort.
GG4 Sherbet FF grows chunky buds with long dark orange hairs and spade-shaped calyxes that get encrusted with trichomes by harvest time, giving them a gorgeous silvery-white appearance. This medium-sized photoperiod can reach up to 200 cm in height and yields up to 650 g/m2 while developing that typical hybrid structure. GG4 Sherbet FF grows with a stocky, bushy appearance, developing one sturdy main cola and fat side branches that support huge yields without much effort. This super-fast variety produces distinctive light-green buds with a high bud-to-leaf ratio, making your trimming sessions a breeze. It’s a top-notch resin producer that doesn’t need much maintenance and will thrive in almost every climate, rewarding growers of all levels with extremely flavorful resin that makes for outstanding hash end extracts."
________________________________________________________________________________________________________________________________________________________________________________________________________________________________________________________________________________________________________________________
The Setup:
This is going to be an outdoor grow, but I have started the GG4 Sherbet Fast Flower indoors as our weather is still too cold to put her outside (nighttime temp's dipping regularly into the 30's℉).
The plan is simple... let her grow inside under a 19/5 light schedule until the nighttime temperatures stay above the mid 40's℉, at which point she'll be moved outside and transplanted into the soil which I have already setup and inoculated with beneficial microbes, and then let the fun begin!🤪💚
________________________________________________________________________________________________________________________________________________________________________________________________________________________________________________________________________________________________________________________
Weekly Updates:
9/4- Here we go into Week 6 of flower for this epic GG4 Sherbet Fast Flower from FastBuds and she is on fire!🔥 I'm praying that our weather stays cool and dry for as long as possible for this gorgeous lady!
9/6- I have switched my watering schedule to mornings now with the GG4 Sherbet Fast Flower, I want to do whatever I can to keep the nighttime moisture levels as low as possible in order to help prevent mold from forming on the flowers as they are huge and dense. I am also checking her trichomes every other day to try to dial in the ideal time to harvest her.
9/8- I'm continuing to water in the mornings on days that we do not get any substantial rain with well water via the garden hose. Today I went through the plant and removed as many old dead leaves as I could along with any shade leaves that were yellow.
9/10- I checked the GG4 Sherbet FF's trichomes today and they are getting very close, and I anticipate that she will be ready in the next few days!
There's another week of flowering done for the GG4 Sherbet Fast Flower and she is just about ready to be harvested which will, from the looks of her trichomes, will be in the next 4-5 days... I'm so excited!🤩

Likes
25
Share


@Ultraviolet
Follow
Coming along, I find the urge to just let it grow vertically but last grow I was a little underwhelmed with the spread once the canopy was past the stretch, I will look to continue LST , really starting to thicken up around the base. Plant must be feeling the need for extreme reinforcement of stem trunk as the extra weight of vertical growth on the long supporting stems have little in way of support.
Filled waterbeads with a concoction of nitrogen, vitamin b, humic, phosphorus, omina.
Added aluminum suplhate to help PH medium, strain likes it slightly acidic.



Likes
6
Share


@Lickey
Follow
They are stretching almost out of control. The lights are at their max height without modifying the hanging mechanisms, which I will definitely have to do. They still have another solid week of stretch yet.
Besides that they seem fairly healthy. The runt (1/4) drinks a little more slowly than the others.

Likes
3
Share


@Passionatos
Follow
Start of the bloom phase I got some nitrogen deficiency but I could handle the problem by giving them some extra nutes

Processing
Likes
18
Share


@eezeegrow
Follow
Plants are growing fast. In this phase they drink about 3 liters a day each.

Likes
15
Share


@Dayexpress
Follow
I started this week with lst to open the canopy. Also removing severl bud sights that will not be getting enough light and defoliated some as well. Next week she will be readu for flower.



Likes
4
Share


@AustinRon
Follow
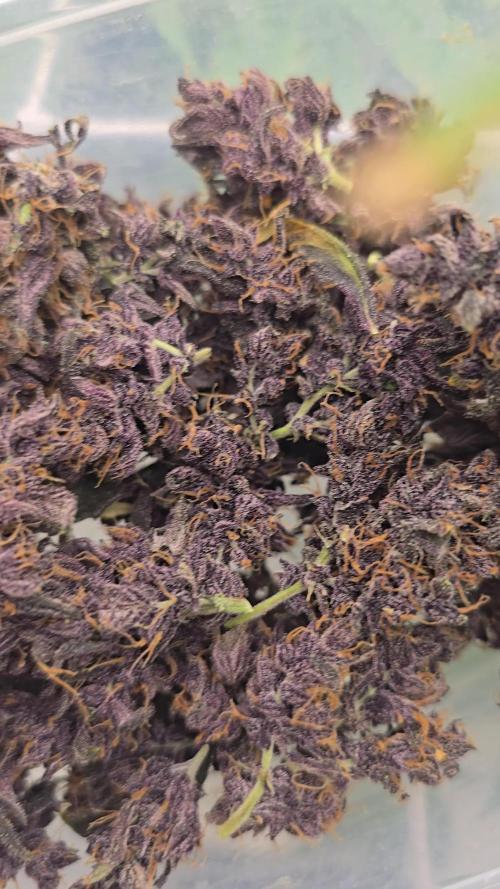
OG 4Q24 Flower Week 9
Orangegasm (Fem) [ IRIE Genetics ]
12/12 @ Bolt (Day 21)
Germination: 20 November 2024
#3A Earliest Harvest Date: 9 February 2025
#3B Latest Harvest Date: 19 February 2025
_________________________________________
Start of Week: [Wed Feb 5, 2024 CR2 4Q24 57:F:8:1]
End of Week: [Tue Feb 11, 2024 CR2 4Q24 63:F:8:7]
OrangeGasm Fertigation:
- MAX: EC: [ 2.4, mS] #Ramping Down
- LightIntensity MAX: [ 850, µMol/m2/s]
______________________________________
OBJECTIVES
- Ramp EC from 2.4 - 1.0
- Start rolling off Primer A&B/Silica Skin to Resin Bloom . . .
__
Wed Feb 5, 2025
OG 4Q24 57:F:8:1
EC: 2.3
Notes:
#5 looks like a 60 day plant, if so - consider Saturday Harvest …
Runoff
- [x] Amount: [ 0.125 , gal]
- [x] EC: [ 4.4 , mS/cm]
- [x] EC∆: [ 2.5 , mS/cm] # Fried Yet? ;-}
Harvest Dehu
- [x] Amount: [ 1.5 , g]
__
Thu Feb 6, 2025
OG 4Q24 58:F:8:2
EC: 2.3
Refresh Reservoir
- [x] Amount: [ 2 , g]
- [x] EC: [ 2.3, mS/cm]
- [x] Primer A&B: [ 31, ml]
- [x] Silica Skin: [ 15 , ml]
__
Fri Feb 7, 2025
OG 4Q24 59:F:8:3
EC: 2.3
__
Sat Feb 8, 2025
OG 4Q24 60:F:8:4
- [x] Disassemble, Clean Reservoir and Pumps, Reassemble
Refresh Reservoir
- [ ] Silica Skin: [ 15 , ml]
- Dropping Silica Skin due to (sparse to medium) granular precipitate
- [x] Amount: [ 6 , g]
- [x] EC: [ 2.1, mS/cm]
- [x] Primer A&B: [ 100, ml]
EC: 2.1
@1900 - Clear Manifold Filter. (Mainline should be cleared on 1845 feed
__
Sun Feb 9, 2025
OG 4Q24 61:F:8:5
- [x] Dilute to EC 2.0
- Flooded Tent, 2 Gallons PLUS of Runoff. Happy Plants.
- Shout Out Shop-vac. ;-}
EC: 2.0
__
Mon Feb 10, 2025
OG 4Q24 62:F:8:6
EC: 1.8
HAND APPLICATION
Prepped One Gallon of 12-8-7-5 @ 1.8 mS/cm w/ PhotoSynthesis Plus, SLF-100
Reclaimed Dehu Water, ~2 Gallons
Refreshed Reservoir, 2 Gallons Rooted Leaf Hydro no Silica Skin, EC: 1.8 mS/cm
Reduced watering to 5 min, then 1 - 1 -1 -1 -1 -1 -1 -1
(It’s not like they’ve been under-fertigated)
__
Tue Feb 11, 2025
OG 4Q24 63:F:8:7
EC: 1.7
- [x] EC: [ 1.7, mS/cm2]
- [x] Refresh Reservoir
- [x] amount: [ 2.5, gal]
Runoff
- [x] Amount: [ 0.5, gal]
- [x] EC: [ 3.6, mS/cm2]
- [x] EC∆: [ 0.9, mS/cm2] # Better than 2.5!
PLANT POSITIONS
3 5 1 7
4 2 6 8
