
Likes
Comments
Share


@TheIceCreamParlour
Follow
3rd flower week complete. I cant help but think I've ruined one of the 2 girls. Shes taking a really long time to recover and bud growth is slow and steady. I've defoliated for about an hour and a half tonight and now really need to get some sleep! I'll pop back tomorrow with lots more photos and a more in depth update on what has changed this week.
Update........ so ive been caring for the burnt up plant throughout the week. Shes not gotten any worse but just seems a little stressed now. I decided to remove the worst of the burnt and dried up leaves last night. I know it will also cause stress but I didn't want the rotting leaves to cause any bacteria growth around the healthy plants.
They've been on everyday waterings at around 1.6 EC. I've included some Hygrowzyme in the last few feeds in the hope some beneficial enzymes may help the root zone take on nutrients.
Despite one of the pair being unwell the other is healthy and vigorous. Shes not getting the attention she rightly deserves so I've included lots of photos to this weeks diary. I wouldn't want anyone to be put off from growing this strain as it has so much potential. I'm hoping that the healthy plant produces the goods and leaves me wanting more.

Likes
45
Share


@Kitties_and_Colas
Follow
~_~_~_~_~_~_~_~_~_~_~_~_~_~_~_~_~_~_~_~_~_~_~_~_~_~_~_~_~_~_~_~_~_~_~_~_~_~_~_~_~_~_~_~_~_~_~_~_~_~_~_~_~_~_~_~_~_~_~_~_~_~_~_~_~_~_~_~_~_~_~_~_~_~_~_~_~_~_~_~_~_~_
❤️💡🌱😽💨
What a great week!! These plants are looking soooo much better, their color is starting to improve.. These Kritial-K are my absolute favorite in the tent, once this grow is over we may buy sevral packs of this.. they're easy, forgiving and look to be massive producers with a little training.. Verdict is still out on smoke quality but if its anything like our last Kannabia strains, its prob a winner..
The Solux is at 75$/14" and im starting to wonder if we'll even need to turn it to 100%.. they're getting more than enough light like this but we may increase power for the last 3-4 weeks of flower (a light meter would be a great one day lol).. not too much else to report, I think we're in for smooth sailing until harvest at this point.. thanks as always for checking us out and happy harvests everyone!!!
⚡Hortibloom/Solux 350⚡
Specifications ⚙️:
Diodes: Samsung LM281 Pro / Osram DR (1,440 total)💡
Driver: Inventronics 350 watt🔌
PPF: 1015 μmol/s ☢️
PPE: 2.9 µmol/j 〰️〰️
Lifespan: 50k+ hrs ⌛
Weight: 14.3lbs lbs (6.5kg)
Veg Coverage: 5 x 5 ft 🌱
Flowering Coverage: 4 x 4 ft 🌼
-Uses an aluminum heatsink (no fan), quiet while operating 👂⬇️
-IP65 waterproof ratings, tolerant to high humidity grow environments 💦
-May be daisy-chained via RJ14 and managed from a single controller 💡~💡~💡~💡~💡
🌎 https://hortibloom.com/products/solux-350-led-grow-light
~_~_~_~_~_~_~_~_~_~_~_~_~_~_~_~_~_~_~_~_~_~_~_~_~_~_~_~_~_~_~_~_~_~_~_~_~_~_~_~_~_~_~_~_~_~_~_~_~_~_~_~_~_~_~_~_~_~_~_~_~_~_~_~_~_~_~_~_~_~_~_~_~_~_~_~_~_~_~_~_~_~_

Likes
6
Share


@TrapnTrade
Follow
So 4/5 weeks into these auto babies 👶 straight into flowering no veg then we gonna go for a crazy light switch from 7th week till finish with 10/14 darkness and see how the girls finish up after flushing.
Likes
3
Share
@PapaTerps
Follow
Black Cherry Gushers - Barney's Farm
Day - watered with 3L of RO tap water with nutrients, pH'd to 6.3. She is really focusing on bulking this week and has required feeding every second day, as a posed to the every three day usual; or when the moisture content of the soil drops below 10%. Since lollipopping her a few weeks ago, I have not had to do any work on her, but today I removed about six fan leaves from her, to help improve light penetration. I have also added side lighting, to boost the PPFD hitting the nodes under the canopy 🤞🏻
Notes:
- her smell is coming through, extremely candy, but is being eclipsed by the Blue Zushi, which is a lot more pungent 🤘🏻
- her bud is bulking really well, and they're hard and dense to the touch!

Likes
14
Share


@DaddyPrime
Follow
6/22 looking good after I tried to spread her out more. She responded well
6/26 sexy ass plant

Likes
7
Share


@GTools
Follow
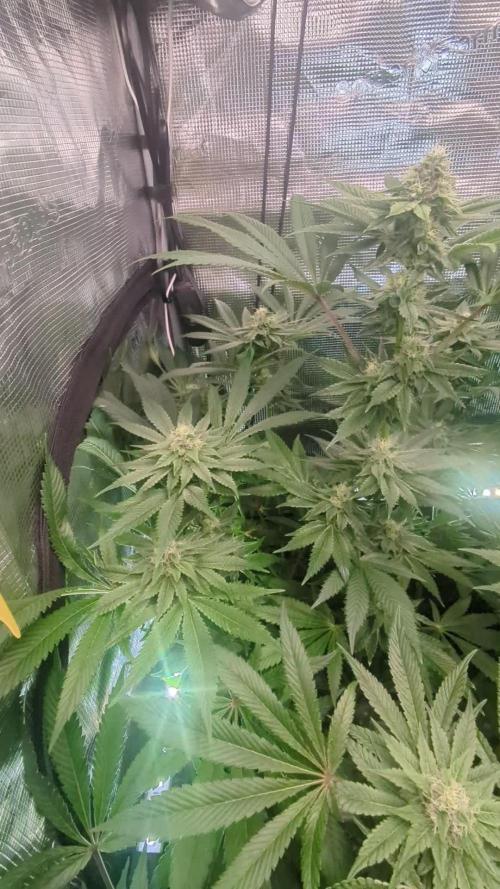
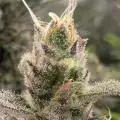
Flushing has started and I expect to harvest within the next days.
Mostly all the trichomes are milky. Not many clear trichomes left, and some older sugar leaves have have trichomes getting yellowish amber.


Likes
12
Share


@L_Choppa
Follow
the gorilla cookies came out really good i wish i couldve done more lol the buds were a little air but the potency is really strong im satisfied with this strain i do plain on doin this one again

Likes
62
Share


@masterofsmeagol
Follow
9/12 Sprayed 1 tbsp K Bicarb with 1/4tsp dawn. Only had time to use a half gallon. I've used more but with all the defoliation this seemed to work and I was in a hurry. I can't ask those watching my plants to do actual labor when I'm not home. I wouldn't want anyone working on my plants but me anyway. I defoliated dead stuff. Still have this rusty looking leaves dieing on my ice cream cake. I need to finish a little defoliating. Broke out my 100x scope and checked a few buds. Things are exploding. Another nice sunny day today. Beastie bloom had no negative effects. I'll use it again and I'll probably use cha ching as well. Went back down to defoliate a little more. I'm getting excited. Still a lot of work left but it's nice to see the progression. Had to cut out a small nug last night that looked like it might start to rot. It was probably fine but I wasn't taking chances. It's so dank and crystally. One of my mystery seeds in the 5 gallon will be done soon. Milky trichs and hard as a rock. Im hoping they will beef up a bit. Little to no amber but things are progressing so fast. I mean nights are in the 40°'s.
9/13 No need to water as it had rained so much the bags need to dry out. Sunny day today. Plants are doing great. Buds increase in bulk on the daily. Took a few pictures and defoliated what needed it. A dog was added to the grow for security. It hasn't gotten used to me yet but it's extremely loud and annoying. Nothing will get past it though. I tried to last night. I shut down the motion sensors informed the other growers (except the person who's shift it was to watch) and I couldn't make it down there on foot let alone a vehicle. Hope the dog liked me but it's certainly useful. It APPEARS we will be having some good weather so I'm excited. I think my plants will be able to finish properly. At least I hope. Either way if I have to harvest early do to the weather so he it but I'll cross that bridge when it comes. Plan to do a preventative BT spray this week.
9/14 FED TODAY. LOWERED GROW BIG TO HALF TBSP. AND AGAIN used 1/4 TBSP Beastie Bloom. Buds are swelling with the sunshine that we've had. I defoliated what needed it and found more dead foliage. It's so weird this damage. I'm pretty sure it's earwigs but the only bother new shoots so that's a good thing. Things are getting close and looking good. I need to do another app of BT. I heard a storm may be coming I'll need to check the weather.
9/15 After a few good days of weather we are in for some rain. Supposably a big storm but it looks like I won't get the worst of it. No water obviously. Something (probably earwigs or jpn beetles) eating or lollipopping lower things. They seem to leave flowers alone. It's just low shoots. Everything is flowering incredibly. I checked trichs on one of my mystery seeds and it looks done. I'm considering taking it. It's in my garage for 24 hrs of darkness and to avoid rain until I make my decision. I also took the two lowest branches off on DJ Short blueberry to taste test and see where I'm at. I probably shouldn't but o do this every year. It will be good to try the mystery bud before I harvest it all. It's just a little guy but the buds are rock hard and with the weather and pm and stuff I'm not sure what I'm going to do yet. UPDATE: APPARENTLY WE HAVE SEVERE THUNDERSTORMS WARNINGS WITH GOLF BALL SIZED HAIL. I can move the other little ones in the garage but everything else is firmly rooted and have taken a beating already. I pray things will be ok.
9/16 No damage from the ridiculous storm last night. I need to spray ASAP. I have a fungal infection with just a few weeks to go. Looks like PM but I know some is a different fungal issue. I'll probably use the k bicarb or citric acid. So far no bud damage or damage up top. The things the earwigs ate were low like the lollipoped lower limbs. It's getting so close. I've been checking trichs and they look great but the buds have some filling out to do.
9/17 DID K BICARBONATE TREATMENT THIS AM. I didn't even look to see if I needed to water. Fuck. buds were soaking wet though so it must've rained. I have to go back down anyway to add a couple strings and do a little more defoliating. Did a treatment with k bicarb this morning.. 1 tbsp with dawn in a half gallon sprayer. I also need to address this earwig problem. They are ravaging some secondary lower branches and Im sure they are spreading disease. I only have a few weeks left and I want the best quality I can possibly get. I plan to put gorilla tape on the outside of the grow bag (double width) and petroleum jelly on the stems. That way they can't climb the bag. If they are in the soil of the bag hopefully the jelly will stop them. I'll also try beer as I've heard that works. I really don't want to resort to borax. Oh and I may have had a visitor last night. I'll have to check the cams. Nothing on the ones I checked but I have some game cams at different angles I haven't checked yet. It was probably just a nocturnal animal. Great to know that the dog announces though. This was at like 12:30 and I was out quick. I only have a few more weeks. I hope the cannabis gods are with me.
9/18 Whatever is eating my plants (earwigs I assume) are progressing from lower secondary or tertiary branches and new shoots to small buds. Looking at trichs some plants look ready. One seedling and the blueberries. I'd like the blueberries to go longer but I'd risk losing them. Fungal and mold issues aren't the greatest either. I was hoping for a big swell but if the weather stays raining and foggy like this it might be better to harvest a little early. I got a second opinion this morning and I'm leaning on taking the seedling and at least the one blueberry with the worst damage that dropped most of its leaves. I'll see how the bottom branch smokes this afternoon and make my decision then. Didn't feed for fear of lockout or if decide to cut. UPDATE: After the second consult with a different local grower I decided to harvest the blueberry that was furthest along and dropping it's leaves. It was done. Luckily it had been flushed with all this sheet rain we've gotten. It rains hard as I speak. Last year I think I had two strings the length of the huge garage and that lasted me all year. This one plant took an entire string to itself. If the weather cooperates this will be a good day. I also flushed the mystery seed I was going to take hoping it might fill out but trichs are very Amber and the bud is DENSE. Not risking mold or insect damage or theft. This took hours to harvest this ONE Blueberry plant. I had to harvest limbs. This was when I could see damage best. I also am curing the buds from the lower branch I took earlier and the other bud that is done. I plan on testing it out tomorrow. I could smoke now but Im already burnt and tired and want to try this with a clear head. I can't believe how long this took. One Big and one little down 10 more to go. Phone died so I couldn't take any pictures.


Likes
25
Share


@Ferien
Follow
No more nutrients, only ph corrected water.
She looks okay and becomes stickier and thicker by the day
It‘S gotten very hot in the tent - up to 30 deg celcius even though we have between 15-22 degrees outside if it.
My filter is no strong enough to filter out the smell when my temperaturw controlled ventilation ramps up. I‘ll have to buy a bigger one.

Processing
Likes
32
Share


Likes
3
Share


@High_Grade_Dadli
Follow
2 of dem from the 2nd set don't seem to catch dem self yet🤷🏾♂️ but the rest are taking off....those from the 1st set still ain't transplanted and they are pushing hard ties ain't holding dem back. 2 that where transplanted previously jus tryin to get dem a good size n send dem on a breeding project for the beginning of the
Most of new cutting have visible root


Likes
2
Share

@High_Grade_Dadli
Follow
So far nothing to complain about buds sites are putting on some size....clone piece is holding up pretty good....hoping she get some roots this upcoming week...never really clone before
Likes
58
Share


@pifflestikkz
Follow
Day 16
Friday 17/05/24 Feed today.
Seeing beautiful nice growth, will start LST this week.
Day 18
Sunday 19/05/24
Water today with calmag
Nice development, nodes forming, will start LST before end of week.
Happy and healthy, she's coming along strong 💪💚
Day 21
End of week
23/05/24
Light water with calmag.
She really has taken veg well. Fat fan leaves, soaking up the hps 600.
Shes super happy and healthy.
I will doing soil top up tomorrow and start LST with a feed.

Likes
12
Share


@WestToEastBerlin
Follow
Englisch:
Towards the end of week 4, the ladies were planted in their final 11 liter pots.
They also tolerated it very well, especially because of the White Shark Mycorrhizae the plants had almost no stunt.
I lollipopped all the plants on day 38 and will give them another week or so to recover before flowering.
This is my first time with such aggressive lollipopping, so we'll see how they take it.
Unfortunately I have to say that the PCG Genetics are not performing as well as I had hoped, whether it's my fault or the fact that the seeds have been in the fridge for over 5 years, I don't know.
I hope that they will at least be convincing in terms of flavor, even if they are not the highest-yielding plants.
Now I have to wait and keep my fingers crossed. :)
Deutsch:
Gegen Ende von Woche 4 wurden die Ladys in ihre finalen 11 Liter Töpfe gepflanzt.
Haben es auch super vertragen, besonders durch die White Shark Mycorrhizae hatten die Pflanzen so gut wie keinen stunt.
An Tag 38 habe ich alle Pflanzen gelollipopped und werde ihnen noch ca. 1 Woche Zeit geben, um sich zu erholen, bevor es in die Blüte geht.
Ist mein erstes Mal mit so einem aggressiven Lillpopping, mal schauen wie sie es vertragen.
Leider muss ich sagen, dass die PCG Genetics nicht so performen wie erhofft, sei es mein Verschulden, oder die Tatsache, dass die Samen über 5 Jahre im Kühlschrank lagen, ich weiß es nicht.
Ich hoffe, dass sie zumindest geschmacklich überzeugen können, wenn es nicht die ertragreichsten Pflanzen werden.
Jetzt heißt es abwarten und Daumendrücken. :)


Likes
12
Share


@Kakui
Follow
Nuevo cultivo, volví a plantar Jamaican Dream, está vez solo se hará LST y defoliación, nada de apical(Main Lining).
Se ha aprendido de errores y atrasos del cultivo anterior, esperando no cometerlos en este cultivo.
Para este cultivo de usarán los nutrientes de la línea Grotek(mega pack), además de micorrizas great white.
Las semillas germinaron al tercer día de plantadas en el sustrato, al igual que el cultivo anterior. Esperaré a que crezcan hasta unos 3 nodos para hacer transplante a maceteros definitivos de 18 litros.
Germ2, han estirado suficiente para remover el plástico, se regaron con agua de osmosis con CalMag a 0.6 EC y pH 6.5, se espolvoreó great white en el sustrato. Se instalo un humidificador en el indoor y se bajó a un 70-80% la potencia del LED.
Germ3, se mantienen en 80% de humedad a 23 grados, se humedece el sustrato.
Germ6, están creciendo al ritmo esperado, se humedeció el sustrato, los parámetros están correctos.
Germ8, primer riego con Vitamax Pro y SoloTek Grow de Grotek, 0.8 EC, y un poco de great white en polvo al sustrato. Creciendo bien.

Likes
13
Share


@cookingwithninja
Follow
Week 6 day 1 video
Week 6 day 4 video
I’m still pushing very hard with carbs every watering, humic acid, soluble n, soluble pk, microbial mass, b+, fishshit. Already tried testers for lowers. Very potent hits harder than a pen. Feels like 30-40% baked for 1-3h per j, different phenos. Not harsh just testers dried for 0:01:15, checked seeds and developing for 2-3 weeks
Likes
7
Share


@TiRobotProds
Follow
Plusieurs sacs a pollen se développe, plante très très hermaphrodite pour ma part.


