Likes
Comments
Share
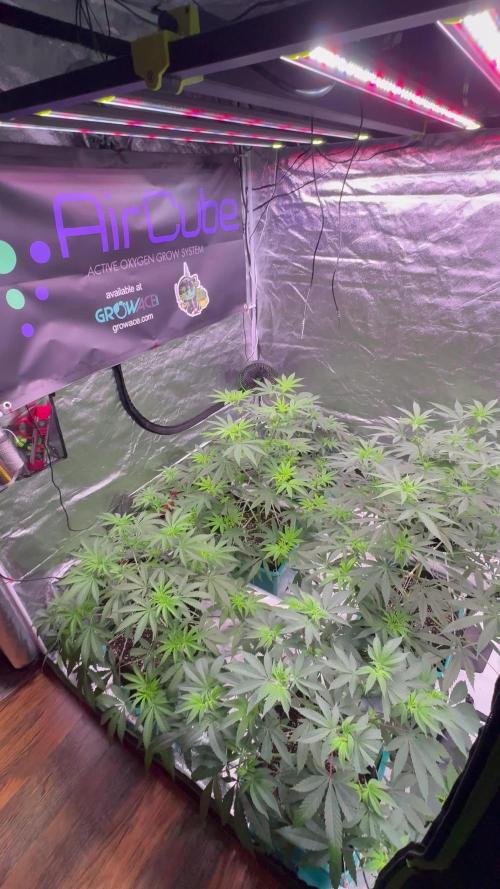
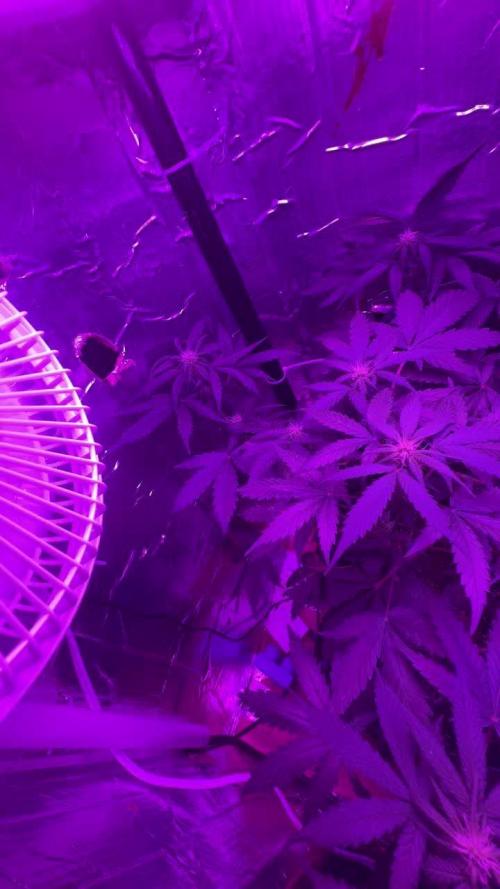
51 Days in flower have passed. This week i got myself an upgrade, new light the FC-E3000 and a 120x60 grow tent so i can grow some bigger and better medicine. I love the specs on the light, the price was right and so i have high expectations from looking at other peoples reviews of the light. We will see if im able to hit the jackpot with this! 🤠 The girls are looking great! Cheese left, Gorilla Girl right. the pictures and videos are self explanatory, its looking awesome!!! If you ever wondered where i stashed the Runtz and Bruce Banner; i took them out of the grow tent and just put them in the corner of my house without light only surviving off the light in the shadow from the sun, they have been neglected for a while but they still went on super strong, they started flowering 3 weeks ago so i had to put them into reveg so they look a little odd now but its all good. it was either that or i would have to throw them in the trash, and im not gonna waste some nice strains like that. Im impressed how they have survived with almost no light and water. ---1st time growing with FLO - Florian Living Organics.--- They claim that there is no need to pH when watering and that their living fertilizer is the only thing that i will need throughout the whole grow so i only need to mix with soil and just water with plain water. If this stuff works then it can simplify my future grows ALOT! Happy growing. 😎
Likes
78
Share
@ClubRiot
Follow
Week 10 , pH Perfect Connoisseur Bloom Part A ( 1 ml/L ) pH Perfect Connoisseur Bloom Part B ( 1 ml/L ) CarboLoad Liquid ( 2 ml/L ) Sensi Cal-Mag Xtra ( 2 ml/L ) Sensizym ( 2 ml/L ) Bio-Heaven ( 2 ml/L ) Overdrive ( 2 ml/L) Nirvana (2 ml/L)
Likes
12
Share
@Bryankush
Follow
Continuando a preparare la sua forma finale. Purtroppo nella mia zona le temperature sono molto alte, circa intorno ai 34° ma per fortuna la Mango riesce a resistere un po. Attualmente la annaffio con 10L di acqua a settimana.
Processing
Likes
98
Share
SONG OF THE WEEK : Isaiah Rashad - 4r Da Squaw ------- Day 32 - That week is a bit hard to manage as the weather is clearly against me, after the hard sun it is time for the heavy rain to shows up 😧. But it's outdoor rules. But the ladies are doing good : -SSW#3 were topped + suppercroped thanks to Tazard & Lumberjack advices I think she's doing right ( many thanks guys 😍). She's 20 cm tall now -SSW#1 Will not be topped , I'm just doing a light LST on her by bending each secondary stems with my fingers everyday and you can see a "good" result on the pictures. She's 34 cm tall -SSW#2 is late on the secondary stems but tall , I still don't know if I'm gonna train her. She's the tallest with 39cm
Processing
Likes
4
Share
Just germinated the 3 OG Kush seeds, only one had a tap root. Decided to soak my White Widow just in case only one OG plant makes it. 6 plants in total (if the other 2 OG makes it)
Likes
13
Share
Last week of flowering (72days from the light switch) Gonna cut soon when the dirt is dry. A quite late harvest. Many buds denser more, and stem can’t longer resist. This season so satisfy. Thank for all mentor and comment. You all are my inspiration for grows. Feeding 23/1 Water 13.5L+Flawless 20ml ppm80 ph6.2 MDR 3L 2Lx5 Runoff MDR 1400 /1155 Zkittle 1600/1300/1150 Pineapp 900/600 Purp 1300 /1200 Sapp 2000/1100 Dozdos 1100/1000 25/1 10.42 6L ppm9 ph6 1L per pot 3L+Flawless6ml ppm116 ph5.9 1.5/1.5 Purp, Zkittle 4.5L+ Flawless7ml ppm119 ph6 1.5/3 Sapp,MDR Runoff Purp 1300 Zkittle 1500/1200 Dozdos 1400 Sapp1300 Pineapp850 MDR950 27/1 runoff Pineapp 500 Purp 900 MDR 600 Zkittle 400 Sapp 300 Dozdos 400
Likes
15
Share
Likes
88
Share
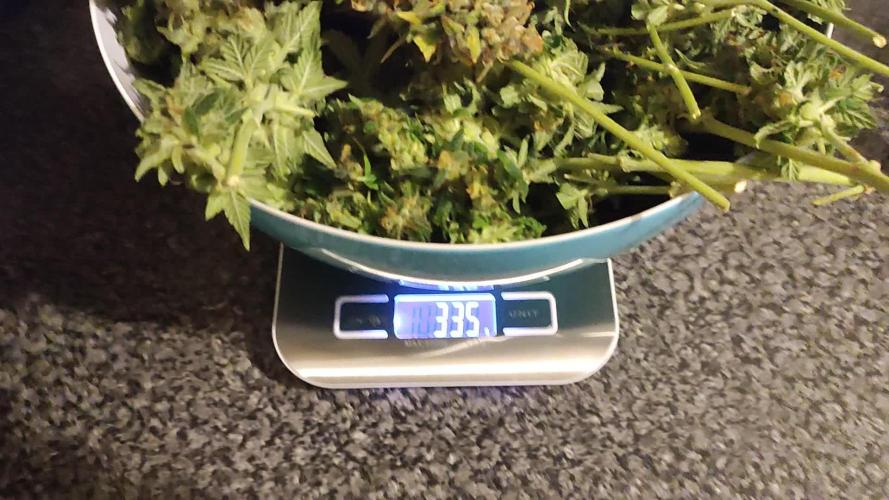
🌾 Harvest Day — The Grand Finale of the Eternity Grow Cup 🌾 Days 72–73 | Trimmed on May 25 | Posted May 27 What a journey this has been — and what a finish. These five incredible Runtz phenos have now completed their cycle, and today, we celebrate the final stage of their flowering life: the Harvest. We sent the girls into darkness on Day 70, allowing them a full 48+ hours of rest and reset. The dark period was just a bit longer, truth be told, because time… it flows as it must. This extended dark time helps increase resin production, allowing the trichomes to mature just that final bit more. On Days 72 and 73, we harvested them with care and reverence. Each plant was hung upside down, whole, in a perfectly controlled 60% humidity environment for 13 full days. Before hanging, we gently removed only the fan leaves, leaving all trichome-rich sugar leaves in place — a natural armor for the delicate resin glands during drying. Why do we do this? Because those sugar leaves help protect the essential oils and terpenes, preserving potency, flavor, and aroma for the smoothest experience later on. 🌿 The Dry Room & The Trichome Guardians Throughout the drying, we used a moisture meter to monitor the moisture content in the stems. Once it dropped to around 12–13%, we knew it was time. This tool is a simple but game-changing ally in ensuring a perfect dry — not too fast, not too slow. We then trimmed everything by hand over a 6.5-hour focused session. Armed with trim bins and good energy, we collected an abundance of glistening trichome heads in the process — a golden bonus from these resin-packed beauties. The leaves themselves told a story: deep purples, near-black shades, autumn fades and metallic tones — just stunning. Each girl was trimmed in order: #5 → #4 → #3 → #2 → #1, revealing dense, chunky buds all the way from top to bottom. Not a single pop-corn bud among them — only rock-solid nugs, heavyweight champions in every sense. 📦 Cure Begins – Grove Bags & Glass Jars Once trimmed, the buds were tucked carefully into Grove Bags and glass jars, each stabilized at around 61% RH. The Grove Bags handle the microclimate beautifully, keeping humidity between 58–61%, perfect for preserving all that hard-earned quality. We’re now opening the jars daily, monitoring aroma and feel. This part of the process — the cure — is where the soul of the flower truly comes to life. ☀️ UV, Reds & The Perfect Run Part of what made this run so special was the precision in light spectrum. 40% whites, full reds, UV and IR, and the girls responded like royalty. The UV pushed trichome development to the max. The deep reds gave us thickness, color, and weight. All of it under ThinkGrow Model Ones powered through the Trolmaster ecosystem — everything syncing in harmony. This run was stable, lush, expressive — a grower’s dream. To my eyes, this was a perfect run. ⚖️ Final Yield: 1,302 Grams (1.3 kg) In a 4x4 tent — that’s just 1.2m x 1.2m for metric friends — we pulled in 1,302 grams of flower, not even counting the buds that were taken for filming, photos, or “quality control testing” along the way. 😉 Dense. Loud. Sticky. Resinous. 🌿 The Hidden Half: A Tribute to the Roots In every grow, there’s a part we don’t always see — a part that lives underground, quietly holding everything together. The roots. And this time, I wanted to honor them too. When we unpotted the plants after harvest, we were met with massive, dense root systems, completely filling the Autopot trays. These roots were vibrant, white and healthy, looking like noodles in a thick herbal soup — a true sign of vitality. The Autopots system, combined with the Aptus Holland Clean Program and Plagron Green Sensation, made sure they had the perfect environment to expand, absorb, and thrive. The PRO-MIX soil was the perfect foundation — light, fluffy, with excellent aeration. It all worked in harmony. After unpotting, I carefully washed every root system, removing all soil to prepare them for the next chapter of their story. Now, they’re hanging and drying — and will be left to cure for at least one month, possibly more, in a dry, dark, and well-ventilated space. But why keep the roots? Because cannabis roots hold ancient value — both medicinal and ritualistic. Though they don’t contain cannabinoids like THC or CBD, they are rich in alkaloids, triterpenoids, sterols, and other therapeutic compounds that can be anti-inflammatory, analgesic, antifungal, and calming. Medicinal Benefits of Cannabis Roots: • Friedelin – known for liver protection and anti-inflammatory effects • Pentacyclic triterpenoids – believed to support immune and anti-tumor functions • Alkaloids – some studies suggest pain-relief and muscle-soothing properties • High levels of fiber and tannins – excellent for digestive and skin applications 🍵 Root Medicine — Ways to Use Dried Roots: Once fully dried (they should snap like twigs, not bend), they can be gently crushed, powdered, or infused: 🌿 Cannabis Root Tea Soothing & Detoxifying • 1 tablespoon of dried, ground roots • 3 cups of filtered water • Simmer gently (do not boil) for 20–30 minutes • Add a bit of ginger or lemon for taste • Sip warm, especially good for menstrual discomfort, inflammation, and general relaxation 🍲 Healing Root Soup Base Brothy & Nourishing • Add a handful of dried roots into a veggie broth or bone broth • Simmer for 2+ hours • Strain before serving • This adds a subtle earthy tone and allows the healing properties to infuse your meal Topical Root Cream or Balm Great for sore muscles or irritated skin • Infuse roots in olive oil or coconut oil (low heat, 2–3 hours) • Strain and mix with beeswax to form a balm • Add essential oils like lavender or eucalyptus • Apply to temples, joints, or sore areas 🛁 Root Soak Bath Perfect for grounding and full-body relief • Bundle dried roots in muslin or cheesecloth • Steep in hot bathwater for 15 minutes before entering • Let the soak draw out toxins and ease tension ⸻ The roots are more than just the anchor of the plant. They are its memory, its foundation, its quiet miracle. By using them, we honor the entire lifecycle — nothing is wasted, and everything has a purpose. This part of the process is new for many growers, and I truly encourage anyone reading this to try saving and reusing the roots. Dry them, process them gently, and let them offer you one final gift. Much love to Aptus Holland, Plagron, Autopots, and PRO-MIX — this wouldn’t have been possible without their harmony working underground while the beauty bloomed above. 🌱 The Gift That Keeps Giving: Reusing the Soil As we say goodbye to one incredible season, we begin quietly preparing for the next. But not everything gets thrown away. In this garden, nothing is wasted. Just like the roots, the soil gets another life. After each harvest, I carefully remove the remaining roots and break up the soil. I inspect it, rejuvenate it with compost and beneficial microbes when needed, and most importantly, I repurpose it — giving it a second life in my outdoor veggie garden. Why do I do it? Because this soil has already done something extraordinary. It has supported life, held moisture, breathed air, balanced nutrients, and fed plants that became medicine. It’s not just dirt — it’s a living ecosystem. And to throw it away would be to ignore its potential. In my veggie garden, this recycled soil now nurtures cucumbers, tomatoes, courgettes, and so many other little miracles waiting to unfold. It’s a beautiful way of continuing the cycle, taking all the energy and intention that was once used to grow cannabis and transferring it into growing food. 🌞🍅🥒 🌾 The Benefits of Reusing Soil: • Sustainability — less waste, less environmental impact • Cost-effective — no need to constantly buy fresh medium • Soil memory — rich in organic material, microbial life, and structure • Nutrient potential — amended soil still holds value for many plants • A deeper connection — a way to honor the entire cycle of growth When we reuse our soil, we’re not just being resourceful — we’re believing in tomorrow. We’re trusting that what we’ve built can be rebuilt. That what has been used can become useful again. That from what seems like an ending, something new can always emerge. And maybe that’s the most powerful message of all in this journey: Planting is believing in tomorrow. 🌍🌱 Every seed in the ground is a little act of faith. So as this season comes to a close, the first tomatoes have been planted. The cucumbers are reaching for the sun. The courgettes are settling in. And the same soil that once gave us dense, resinous flowers is now feeding the vegetables that will grace the table. From harvest to hope — the cycle continues. And it’s beautiful. 🎉 The Final Touches Fun fact: • Trimmed on May 25 • Photo shoot on May 26 • This report: May 27 • Dry Bud Exclusive Photo Set: Coming soon Stay tuned — the next upload will be something special, just in time before the Eternity Grow Cup closes on May 31st. ⸻ 💚 Thank You To Zamnesia — your genetics were nothing short of extraordinary. To GrowDiaries, for hosting such a powerful space for community. To everyone following this journey, your support, love, and kind words fuel this project and keep the spirit alive. Let’s keep pushing boundaries, together. With roots deep in the earth and eyes on the stars — the next chapter begins soon. Much Growers love always, 🌱 Dog Doctor Official 🌱 Genetics - Runtz https://www.zamnesia.com/6000-zamnesia-seeds-runtz-feminized.html Nutrients - Plagron https://plagron.com/en/hobby - Aptus Holland https://aptus-holland.com/ Controls - Trol Master https://www.trolmaster.eu/ LED - https://www.futureofgrow.com/en LED - https://www.thinkgrowled.com Soil - https://www.promixgardening.com/en Germination - Cannakan https://cannakan.com/?srsltid=AfmBOopXr-inLXajXu3QFgKXCXXos4F1oEvScjMKIB5MR5dk8-GJ-F49 DOGDOCTOR 15% off Smoking Papers - https://ziggioriginal.com/ Terpene saver - https://grovebags.com/ As always thank you all for stopping by, for the love and for it all , this journey of mine wold just not be the same without you guys, the love and support is very much appreciloved and i fell honored with you all in my life With true love comes happiness Always believe in your self and always do things expecting nothing and with an open heart , be a giver and the universe will give back to you in ways you could not even imagine so As always, this is shared for educational purposes, aiming to spread understanding and appreciation for this plant. The journey with nature is one of discovery, creativity, and respect. Let’s celebrate it responsibly and continue to learn and grow together! Growers Love To you All 💚 #EternityGrowCup #RuntzHunt #GrowersLove #CannabisCommunity #AptusHolland #ProMixSoil #TrolMaster #Zamnesia #Plagron #ZiggiPapers #Grovebags
Likes
10
Share
Vendanges en deux parties pour avoir différents effets. Après 8jours de séchage cette dame pesée 46g. Fumé douce note de fruits et de hash.
Processing
Likes
7
Share
@Yukagrls
Follow
She is growing so fast! Already 19 days old. So far she's had light 24/7 and every time it rains I get some of that water. I think they get more nutrients from that water straighr from heaven, lol!.
Likes
44
Share
**Encontrarás la traducción a español al final de la descripción** From/Desde: 10/05/19 || To/Hasta: 16/05/19 From day/Desde día: 78 || To day/Hasta día: 84 You can find the Money Maker Diary here: ** Podéis encontrar el diario de las Money Maker aquí:** https://growdiaries.com/diaries/25667-gorillamakingmoney-gorilla-vs-money-m -----IMAGES & VIDEOS----- 5 - HomeMade Organic & Cheap CO2 generator (more info in week summary) 9, 10, 11 & 12: The bud on the right is a Gorilla one, the buds in the left or/and in the middle are Money Maker ones. 15 - Same Gorilla plant buds, one affected by CO2 in the roots and the other not. -----WEEK SUMMARY----- The smell is more sweet and intense every day, friends that came home turned them eyes into crystals when they see this little babys. The size isn't awesome, but the high ammount of buds full of crystals plus the strong sweet aroma makes them awesome. Buds are growing and fattenning very very well. This week i added a boost of HomeMade CO2, i never measured the results of this invention so i can't give CO2 measurements. This method is widely used in home aquariums and there is where it comes from. For those interested i'm going to write here more detailed instructions. The 4 liters i've made will last for about 2 weeks. ---NEEDINGS--- - 250 ml Bottle - 6~10 l Bottle - 400 g Sugar / l water - 1 Envelope of organic baker's yeast / l water (CHEMICAL WILL NOT WORK) - 3 mid plastic tubes 40~50 cm - 1 short plastic tube 5~6 cm - 4 tube adapters - Hot glue to seal adapters The process of creating CO2 is simple, mix water, organic yeast and sugar in a bottle, and the sugar will free CO2 in the process of fermenting to alcohol due to the yeast. 1. Make a hole in the center of the big bottle cap, insert an adapter and secure it with hot glue 2. Make 3 holes in the small bottle cap and glue the other 3 adapters 3. Link both caps with one of the mid tubes and insert the other tubes on free adapters 4. Insert a short tube in the bottom of the small cap in the adapter that came from the big cap 5. Watch the Video!! -----WATERING CALENDAR----- Plants are beginning to drain the pots a bit faster so from now on i will raise the water ammount on each watering day 0.25 l. 11/05/19 - 1,5 l with All week nutrients -(Nirvana & Blombastic) also Big Bud half dosed @ PH6.4 & 2 E.C. 14/05/19 - 1,5 l with Bud Candy, Big Bud, Nirvana, B52, Bud Factor-X, Sensizym & Blombastic @ PH6.4 & 1.5 E.C. *****ESPAÑOL***** -----IMÁGENES Y VÍDEOS----- 5: Generador de CO2 casero, barato y orgánico (más info en el sumario semanal) 9, 10, 11 & 12: El cogollo que sale a la derecha es de una Gorila, el de la izquierda y/o el de en medio son de una Money Maker 15: Dos cogollos de la misma planta, uno afectado por CO2 en las raíces y el otro no -----SUMARIO SEMANAL----- El olor es más dulce e intenso día a día, los amigos que vienen a casa a verlas se quedan ojipláticos al verlas. El tamaño no es una maravilla, pero la gran cantidad de cogollos llenos de cristales añadido al aroma que entra por las fosas nasales las hacen increíbles. Los cogollos crecen y engordan de maravilla. Esta semana he añadido un boost de CO2 casero, nunca he hecho mediciones de los resultados por lo que no puedo darlas. Este método es ampliamente usado en peceras caseras y de ahí saqué la idea. Para aquellos interesados dejo aquí instrucciones más detalladas. Con los 4 litros de agua que he preparado yo da para unas 2 semanas. ---NECESITAMOS--- - Botella de 250 ml - Botella de 5 a 10 litros - 400 g de azúcar por litro de agua - 1 sobre de levadura de postre orgánica (LA QUÍMICA NO FUNCIONARÁ) - 3 tubos de plástico de tamaño medio 40~50 cm - 1 tubo de plástico de tamaño pequeño 5~6 cm - 4 adaptadores para los tubos - Cola caliente para pegar y sellar los adaptadores El proceso de generar CO2 es simple, mezcla agua, levadura orgánica y azúcar en una botella, y el azúcar liberará CO2 en el proceso de fermentación a alcohol. 1. Haz un agujero en la tapa de la botella grande, inserta un adaptador y séllalo con cola caliente 2. Haz 3 agujeros en el tapón pequeño y haz lo mismo con los otros 3 adaptadores 3. Conecta los 2 tapones con uno de los tubos y conecta los otros 2 tubos a los adaptadores restantes 4. Conecta el tubo pequeño en la parte libre del adaptador del tapón pequeño que viene del tapón grande 5. Mira el vídeo -----CALENDARIO DE RIEGO----- Las platas comienzan a secar los tiestos un poco más rápido, asi que de ahora en adelante incrementaré 250 ml de agua adicionales en cada riego. 11/05/19 - 1,5 l con todos los nutrientes semanales -(Nirvana & Blombastic) BigBud mitad de dosis @ PH6,4 & 2 E.C. 14/05/19 - 1,5 l con Bud Candy, Big Bud, Nirvana, B52, Bud Factor-X, Sensizym y Blombastic @ PH6,4 & 1,5 E.C.
Likes
13
Share
Likes
11
Share
I used to watering with clean water for week now some rainies days coming 😏
Likes
15
Share
This is day 75 from plant. Froot by the Foot is nearing the end, smelling very sweet and creamy. Finally showing the one gallon Top Gun some love, it’s looking so cool now and smelling super funky, my favorite smell. Got some good photos using a loupe I just got. The big top gun is much bigger than the others, its cola is very impressive too me, so cool how it stacks.
Processing
Likes
10
Share
Week 1 - Day 1 20L Super Air Pots with a bottom layer of clay pebbles, (an inch deep at the centre point) and topped off with Growdog’s 70/30 coco perlite mix. The tops of the pots are covered by green plastic water distributers to evenly spread the water from the 12” watering rings. 2 lights; each 300W actual draw, currently inside the tent. 2 more coming next week to make a total of 4, across the 6 plants achieving a true watt draw of 1200W. Aiming for 1g/watt Germinated seeds from FAST BUDS, were planted and hand watered using tap water pH’d to high 5.8 to low 5.9 with H&G Roots Excl. giving a nice PPM of 362 to start. The BudBox tent is a 2x2x2m, using a Medusa Boosted XL run off trays to a waste brain were the run off can be tested. This will then be recirculated into the feeding tank again. The feed tank will a standard 100L water butt, retro fitting pumps inside for Feeding and Pump to waste - for cleaning the tank out each week. Another 100L water butt will contain a store of filtered RO water which will fill the feeding tank. A 10L PureMate humidifier is set at 65%, along with 2x RAM 16” oscillating wall fans which are mounted to the top of the tent for maximum coverage - set to lvl1 on swing giving the 25°C. No extraction yet. This is ready and waiting. 8” HyperFresh fan with a RHINO 8”x600 pro filter. We are using 8” acoustic ducting.✌️🏻 Week 1 - Day 2 No change. Keeping the new environment stable is difficult. The humidifier is not large enough for the space. Week 1 - Day 3 Fed PH RO water this morning. Trying to keep the humidity up inside the tent. They have popped up! It begins :D Did a feed of 5.8PH RO with CocaA&B 0.4ml/l, Roots excl 0.3ml/l, Calmag 0.2ml/l for a 150PPM. 300ml was used to moisten the coco per pot. Extraction fully connected. Environment stable at 23-24°C, trying to stay at 23.3°C. Humidity fluctuating 47-60%, humidifier struggling, but hopefully be okay. Week 1 - Day 4 All 6 are up and reaching. Husks hopefully will pop off soon. Will be doing another small feed this evening to keep the coco moist. Little leaves have appeared!! Fed another 300ml, 5.8PH @ 151PPM/ plant. Week 1 - Day 5 All shooting up now, tallest at 5cm down to 3.5cm 🌱 I gently helped the last 2 husks off the smallest ones to hopefully even them up. Gave the coco 1L of RO water around the edges. Week 1 - Day 6 Nothing to report this morning. Another PPM feed to be done shortly. Soaked the coco until run off with around 3-4L per pot using 5.8PH nuit water; 0.4 Canna A&B, 0.2 Calmag, 0.3 Roots Excl. 152PPM. First time we tested the Medusa brain - works well and pumps away to the feed tank, need to change one of the low trays to be a boosted tray for better drainage. Giving 5 boosted trays and one normal. Hand feeding up until this point, but will connect up the automation in the next week. Week 1 - Day 7 Strongest are growing around 1cm a day now. Tallest 6cm, smallest at 4cm. Looking forward to next weeks progress :) Bought a wet&dry vac - best thing ever!! Haha. Cleans everything in sight plus all the water from the dirty run off. Lifted all the pots, still a good weight to them so no feed or RO water today I think. Bring on week 2! 💪🏻
Likes
7
Share
Week 4 flower. Switched to canna nutrients yesterday. No noticeable issues yet.
Likes
10
Share
@Canna96
Follow
Hope everyone is having a great weekend. It was a good week for the ladies, all the toppings are complete, and now I am just focusing on some LST to try and keep all 8 tops level on all the ladies. Today is day 42 and I just removed the milk crates that all of the ladies were sitting on to give them more vertical space. I am still feeding GH nutrients, silica, cal mag, and maxi grow. I will transition to flower nutrients approximately one week after flipping to flower. I have found that it is important to continue feeding plenty of Nitrogen through the stretch. The only way I would transition sooner is if I was running out of vertical space. Still very happy with the Spectrum X from Medic Grow. I am running her at 69% and the plants seem very happy and healthy. The heat and humidity are finally letting up in my region so it is nice to be able to open some windows and drop the temp outside the grow tent. I hope everyone has a great weekend, Thanks for stopping by, Stay Safe and Blaze On!!! 💪 Website: https://medicgrow.com/ https://growdiaries.com/grower/medicgrowled
Likes
97
Share
@AsNoriu
Follow
Day 106. Trim jaiiiiiilllllllll !!!! First done, think it could reach my record 240. Insane quality. 4 rows of solid buds hanging .... Next one .... Both finally finished and honestly, that's my plants to be proud of !!! Day 114. All is done, no doubts its my best grow. Happy Growing !!!
Processing
Likes
23
Share
Que Pasa familia,Tenemos cambios , 12/12 empieza lo bueno(floración), empieza a oler el cuarto a un aroma especial 😉, os voy a dejar muchos vídeos para que no tengáis ninguna queja. •primer problema y único , es la temperatura. (Max30 min28 con Luz). Llevaba varios días comiéndome la cabeza , de mientras tengo medio abierto las compuertas del indoor. Todo lo demás funciona, se las ve Sanas, veremos las próximas semanas.