
Likes
Comments
Share


@Hempy_The_Kid
Follow
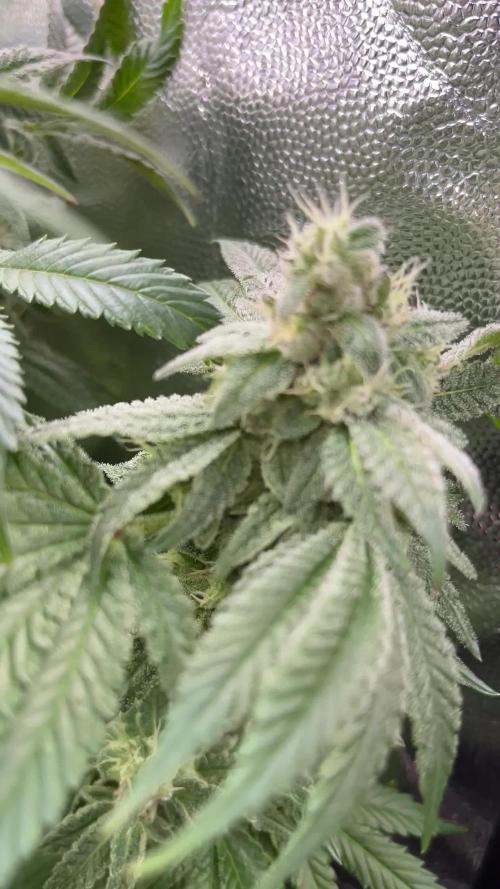
10/05/22 watered.
10/09/22 mid-week found WPM on plant. Bathed in sodium bicarbonate. Also plant is now in bud cycle.

Likes
Comments
Share

@Jardin33ro
Follow
Asi vienen este transcurso de semana, ya tratamos de bajar Ec de a poco e incorporamos el aditivo overdrive para el engorde final. Tiene mucha resina, y un olor a uva con diesel. Una maravilla, tratamos de mantener un vpd estable entre 1.2 y 1.3 kpa, ya estamos en la recta final
Likes
73
Share


@Roberts
Follow
I had a excellent grow of this plant. I didn't have any major issues during the grow. It looks like she provided a good yield. And smelled great when I was able to smell. I am Fighting a cold at the moment. 😒 I am very eager to try this flower once it gets done in the cannatrol, and is ready for its smoke report. This looks like it was a great strain. The harvest video is on my YouTube channel. GD is still having video upload issues on bigger files. Thank you Medic Grow, and MSNL Seeds. 🤜🏻🤛🏻🌱🌱🌱
Thank you grow diaries community for the 👇likes👇, follows, comments, and subscriptions on my YouTube channel👇. ❄️🌱🍻
Happy Growing 🌱🌱🌱
https://youtube.com/channel/UCAhN7yRzWLpcaRHhMIQ7X4g

Processing
Likes
36
Share


@Master_weeda
Follow
Bonjour à tous les padawans et maîtres jedis
Tout d'abord merci à @zami_official de zamnesia Seeds de me permettre de cultiver leurs fabuleuses génétiques ainsi que @Cellmax_Nutrients de me permettre de faire cette culture en m'offrant le substrat et l'engrais nécessaire à ce run.
Cette souche sera ma première féminisée étant un jeune cultivateur (mars 2019) je voulais apprendre en cultivant des autofloraisons durant un an. Aujourd'hui nous y sommes enfin et pour ma première féminisée j'ai de grand projet, j'espère arriver à faire un main-lining de 32 buds et pour ce j'ai pas choisi une souche au hasard car j'ai opté pour la Bruce banner #3 de @zamnesia
Je rappelle que je cultive par passion et que le rendement n'est pas ma priorité et que je n'utilise que le strict minimum du matériel nécessaire à une culture correcte au prix le plus bas possible
MATÉRIEL CONFIGURATION
Box 80×80×160
Lampe led Lampwin 300 watts ×2
Lampe COB led Macegrow 450 watts
Ventilateur à pince 15 watts
Xiaomi Deerma humidificateurs 5L
Hygrometre thermomètre
Extracteur PROFAN 107 m3/h - 100
Prise programmable électronique ×2
Pot 0.25 litre
Pot 1 litre
Pot 3 litres
Pot 11 litres
Pot 50 litres
Cellmac nutriments
Cellmax biobloom
Cellmax biogrow
Substrat cellmax bio ligthmix
Fil de fer et pince coupante
Microscope
Petite balance de précision
CULTURE ÉTAPE PAR ÉTAPE
J'ai tout dabord fais tremper ma graine dans un petit verre d'eau pendant 12 heures dans le noir et je l'ai ensuite placé dans un Tupperware hermétiquement fermé entre de bouts de sopalin bien humidifié dans un endroit noir à environ 27 degrés celcus.
Une fois la graine germé et d'une taille de 1 ou 2 centimètres je la prend délicatement et la dans un pot de 0.25l je recouvre de terre je tasse et arrose.
Je place ma lampe led 300watts à environ 90 centimètres de la plantule avec un cycle de lumière de 24/24 pendant une semaine. Au début de la semaine 2 le cycle de lumière passera en 18/6 grace a un programmateur.
Jour1: léger arrosage
Jour2: léger arrosage eau ph 6.3
Jour3: léger arrosage
Jour4: arrosage avec 10 centilitres d'eau ph 6.3 à laquelle j'ai ajouté 5 millilitres de cellmax rootbooster
Jour5 arrosage

Likes
6
Share


@Terpio1500
Follow
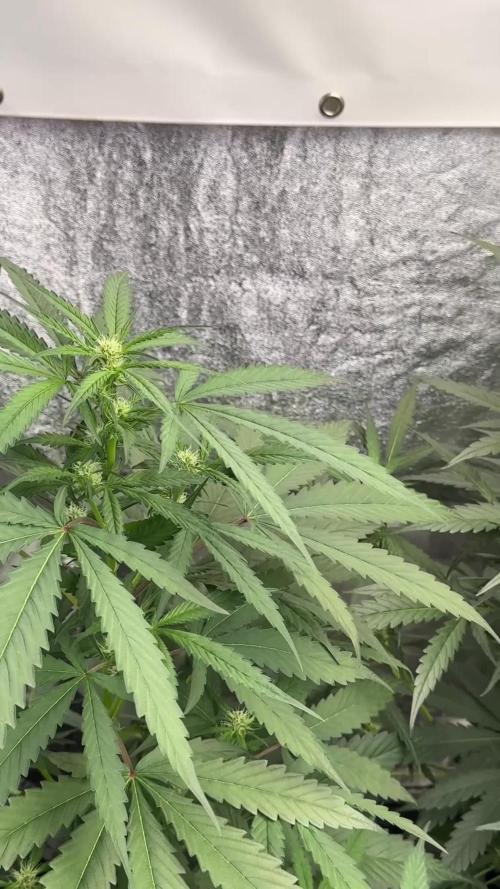
Week 3
Great Pistil growth looking forward to day 21 defoliation
This one looks really good love the stretch it’s not getting to lanky
I’m seeing really fast growth
The New.
Check out my other Dairies (Gelato Cake& Jungle Verde)
Nutrients (floraflex) are in Grams/gal*
Light: HLG
Follow my IG @therealterpio for more updates & content!
Likes
8
Share


@GrowZex
Follow
Hello beautiful people!
Another week of veg.
I started to train the girls and pull them down.
I topped them once, not rly planning to do it more.
Nutes still the same.
These girls are rly more indica. Big leaves and very stout.
Thats it!
Love & Peace 4 all!
Likes
16
Share


@Ladyblazed
Follow
Bud forming so fast!!!!!! Comparing to previous plants I growth in witch I used biobizz light soil I changed kind of soil in this one I’m using canna professional and the different is quite noticeable I’m really satisfied. I was worried that the small box I’m growing in would eventually make the plant suffer but it’s totally not, the plant is responding well!!
Started with the maximum dose of bud ignitor by advanced nutrient. I’m really exited for this lady can’t wait to se the beautiful complete resinous buds.. keeping growing with LOVE 💚


Processing
Likes
4
Share


@Kitties_and_Colas
Follow
My bag seed hermi managed to pollinate this plant some but nowhere near as bad as the plant I removed from the tent...valuable lesson learned this cycle and we got some cannabutter out of the deal..my cannabutter process here: https://www.youtube.com/watch?v=PAZOt4CukSc&
Likes
Comments
Share

@DogDoctorOfficial
Follow
Blueberry Muffin – Pheno B
Week 6 | Nature Keeps Her Own Calendar
Growing multiple phenotypes from the same seed pack is one of the greatest reminders that every plant writes her own story.
Even when everything is identical—the same room, the same lighting schedule, the same nutrients, the same environment—each phenotype responds according to its own genetic blueprint.
Blueberry Muffin Pheno B continues to prove that point beautifully.
While her sister has already settled comfortably into flowering, this lady is still taking her time. She's showing the earliest signs that bloom is approaching, but she hasn't fully committed just yet.
And that's perfectly okay.
Sometimes the best thing a grower can do is stop trying to rush nature and simply pay attention to what the plant is saying.
🌱 The 12/12 From Seed Adventure
If you're joining this diary for the first time, welcome!
This entire 8×8 Adventure is being grown using the 12/12 from seed method. From the moment these seeds germinated, they've received twelve hours of light and twelve hours of darkness every single day.
Unlike a traditional photoperiod grow, where the grower decides exactly when flowering begins by changing the light cycle, this approach allows each plant to determine its own timing.
That's why these two Blueberry Muffin sisters look so different despite growing side by side.
Pheno A embraced flowering weeks ago.
Pheno B is still finishing the work she wants to do before making that transition.
She's reminding us that genetics don't own a calendar.
They simply follow their own rhythm.
🌿 A Compact Bush With Big Potential
One thing that immediately stands out this week is just how compact this phenotype has become.
She's noticeably shorter than her sister, yet every internode is packed tightly together, producing a dense, healthy canopy filled with future flowering sites.
The gentle Low Stress Training continues to work exactly as intended.
Rather than forcing dramatic changes, it has gradually opened the plant while encouraging side branches to grow upward and compete for the canopy.
Leaf tucking has remained part of the daily routine, helping expose developing shoots without removing unnecessary foliage.
With such tight growth, every little adjustment makes a noticeable difference.
The result is a beautifully balanced little bush that feels full of potential.
💧 Individual Care for an Individual Plant
One advantage of growing each phenotype as its own diary is being able to treat every plant according to its own needs.
Unlike several of the other girls in this room, Pheno B is still being hand-watered.
She continues receiving her own feeding schedule, allowing me to make adjustments specifically for this phenotype while observing how she develops before eventually joining the rest of the flowering program.
Not every plant wants the same meal at the same time.
Listening to that difference is part of becoming a better grower.
🍽️ Feeding
While many of the flowering plants have already moved to a bloom-focused nutrition schedule, Pheno B continues following a transitional feeding program that supports both vegetative growth and the approaching flowering stretch.
This week's feeding consisted of:
• Terra Grow – 1.8 ml/L
• Terra Bloom – 1.8 ml/L
• Pure Zym – 1 ml/L
• Sugar Royal – 1 ml/L
• Power Roots – 1 ml/L
• Power Buds – 1 ml/L
The nutrient solution remained stable with an EC of approximately 1.78 mS/cm and a pH adjusted to 6.02, providing everything she needs while allowing her to continue developing at her own pace.
For now, there's no reason to rush any changes.
Healthy plants tell you when they're ready.
🌡️ Environment
Environmental conditions remained very consistent throughout the week.
Daytime temperatures averaged around 29°C, with nighttime temperatures close to 25°C. Relative humidity settled around 60%, while atmospheric CO₂ measured approximately 693 ppm.
These stable conditions continue providing an ideal environment for steady growth, allowing Pheno B to focus her energy on building structure before fully committing to flower.
Consistency is often one of the most overlooked nutrients in any grow room.
📸 This Week Behind the Lens
This week's photographs perfectly capture the personality of this phenotype.
The side profiles reveal an incredibly stocky plant with thick stems and remarkably tight internodal spacing, while the close-up images begin showing the earliest hints of floral development hiding between vibrant green leaves.
She's not stretching dramatically.
Instead, she's quietly building a strong, compact framework that could eventually support some beautifully dense flowers.
Sometimes the plants that make us wait the longest surprise us the most at harvest.
🔍 Looking Ahead
I have a feeling this could be Pheno B's final week of vegetative growth.
The first signs are there.
She's beginning to hint that flowering is finally approaching, even if she's still taking things more slowly than the rest of the room.
Over the coming week I'll continue with gentle leaf tucking, maintain the current feeding program, and simply let her dictate the pace.
If she officially enters flower, the diary will naturally follow her into that next chapter.
If she chooses to wait another few days...
That's perfectly fine too.
After all, one of the biggest lessons this project continues to teach is that plants don't grow according to our expectations.
They grow according to their genetics.
💚 Thank You
A huge thank you to everyone following this 8×8 Adventure and sharing this journey with me.
Whether you're here to learn something new, compare growing techniques, ask questions, or simply enjoy watching these different phenotypes develop, I truly appreciate having you along for the ride.
Special thanks to:
💚 GrowDiaries for providing a platform where growers from around the world can document every success, challenge, and lesson.
? Zamnesia for these fantastic Blueberry Muffin genetics, which continue to showcase just how diverse two sister plants can become.
🌱 Plagron for supplying the nutrition that supports every stage of this grow, allowing each phenotype to receive exactly what it needs.
💡 Future of Grow LED for delivering the consistent light that powers this entire project from seed to harvest.
And finally...
Thank you for taking the time to follow this adventure.
Every comment, every question, every shared experience, and every bit of encouragement helps make these diaries something far greater than a simple grow log.
Growers Love, and I'll see you next week... where we'll discover whether Pheno B finally decides it's time to join her sister in full flower—or reminds us once again that nature always keeps her own calendar. 🌱💚
Likes
4
Share


@Gisbert
Follow
Meine Dame in der Sonne hat trotz Topping die ein Meter Marke geknackt und ist jetzt 1,04m groß, die andere im 12-12 Modus ist nur 76cm groß, bildet dafür aber wundervolle Blüten. Das Wetter bleibt wechselhaft bis schlecht! Das Wetter bessert sich, leider habe ich einen massiven Befall von Trauermücken, Nematoden sind bestellt. In meiner Purple Bud in der Blüte habe ich zusätzlich Milben entdeckt, also sind auch Raubmilben unterwegs😢
Der Sommer ist zurück und das freut mich und die Pflänzlein. Meine Zusatzbeleuchtung habe ich so eingestellt das sie von Sonnenauf bis Sonnenuntergang eingeschaltet ist. Die Dame mit dem Natürlichen Lichtzyklus bekommt nun also auch von Tag zu Tag weniger Licht. Ich bin gespannt wann sie sich auf den Weg in die Blüte macht.


Likes
10
Share


@Thibaut
Follow
they did okay rough weather this week.
i made a little greenhouse for them good humidity if the sun in on it.
only gave them once ph water.
both strains grow equally atm
only this time i dont know about the feeding , someone recomend auto feeding? i have biobizz products and guano ,
keep growing ✌️


Processing
Likes
5
Share


@Andres
Follow
..We will see what she offers outdoor ... starting the fall ... with previous crops in the fall winter ... they are not very productive harvests ... so I will help them grow. If it were summer ... thanks royal queen ....

Likes
8
Share


@Draco1243
Follow
My favorite was the bussdown. She was east to grow smells great. Great yeild gets u straight stoned. Resist to alot , they didn't have any issues well a few others did.

Likes
13
Share


@YOUNGSTERBR
Follow
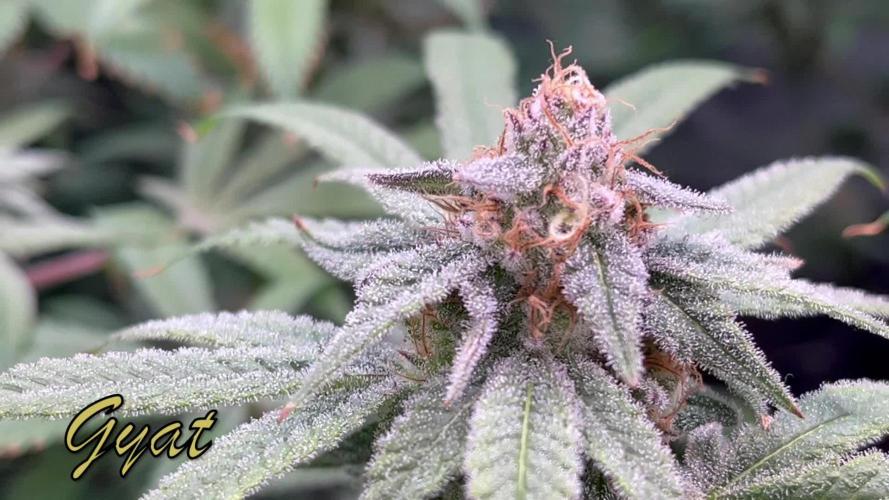
apenas 1 das que estavam na tela de SCROG conseguiu sustentar até essa semana mesmo com problema de PH do solo, as outras 3 tive que colher na semana passada, a descoloração das folhas já começando a indicar que o fim está próximo, pouquíssimos tricomas ambar, cheiro maravilhoso!

Likes
16
Share


@eldruida_lamota
Follow
Vamos familia, hora de cosechar estas gorilla de RoyalQueenSeeds.
No veáis que pinta que tienen las flores están bien formadas y repletas de tricomas.
Estoy deseando probarlas.
El problema han sido las temperaturas las últimas semanas que excedieron los 30 grados.
Aun así salió todo para alante
Agrobeta:
https://www.agrobeta.com/agrobetatiendaonline/36-abonos-canamo
Mars hydro:
Code discount: EL420
https://www.mars-hydro.com/
Hasta aquí es todo , espero que lo disfrutéis, buenos humos 💨💨.