
Likes
Comments
Share


@GGrows
Follow
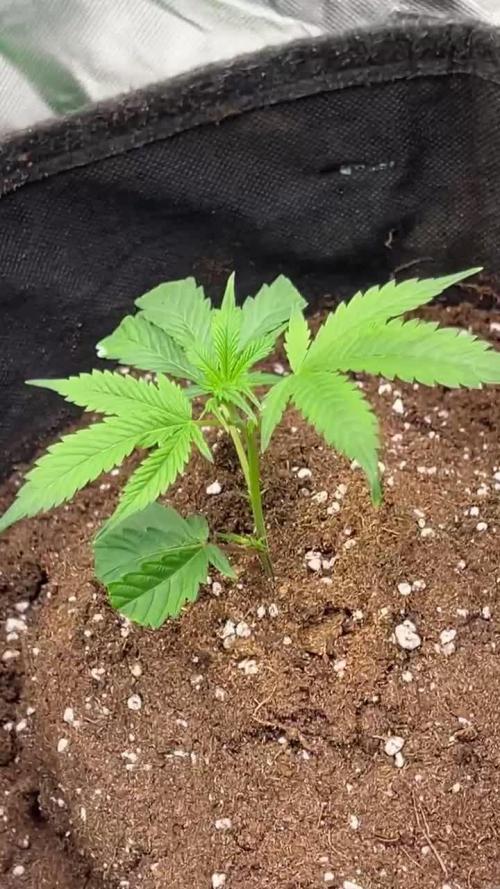
This girl keeps growing. Started shortening her light cycle as she is getting really big. I have bent the main tops so often so that the rest can catch up. She looks great thought... Love this plant.

Likes
7
Share


@Hempcules
Follow
WEEK 5 (DAY29-35)
The Runtz are thriving so far.
Both plants have developed eight evenly spaced shoots, and now I’m waiting for the flowering to begin.
Additionally, I have trained both plants with hooks to create a beautiful canopy.
I’m still excited and hope they continue to grow as well as they have so far.

Likes
76
Share


@TheFattyMcCoy
Follow
Hey yall! Another week down. A lot has happened.
To start, we up-potted from the red solos into my living soil blend that I have been working on for almost a year. It's so full on living creatures and beneficials. I used to have fungus gnats a lot when working with living soil, it's almost impossible to avoid. .. Then enters beneficials; we have black soldier Flys, persimillis predatory mites, definitely earth worms, most likely a mix of night crawlers.
No more fungus gnats, I highly recommend using beneficial nematodes, cucumeris and persimillis predatory mites are excellent (swirski predatory mites are expensive). Just look at the Soil Food Web and identify what pest you have, then purchase their predators from a trusted insectary.
Anyways I added another 200watt LED and spread out the plants in a 2' X 4' tent. It's extremely dry in my location and having the heat on makes the air even drier. So getting my VPD stable has been an immense challenge. Right now
Also we need to be able to add VPD or at least GD needs a built in calculator to help folks with VPD, Vapor Pressure Deficite.
As of right now I am sitting at 0.85 VPD, so pretty good for today. I have 4 humidifiers and have had to hang moistened towels on the doors of the room I am growing in. It literally has been a huge challenge to keep the humidity high enough for my VPD to be in range for the young plants I have now.
Good thing is my current humidity without running any humidifiers is perfect for the flowering stage, so I can't wait to move this along.
As for topping and training; like I said I really want to move these ladies into flowering sooner than later. I have several reasons to do limited training so I can limit my veg time, also getting this crop done as fast as possible is best for my set up. Until I can get a larger house 🏠 😩 because we got a baby on the way 👶 so need to make space.
I have made compost tea twice this past week, wetting the soil and also spraying the leaves. My sprayer broke so I ended up pouring the tea on the plants gently, I got worm castings on the leaves lol. Gently rubbing that off once they dried. Also I applied the tea at night.
My tea recipe:
Reverse Osmosis water, 2 to 4 gallons
I bubble that with added minerals for a day
Add 2-3 cups of Activated worm castings (To activate the castings I added about 3 gallons of high quality castings with what I consider to be nutrient amendments, SO I add = kelp meal, neem cake, organic coconut flour, organic corn meal, organic wheat flour, and organic cold milled flax seeds and let that sit for a week then add about 2 to 3 cups of that mix to the tea)
I also add biology from about a cup of 2 different soil mixes I have around my compost bin, just trying to get a more diverse biology by adding those two different soil sources. And mind you the grow beds I took the soil from has been organic for many years and has a large amount of beneficials and tons of excellent biology.
Other than that I bubble that for 12 to 24 hours, with as much air as I can get. I use air stones but you really need to clean them off once you are done brewing. I also have an Air Lift with a large air pump that really works great, K.I.S. Organics sells one that works great or you can build one easily with with PVC pipe and a few adapters from any Home Depot or Lowes.
Also I do add DynoMyco to my roots when up-potting. They are an amazing brand that has backed up research, I think they have more propagules per gram of two strains they identified to work great with cannabis. Now having said that, each individual phenotype out of each individual and specific strain/cultivar is going to have different bacteria/fungal strains that it prefers and by growing the same strain, hopefully the same exact cut, and grow 3 to 4 cycles before you truly have the mycelium networks built and fully functional.
What I am saying is stop throwing out "used" soil and go over 7 gallons, bigger the better for biodiversity. Stop buying "new" soil, amend your previous beds and pots. You will see a huge difference. Hopefully I can show you all of this with my Grow.
Anyways please feel free to ask away any questions! This grow is about saving money 💰 🤑 and growing the best clean medicine as possible.


Likes
8
Share


@420DeepGrow
Follow
📆 Semana 7:
La Epsilon F1 Auto avanza con fuerza en la floración. Los cogollos se desarrollan compactos y uniformes, cubriéndose de una capa cada vez más visible de tricomas. El aroma se vuelve más punzante, con toques especiados y cítricos que anticipan una cosecha de calidad. El ritmo de nutrición se mantiene estable, reforzando el aporte de PK y azúcares sin provocar excesos.
¡Seguimos creciendo fuerte! 💪


Likes
18
Share


@EaRtH
Follow
7.11. - Entering second week of flowering with some buds already developing. Leaves around are getting covered in sugar. I think even the smallest one might have some decent yield. I cut off some of the lowest branches so the bigger ones will get more energy. Watered.
9.11. - I did a decent defoliation on the biggest plant. Basically just the lowest leaves without any light and few small branches.
11.11. - I've decided to cut back on the nutrients as plants are starting to show signs of toxicity. Today I gave them just pure water.
7.11. - 13.11.
Likes
62
Share


@Hou_Stone
Follow
one of my FullGas is late from the beginning and even for flowering.
I preferred to remove my net this week, to more easily access my plants and water them. I hope the branches will hold
I cut a lot of leaf this week. I hear different opinions that say it's beneficial others not... At least it will have the advantage of lowering the humidity.
---------------------------------------------------------------------------
- Water: tap water at 300 PPM, I add 0.7G of Hybrid powder and 0.3g of booster PK+ per liter to reach 950PPM and I adjust the PH to 5.8. I watered daily until water drained from the pot (to release nutrients from previous waterings) and I take a 3-4 day watering break to let it dry out before resuming a daily watering schedule.
-Daytime temperature: 22-26°C
-Night temperature: 20-24°C
-Humidity: 50-75% ( Too high but it's hard to lower it... I need advice please contact me if you have :) )
-Lamp: Mars Hydro FC3000. intensity 90% at 35cm from the top leaves
-Room: Mars Hydro 100x100x180cm
-Extractor: Mars hydro 402 CFM Max. power 3/10
-Substrate : 70% coco, 25% perlite, 5% vermiculite.
My instagram : https://www.instagram.com/p/CuMhQ_BsjRP/?utm_source=ig_web_copy_link&igshid=MzRlODBiNWFlZA==
Looking for MarsHydro equipment for your crop? 🔥
You can use my promo codes! 🙏😻
3% off with "houstone3" for: TS LED Grow Light, Tent, Ventilation
5% off with "houstone5" for: FC&FC-E&SP LED Grow Lights; Grow Tent Kits
https://www.mars-hydro.com/?acc=hou-stone

Processing
Likes
5
Share


Likes
4
Share


@CannaIGrow
Follow
Topped this girl this week. Growing pretty good so far. I’ll be potting up to 3 gal pots next week sometime. I also have a Bison Brew that I’ll be using sometime after transplant.
Likes
9
Share

@Limez
Follow
Die kleinen stehen jetzt seit 1-2 Tagen im Zelt, bei 20% Licht Leistung (~50W) bei einem Abstand von 50-60cm. Die 3 die ich behalten werde hab ich direkt in den 20L Endtopf gepflanzt, weil ich die Töpfe und das Gewicht mittlerweile relativ gut einschätzen kann. Morgen füll ich die Töpfe noch ganz auf, mir ist leider die Erde ausgegangen. Beim eintopfen hab ich die easy plugs rundherum mit mikorizha bestreut um das wurzelwachstum, sowie die pflanzengesundheit zu fördern. Luftbefeuchter bzw. Entfeuchter werden die Tage noch hinzukommen, allerdings brauch ich erst neue Batterien für mein hygrometer damit das alles passt. Das nächste Update gibts in einer Woche. Werde dann aber toppen um mit einem Scrog das gesamte Zelt und die beiden Netze zu füllen.
Lg Limez

Likes
6
Share


@Budking420
Follow
These girls are flowering super fast almost starting to ripen but I'm sure they'll swell more! Super excited to have this one done in a few weeks it's one of my favorite medical cultivars. The powerful fruitiness is surely a pleasant smell to take in although I reccomend a carbon filter if you live in tight quarters. Shes super happy without LST I learned as these are the last of 4 stranana that I have ran and LST once hurt my yield as I find it does have strong sativa genes. She likes to stretch out. Check back next week to see just how fast she buds! And remember its 4:20 somewhere!!!!!!!
Likes
2
Share


@Hydro_sweetness
Follow
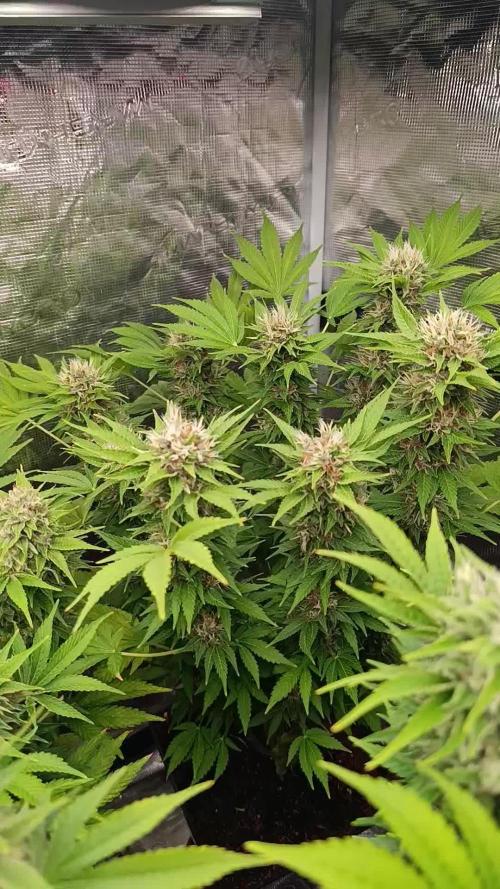
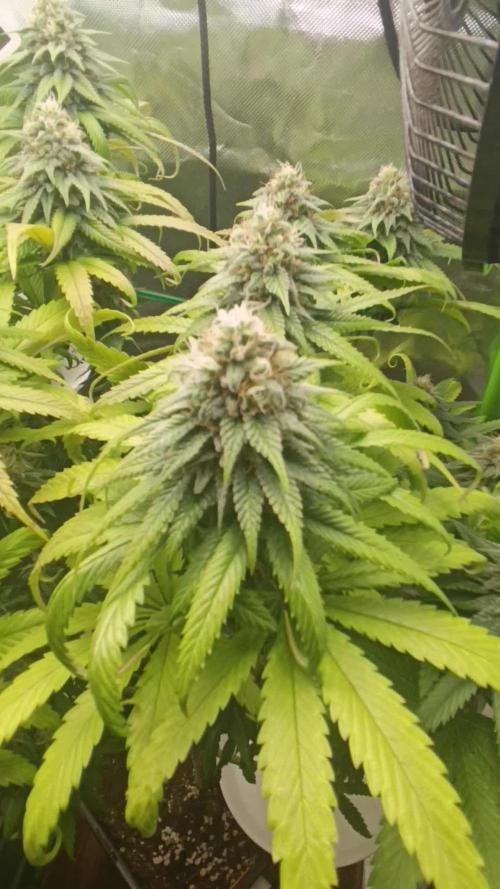
Hey welcome back in the 7th week of flowering with the Dutch Passion’s Brooklyn Sunrise.
This week the ladies are doing pretty well after giving giving them some PK 13-14 extra.
You can really see that they are also finaly swelling and some of them just exploded!
I will continue the normal feeding schedule from now on again.
That’s it for now see you all next week!
Likes
18
Share


@DeepRootsGrowTrees
Follow
PURPLE KUSH / KANNABIA SEEDS
WEEK #7 OVERALL
WEEK #6 VEG
This week she got fresh growth from her topping she split into 4 tops somehow so she bushy! Stay Growing!
Thank you for stopping by and taking a look it's much appreciated!!
Thank you to KANNABIA SEEDS!!!
PURPLE KUSH / KANNABIA SEEDS


Likes
17
Share
@420DeepGrow
Follow
📆 Semana 8
El cultivo sigue avanzando con inercia en esta fase final, con los cogollos terminando de coger cuerpo y firmeza. Los cálices se ajustan y compactan, dando una sensación más sólida y pesada en toda la estructura floral.
La resina continúa acumulándose y aporta un recubrimiento más denso y visible, con tricomas en su mayoría lechosos y aún en evolución hacia su punto óptimo. La planta mantiene buen ritmo, centrando su energía en rematar calidad y terminar de llenar las flores.
El conjunto se mantiene sano y uniforme, mientras el aroma se vuelve más profundo y persistente, marcando claramente la recta final del cultivo.
Seguimos creciendo fuerte 💪!


Likes
14
Share


@Wenz004
Follow
My F-MILF (NL untopped) is going to eat my tent
She is not soaking 5 l (nutrified)per day...she drinks it with open mouth. Not a single drop drain
Getting this:
Aptus Topbooster 4 drops/l
Aptus P-boost 10 drops/l
Aptus regulator 3 drops/l
Aptus All in one 0.6 ml/l
Aptus CaMg 0.6 ml/l
Trying to keep ph not lower than 6.4...
Not easy because P-boost puch it down a lot
All TA nutrients above are only for NL untoppes in smaller tent
Likes
9
Share


@andrewkeed
Follow
Everything goin very smooth. will update soon on other changes that may come up


Likes
4
Share


@Freddd
Follow
The phenotypes are now very distinct, the small plant's leaves go directly from green to dark plum colour they do not go yellow at all. Unlike the early orange bud. It almost looks like it has a blue light on it.