


Likes
Comments
Share


@Rinna
Follow
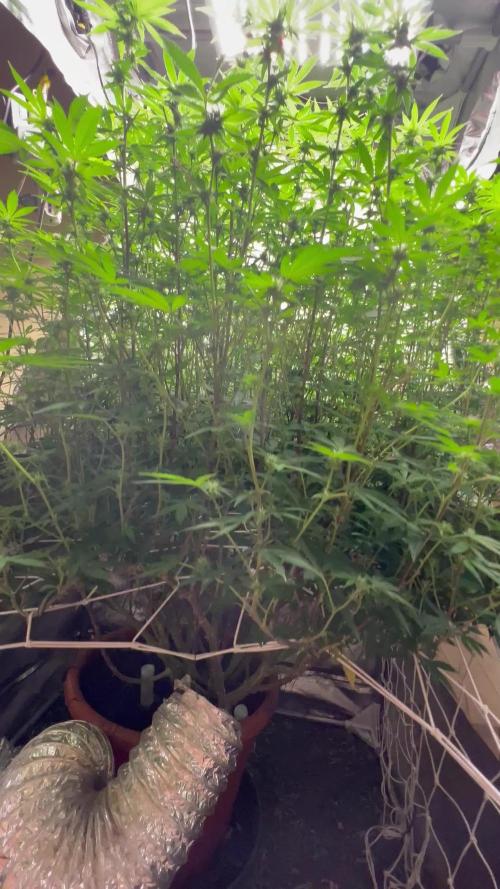
She is looking very good, although she was getting very bushy without training, I have to spread the canopy out over the whole tent to maximize yields. I got 4 plants in a 80x80 space and will be trying to create a even canopy, so far so good 💪🏻

Likes
3
Share


Likes
5
Share

@Bread_n_Buds
Follow
There are some things that remain memorable in my journey as a grower, and one of them is my encounter with Nectar Drip.
This strain stole my heart and will never give it back like all the strains in my top five, but every time it's magical, like falling in love, except I don't feel butterflies, but Wu Tang's Killa Beez.
This strain is a unique marvel, one of those one-night stands, because it's a Limited Edition, already sold out after a few days of release, and given its limited nature, it will never be released again. I begged my friends at Zamnesia on my knees, but they're adamant about this: once a Limited Edition is gone, it's gone forever. Think carefully before letting it slip away.
Add to this the fact that I've been a hop-hop guy for about 30 years and have also followed the entire Meth journey, and it's incredible to grow a strain named after the albums that drove me crazy when I was 20. It's pure fire for my graying ass.
And the best part is that it's not just conceptual fire, but the strain is a marvel like very few on the market, producing wonderful flowers in every way: hardness, density, and weight are unbeatable. The resin production is top-notch, and, as only American plants can do, the yield is consistently good and lends itself perfectly to mainlining, topping, mainfolding, and cloning.
We're talking about a strain with typically American characteristics called Nectar Drip, obtained by hybridizing a Zamnesia Apple Fritter with a 24K Gold Fangs by Tical. The result is truly explosive, with an apple aroma and a huge amount of resin that makes it perfect for extraction, even from residue. The leaves are full of pure resin and smell like heaven.
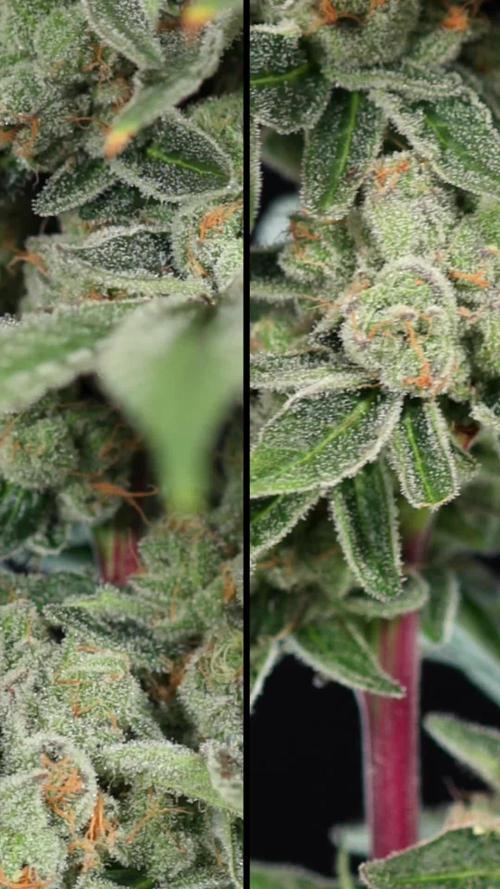
I'm deeply embarrassed by her beauty again, like when a beautiful girl talks to me and makes me blush. And I have to say, she's not even the best; There are four more epic plants on the way that might surprise us, one of which is a clone of this one.
Maturity - The pistils have been looking super mature for quite some time, especially the upper ones, which are very red, and we're still over 90%.
It's a 50-50 Indica/Sativa mix. Sorry, I may have written it wrong in previous diaries, so it'll be all day. I'll let you know how it goes. For now, it's curing.
The plant was cloned and left in the vegetative stage for a short time, trained with a Main, but without bending it; I find it practical.
We chose 100% organic soil, 1000% Plagron, as always.
The soil we chose is the recently launched Plagron Bio LightMix, which will allow us to start with more gradual and consistent watering, without the sudden changes that liquid fertilizers can cause. A week of soil is sufficient, so don't overdo it.
Choose your preferred method and calculate your results on the website:
www.plagron.com
Visit the new Growshop section on the Zamnesia website:
Z - https://www.zamnesia.io/it/531-growshop
These seeds are sold out and were a limited edition. I'm so sorry I didn't save one, but we can choose from Zamnesia's excellent strains and keep an eye out for exclusive limited editions like this one when they're released...
Z - https://www.zamnesia.io/en/35-cannabis-seeds
T - https://www.zamnesia.io/en/35-cannabis-seeds/745-tical
Z - Nectar Drip is a unique cannabis hybrid created in collaboration between Zamnesia Seeds and TICAL. These flowers are pure power, with up to 26% THC and effects that stimulate the mind and stabilize the body. But if you want to try them, you'll have to hurry: only 750 packs are available!
There's nothing better than a good collaboration: we know this better than anyone! For this partnership, we joined forces with TICAL to create a strain packed with flavor and potency. We brought our delicious Apple Fritter, while TICAL contributed its 24K Gold Fangs. After perfecting the result, Nectar Drip was born. This strain produces potent flowers with a THC content of up to 26%, accompanied by delicious fruity and skunky aromas. Considering one of its parents is Apple Fritter, you can be sure that Nectar Drip has inherited an explosion of fruity aromas and flavors. Skunky notes are evident, creating a rich and intriguing profile. Smoking this beauty will leave you relaxed, with a pleasant cerebral euphoria accompanying the experience. It's definitely a great evening smoke, perfect for when you want to take a moment for yourself.
You already know this, but I recommend it. You'll find so many wonderful things here, essentially "the best that nature has to offer."
Z - www.zamnesia.com //
Music //
Last Week by Daddy
Method Man's entire discography + Wu Tang by
www.radionula.com
+ Feng Shui Music
Likes
23
Share


@adam_pawloski87
Follow
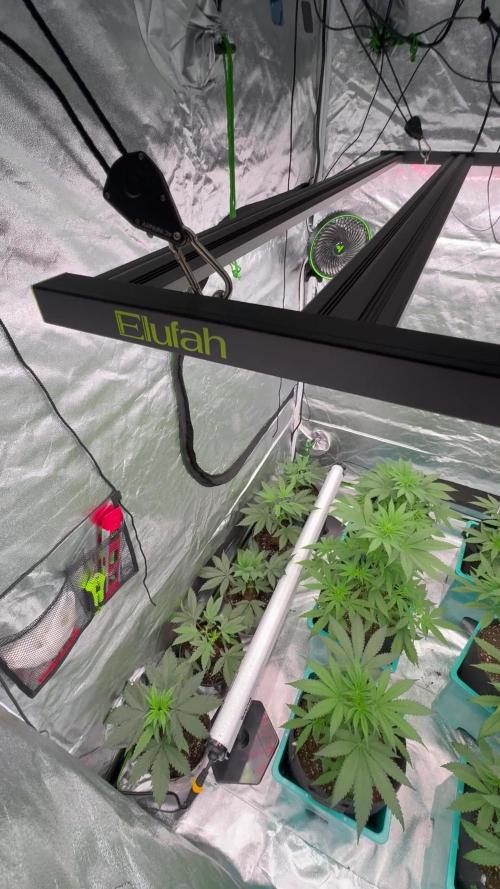
This week has been great ,today is day 78 and the girls are just doin their thang , 1 looks ready for flush already and the rest look about another longer then flush for them aswell,, can’t wait to see how these girls finish out over the next couple of weeks 😍!! Y’all keep them eyes peeled an stay tuned for next week! Peace love an positive vibes to y’all Cheers.💨💨💨


Likes
5
Share


@JBOrganix
Follow
Super burnt lol. Ooops I'll still finish her off and hope for the best. Should still be some decent smoke 👌 this one definitely got the worst of it
Likes
1
Share


@MrRaid
Follow
Okay I like this strain if I get an indica pheno buds are solid and frosty dank sticky smell like chocolate earthy pungent very colourful buds buds swell alot on the indica pheno and
Day 77 from seed plant 3 harvest she cant support herself this pheno reminds me of blue cheese very pungent when handled small but rock hard buds keep you updated on smoke report after cure plus the other 2 plants 👍
Plant 1 harvested on 11th December 81 day from seed will update with pictures
Likes
Comments
Share


@squalino
Follow
DUEL #003 — FAT BASTARD AUTO (TRUMP) 🌱 Deux plantes. Même génétique. Deux méthodes de culture. Cette fois, THCHunter 🐺 et Squalino 🦈 s'affrontent avec la Trainwreck Auto d'AutoSeeds. Nous comparons tout au long du cycle : croissance, structure, floraison, résine, arômes et résultat final. 🔥Même variété. Deux cultivateurs. Un duel. Que le meilleur gagne ! 🐺🆚🦈 #CannaLover #Duel002 #TrainwreckAuto #AutoSeeds #THCHunter #Squalino #GrowBattle #CannabisCulture
1 ERE GRAINESBPAS SORTI
PLANTATION DE LA 2 ÈME GRAINE LE 12/09

Likes
2
Share


@CheeRz
Follow
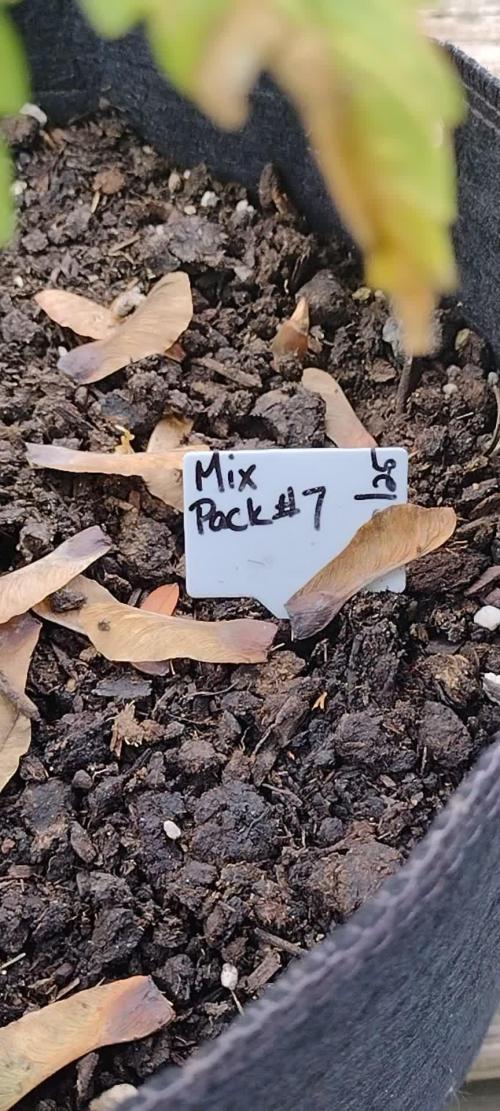
The nice weather has finally returned, and it should stick around for the next few weeks. It's just in time for the last couple weeks of the ladies. ☀️☀️☀️

Likes
9
Share


@MuzzFuzz
Follow
little bit of defoliation upped the ppms to around 500 ppm just fluvic acid and AB GT Coco. Coming along ok definitely a big difference in the strains. I think the GSC will be pretty tall after stretch limiting options on light power. Currently running the light at 50% and 1000ppm co2
Access to tent pretty tight and difficult to get to the GSC have been topping 2nd round and more LST stretching out a bit but the space will crowd up in stretch. Next time I’ll do 4 instead of 6 all same strain.
Likes
17
Share


@Grow420
Follow
Few days into week 7 and everything is coming along nicely starting to see some orange hairs in there too starting to get exciting!!

Likes
11
Share


@Loud_Jazz_de_Cavolo
Follow
Their first Neem oil leaf drench massage. Their first fertigation or watering.
For the Og kush the third week Biobizz nutrient dose was followed. The only addition to the third week All Mix dosology was the inclusion of Alg a mic. At the above rate + Great white + bactrex. The above list of nutrients correspond to the OG KUSH Allmix schedule and doses.
Fot the amnesia haze the watering had only Bactrex, White sark and Pro symbiotic at the doses listed above. No pH was adjusted nor measured and no EC either.
*03/29 UPDATE*
Since no option given for "breaking down" each strain individually ragarding the Nutrients section I ll update the irrigation/fertigation/nutrient regimen for each week in this section. Each time something changes on the Nutrients section it ll always be the last used doses of nutrients only for the OG Kush strain. For the Amnesia only CalMag treated water will be given in alternate irrigations along with a twice a week bacteria introduction to the system. So, today
both plants got 1.8 lts of RODI CalMag treated water to .340EC with a controlled pH of 6.3. The Amnesia had a significantly higher runoff which I didn't anticipate nor understand but I'll find out why for sure.
Some light LST directional guiding was given to the plants for forming purposes and future canopy levelling.
In the Grow Hut since day one the plants are continuously enjoying the company of Pandit Hariprasad Chaurasia s music. They love it!
*03/30 UPDATE*
The best possible outcome regarding live phytoprotection by beneficial insects for pest control.
As of yesterday I have two unidentified tiny sliders, possibly common garden ones and as of today a Coccinellidae sp. larvae running around the canopy (check the video) Hope for many more of them sweet protectors. Neem oil along with DE has successfully helped in deterring some Gnat "congregation".
*03/31 UPDATE*
Plants are growing strong and vigorous. Some LST done and their new canopy hairdo can be seen in the pics.


Likes
5
Share


@pzwags420
Follow
The start of week 5 is going well. Blueberry is smelling nice and my seedlings should be showing preflowers soon.


Likes
116
Share


@Kitties_and_Colas
Follow
~_~_~_~_~_~_~_~_~_~_~_~_~_~_~_~_~_~_~_~_~_~_~_~_~_~_~_~_~_~_~_~_~_~_~_~_~_~_~_~_~_~_~_~_~_~_~_~_~_~_~_~_~_~_~_~_~_~_~_~_~_~_~_~_~_~_~_~_~_~_~_~_~_~_~_~_~_~_~_~_~_~_~_
10/14/21
😻 Everything looks great!! It's not often that our seedlings pray like this, they couldn't be happier under this MarsHydro..we should of noted last week that all seeds were placed immediately in their final pot (we do transplant autos sometimes, this was more for convenience) ..being a new light we're a little iffy on distance but 24 inches has them pointing skyward (we're keeping a close eye for any buring)..we typically do 18/6 for all autoflowers but thought we'd try 20/4 for a change..we'll update again midweek..thanks for reading if you made it this far and happy harvests everyone!! ❤️💡🌱😽💨
⚡Mars Hydro/SP-3000⚡ Specifications ⚙️:
Diodes: Samsung LM301B / Osram 660nm (960 total!)
Driver: Meanwell 300watt 🔌 (300W±5% @AC120V-277V)
PPF: 824umol/S ☢️
PPE: 2.8 µmol/j 〰️〰️
Lifespan: >50k hrs ⌛
Veg Coverage: 3 x 5 ft 🌱
Flowering Coverage: 2 x 4 ft 🌼
Weight: 10.1 lbs (4.6kg)
-Uses an aluminum heatsink (no fan) and the driver can be removed to be placed outside the tent 🌡️⬇️
-IP65 waterproof ratings, tolerant to high humidity grow environments 💦 ..
-Up to 30 of these lights can be daisy-chained together and controlled from a single light! 💡~💡~💡~💡~💡
~_~_~_~_~_~_~_~_~_~_~_~_~_~_~_~_~_~_~_~_~_~_~_~_~_~_~_~_~_~_~_~_~_~_~_~_~_~_~_~_~_~_~_~_~_~_~_~_~_~_~_~_~_~_~_~_~_~_~_~_~_~_~_~_~_~_~_~_~_~_~_~_~_~_~_~_~_~_~_~_~_~_~_
Processing
Likes
10
Share


@CanadianFillmore
Follow
Start of flowering week 1. This girl is already bigger then her round 1 sister and she's starting to stretch after just a few days of 12/12 light. The only nutrient difference this grow, will be the addition of sensizym, hopefully she helps pack on a few more grams per plant.


Likes
7
Share


@Weedganja420
Follow
Muy buenas!!
Asi va esta bonita cepa!
Muy indica y chatita ahunque ahora que tenemos menos horas de luz se ve como va estirando mas.
Ya se ven los primeros pistilos, vamos a ir viendo como se forman esas flores!!

Likes
14
Share


@CrazyRussian
Follow
This is the third monday. The girls still look healthy, I gave blooming nutrients for the first time as the schedule suggested.
The Attack of Gnats:
Inside the tent there is a huge fan, which was unstable, if I tilted it too much, so I put a 20litre soil bag (with some cheap shitty soil for decorative flowers) at the base of it to make it solid. As the tent started to warm up, the soil was warm ask well. After a couple of days some gnats mysteriously appeared in the tent. First there were only two, but now there is a whole army. I bought a "special" trap for them, it came in a pear shaped plastic dispenser with some sort of "killer liquid" that will eliminate the enemy. As soon as I opened the little container with the liquid my first idea was to smell it. Surprisingly the smell was familiar, and I smelled it before in salads. I asked my girlfriend, and she immediately told me, that this killer liquid is nothing more than Apple Cider Vinegar. I searched google, and I found out, that you can make very effective gnat trap at home by using apple cider vinegar, sugar, and dish soap... This costs you almost nothing, because you can find everything at home. Learning every day.... :) Now there are only a few more gnats left, but I will kill them in the following days. 🙏 Namaste
Likes
3
Share


@Ogbangbang2981
Follow
same as last week nothing to special just growing healthy on her bat poo feed coming up nicely I think other people might see differently but that's small grow space C4Matic and friends .
Processing
Likes
52
Share


@CBD_Sweden
Follow
2017-09-11. Kl 12.00. Week 3 starts. I have cleaned the whole room for the new week and gave the girls water and nutes. Added videos and pics. Girl is 10 cm high.
--------------------------------------------------------------------------------------------------------------------
2017-09-12. Kl 10.00. New pic and video.
---------------------------------------------------------------------------
2017-09-13. Kl 22.00. Added new video.
---------------------------------------------------------------------------------------
2017-09-15. KL 10.00. New pics and video. The girl is 14 cm high.
---------------------------------------------------------------------------
2017-09-16. Kl 10.00. The girl is starting to grow little better now and i hope she is picking up the pace. Added new videos.
