





Likes
65
Share


@DudeGrowsWeed
Follow
This girl is getting close, buds are fat, crystals are sparkling, hairs are orange and leaves are yellowing all over. Gave her Recharge only this week. As soon as I start seeing some amber trichs, she's coming down. Oh, did I mention she STINKS! 😄

Likes
4
Share


@m0use
Follow
***Sponsored Grow*** = Medic || https://medicgrow.com || Grow = ***Sponsored Grow***
Not a whole lot is happening this week, still having some PH issues in the medium, I believe this is from the microbial mass I added a while back. A microbe product, PH going into the medium is around 6.5-6.8 and coming out is between 5.5-5.8, so something is acidifying it up. Also noticed the runoff last week was a bit higher at times. So lowered the feed down quite a bit, going in at 1.4EC vs 1.8 will bump it up to 1.5 and 1.6 in the next few weeks. I also added in a bit of a PK booster. nothing to crazy only 60ppm worth on a total allowance of 700PPM
Lights now running at 100% with V1 spectrum, decided to go with 100% now vs after stretch, will see how it works out.
Till next week.
https://medicgrow.com/
+
https://seedstockers.com/
Facebook:
https://www.facebook.com/medicgrowled
+
https://www.facebook.com/SeedstockersBarcelona/
Twitter:
https://twitter.com/medicgrow
+
https://twitter.com/seedstockersb
Instagram:
https://www.instagram.com/medicgrow420/
+
https://www.instagram.com/seedstockers_seeds
YouTube:
https://www.youtube.com/channel/UCNmiY4F9z94u-8eGj7R1CSQ
+
https://www.youtube.com/channel/UC4GiFYrIWeNtwtXjcivCmfw
Growdiaries:
https://growdiaries.com/grower/medicgrowled
https://growdiaries.com/grow-lights/medic-grow
+
https://growdiaries.com/grower/seedstockersofficial
https://growdiaries.com/seedbank/seedstockers

Likes
18
Share


@J_diaz420
Follow
Se añade co2 casero a base de fermentación con mezcla de azúcar más levadura, solo eso, por ahora todo bien

Likes
126
Share


@WhiteWidow
Follow
** video in 2 parts
Sweet and sour showing interesting gold color on her leaves and some curled tips so i flushed her with canna flush and will dry her for a few days.. i dont know whats the provlem except the cold nights for the last few days. Would like to hear opinions..
Grapefruit from dinafem is amazing smell - very fruity and sweet..
Sweet and sour and spliffs strawberry share almost the same smell but sweet and sour is more hubba bubba chewing gum, intensive sweetnes...
Remo chemo still no distincitve smell, just sweet.. amazing trichome production.
Ayahuasca isnt purple and smells like a bag of nuts and petroleum. Very odd i am afraid i wont like.her...


Likes
18
Share


@HashCakes
Follow
Nothing too exciting still. Growing a little smaller than I'd expect but the roots seem great. Swapped the lights. Cranked the sf1000 to 100% and put it up to 25". Hung the t5 on the side. Will probs pull it out when it goes to flower.
Likes
16
Share


@RFarm21
Follow
Olá growmies.
Esta gorilla está a demorar muito mais tempo comparando com o meu primeiro grow. Penso que o problema tenha sido as doses baixas de nitrogenio que dei durante a floração e as temperaturas no máximo chegaram aos 23 graus.. no próximo correrá melhor. Vivendo e aprendendo 👍
15 janeiro: continuação do flush - regada só com água, 2l.
Vou esperar mais uma semana no máximo para cortar. Na esperança que alguns tricomas comecem a ficar âmbares.
18 Janeiro - harvest day! Ja está a secar! Atualização em breve!

Likes
4
Share

@HoneyBlunt42
Follow
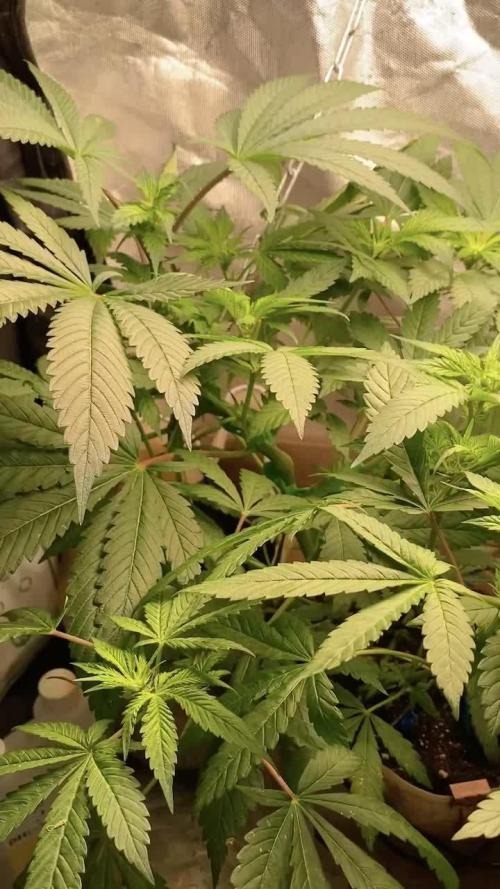
The plant has already filled 70% of the 60 x 90 cm box. Small flowers are starting to appear. I'm bending the branches with plastic clips—the maximum height of the space is 100 cm.
I sprayed stimulants on the leaves.

Likes
19
Share


@adam_pawloski87
Follow
Let’s Go Day 81!!!! This week went real great 2 Ogreberrys are hanging to dry and also the Bruce Banner is too after there 48 hr of darkness! The 3 other Ogreberrys began flush on Monday so finish out this week of flush and one more week of flush after that an they will get the chop too! But stay stunned for next week , we’re not done yet so keep them eyes peeled!! Y’all have an amazing productive day as well as a great week ! Peace love an positive vibes to everybody Cheers 😶🌫️💨💨💨💨💨🤙🏻

Likes
31
Share


@Mrs_Larimar
Follow
This Spring I was asking @James from RQS, wich recommendations he can give for Good Outdoor Performer in my Country. ( Northern Europe)
Because most of the Year i have to Harvest earlier due bad Weatherconditions.
Because in 3rd .of September, weather changes, and big Rain begins
He recommended me Honey Cream and Speedy Chile
So I started Grows with this Strains
And its a Superstrain!! for my Conditions,
That means they get ready in Time, before everything gets worse
Great growing Strain, very big and stable Branches, .........When they started Flowering they go in Overdrive
The Result is a wonderful strong Plant, filled on and on with Buds
Today we harvested The Lady in the 75l Growpot
On Sunday the Lady into the ground, gets Harvested
We made some Photoshooting and Videos to show her Beauty, but its nearly impossible To catch her in Pictures
but we tried
Luckyly ii nvented in a wet trimming machine, and the Lady was cut down in short Time,
and gave us a good Number ( i have no cluehow much,,,Iam guessing for 300 g)
Sunday October 4th
Second Honey Cream was Harvested, She had agood shot Of Purple due Cold nights.
She was so fresh , when I took of the Bif Leaves, they made asmacking Sound
Plant Number 2 was sitting in The Ground, I started fertilising her late( 2 weeks before Harvest), but not tooo Late
She nearly catched up , in Budbuiding her Sister.
So Thank you for those Gentics... its for me a "must to grow again Plant"
Iam going to write more on Sunday, about buds smell and resinousness


Likes
6
Share


@LoganatorDude
Follow
So I didn’t know about Grow Diaries when I started this, and do I am jumping in first day of second week. I know for a fact that she has been slowly picking up some vegetative growth over the past week. Before that I would say it was between 1-2 weeks to get her rooted out.
She has been inside the tent still, but will be transplanted outside in a fabric pot with a whopping 100 Gallons of custom made soil.
I am still new and learning. I started mother from seed and will be using her to make more seeds(rev-fem). It is possible I may be obsessed 😍. Either way it is also my very first successful clone, which I literally took ONE cutting at about 10” long off the main trunk towards the bottom, then I took off an additional 4”. I guess I was confident? Even though last year, or year before that when I tried a lot of cuttings from a completely different plant, they all failed miserably. I knew why. I just needed to be way more on top of my game with the cuttings. Anyways, this one here means a lot to me because it’s my first clone!
Let’s hope I don’t love ❤️ (water) it to death ☠️!!! lol

Likes
25
Share


@MadeInGermany
Follow
Info:
Unfortunately, I had to find out that my account is used for fake pages in social media.
I am only active here on growdiaries.
I am not on facebook instagram twitter etc All accounts except this one are fake.
Have fun with the update.
Flowering day 33
since time change
to 12/12 h.
Hey everyone 😃.
Another wonderful week goes by :-).
The lady is developing very well.
The flowers begin to develop properly and already smell very nice 🙂.
The day before yesterday was the last time 1 g of GHSC Powder Feeding per L substrate was added :-).
That should last to the end now.
Of course, she continues to receive GHSC enhancers 👍 every 14 days.
The tent was cleaned every day just like the humidifier was refilled every day.
I am very curious how it will develop in the coming week and until then I wish you a lot of fun with the new update.
Stay healthy 🙏🏻 and let it grow 🍀🙏🏻
You can buy this Strain at :
www.Zamnesia.com
Type:
Purple Punch
☝️🏼
Genetics:
Granddaddy Purple x Larry OG
👍
Vega lamp:
2 x Todogrow Led
Quantum Board 100 W
💡
Bloom Lamp :
2 x Todogrow Led
Cxb 3590 COB 3500 K 205W
💡💡☝️🏼
Soil :
Canna Coco Professional +
☝️🏼
Fertilizer:
Green House Powder Feeding
☝️🏼🌱
Water:
Osmosis water mixed with normal water (24 hours stale that the chlorine evaporates) to 0.2 EC. Add Cal / Mag to 0.4 Ec Ph with Organic Ph - to 5.5 - 5.8 .

Likes
6
Share

@IslandTerps
Follow
Strains: Zamnesia – Strawberry Cough | Kalini Asia | Permanent Marker
Grow Type: Indoor
Plants: 3
Pot Size: 16 Gallon & 13 Gallon
Medium: Coco Coir & Perlite
Nutrient Line: Athena
Week 4 Flower Update
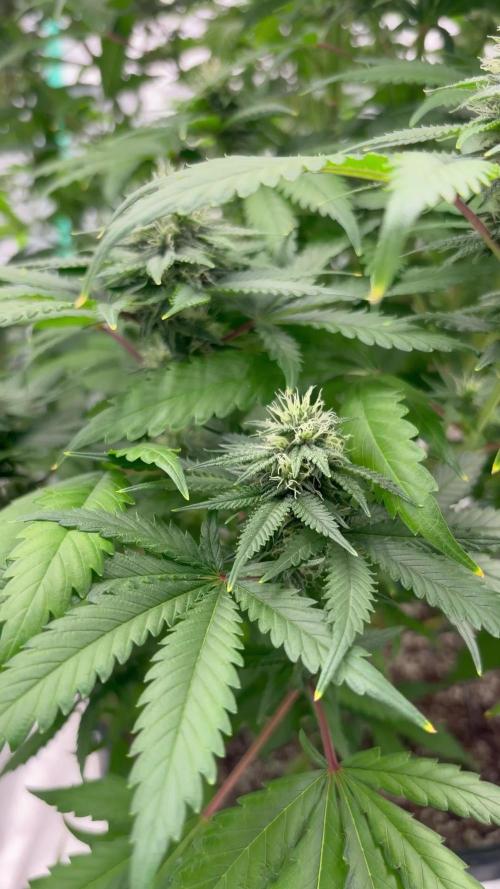
We’re in week 4 now and things are starting to look real nice. Buds are filling out properly and you can see them starting to take shape across all three plants. Frost is beginning to come in as well, not heavy yet but definitely showing up and getting more noticeable.
I did notice a slight nutrient burn on the tips of some leaves nothing crazy, just a little sign that they’re getting a bit more than they need. I’ll dial the nutrients back slightly and keep things in check. Nothing to stress about.
Other than that, everything is running smooth. Plants look healthy, structure is holding up, and they’re right where they should be at this stage. Really looking forward to seeing how they swell up over the next couple weeks.
Feeding
Volume: 6L
pH: 6.0
PPM: 900–950 ppm (slightly reduced)
Frequency: As neede
Indoor Climate Conditions (Flowering)
🌡️ Temperature: 26°C day / 18°C night
💧 Humidity: 45–50%
📈 VPD: 1.3–1.5 kPa
Coming into that good part of flower now 🔥 let’s see them stack up 🌿
Processing
Likes
24
Share

@MadeInGermany
Follow
Hi guys :-) .
There isn't really anything to report this week 🙈🌱🙏🏻.
The plant develops very nicely and gets its first real pairs .
Watering is rarely and rarely, since they have an optimal air humidity in the upper range between 75% and 82% 👍.
I wish you all a lot of fun with the diary and a nice week 👍😊.
Stay healthy and let it grow.
Type:
Runtz
☝️🏼
Genetics:
Zkittlez x Gelato
👍
Vega lamp: 2 x Todogrow Led
Quantum Board 100 W
💡
Bloom Lamp : 2 x Todogrow Led
Cxb 3590 COB 3500 K 220 W
💡💡☝️🏼
Earth: Canna Bio
☝️🏼
Fertilizer: Monster Bud Mix
☝️🏼🌱
Water: Osmosis water mixed with normal water (24 hours stale that the chlorine evaporates) to 0.2 EC. Add Cal / Mag to 0.4 Ec Ph with Organic Ph - to 6.0 - 6.3
💦💧
Likes
22
Share


@Afterglow
Follow
День 29. Чихать хотела растишка на топпинг, она все равно пытается разорвать бокс и горшок. Сегодня поливать не буду, скорее завтра. Субстрат пока сырой, пусть корни ищут влагу и растут. Чувствую через дней 10 буду делать SCROG и к концу 6-ой недели переводить на цвет. Имеем 4 этажа, 8 веток, что в принципе достаточно. Растет так быстро, что мелкие перья у семилистников не успевают развернуться.
День 30. Кормление также по плану, 800/5.6. Обрезал 4 лапуха, так как после топинга потянулись вверх нижние этажи, но лопухи мешают и загораживают от света. Скоро начну пригибать ветки. Всего планируется 8 колл - по 2 с каждого этажа. Еще отодвинул от света подальше, горшки стояли на подставке. Как и хотел сделал растишку коренастой, а вот будущие коллы надо вытянуть, чтобы удобно было развести под сеткой.
День 31. Уже даже не смотрю на PH и PPM, потому что рука набилась опять на этот гров. Замешивал AD phPerfect Coco по 2.5мл на 2 литра. Чуток снижаю PH/PPM чтобы не было засола. На дренаж не смотрел. Лень. По фото и так видно, как после топпинга даже рванули те листья, которые даже и не собирались расти. Стрельнул третий этаж. Чую нужно начинать загибать. Видимо, уже завтра.
День 32. Не смотря на топпинг и дефолиацию растишка за 3 дня даже не то чтобы стрессанула, а увеличилась в объеме раза в 3 точно. При чем складывается впечатление, что она растет ночью, а не днем. Полив новым компотом 5.5/550, выход 5.9/530. Растиха начинает голодать, точнее аппетитно кушает. Завтра буду заряжать под 800. Центральный ствол уже толщиной примерно 5мм. По краям горшка уже видно куча повылезавших корней. Надо будет еще раз покормить микоризой. Пригнул два верхних этажа. Даже не знаю, буду ли делать SCROG или нет. 8 плотных веток мне хватит за глаза на пол года с одного куста, а у меня их два разных сортов. Наверное дождусь пока нижние этажи сравняются с верхними, переведу на цвет в конце 6-ой недели и посмотрим, нужен ли скрог или нет. Уж очень кусты низкие получились в этот раз.
День 33. Натянул сетку и будем выравнивать этажи. Как все подрастут и разойдутся по углам - буду переводить на цвет. Полив GHE, PPM/PH - 740/5.5, выход 638/6.3. Говорит что мало жратвы и надо еще. Завтра подниму до 1000 PPM. Надо PH поднять до 6.8 в дренаж.
День 34. Обнаружил что серьезно облажался с самого начала грова... Новый TDS метр по умолчанию показывает в μs, а мне надо в PPM. Коэфициент кондуктомера 0.5, то есть у меня компот в два раза меньше насыщенности, чем нужно. То то у меня вечно PPM падает, а PH растет и понять не могу почему так активно жрет, но растет не так как нужно. Судя по моему же дневнику и фоткам, активно росло именно тогда, когда проливал 800-1000μs (400-500 PPM). Пролил теперь уже нормальным компотом Coco Grow A+B PPM/PH 740/5.7, выход с дренажа 483/6.3. Жесть какой низкий PPM. Надо будет понаблюдать.

Likes
57
Share


@ATLien415
Follow
🙏 Big thanks to Plagron and Zamnesia for putting on the Eternity Grow Cup 2025. This kind of platform means a lot to the community. The chance to push our grows, test out new techniques, and connect with other cultivators from all over has been inspiring. Appreciate the love and effort that went into making this event happen! Hope everyone enjoyed looking over my shoulder on this grow and best of luck to all participants!
REVIEW - Runtz (fem., photo.) from Zamnesia: ⬛⬛⬛⬛⬛⬛⬛⬛⬜⬜
The seeds from Zamnesia germinated rapidly, rooted strongly, went wild in veg, and produced an ample amount of high-quality medicinal flower. The diary speaks for itself on that front so this space will be more of a phenotype review. The plants were labelled A, B, and C from left to right respectively in photos. A and B were the 'clasicaly-appearing' sativa-esque leaves while C was the more 'indica-appearing' phenotype. Although A and B appear the same qualitatively, they did produce substantially different amounts of flower (despite their DLI being near max out for the entire tent footprint without supplementing CO2, so I do not think just being in the middle attributed to this). Past their different yields, A and B also have vastly different profiles. A is a classic gelato/ice cream cooler/Z terps, and my personal favorite of the plants (wish I had taken a clone of this one instead). B is the most on point for what I think of with Runtz, classic Z terps but with a slight tropical/rotten/sweetness to it. C had the misfortune of being ready to chop a little earlier than the other girls so her profile is mostly just spicey kush now. I did observe intersex flower sites but given the entire context of the diary and how the plants performed, I have to assume it was user error. No pollination observed in any of the flowers, as zero additional intersex sites occurred. The distinction between A, B and C is what I would expect from a typical F1 cannabis seed. I do not enjoy growing from seed much but these girls were manageable. Add to that the relative stability of the genetics for a Runtz recreation, and well, these are good quality beans for a great price. Not only is Zamnesia responsive and available, their confidence speaks volumes. How many vendors would have an in-house Runtz, knowing how much of a genetic-gravity-well it is in, and be confident enough to let ~200 randos grow it and show it?
REVIEW - Green Sensation from Plagron: ⬛⬛⬛⬛⬛⬛⬛⬛⬜⬜
I enjoyed using the green sensation, the NPK values on it make it versatile in application and a power-house in flower. I can't say I noticed anything better or dramatically improved, although comparing to Heavy 16 and asking for a marked improvement is big ask in my opinion. What I was able to do was seamlessly integrate the Green Sensation into my current routine. The additive stayed homogenous, was easily introduced into solutions with no adverse impact to the water contents or pH. Most importantly, the plants enjoyed the additive and it did accomplish the main goal of being able to wane off your primary line. In this respect, by using Green Sensation I was able to save resources by lowering my Heavy 16 inputs across the board approximately 50% and supplementing with Plagron's Green Sensation.
Likes
7
Share


@Cannabiszimba
Follow
conseguimos mudar ela para um vaso maior, última atualização antes de iniciar o 12/12. estou gostando como ela respondendo aos treinamentos. está bem ramificada e pronta pra entrar em floração.

Likes
59
Share


@Ezzjaybruh
Follow
————-DAY 22 of flower—————-
Alright stretch is all wrapped at this point. Did a little bit of defol just cuz things were getting cramped on the interior of the plants.
Having to really watch run off on these girls.
Couple signs of mildew 🤦♂️
Ugh - been months since I’ve had a lick of mildew and it starts up now. Lots of reasons probably - weather and shit outside. Just turned furnace on for the first time it’s kicking up all types of shit from inside the ducts.
Upped ArmorSi cuz silica is supposed to help with WPM.
Pheno 1 & 4 are largest two.
Pheno 1 has more lateral branching into even canopy.
2 is middle child as far as size.
3 caught up actually after some late stretching.
All are about the same nutrient wise except for 1 - she’s the odd one out as far as morphology in some respects. Also as I started saying is showing different needs as far as nutrients. Showing some calcium deficiency in the last week.
Overall so impressed with these genetics and results thus far.
——————- Day 26 ——————-
Stacking and putting weight on.
PK boosted
3 first to show some purps in buds. Littttle tiny bit in 1 as well.
Frosty as hell
WPM seems at bay

Likes
45
Share


@Kushycat
Follow
I caught the sun and captured the moment as it shone on my special rose. 🌹 It was pretty windy, as you can probably tell from the video, but I think I still managed to get a few nice pictures. And finally, a video where you can see the blooms a little more clearly, along with some close-ups.
For really close-up shots, I guess I’ll have to resort to my smartphone after all. I’ll post those next time, or maybe sometime in between.
Peace be with you all. ✌️

Likes
15
Share


@RunWithIt
Follow
Had to take a hiatus for about a week or two. But now I'm back in full swing! The girls are all swimming along great! I believe in my last update I discussed wanting to main line this plant. But instead I'll do some lollipopping and topping. I figure that would be less traumatic than performing a main-line this late in it's growth. The one sweet zombie clone I got to root is coming along awesomely. I've been feeding compost tea to establish benis and now their growth has really picked up. I'm really worried about how crowded it will get in this tent, so I may end up putting my clones outside once we have vegetative conditions outdoors. Either way, I'll just run with it lol.
Cheers growmies!
- RWI 😶🌫️ 😎
