
Likes
Comments
Share


@gottagrowsometime
Follow
Welcome to my CBDV diary. Has been blast.. there's so much more to growing a CBD plant, my point is I'm far from where I want to be with the Quality of the end product as far as density goes. (I got the quality part down) she's 1 stinky sticky ass bitch.
Wk 9 Day 58-63 Plant was kept on feed till the bitter end. She was confided to the 70cm2 for her last few weeks of life but I've no doubt, if I had of kept her going under the FC 3000 she would of reached deeper down and gave me denser buds on top. There is so much airy ripe bud below I'd say it'll make up for 1/3 of the overall harvest. Which will be quite a lot. Id say in the 80-100g no doubt. She has some major big buds that are stacked with swollen calyexs that are glistening and very sticky. I can she's had enough. I didn't have the light to finish the end that the FC 3000 created on a lot of my autos. On most I clipped it away after I had to confine my plants to their own tents for good. But, she kept eating.
Wk10 63-67 I stopped everything nutrient wise. And let her finish the ride out on water until day 67 and she gladly ate what was in her pot and showed no signs of wanting more, so I hard flushed her 1x pot value (11L) and got a ppm of 900ish, so 2x (22ish) more the pot value until it came down to 210. And for 3 more days I left them girls drink what they could from the pot and left them under my 100w where they've lived the past 3-4 weeks and I'm gonna pull them this week, they are resting 30hrs already and then I'll pull them, and harvest them whole, roots and all will be pult and I'll shake the clay off, bag the roots and hang dry upside down, (so no dirt falls on the buds while drying from the roots) and will dry at 55-60 rh with a temperature of 17-19c. I'll try keep the RH around 59 but I'm not gonna worry too much if it differs from that range. I already cut a wee bud off her the today, just a small 1 to try her for taste. And I'll rate it on harvest. As she's low on CBD, I'll rate her on taste. But, she'll be a nice addition to my full THC smoke no doubt.
Never really removed any substantial growth from her to even call it a defoliation, there really was no need. I done a decent job at LST and my plants got rotated every day and I pult nodes/leafs this way and that. So, I'm happy with the results. She has a lot of girt and not too much lollipoped with a good amount of CBDV bud in 70 days. Very nice indeed..
Thanks so much for looking at my diary guys. I hope to do better the next time. But, as I am using dry additive powders I'm sure I'll be able to dial in that key nutrient ratio for my CBDS. She's been my biggest auto of this grow. At 71cm tall, and a big ass cola I am very happy. She has a lot of girt and stinks fruits, mainly passion, I'm guessing. As I've learnt, you don't know the true smell of your weed until you get at least a 2 month cure on it.
Harvest Day.. Day 70 was done on day 65 then I left as I like my weed little on the harsher side. She very punchy. Has like a deep wood smell but very citruses with hints of tropical fruits. I've harvested 6 autos today. And, its hard to pick up the smell. Very sweet smelling and citrus fruits. (Ill give a more independent smell profile upon the trim and hopefully she'll come into her true smell upon a 2 month cure. As all my bud is given)
To my sponsors from kannabia thanks so much for allowing me to try this plant. I've loved growing it. Hopefully I'll do it more justice on my next round of growing it.
And, to my sponsor from marshydro, she's a rock star. Thanks very much for all your help.
COUPON FOR MARSHYDRO
Use code "ggs" at any official marshydro site for a discount.
FC 3000 & MARSHYDRO LIGHTS
The FC 3000 300w it has a high ppfd 1525 umol/s, 2.85 efficacy and has the new UV addition which brings it closer to the (RA) spectrum, that's the Sun spectrum. The FC-FC-E has this, Also it has a much even PPFD making for a more evenly grown canopy and has a deep penetrative light as it allows you to move the light closer to your canopy with a reduced risk of light stress. The TS versions are a great light to. These are different though. As they have a much higher ppfd in the middle, so I suggest you rotate them plants and move em about to get the best out of the high PPFD
And to the community. Much respect for anyone that can grow their own bit of chronic. Fair play to you.
Enjoy your harvests and thanks for tuning in. Be sure to drop a like or comment so I can visit your diaries. Either way, thanks for dropping by.

Processing
Likes
57
Share


@MadeInGermany
Follow
Day 13 Since time change to 12 / 12h.
Hey everyone 🤗.
They grow beautifully evenly 😍👍.
Once again great genetics @SweetSeeds 😃.
Both have started to form their flowers.
Green House Powder Feeding Bio Bloom was added. (3 g per liter of substrate).
Phenotype 1 is already red / purple 😍😍😍.
I'm really looking forward to this Grow 😋.
I wish you lots of fun with the update, stay healthy 🙏🏻 and let it grow 🍀👏🏼
You can buy this Strain at :
https://sweetseeds.es/de/red-mandarine-f1-fast-version/
Type:
Red Mandarine F1 Fast Version
☝️🏼
Genetics:
Red Poison Auto®️ (SWS39)
X
Tangie (California Orange x Hybrid Skunk)
👍
Vega lamp:
2 x Todogrow Led
Quantum Board 100 W
💡
Bloom Lamp :
2 x Todogrow Led
Cxb 3590 COB 3500 K 205W
💡💡☝️🏼
Soil :
Canna Coco Professional +
☝️🏼
Fertilizer:
Green House Powder Feeding
☝️🏼🌱
Water:
Osmosis water mixed with normal water (24 hours stale that the chlorine evaporates) to 0.2 EC. Add Cal / Mag to 0.4 Ec Ph with Organic Ph - to 5.5 - 5.8 .

Likes
2
Share


@FourTwenty_Plants
Follow
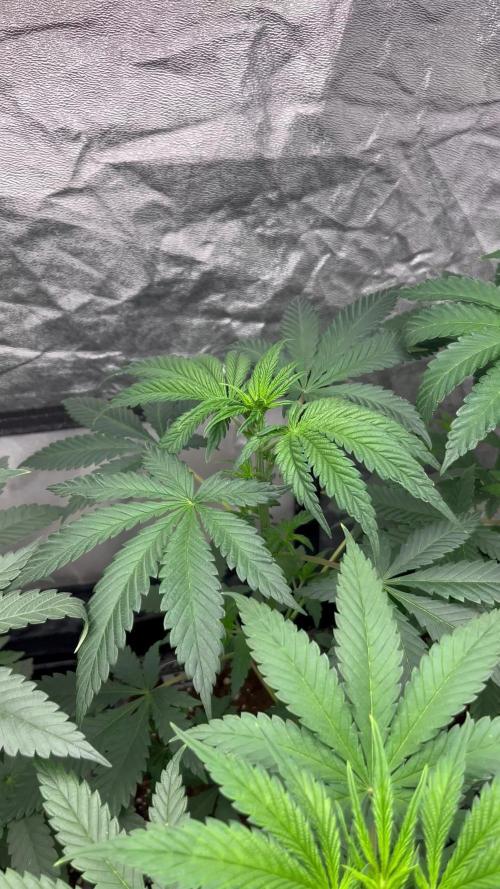
Been on the Spananbis so I wasnt able to check on them but they did really good the last few days. Put a net on them to spread them out a bit cause im scared of not enough airflow between the plants

Processing
Likes
3
Share


Likes
27
Share

@Bncgrower
Follow
Another successful harvest. This time it was my perfect girl, a very good strain, easy to grow, fast, and without many demands. Besides the controlled environment, it has a wonderful smell. The buds were very dense and sticky. Every time I touched the scissors, a strong smell emitted that filled my room. I really liked the result, and this will definitely be the first of many. My favorite so far! ✌️💪🌿🍁


Likes
25
Share


@7THBEZ
Follow
hi, everyone👉😍 Let's Go😘👍
she look very nice with the LST that i give to her😘
i feel this week maybe the last week for veg 😝
so, i water with "homemade mixed for veg" (the old one) 👍😘
and add some "homemade mixed for bloom" 😵👉😵😂
i also do defoliation the twin leaf under the twin branch 😂😭😖
😍👈the twin branch is fine👉😍
edit : 17/9 , i start water with homemade mixed for bloom🙌
for next week i will change the diary to flowering period😊
thank you for watching 👊
hope all of you enjoy , see ya✋
Likes
3
Share


@Bluemels
Follow
Tag 36: Die Pflanze entwickelt schon wieder offsichtlich einen Mangel, ich versuche es jetzt mit Bio.Bloom und Alg a mic zusätzlich.
Tag 41: Ich baue das scrogging Netz ein.


Likes
4
Share


@Drtomb
Follow
I provided the girls another drink of bloom ferts... Looks like they need another week of growth to fatten and finish. This strain looks to be closer to a 70 day finisher. Will be switching back to pure h2o for the final week.

Likes
Comments
Share

@eldruida_lamota
Follow
Que pasa familia, vamos con la quinta semana de vida de estas Forbidden Mochi feminizadas de Seedstockers.
Vamos al lío, las plantas se trasplantaron a macetas de 7 litros.
El ph se controla en 6.5, la temperatura la tenemos entre 24/22 grados y la humedad ronda el 70%.
El ciclo de crecimiento puse 20h de luz, el foco está al 50% de potencia.
Me gustaría estar más encima este cultivo pero la salud me está impidiendo un poco este 100% con el proyecto. Con suerte la semana que viene andaré mejor.
- os dejo por aquí un CÓDIGO: Eldruida
Descuento para la tienda de MARS HYDRO.
https://www.mars-hydro.com
Hasta aquí todo, Buenos humos 💨💨💨

Likes
4
Share


@Finsfan
Follow
I did a heavy defoliation with the green crack for the first time.. the first 3 pics are pre- and the last 3 pics are post-defoliation.
Definitely better air flow now as well as more "tops" being seen.
Tomorrow going to do the durban.. update w more pics then.

Likes
15
Share


@masterofsmeagol
Follow
7/27 My phone ran out of storage and wouldn't let me take a video. I tried deleting several other videos bit that didn't work either. Finally I wad able to upload a few RANDOM pictures from the "website" camera. But no video. Everything looked so beautiful tjis morning too. Not watering was the right choice. I defoliated a couple septoria leaves on the reveg 10th planet that wad about to receive its third dose of Plant Doctor. The chem dog #4 and mk ultra this will be their second treatment. Seeing the positive impact of the product and finding a few septoria leaves I decided to treat every plant in the garden with plant doctor. I'm still going to do the diy Dr. Zymes but Plant Doctor had been working good and I want to suppress as much as possible. Everything looks great. I started by giving the thirstiest plants a half gallon of water. I then did a root drench of 3tsp per gallon on every plant but the 10gal. A gallon of solution was used on each plant. I really feel like this is a good mood. Previously AFTER I applied Plant Doctor the plants would have a noticeable positive effect shortly after. I'm hoping this will be the case here. I think stretch has stopped. I have one special Kush that has buds already but EVERYTHING is in early flower. I'll fix the phone and get a video up there.
EDIT: WENT BACK AROUND ONE TO DO A LITTLE DEFOLIATION. EVERYTHING LOOKS REALLY GOOD TO ME. I DID DEFOLIATE A COUPLE SEPTORIA LEAVES. BUT REMOVING A LEAF OR TWO FROM A MONSTER REVEG IS NOTHING. REALISTICALLY I SHOULD BE REMOVING MORE FOR BETTER AIR FLOW. THATS SOMETHING ILL NEED TO DO. SO HAPPY THINGS ARE DOING GOOD. EVERYTHING IS IN VARIOUS STAGES OF FLOWER. NEXT FEED ILL BE USING A BLOOM NUTRIENT. NOT SURE BUT PROBABLY LIQUID KOOL BLOOM.
7/28 Didn't have much time this morning. I've got a wife with medical problems and I'm trying to redue my house before the end of the summer so I'm busy to say the least. Still no pm. Not many pests either. The rose bushes behind them have been DEMOLISHED by jpn beetles. I see no negative active reactions from treating everything with plant doctor 3tsp/gallon. The first plant I treated with it was that 10th planet and its gotten three treatments and looks great. I'll get a spot here or there once in a while but for the most part it's supressed. I have some pruning to do. Everything os in early flower but that one special kush is pretty far ahead.
EDIT: SINCE IT WAS MID 80S I WENT OVER AROUND 1 TO CHECK THE GIRLS. THEY LOOKED GREAT. I DEFOLIATED A COUPLE SEPTORIA LEAVES BUT ONLY A COUPLE. I STOPPED AT A LOCAL SHOP AND SHOWED MY BUDDY A VIDEO. HE SAID TO NEVER SPRAY ANYTHING WITH LEAF SEPTORIA WITH "ANYTHING" BECAUSE OF HOW IT SPREADS. I DIDNT MENTION THE CONTRADICTORY EVIDENCE THAT I'VE FOUND IN MY RESEARCH BUT HEY. HE HASNT LED ME WRONG. PLANT DOCTOR SEEMS TO BE DOING THE JOB. THAT AND DEFOLIATING ANYTHING I SEE. IVE WORKED TOO HARD TO LOSE THEM TO A DISEASE THAT MAINLY EFFECTS THE LEAVES. PLANT DOCTOR WILL KEEP IT SUPPRESSED.
7/29 Today is supposed to be really hot. In the 90's. I watered everything a gallon except the thirstier plants got 1.5 and the 10's got 1/2 gallon. I defoliated a few septoria leaves. I'm sure there will be a few more after watering. Instead of alleviating my concerns my buddy kinda got in my head with the septoria talk. Things will be fine. Everything LOOKS gorgeous. He even said, "They look really good and healthy" and "not to get complacent defoliating." The plant in the 50 seems to be worse off than the others. I'll keep an eye on it but if I got spots near the sugar leaves I might just cut that little runt. This was all preventable too. Person mowing the lawn BLEW DISEASED GRASS, SHRUBS AND BIRD SEED IN MY CAGE RIGHT AFTER TRANSPLANT. I legit had to dig out at least a dozen sunflowers or other seeds that sprouted. Realistically things will be fine. The plant I've been treating for three weeks with plant doctor looks great. So do the others. Everything looks good. I just get occasional leaves I previously would've overlooked or attributed to something else. As long as I can keep it suppressed enough through flower I'm good. Anything that isn't good enough will go towards extracts.
EDIT: WENT OVER AROUND ONE. A COUPLE PLANTS IN TJE BACK THAT I WATERED FASTER WERE LIGHT SO I SPLIT A GALLON WITH THEM. THE 10TH PLANET THAT HAS GOTTEN THE FULL PLANT DOCTOR TREATMENT IS DOING AWESOME. I DID HAVE TO DEFOLIATE A HANDFUL OF LEAVES. HONESTLY I THINK IVE PROBABLY HAD THIS YEARS PRIOR AND DIDNT RECOGNIZE IT. IM PRAYING EVERYTHING WORKS OUT. IM DOING MY PART. I'M GOING TO HAVE TO DO SOME MORE RESEARCH.
7/30 Came over to the 10th planet plant in the front row all the way in the back was drooped all down and is yellowing up pretty good. I defoliated what I could and gave it a gallon and a half of water. I defoliated any sep leaves I could find. If that plant foesnt pick up like they normally do I may need to ditch the plant. If it continues to get yellow and look unhealthy I'd rather get rid of it than risk more damage. It was light as a feather so I assume it will be fine. I'll update as I go. Everything else looked good though.
EDIT: DESPITE IMMENSE ANXIETY I GOT THAT FEELING SO I WENT AND CHECKED THEM. THE ONE I WATERED DID PICK BACK UP BUT IT HAS A LOT OF YELLOW LEAVES. THE 10TH PLANET THATS DOING GOOD WAS BONE DRY AND STARTING TO DROOP. I GAVE IT 1.5 GALLONS. THE HUGE MK ULTRA ALSO WAS STARTING TO DROP AND LIGHT AS A FEATHER. I GAVE THAT A FULL WATERING CAN WHICH IS DAMN NEAR 2 GALLONS. THE REST WILL GET WATERED TOMORROW. NO SIGN OF SEP THIS TIME. I WASNT THERE LONG BUT STILL. THE OTHER PLANTS WERE LOOKING GOOD AND ALL PRAYING TO THE SUN. TOMORROW ILL WATER AND FEED.
7/31 Came over this morning to one of my plants on the 10 drooped right over. I shouldve watered it yesterday when I did the others that were light. Coincidentally the three that needed the water were the 3 revegs. I watered what didn't get it yesterday with a gallon each. I then fed everything a powerade bottle. Started liquid kool bloom today. We shall see how that goes. I defoliated quite a few leaves. I think I may have had sep in the past on some plants and just didn't notice. Plants still look good but I keep a good eye on them. And I defoliate a lot. I've taken my buddies advice and not sprayed anything. I don't really have any pests. A pillar here or there or a "A" cricket or jpn beetle. Of there is one four eyed plant bug but I can't seem to kill it. I've almost caught it a couple times. Anyway like usual I'll keep this updated.
8/1 Girls looked good this morning. I has to water the 10th planet in the front back and one of the 10s. Defoliated a few yellow leaves and picked off a couple sep leaves. It rained a little and I'm really surprised that I haven't seen MORE sep leaves. These girls are resilient. One more day and it's plant Dr day. That 10th planet that has had 3 treatments and will just receive its first "preventative dose" after the three big ones is doing amazing. That one special kush I the front is flowering much faster than anything else. I'm grateful for what I have.
EDIT: WENT OVER TO SEE IF I NEEDED TO WATER AROUND 1PM. EVERYTHING LOOKED GOOD. THE FURTHEREST KUSH WAS A LITTLE LIGHT BUT IT CAN WAIT FOR TOMORROW. I DEFOLIATED ANY FADING LEAVES OR ANYTHING THAT EVEN LOOKED LIKE SEP. ALL PLANTS ARE IMPROVING AND LOOKING REALLY GOOD. MK ULTRA IS GOING FIRTHER INTO FLIWER TOO. FOUND ONE JPN BEETLE WHOCH I PROMPTLY KILLED. AROUND THE GOUSE THERE ARE ROSE BUSHES. LUCKILY. JPN BEETLES ARE ON TOP OF EACH OTHER FUCKING AND DESTROYING THE PLANT. IM VERY LUCKY DAD LETS ME KEEP THESE AS TRAP PLANTS. I WENT OUT AND PROBABLY COLLECTED 50 BY BRUSHING THEM IN SOAPY WATER. I HAD TO DO THAT 2 OR 3 TIMES A DAY ONE YEAR. IM SO GRATEFUL ROSES ARE THERE FAVORITE FOOD. PLANNING TO WATER TOMORROW AND I MAY APPLY PLANT DOCTOR A DAY EARLY. IM NOT SURE. IT WILL HAVE TO BE A DAY LATE OR A DAY EARLY. ILL PLAY IT BY EAR. I THINK THEY COULD WAIT REALISTICALLY. IM JOT SEEING MANY BAD LEAVES. KNOCK ON WOOD.
8/2 Must've rained last night. Plants looked great this morning. Wife had an early appointment so wi was at the garden before 6. It's getting to he cold in the mornings. That one special kush is so far ahead of everything else flowering wise. The others are catching up. I only found a couple leaves that looked like sep leaves. Plant Doctor tomm and the first preventative dose for the 10th planet I treated first. That's doing phenomenal. I may end up needing to spray for pillars later in the season. I'll keep this updated.


Likes
7
Share


@Fonzi
Follow
Sie duften sehr lecker. Die Jacky White sehr zitronig. Strawberry ak riecht fruchtig nach Erdbeere.


Likes
9
Share


@SantaStone
Follow
Hello everyone!👋 Thanks to everyone who stops by!😉
We continue to recruit.💪
-The plant began to actively secrete resin and grow new trichomes.
-The resin has a rich and sweet smell, similar to berry candy.
-Nirvana from AN has been added to the diet.
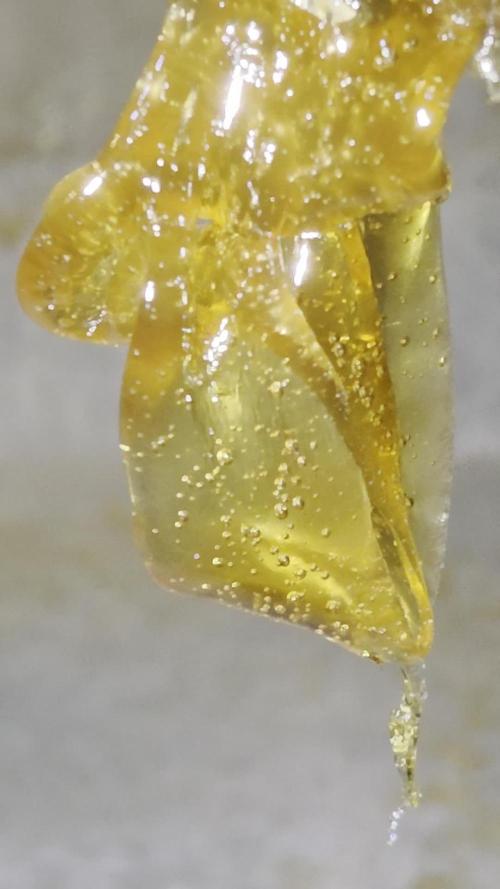
-Added a little macro photo.😍
-No problems or deficiencies were found.
Likes
37
Share


@Aleks555
Follow
🏆 Eternity Grow Cup 2025 with Plagron and Zamnesia 🏆
Zamnesia – Runtz
93 days from seed | 62 days in flower
The time has come — harvest day is here, and our incredible journey with this beautiful Runtz from Zamnesia has come to a fragrant, frosty end. For the past two weeks, she’s been enjoying pure, clean water as we prepared her for the finish line. Her leaves gently faded to gold, signaling her maturity, while the trichomes turned from cloudy to amber — with about 15% showing that deep golden hue we were waiting for.
She grew strong and vibrant thanks to the outstanding genetics from Zamnesia Seeds, and we’re beyond grateful for this opportunity to cultivate such a top-tier strain. Her structure, aroma, and resin production were truly impressive.
A massive thank you to Plagron as well — your nutrients have once again proven to be the perfect fuel for our grow. Easy to use, reliable, and effective — we couldn’t ask for better support for our plant’s development.
Stay tuned — soon we’ll share the dry weight and a full smoke report. But for now, it’s time to celebrate the harvest!


Likes
44
Share

@Miketama
Follow
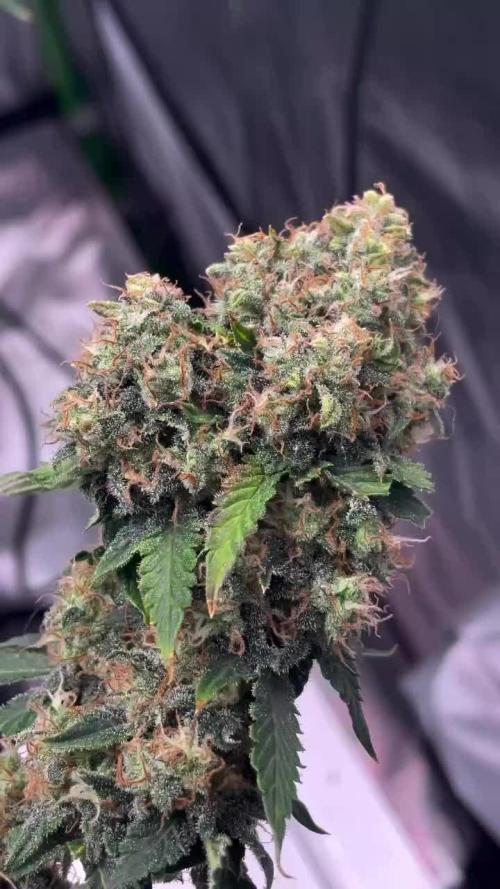
Harvest day! Cut her down at day 73 from seed. 170g wet off one plant, not a heavy yielder, but this particular pheno just grew that way. Buds are super compact, stacked calyxes, minimal sugar leaves, honestly a pleasure to trim. Smell is floral but complex and hard to pin down, not a typical profile. Can’t wait to see what she’s like after cure. ✂️🌸

Likes
Comments
Share


