The Grow Awards 2026 🏆 


Likes
Comments
Share
@Gumbassman
Follow
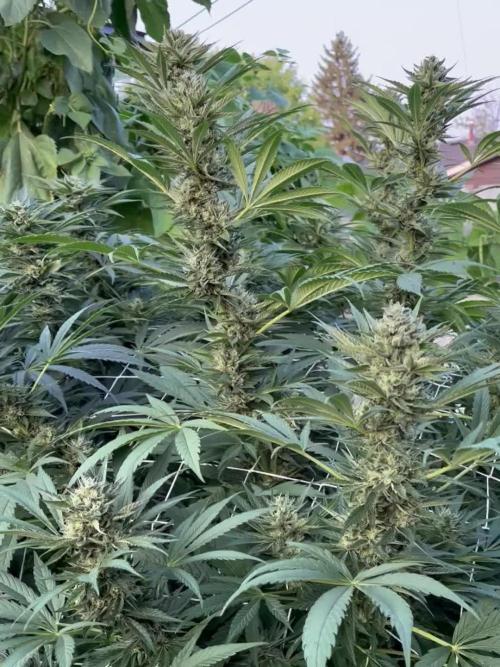
Just began flower, smells a little, but coming along, also with hips of bud sites. Some buns from net nut mix.

Likes
5
Share
@BB_UK
Follow
This girl is amazing! She Held out another week before flowering and could be the biggest because of that but only time will tell as the Lemon pie and forbidden runtz are topped 😊 so stay tuned! Will tidy the fan leaves and lower unnecessary stems away next week! Thanks for stopping by gromies! Fastbuds are the best hands down!
Likes
9
Share
@Lazuli
Follow
Final 2 weeks the leaves start to fade on their own, today i stared feeding ripen
The buds look weird but frosty
The smell is insane
Likes
18
Share
@Northern_Ent
Follow
Sep 6: Tropicana Cookies FF is doing great. Maybe not as much flower maturation last week as I expected but we’re just starting week 8 of flowering. So likely the end of September which is fine for the late start on this plant.
Sep 7: decided on a final top dressing of malted barley and Power Bloom. Seems they need a bit more P.
Likes
4
Share
@805homegrown
Follow
Looking very nice for my first indoor plant with what I had to work with I am satisfied so far

Likes
45
Share
@masterofsmeagol
Follow
8/14 Everything looked beautiful this morning. Seems like I've got the watering schedule down better. I do have one gmo that looks hungry so I need to increase nutes. At least on that plant. Toasted toffy has little spits that could be water marks, pests or septoria. I don't think it's septoria. In the pastvi lost far more leaves when I had septoria. I've been crazy busy. I'm surprised things are going this well. I need to put up the final supports so I can add to them once I've got big heavy buds. I was really stoked to see everything doing so well. The plant in the 50gallon is the furthest in flower. I'm so grateful to have the ability to grow high quality cannabis for myself amd my wife. There's nothing quite like it. That hash I made turned out great. I think I'll press it today. Supports will be done this week. Saw a few aphids on the plant I cut down. Earwigs aren't here this summer or there would be NO aphids. Plus when I cleaned out the insides this morning I found some dead leaves WAY in the middle by the stalk. They would've eaten that shit if they were here. Birds and other predators seem to be keeping pillars at bay. I'm not seeing the damage and when I do sfind one it's absolutely tiny like a newborn. I'll think about whether I need to spray BT.
8/15 That fucking cancel button always fucks everything out. I was done no I need to start over. Didn't water last night. Found pm on my gmo in the 30. Interior of the plant. Should've defoliated better and earlier. Oh well. I'll treat with k bicarb or plant doctor. I'll have to think about it. Other plants are looking good. Well they all are. I just hate pm. I can't isolate it due to local laws so it is what it is. Nothing I haven't dealt with before. Watered today. The middle gmo in the 30 got 1.5 gallons. The other plants each got a gallon. Including the one in the 10gal and 50 gal. Its supposed to rain but only like .1. I also chose to feed today. All plants got a gallon. I DID NOT WATER THE EVENT HORIZON IN THE MIDDLE AND THE SHERB PIE AS THEY WERE PRAYING AND HEAVY. I need to get these supports up. I'll update as I go.
Oh and one thing I remembered is that, I didn't properly sanitize the trellis nets I installed on the plant that has pm (non visible today but still). I harvested the plant that used that bet last year was harvested in two stages. The bottom I let go way later and ended up with a little pm on the stuff I left for hash material and it got some pm. I wonder if that's whete this came from.
8/16 Death in the family this morning. I couldn't decide if I should use organocide plant doctor or not. It's a systemic It's been discontinued and reformulated. It's a systemic fungicide. Instead I mixed two tsp potassium bicarbonate with a little dawn in a half gallon mister. I used gloves and defoliated everything that had pm on it. I checked the plants next to it and luckily it hasn't spread yet....but it will. I feel safer using the k bicarb. I'll do more research and try to find the best way to tackle this. I don't want to get rid of the plant and due to local ordinance I can't isolate it. If I can keep it to this one plantvthat would be fine. I'd just use it for extracts. So glad I didn't use all that netting and put up tjosr supports. I'll need to disinfect them if I decide to use them. We'll see. Plants are coming right along flowering.
WENT BACK OVER AND DEFOLIATED A BUNCH OF fan leaves and interior stuff to promote airflow. Still saw pm on that plant u had treated earlier with k bicarb. I can't isolate due to laws and I'm not willing to discard this massive monster cropped plant. So I'm going to treat it. I started by removing everything infected and improving airflow on that plant and all the others. I didn't make it to one event horizon. I plan to treat the infected plant with Organocide Plant Doctor since its what I have on hand and I've had good luck. It's a systemic. After I treat the one plant and see that it didn't hurt the plant I'll use a preventative dosage on the other plants. I've battled wpm several times. This is something I'm very familiar with. What sucks is it's totally my fault it happened due to grower error. This has set back me puttingvup my supports as well. Plants look good woth a haircut. Also the toasted toffy had some leaves removed with spots that looked like septoria. I think nutes havecreally kicked things in gear. Now there are little buds on plants.
8/17 BAGS still seemed heavy so I didn't water. It's been MUCH cooler. It's 63 at 9am. It would normally be 80 by now so maybe they aren't using as much water. I watered the the toasted toffy I missed last round but the Sherb Pie still had weight to it. I also watered the GMO on the far side and the one in the 30 as the seemed a little lighter. I looked in and I couldn't find a SPOT of powder mildew on the plant! I know it will come back but on this 100% rh day there isn't a spot I can find! I'm going to go check on them later today. Do some more defoliation and treat the plants with Plant Doctor to try to mitigate the spread of the P.M. Very suprised the k bicarb worked like that.
WENT BACK OVER AROUND 11. I WATERED THE TWO THAT DIDNT GET WATERED LAST TIME. THE EVENT HORIZON AND THE SHERB PIE. IT WAS COLD AND OVERCAST. TEMPS HAVE BEEN MUCH COOLER. SOON AS I WATERED THE SUN CAME OHT AND THE TEMP WENT UP. I WENT THROUGH THE PLANTS I MISSED AND SEFOLIATED LEAVES AND INTERIOR BRANCHES TO INCREASE AIRFLOW. SURPRISED TO STILL SEE NO PM WITH 100% HUMIDITY. I WENT THROUGH EVERY PLANT. ILL NEED TO GO TJROUGH AGAIN BUT TJIS IS MUCH BETTER. THE TOASTED TOFFY THAT MAY HAVE SEPTORIA I WILL TREAT TONOGHT WITH PLANT DOCTOR. I REMOVED ANYTHING LOOKING INFECTED. I LSTed THE BIGGEST BRANCHES WITH CLIPS TO THE BAG AMD TWINE. SO AIRFLOW IS MUCH BETTER. I THEN REMOVED A BU CH OF THE MIDDLE. I COULD TAKE MORE BUT ON OUTDOOR HARVESTS THAT LITTLE STUFF GOES IN EXTRACTS. I PUT A FEW HOURS IN TODAY. IM GOING BACK AND ILL TEST THE PLANT DOCTOR ON THE TOASTED TOFFY. BUT IF THE K BICARB WORKS THIS GOOD ILL JUST KEEP USING THAT.
8/18 It started sprinkling when I left this morning. I did more defoliation on a few different plants. Including the healthiest GMO. It seems like things should be further in flower but it is what it is. I'm not doing clones again. Only reason I did is because I lost my 72 seedlings and depleted my seed supply. I hate treating pm. Lost Coast Plant Therapy I'd really whete its at when it comes to treating pm. I might just order that. My commercial buddy told me that he wouldn't use the plant doctor and not to "spray shot all over my plants". He's probably right. I see something small and try to overcurrent. I dont see any more septoria looking leaves on the toasted toffy since I lsted it and removed damaged leaves. I was going to use the fungicide plant doctor on that and then use it ad a preventative. He's probably right. I've put a lot of work in defoliation and such. It WILL spread but it hasn't yet. I removed what I saw. I was going to hit it again with k bicarb but it said it should be weekly treatments.i hope I'm doing things right. I shouldn't be this worried about pm but I've got am anxiety disorder. I'll fully sterilize (AGAIN) my posts and trellis netting before I instal it. I'll probably go check on them later. It's hard to avoid pm with 100% humidity and 30° temp swings. I've got a few lights so maybe this winter I'll do indoor. I'll try to keep this updated. LOOKING BACK AT PRIOR DIARIES I GUESS IM RIGHT WHERE I SHOULD BE FLOWERING WISE. I JUST HAD A COUPLE REALLY EARLY PHENOS A COUPLE TIMES.
8/19 Defoliated some more stuff amd tried to improve airflow. Humidity is high and it was sprinkling earlier. I think we'll have showers. Not seeing much pm. MAYBE a little in the middle of that middle gmo but it could just be residue. I'll treat it again with potassium bicarbonate soon. If that doesn't work I'll switch up treatments. I've got citric acid amd some other stuff too. I almost ordered lost coast last night but decided I'd wait to try it out. The toasted toffy has SOME spots that look like septoria. It's the second furthest in flower and very indica leaning. It seems to be flowering vigorously so I don't want to fuck with it too much. I could use plant doctor on it and see what happens but I'm going to monitor for a few days after defoliating.
WENT BACK OVER AROUND 4 AND SHOOK OFFCTHE PLANTS. HADNT RAINED MUCH. BAGS ARE STILL HEAVY. THE TEN WAS LIGHT AND THE EVENT HORIZON BESIDE IT SEEMED A LITTLE LGHT AS WELL. I THINK IT MIGHT BE ME COMPARING THEM TO OTHER PLANTS THAT ARE SATURATED. SEEING HOW THEY BOTH LOOKED THE BEST IVE EVER SEEN THEM I HELD OFF WATERING. ITS ALSO SPRINKL9NG AMD GOING TO RAIN TONIGHT. ILL REASSESS IN THE MORNING. PLANNED ON USING PLANT DOCTOR ON TOASTED TOFFY BUT DECIDED AGAINST IT PARTIALLY DUE TO THE RAIN. PARTIALLY BECAUSE I PUSSED OUT. I WANTED TO FEED. IVE NOTICED SOME FADE AND PLANTS PUSHING AND TRYING TO GET OVER THE FENXE INTO FLOWER. THE TOASTED TOFFY AND THE UNKNOWN IN THE 50 ATE THE FURTHEST ALONG AND DEVELOPING ROCK HARD BUDS. GMO HAS A MASSIVE STRETCH. THINGS CHANGE DAILY. I WANTED TO GET A GOOD DOSE OF NUTES IN SO AFTER THIS LITTLE BIT OF RAIN WHEN WE GET THAT NICE SUNSHINE MY PLANTS WILL TAKE OFF!! THEY'VE BEEN PROGRESSING FAST DESPITE THE SHITTY WEATHER.
8/20 It's still sprinkling. It SAYS WE got zero rain yesterday but that's just not true. Today is supposed to be light showers with like .02 in 9f rain. I mixed up some water to check the plants. I figured a few would he light. The event horizon on the back SEEMED a little light. So did the one invthe ten. I realized it was just comparing it to the bags that were saturated. Still I ended up giving the event horizon in the back a half gallon and split the other half with the one in the 10 that dries out super fast. It's crazy. The weather just abruptly changed one day and I go from watering twice a day to hardly at all! Everything but the sherb pie and the seedling in the 10gal are vigorously flowering. Upping the nutes was a smart move. The seemed to like it. I'm gonna check later and as soon as I can I'll hit that toasted toffy with plant doctor. That's tied for furthest along in flower. I've done a bunch of research and I think this is the right move. I'll keep this updated. After this small patch of shitty weather we are goingvto get some sun amd these girls will EXPLODE!
WENT BACK OVER A FEW TIMES. LAST AT SIX. I DID SOME DEFOLIATION AND PRUNING OF PLANT INTERIORS. ITS ABOUT TIME TO TREAT THE TOASTED TOFFY AGAIN WITH PLANT DOCTOR. I CAN SEE SOME SEPTORIA SPOTS. I TREATED THE EVENT HORIZON THIS MORNING. IT GOT A FEW HOURS BEFORE A LITTPE RAIN WND THEN SUNNY AND 80. I USED BETWEEN A QUARTER AND HALF GALLON ON THE INE PLANT. I MAY NOT HAVE USED ENOUGH OF THE MIXED UP SOLUTION ONVTHE TOASTED TOFFY. IT HAD BEEN WORKING AWESOME AND NOW THAT ITS TIME TO REAPPLY I NOTICE A FEW LEAVES THAT LOOK INFECTED. OVER THE NEXT WEEK ILL BE MONITORING THE RESPONS FROM THE PLANT DOCTOR. I'M CONSIDERING APPLYING PLANT DOCTOR TO THE REST OF THE GARDEN. I THIBJ THE K BICARB HAS BEEN DOING GOOD KEEPING THE PM DOWN ON THE MIDDLE GMO. I HATE THAT I HAVE TO FIGHT DISEASES. IM NOT DOING CLONES AGAIN. AND IM GOING TO BE MUCH CLEANER. THE SHERB PIE LOOKS A LITTLE OVERWATERED AND HAS SOME YELLOW LEAVES BUT MANY HAVE TURNED PURPLE AND OTHER FALL COLORS. THE PLANTS ARE AGGRESSIVELY FLOWERING AND TEMPS ARE CHANGING. STILL IN EARLY FLOWER. IVE GOT A GOOD FEELING. IVE DEALT WITH MUCH WORSE AND CAME OUT GOOD.


Likes
10
Share
@cjaygrows
Follow
Buds are super frosty and sticky, smell like sour dog shit I couldn't ask for anything more my best grow yet


Processing
Likes
5
Share
@Mr_nugs_lover_David
Follow
Wonderful haze berry pheno, looks super pretty, this pheno number #1 looks very "perfect" because of the shape of the leafs and so. She's gonna be an awesome plant, let's see what I can Do guys! 💚🌱💎❤️👨🌾

Likes
64
Share
@ClubRiot
Follow
The weight of these buds is unknown, but the Masters of this site will be visually approximate. I have all the confidence in their knowledge in elementary physics.
Likes
11
Share
@Madman2020
Follow
Generative steering
Day 30 sprayed with Jas
Day 31 noticed spider mites


Likes
89
Share
@nonick123
Follow
Día 42 (27/02). Riego 1,25 Litro H20 + Wholly Base 2,5 ml/l + Solid Green 1,5 ml/l + Rise Up 0,5 ml/l de Gen1:11
TDS 898 PPMs - pH 6,5 (mínimo ajuste con pH+ para subirlo desde 6,2)
Plantas sedientas con un intervalo de riego cada 4 días. A partir de ahora regaré cada 3 días
Día 43 (28/02) Las ramas crecen muy rápido y se van colocando para recibir el máximo posible de luz. Es impresionante su evolución día a día!
Día 44 (29/02) Han crecido 17 cm desde que cambié a 12/12. Alucinante! 😍😍😍
Día 45 (01/03) Riego 1,25 Litro H20 + Wholly Base 2,5 ml/l + Solid Green 1,5 ml/l + Rise Up 0,5 ml/l de Gen1:11
TDS 891 PPMs - pH 6,25
Añado un poco de substrato al top y a los bordes de la maceta antes de regar, porque se ha compactado ligeramente.
Día 46 (02/03). Las plantas siguen su crecimiento imparable. 3 cm al día 😍
💦Nutrients by Gen1:11 - www.genoneeleven.com
🌱Substrate PRO-MIX HP BACILLUS + MYCORRHIZAE - www.pthorticulture.com/en/products/pro-mix-hp-biostimulant-plus-mycorrhizae
🎚️Controlled by TrolMaster TCS-1 Tent-X System Main Controller - https://www.trolmaster.com/Products/Details/TCS-1
Es genial tener el TrolMaster TCS-1 Tent-X ya que puedo tener una visualización rápida de la temperatura y la humedad en tiempo real, y también de las últimas 24 horas y de los últimos 7 días (week)
Así puedo ir ajustando la extracción para tener una VPD ideal, y tener una pantalla que te indica si estás en rango, en función de si estás en Fase Vegetativa, Floración o Stress
Es genial a su vez tener un tabla / grafico visual de VPD en función de las fases. Mira las últimas fotos para ver esta tabla tan interesante! ("Trolmaster VPD Graph" photo)
Likes
12
Share
@Smokwiri
Follow
Welcome to my Umme diary
Almost finished...
Letting it grow a bit longer...
Growing with MarsHydro sp3000
Umme
Brownie Scout x Blackberry Moonrocks®️
Genetics: mostly Indica
Yield: 550g/m² • up to 700g per plant
flowering time: 8-9 weeks
THC: up to 30%
Aroma: blueberries, sweet
UMME, feminized seeds
Our Umme is a unique personality, she is incredibly strong, full of life, shows an extraordinary interest in cannabis and delicious flavors and is probably one of the friendliest beings on our planet. Umme is a Vietnamese Pot-Bellied Pig lady and she inspired us to name our new THC-rich strain after her. Both she and our new cannabis strain are real heavyweights with an irrepressible energy.
For UMME we have crossed a particularly aromatic Blackberry Moonrocks and a Brownie Scout selected for potency. We have thus created a unique genetic basis for an outstanding new and extremely potent strain that will certainly be found in numerous varieties over the next few years. And how could it be otherwise, Umme has become a real queen and a bud machine at the same time, producing excessive amounts of resin, buds and intense effects.
The large, dense, resin-drowned flowers often get a beautiful purple color. The buds can reach a massive THC content of up to 30% and are therefore far too strong for many beginners. In addition to the extremely thick layer of white trichomes, it produces a fascinating aroma that is addictive. This is reminiscent of blueberry cake and has notes of cinnamon and vanilla.
The high is overwhelmingly powerful. It gives you a feeling of deep joy, euphoria and pervasive relaxation like you’ve never experienced before. Mind and body are wrapped in a fluffy cloud and it becomes impossible to get up from the couch. The cerebral effects expand the senses and create an impressive feeling of bliss. Stress and worry are shot into another galaxy as space and time reach a new dimension. The effect and the diverse terpene profile make Umme an unforgettable experience.
Those who make clear concentrates or distillates will love the strain because it naturally produces such a highly concentrated amount of THC.
Growing UMME
The indica dominant strain has a flowering time of 8-9 weeks and produces high yields of 500-550 g / m² with no problems under good conditions. Outdoors, the strain reaches a height of 200-250 cm while indoors it grows to around 115-130 cm. The plants from the seeds develop quickly and are amazingly vigorous and hardy. No grow is really complete without the hassle that it upsets everything that has existed.
Medical Use
The strong physical calming effect helps to relieve pain, stress and muscle tension. It ensures a deep sleep and helps to calm down after a stressful day.

Likes
7
Share
@Cultivatorcarlos
Follow
No bug or disease problems. I even took her off veg nutes way too soon and she recovered like a fucking champ. I’m popping two more this week. Unfortunately i didn’t weigh it because Of some very unfortunate circumstances that I was dealing with at the time. I essentially had to vacate my premise within 24 hours. A few days after harvest. Anyways. I ended up smoking the whole thing with my friends and it was straight fire. The terps were crazy also. Super sweet. After curing she had a very sweet smell like bubblegum / grape. This was only my second harvest ever.

Likes
19
Share
@Foggedaboudit
Follow
Flush is on. A week or so I reckon. 90% of trichomes are already cloudy. The smell is so complex! The colors amazing! Can’t wait!

Likes
52
Share
@GuerrillaNo_4
Follow
UPDATES:
- Temp drifting 1-2'C higher due to weather changes.
- Nutes changed slightly.
- VPD increase of 0.15kPa.
- UVB introduced. (2 hours a day at 30cm, mid light cycle)
GENETICS:
-MSNL - Gorilla Glue Auto ~ my favorite strain, as you can tell by my username!
WATER:
-Condensed (Starting at 40ppm)
-Disinfected prior to adding nutrients etc. (Using COOSPIDER UVC - 253nm & 187nm bulb)
CLIMATE:
- Ambient Air Temp = 28/30'C ~ 26/27'C LST ~ Leaf to air temp variance of between 1-2'C
- Night Temp = 22/23'C ~ Day/Night temp differential 6-7'C
- Under Canopy Temp: 26'C (Day) ~ 21'C (Night)
- Relative Humidity = 50-60%RH (Avg. 55%RH)
- VPD = 1.45kPa (Avg.)
- Co2 ranges from 900ppm to 1500ppm (Avg. 1200ppm)
AIR PRESSURE:
- Ambient Air Pressure (outside tent) = Mean Avg. 1010 mbars (101 Kilopascals)
- Actual Air Pressure (inside tent) = Mean Avg. 1005 mbars (100.5 Kilopascals)
- Air Pressure Differential = up to 0.5 kPa range between inside & outside
LIGHT:
- MIGRO UVB310 ~ 2 hours daily mid light cycle.
- Warm White 3000K/White 5000k/Far Red (660nm)
- At plant canopy = PPFD 900-1000umols/s/m2 ~ Lux 45,000-55,000 ~ Daily Light Integral 55-65
- Under canopy lighting ~ Blue (460nm)/ Red (630nm)
NUTRIENTS:
- Mostly Advanced Nutrients (For base nutrients and most additives, as only company I could find scientific data on)
- Canna (For Calmag Agent and Cannazym)
- Plant Success (Great White Mycorrhizae)
ADDITIONAL GROW TECHNIQUES:
- Mostly getting out of the plants way and letting nature take its course.
- Some LST. (i.e. tying down branches and tucking large leaves away)
- No HST or Defoliation.
INFECTION PREVENTION & CONTROL:
Infection control practices i.e
-PPE, Alcohol Hand wash
-Gray room outside tent,
-Carbon filter
-HEPA filter
-Plasma Ionizer
-Inline UV-C germicidal bulb
- Also using an additional higher powered COOSPIDER (UVC) 253nm & 187nm bulb, to disinfect the gray room outside of the tent once a week for 30 mins.
- Ozone (o3) gas that is produced using the COOSPIDER, is then directed into the tent to further control any unwanted pathogens.
- Ed Rosenthal (Zero Tolerance organic pesticide), sprayed once a week as preventative measure. On hand for heavier use (Once every 3 days before lights out for 15 days) in the case of an outbreak
(No outbreaks yet, due to aforementioned preventative measures)

Likes
21
Share
@Mosquito_Haarlem
Follow
White Truffle Automatic exceeded expectations in terms of aroma, resin production, and especially yield under a modest 100W LED.
The sativa-like scent gave the whole thing a surprising old school twist.
Perfect for growers looking for top quality in a small space.
Another topstrain from Zamnesia 👌


Likes
8
Share
@I_Identify_As_A_Dan
Follow
Week 10 for Ztrawberry by Greenhouseseedco,
Her colour is getting so much better! Look at that darker green coming in with the new growth. Still needing her to toughen up a bit before we get into flower.
