
Likes
Comments
Share


@Hippity
Follow
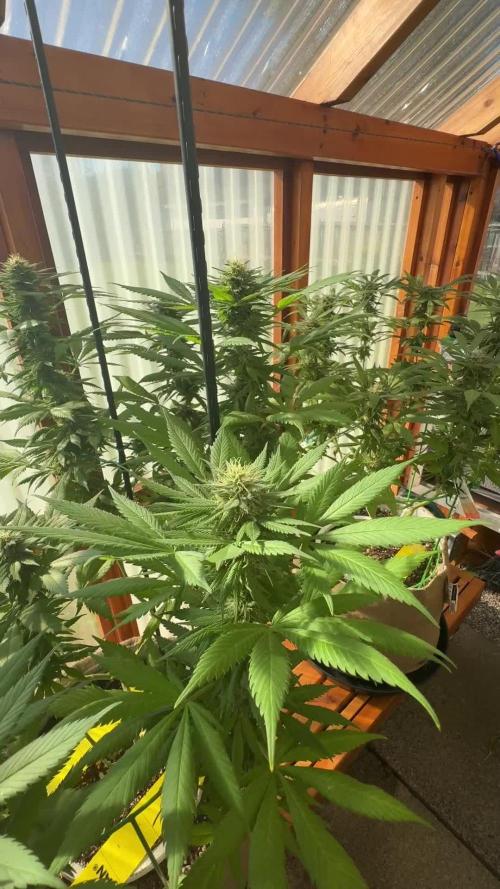
The girls look healthy, happy, and smell delicious, kinda sweet citrusy. I'm overall satisfied so far. They have some crystals forming on them as well. I feel like it's gonna be a successful grow. But don't think I'm gonna use Green-O-Matic again, it's not as short as I wanted it to be, and it has unstable phenotype. I hope the effects are nice and relaxing though.

Likes
12
Share

@cultivars
Follow
OCTOBER 11h to OCTOBER 17th
Sunrise: 08:20 | Sunset: 19:03 | Total Daylight: 10:43
This was another pretty good week for weather, however the last couple of days have been cloudy with rain, causing some spikes in greenhouse humidity. Temperatures for the most part have been good, with one overnight low in the greenhouse of 13C.
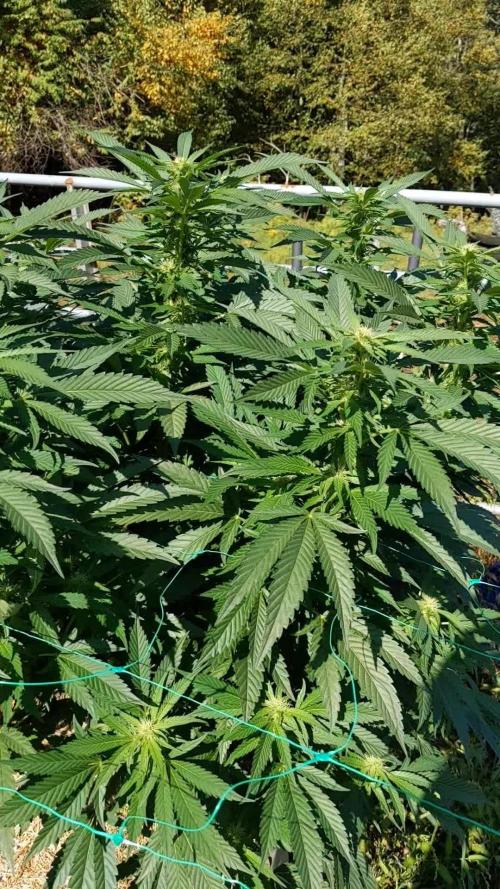
Purple Romulan is doing well but is the furthest behind in reaching maturity of all specimens in garden. Flowers are of decent size, with adequate trichome production.
Greenhouse is emitting very strong smells now, mostly a sweet skunk scent.
Weather forecast appears as though it will be adequate and manageable temperature wise for the next week.
DAY 155
Greenhouse 13C in the morning, with outdoor temperatures down around 3C (frost evident on rooftops in area). 500mL drip of plain rainwater to all specimens.
DAY156
1L hand water BTI treated rainwater (no additives); Greenhouse held to 18C overnight, humidity a little high (51%) but dropped as sun rose; Overcast day.
DAY 157
Beautiful sunny day, with warm temps; Greenhouse was 18C in the morning.
DAY 158
-1C in the morning outside, 13C in the greenhouse, which is fine. Nice sunny day.
DAY 159
Overnight low outside 5C, 17.5C in greenhouse, which is ideal. Humidity in check, at 41%. Cloudy, overcast day, with greenhouse heater working to maintain day-time temps of 21C (no solar energy to drive heating).
DAY 160
Greenhouse 14C in the morning, 3C outside. Humidity at 41%; Clear morning, with some sun, turning cloudy with light rain in the afternoon, resulting in a humidity spike in greenhouse to 50%.
DAY 161
Lots of rain overnight, causing spike in greenhouse humidity to over 60%; Will require monitoring; Temps in the morning 18C in the greenhouse, mild outdoors.


Likes
10
Share


@Deniguez
Follow
Siamo quasi giunti al termino di questo ciclo.. queste bestie si sono dimostrate forti, e trasudano terpeni da ogni parte. Son davvero curioso di ció che sarà il prodotto finale!

Likes
29
Share


@growsmoke420
Follow
Not much to Update. Still Growing along n filling in. Still Watering Her every other Day with Note Feedings every 3rd Watering. Leaves are Yellowing so Hopefully She'll Ripen n Come Down soon.

Likes
27
Share


@adam_pawloski87
Follow
Let’s go day 43!!!! Week went real well , girls started preflower so sometime this week I will be switching up the nutrients for flowering! We are stable and looking super healthy! Can’t wait to see what these ladies do this week! Hope you all enjoy !

Processing
Likes
12
Share


@PickleRick
Follow
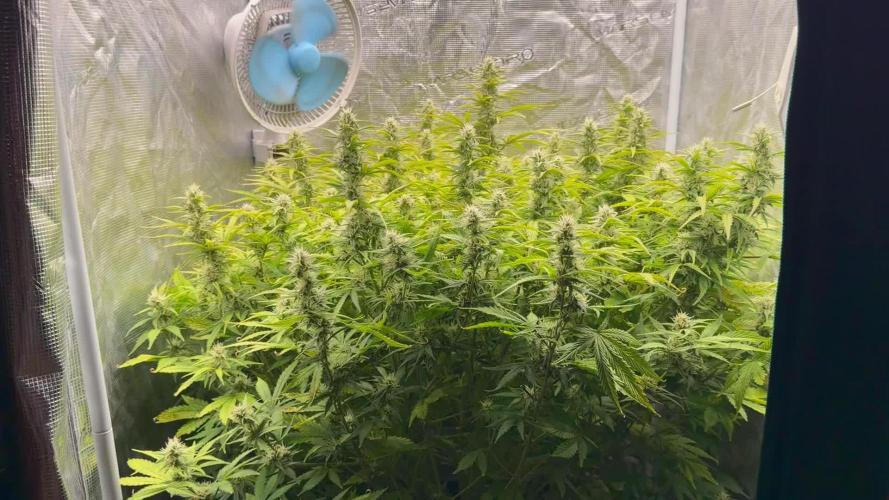
Girls are about a week out or so! Girls are fattening up each day and trichomes are starting to go milky. Harriet (left) has been having trouble with pH dropping but she's still drinking. I ended up removing about 2 liters of solution and put pH'd water to lower the ppm. Seems to have helped bring the pH up to about 5.3 (up from 4.1) but will continue to monitor.
I noticed the leaves are starting to discolor on the serrations, and got a slight tip burn, so thinking dropping the ppm a tad was good? Lol
Haven't totally decided when and how long (if any) flushing I'll do. I see conflicting info and anecdotal evidence to it's effectiveness. Guess it's time for some soul searching 🤣
See y'all next week!!

Likes
14
Share


@Cannabot
Follow
Transplanted into final this week,both have started pistolling so I'd say from next week it will be 1 week flower.My dog chomped on one or 2 leaves which really pissed me off...OCD like that
Likes
4
Share

@Minuteman_Organics
Follow
The girls are doing great. Some are much further along than others which is a little worrying. Seems like some are in week 4 while others are ending week 2. Hoping for a dry mid October for the late finishes

Likes
9
Share


@41310a
Follow
Cultivation was very easy in terms of vegetation and up to half of flowering, where I encountered difficulties and ended up postponing their harvest.
drying Purple presented 220g wet and 39g dry. I can smell a fruity scent on it and I see a lot of resin. I'm happy with the result but I still want a 50g plant.
Likes
5
Share


@Bryankush
Follow
Giorno 1 molto bene le ragazze sono in ottima forma e questa sarà l'ultima settimana di veg.
Lei è veramente molto in forma😁 quindi ho deciso di fare su di lei un esperimento, cioè pizzicare il ramo e piegarlo nella posizione che voglio. È la prima volta che pratico questo quindi non so nemmeno se lo fatto nel modo giusto, ora vedremo se basterà e come reagisce. Ps:non ho tolto nessuna delle splendide prendisole!! Le ho soltanto spostate fuori dai coglioni
Giorno 2 defogliazione e Lollipopping
Giorno 3 stamattina la pianta si era già completamente ripresa🤬 quindi ho pensato di piegarla ulteriormente e per sbaglio ho finito per spezzare il ramo😤. Mi serviva di lezione dato che non avevo mai fatto questa pratica prima quindi va bene così. Ora lo fasciata a un pezzo di legno e speriamo che entro martedì stia bene per andare in fiore🙃.
Giorno 5 annaffiata con 2L
Giorno 6 da oggi 12/12

Likes
Comments
Share

Likes
21
Share

@IslandTerps
Follow
Strain: Barney’s Farm – Mimosa x Orange Punch
Grow Type: Indoor
Pot Size: 5 Gallon
Medium: Peat Moss & Perlite
Nutrient Line: Athena
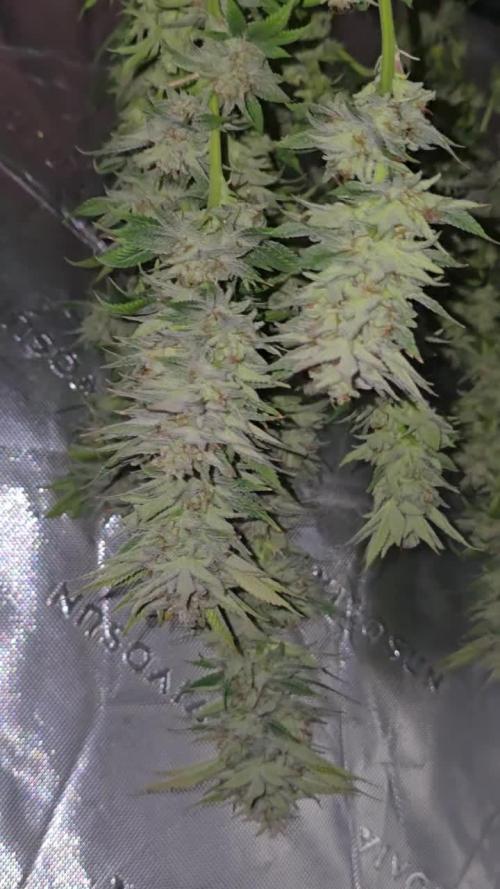
Week 20 Update
Sorry for missing the last two weeks of updates things were very hectic on my end. Glad to be back for Week 20, and I’m also looking forward to the harvest entry soon. This week she was flushed with plain water and then chopped. She’s now hanging to dry, and the buds are looking frosty and full.
Feeding
Flush with plain water before harvest.
Indoor Climate Conditions
Day Temperature: 25–27°C
Night Temperature: 21–23°C
Humidity: 50–55%
Drying Climate Conditions
Temperature: 20–22°C
Humidity: 55–60%
See y’all next week!

Likes
9
Share


@SuperSmoker
Follow
check out my youTube and show some love!!
www.youtube.com/superiorsmoker


Likes
46
Share


@Ju_Bps
Follow
Hello my friendly growers,
This end of week, smeel the end of the plant,
Trychromes of today look plant ready to harvest so I ll harvest tomorrow.
See you in few day for the result of harvest.
Thanks to follow and like me,
Nice community 😍🤩
Have a good week


Likes
101
Share


@Papablob
Follow
10/05 Allez! une semaine de plus.. Elle commence juste à ambré.🙂
12/05 J'ai du faire une bêtise.. 😕un truc qui l'a bloqué en début de maturation.. 😰 qui a stoppé l'émission d'odeurs aussi.😕 Mais je l'aurai! 😣 Je vais me la fumer celle-ci aussi. et toc! 😛
Likes
18
Share


@Hashy
Follow
This is a fastflowering test strain and I have no real information on the genetics. I flowered her for quite a while to get the lowers that lacked the light develop more.
I trimmed her after 15 days of drying and got 31g of decent buds and 12g of larfy buds that will go with the trim to make some hash.
Power used for whole grow in 114 days.
Lights=201.7Kw (201.7×0.25)(=£50.42)
Rad=212.23kw (212.23×0.25)(=£53.05)
201.7÷114=1.769kw per day light average.
Average 100w for veg
Average 150w for flower.
Light average for grow 125w.
Stats for the grow.
FFNA2410=42g
FFNA2411=45g
FFNA2412=43g
Acapulco Gold=44g
Expected hash from trim 28g
Total=174g
174÷125=1.39g/W
Likes
13
Share


@Skinnytalls420
Follow
Day 44-21/05/22 everything is looking good I might take them out tomorrow do some light defoliation and move them about abit not sure yet!!!!
.
Day 47-24/05/22 they look real good today!!!!
Likes
12
Share


@chrisss
Follow
Day 57) nothing
Day 58 ) Fed ph”d recharged water, half a gallon
Day 59) nothing
Day 60) Fed calmag and bloom , lotta calmag cuz I see cal def
Day 61) nothing
Day 62) flush with 2 gallons of phd water
Day 63)
Likes
Comments
Share


@Cygi86
Follow
We have Monday today and we starting week 4, girls are after trimming and low stress training… everything going well