
Likes
Comments
Share


@NLHydroponics
Follow
This week I started her LST and bent her top over as far as possible without snapping and locked her in place. I use soft wire "Gear Ties" sold in the hardware section of most places. I got mine at Home Depot. I highly recommend these for anyone serious about Lst.
I kept her in this position for about 4 days before adjusting placement and pulling the main top back down below the lower branches.
I have been maintaining the same feeding schedule "week 4 hydro" 3/4 str main nutrients, 1/2 str Open Seasame.
She started showing preflowers on me even though it's been in an 18/6 light cycle. So that's why OS and week 4 feeding was opted.
Even though the plant was technically 2 months old, she's only been fed and treated right for 2 weeks now. So week 7 from seed, I started at the week 3 schedule.

Likes
11
Share


@BruWeed
Follow
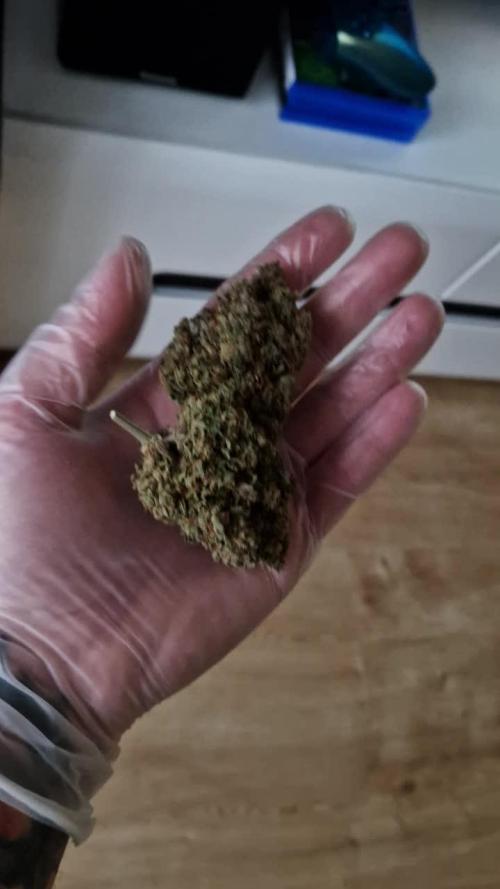
🍀21/07 - Ya se encuentra en etapa de secado.
🍀El lunes le agregue 30L de agua y 10ml de Top Wash.
🍀Esta planta se encuentra mas resinosa y densa que la otra que también cultive.
🍀Todo fue perfecto desde el momento uno, no tuvo ningún problema en toda su etapa de vida.
🍀Tiene mucho olor, a caramelo o crema, todos sus cocos son densos y gordos.
🍀En total dio 163g.
🍀En estos días seguiré subiendo mas imágenes de como viene.
😶🌫️🇦🇷🍀Podes seguirme en Insta gram como @bruweed_arg🍀😶🌫️🇦🇷

Likes
5
Share


Likes
5
Share


@beer420
Follow
Flowering time!
What a week.. The two girls are getting huge! Realise when seeing this tent of two (!) plants, that you are watching autoflowers! The genetics on these are crazy.
With the added training each developt 3 or even 4 fully main stems. The amount of bud sites is just crazy and I'm expecting a big yield.
The only nutrientes I used are the boosters from RQS. I just reguarly add these with waters and thats it! Nothing less nothing more. You already see them getting frosty.
Really excited and amazed!
Anyone can sport which of the two is the Bubble Kush and which is the blue cheese?
Greetings everyone!


Likes
8
Share

@GREENPHOENIX6262
Follow
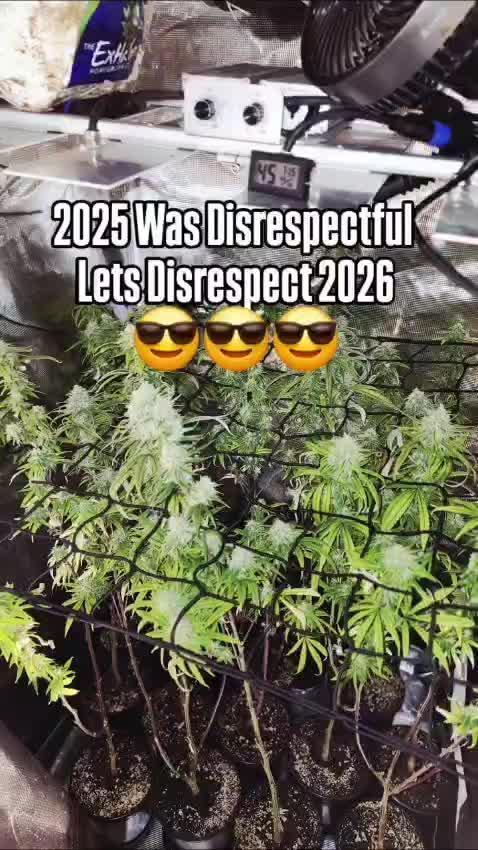
12/30 - Dropped the 3x3 net for spacing - Micro dosing Silica and Green Planet through harvest - Sick plants have bounced back and are flowering accordingly - Update concluded 😎😎😎😎
Likes
3
Share

Likes
39
Share


@MrSpooky882
Follow
Jetzt wirds spannend es neigt sich dem Ende, die Farben werden immer schöner und die trichome werden immer mehr und mehr und alles wird lila einfach herrlich 😁
Ich habe beim letzten düngen den biobizz bloom gegen einen hesi Mineral Dünger ausgetauscht weil mein biobizz Blüte Dünger leer war, ich hoffe Ich habe damit nichts zerstört 😅😏🙄
Ansonsten wird nur noch mit Wasser gegossen in 2 Wochen is schluss 😏😁👌
Likes
28
Share


@No_Clout
Follow
Hopefully will be starting flush next week seeing how it is, gonna do a two week flush, yes it is coco but I want a proper flush this time round so o can get that thick white ash we all know and love instead of some nasty dark gray/Black.

Processing
Likes
Comments
Share


@MG2009
Follow
06/01/2020
Time to make the seeds!
First my Cookie Cake F1 plant is a 7 star cookies male
(Top dawg seeds) X a female Captains cake clone
(Captains connection) and will be growing TLO Style.
7 Stars Cookies Strain | Marijuana Strain Reviews
50% Sativa /50% Indica
THC: 22% - 27%
7 Stars Cookies is an evenly balanced hybrid strain (50% indica/50% sativa) created through a potent cross of the classic F1 Durban X Girl Scout Cookies strains. This potent bud is infamous among cannabis users for its super high potency and long lasting effects that are perfect for any hybrid lover. The 7 Stars Cookies high starts with a rush of cerebral effects that rush though your mind, lifting your spirits and leaving you blissfully happy and unfocused. As your mind flies higher and higher, your body will begin to slip away into a state of deep relaxation that leaves you totally stoned and out of it. A sharp pang of hunger comes next, leaving you with a ravenous case of the munchies as your mind slips in and out of calming sedation. Thanks to these effects and its super high 22-28% THC level, 7 Star Cookies is often chosen to treat those suffering from conditions such as chronic pain, insomnia, stress, depression, and migraines or headaches. This bud has a sweet citrusy flavor with hints of spicy earthy grape upon exhale. The aroma follows the same profile although with a light pungency to it. 7 Star Cookies buds have fluffy dense popcorn-shaped olive green nugs with bright orange hairs and golden crystal trichomes.
Captain's Cake Marijuana Strain Information
About Captain's Cake
Hailing from the beautiful land of Maine, Captain’s Cake is brought to us by The Captain’s Connection. This indica-dominant strain boasts two pretty incredible parents, Girl Scout Cookies and White Fire Alien OG, making her a bud that offers great effects for both recreational and medical patients. While Captain’s Cake typically acts as a true hybrid, user sensitivity may dictate that your experience comes with the roll of the dice.
A fairly potent strain in her own right, Captain’s Cake averages around 21% THC. Rumor has it that CBD levels can vary dramatically, with some reports showing a range between 1% and 15%. While that data remains to be confirmed, you can instead relish in beautiful buds that are bright green, featuring orange pistils and lovely amber trichomes. Oddly enough, flavors and scents do vary a bit with this strain, and you’ll notice it smells much worse than it tastes. A sour and earthy fragrance that includes lemon, nuts, and berries will hit you right away while your mouth enjoys a nutty vanilla cookie experience that’s slightly citrus-like.
Captain’s Cake is awesome for those times when you need a boost of energy to get through a particularly trying task. Whether you’re experiencing the three o’clock workday slump or you simply have to clean the house before it gets any worse, this strain is here to help. Users note a euphoric boost that helps you to focus on your tasks while having a huge smile on your face, but keep in mind that this joyful experience can only last so long. Soon the munchies will hit, and after you’ve had your fill of snacks, you’ll be ready to settle in during a sedating comedown.
Even if Captain’s Cake doesn’t have an astounding amount of CBD, medical patients still note that she’s a strain that is practically magical. Users find that mental woes are easily dissolved after taking a few hits, making stress and depression a thing of the past. Bodily aches and pains are also treated with a slight feeling of physical sedation, and those who struggle with their appetite will likely turn to this bud time and time again.
This plant is an ideal choice for new and experienced growers, and the ability to cultivate inside or out makes her pretty versatile. Said to be a quick flowering strain, you’ll be gifted with a nicely sized yield after 8 to 9 weeks. Plants tend to grow fairly large, so make sure you have enough space dedicated to your crop before you begin.
Depending on how you handle marijuana, Captain’s Cake may knock you out for an amazing nap or in some cases may fire you up with tons of energy. Others will experience a nice set of hybrid effects, so it’s best to know yourself before lighting this one up.
Red Sky is
Description
The (paternal P1) father is the legendary Cherry Hemmingway male. A hybrid of a landrace Bhutan, and Rez Dog’s Firecracker (Williams Wonder x NYC Diesel).
The female KOS’s own Skyanchor (Bogglegum x PSI) a cross using a prime selected male of BOG’s Bogglegum. A bad ass old-school hybrid made using a Northern Lights #5 (real deal) crossed to a Bubblegum (real deal). The female used to make the Skyanchor was my clone only PSI (Purple Salem Indica) that I was given by my good friend Keith, in Salem, OR, USA. Some kind of crazy old Purple Kush variant; potency is not only severe with this baby, but supernaturally intense.
The Cherry Hemmy is well known by me to relate large yields and incredible vigor along with increased resin production, and also usually relates cream soda, vanilla, or cherry-ish terpenes, making exotic and addictive combinations when used as part of any hybrid. So, the Red Sky yields well—very well.
Some truly legendary strains involved in this Small Batch Seed run.
Great genetics equals great end results.
I put video of Red Sky #3's brothers #2, and #4.
Processing
Likes
44
Share


@MissFlowerPower420
Follow
Marge is literally romping away now . She looks healthy n very bushy . Have high hopes for this lil beauty
Processing
Likes
10
Share


@Barcelona_Farmers710
Follow
Bueno entramos en semana 3 de flora... pasaremos usar pl booster y esperemos poder pasar led antes que acabe esté cultivo. El calor lo hace insoportable para las plantas están bastante resentidas a ver que tal sale! Salut y força al canut farmers!🔥
Likes
59
Share


@DogDoctorOfficial
Follow
she performed like a champion and delivered the same way, the fruit quality is out of this world, now needs rest for full potential but i can already tell she is a winner to me!!!
As always thank you all for stoping by, for checking my journey , for the love support and for it all, i am blessed and humble with you all.
Just a reminder , all i grow is medicine for myself, for me and for my best friend with is me nothing to sell, so don’t even ask.
All info and full product details can be find in can find @
https://ganjafarmer.com
https://aptus-holland.com/
#aptus #aptusplanttech #aptusgang #aptusfamily #aptustrueplantscience #inbalancewithnature #trueplantscience #Ganjafarmer #growerslove
With true love comes happiness 💚🙏 Always believe in your self and always do things expecting
nothing and with an open heart , be a giver and the universe will give back to you in ways you could not even imagine so 💚💚💚
More info and updates @
https://growdiaries.com/grower/dogdoctor
https://instagram.com/dogdoctorofficial
https://youtube.com/channel/UCR7ta4DKLFMg2xxTMr2cpIg
💚💚💚Growers love to you all 💚💚


Likes
36
Share


@TheGreenLeopard
Follow
nice week this week. very noticeable transformation. I have a yetti purple berry kush in there which smells just amazing. this week i tried, for the first time, some under canopy LED. 2nd day with it today as i write this. they really took it well. perked up and kept at it. the color and hue is starting to come through. Super happy with this tent. I think its worth the effort to create an organised space to give yourself the best chance possible. you will see the difference in approach form Auto tent and then photperiod tent.


Likes
10
Share


@Gokou4OG
Follow
These girls are on fire , super dense heavy nugs . Smells incredible and can’t wait . Harvest is expected before the end of the month . Btw this is actually my first grow … I’ve been studying a lot and have certs from thc university.
Likes
102
Share


@love_2_grow
Follow
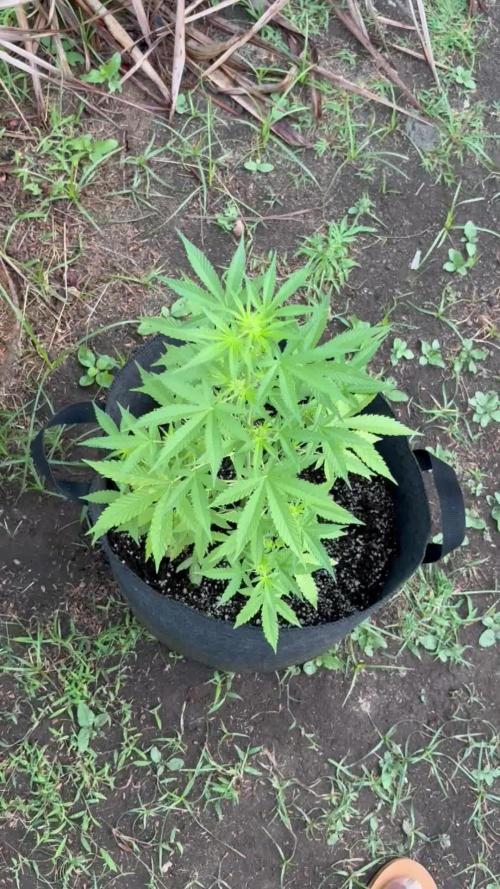
D28 - The first day in the fourth week of veg. She is now 18 cm tall, and I'll start doing some low-stress training this week. I trimmed the cover crop today as it was a bit all over the place. I gave her around 1.2-liters of the compost tea I started brewing yesterday, and for once, I remembered to check the pH and adjust it to 6.5. Yay, progress!
D31 - Today, I finally got around to doing some low-stress training. I should have done it ages ago, and I don't even have a good reason for not having done it, but hey, better late than never. Right?
D32 - She is bouncing back nicely from the training yesterday. Starting to smell a bit so I got the active carbon filter installed.
D34 - The last day in the fourth week of veg and the final day as she is in flower now. I did some more LST, as well as defoliation and cover crop trim to increase airflow.

Processing
Likes
3
Share


@MalajuaniB66
Follow
Still flushing, wait for the right time to harvest. 💪
Flushing ไปก่อนจ้า อีก1-2 สัปดาห์เก็บได้ละะ
