
Likes
Comments
Share


@mquintero7
Follow
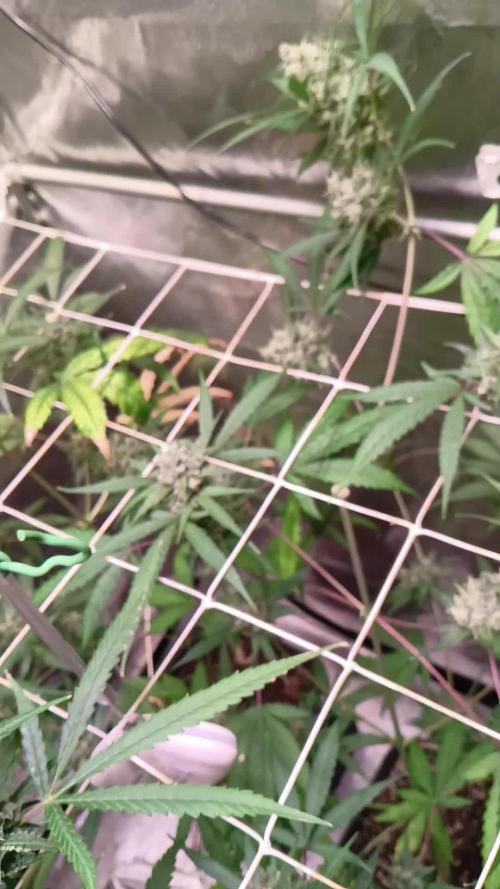
She is in full flowering stage, smelling very good and with excellent development.
During this stage a lot of pistils present and growing.
Also cutting old leaves and big ones that don't allow sunlight to enter the plant.

Likes
63
Share


@Wicked_Stix
Follow
Shes big
Shes beautiful
Shes a beast!
Shes my winner. The last plant standing of this run and she is getting flushed with ro water. I have taken late flower clones of this girl because it would be inhumane to let her die. I will reveg them if they root and dose one with silver to make a lot of beans. Beaming her with 720 watts of light her last week of life just because I can.
Ps. If she dont win diary of the month then its rigged🤣🤣


Likes
19
Share


@Ixnay
Follow
First pistils came through this week! Switched the 'bloom' switch on the light to double LED count and add the red to the spectrum.
Defoliated lower growth again on day 45 before noticing the pistil 48 hours later.
Spotted a nutrient burn, and that I haven't been watering until enough runoff so possible nute/salt buildup?
I also realised the plant was drooping before feeding so going to increase feed volume to keep the coco more moist.
A nice amount of main colas considering her rough childhood.
Fed no nutrients from day 47-49, just feeding 5.8pH water to reduce salt content. Water was 60PPM at 5.8pH and after 8L still got 500PPM runoff. Definitely need to change feeding method. Thanks for the tips to those who answered!

Processing
Likes
14
Share


@Irishvirus
Follow
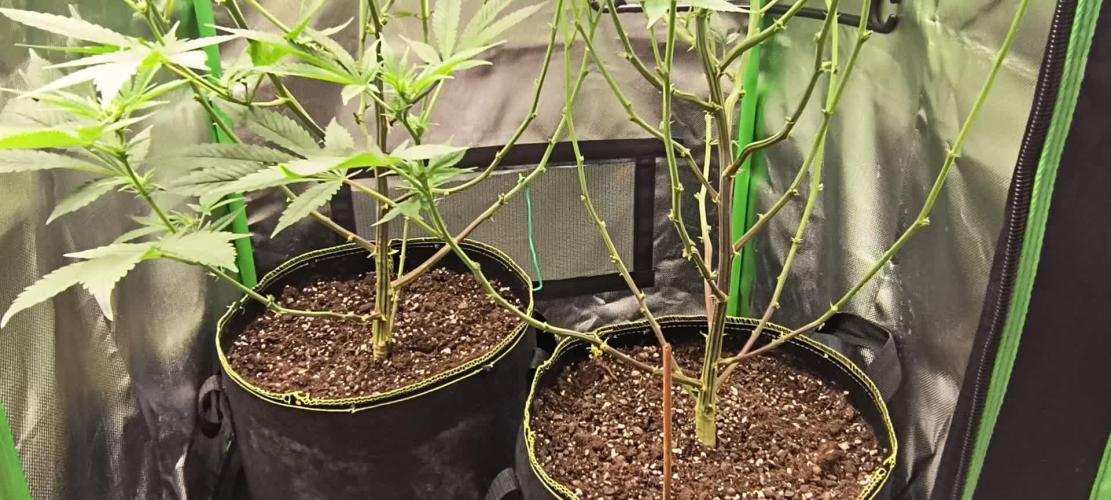
Switched her to 12/12. I trimmed away some of the growth I deemed not worthy. She's got amazing roots and is already starting to grow a lot every day.


Likes
3
Share


@Mr_nugs_lover_David
Follow
I have moved my last automatic ladies of the season indoor cause I didn't want to risk the integrity of the nugs because of the high humidity. I have brought her with all of my plants under my LED panel of HortiONE 190w. 100% organically grown with Biotabs organics, super citric and earthy and kushy smells, very special plant, definitely would love to make a sea of green with 25 blackberry kush in a 1,20. LOVE IT! 👌 💎💚😋


Likes
13
Share


@Aedaone
Follow
Temperature and measurements listed in grow conditions are averaged for the week. The pH listed in the grow conditions is soil pH. Nutrients listed in nutrients section are ml/per gallon of soil.
Day 1 we had rain showers in the morning and throughout the day. They showed first sign of flower.
Day 2 we had rain in the morning, drizzle and showers in the afternoon. The ferrous sulfate reduced the soil pH from just above 7 to just below. I added 10ml blood meal and 10ml ferrous sulfate top dressed to each pot. The nitrogen should boost the stretch during early flower. The additional ferrous sulfate should keep the pH in the 6.5-7 range and help with chlorosis during early flower.
Day 3 we had more rain, drizzle, and mist all day. The soil pH is responding slowly. It's down to 6.8
Day 4 we had rain all morning. The pots are soaked.
Day 5 we missed the scattered showers, but it's been 80-90% humidity. We did have lots of sunshine.
Day 6 we had lots of sunshine and temperatures above 80° F
Day 7 we had lots of sunshine with temperatures in the mid 80's F. I had to water about .5 gallons directly from the hose. The well water is 7.6 pH and 50°F.
Overall this week was a success this plant more than doubled in height. There's still a small excess of phosphorous in the soil. The plant grew into it this week.

Likes
98
Share


@SlowpokeFuegobud
Follow
Welcome to the spectacular world of the Fastbuds photoperiodics!! 😎 They're like us!
🌱 🌱
Preflowering on day 35!! 🌺 Switch 12/12 was on day 25..
Week 3 you can see what happens when I don't adjust my pH.. 😇 From now on RO Conditioner and also pH minus! 💧
I popped the two remaining seeds, after I effed up one in the last grow. 😅
@Fast_Buds here we goooooo!! 😘 🚀
_______________________________________________________________________________________________________________
Setup:
140x70x200 cm Spiderfarmer tent
2x Monkey 16W fans (not oscillating)
1x Secret Jardin 30W
1x box fan 50W oscillating (on lowest level)
LED
Full Spectrum 320W AGLEX AGL-320W-MA
5,6 kg
foldable, dimmable
864 pieces Samsung LH301H
864umol/s
2,7umol/J
full spectrum white + RED 660nm + IR 740nm
wavelength range 380-780nm
covering 3x4ft
Green Buzz Nutrients https://greenbuzzliquids.com/
❗ Use code GD42025 for generous 25% discount (for orders of minimum 75€)
Biobizz Lightmix
Carbon Active Granulate Filter 125/360 cm³/h
PrimaKlima exhaust EC 125-400/240 cm³/h
Likes
1
Share


@magicjohnson
Follow
Continued the Scrog, Starting to notice pistils on the Stardawgs and very very premature signs on the GG.
Likes
25
Share

@Hempcules
Follow
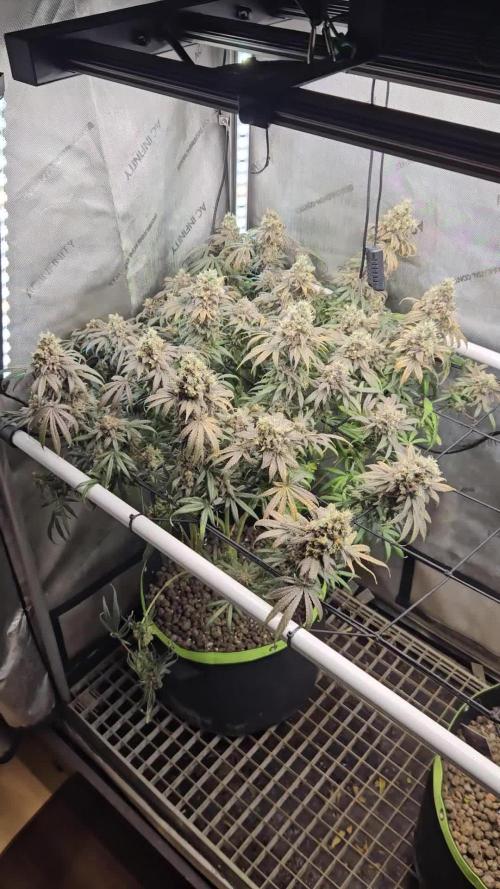
WEEK 18
Not much happened during the final week. Most of the trichomes turned milky, which was exactly what I was hoping for.
PPFD: 1000µmol/m²/s
Water: 2x plain water
Vpd: 1,8Kpa

Likes
4
Share


@Kekkonen
Follow
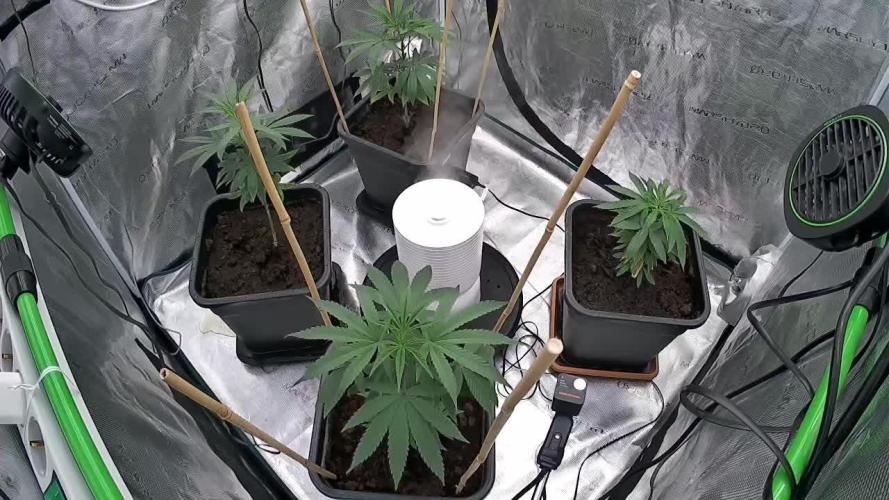
Happy little seedlings are growing well in a plastic box with lots of humidity. 8 out of 10 seeds germinated. On day 6 planted 6 of them to 60l growbags ( 3 to each) and 2 to 20l ish pots.

Likes
37
Share


@Wrongholn519
Follow
Edit: I came home from work after making my weekly log entry yesterday and I could smell my grow from my driveway... so I asked for help. THANK YOU OOZLEFINCH FOR THE HELP.. THIS IS WHY WE ASK FOR HELP...
I left a question on here stating that my new canister wasn't working and asked for generic advise. He left an answer that pointed out the fact that my exhaust fan might be set waaaay to high... and it was! It turns out there's a limit to the amount of air that filter fan 'scrub', and my exhaust fan goes way over that limit even on 6 or 7.. I turned it down to 3 and the smell got better immediately. ☮️
Still on auto pilot at this point... I'm really close to harvest.. and I'm not even on day 60 😲. I created videos this weeks, they capture the plants in ways that a still picture just won't.
My entire house stinks.. my neighbors are looking at my funny, and my wife thinks a family of skunks is hiding in our walls... I've never had this problem.. I even got a brand new carbon air scrubber and its not helping 🤣
Process/ Environment changes since last week:
- To help preserve the terpenes I've been trying to lower my temperature, which is hard without an AC unit I'm not plugging in an ac just to grow some plants. I'm at 24- 26 degrees C (75 - 82 F).
- I've been lowering my humidity accordingly to keep VPD in a good range
- I lowered my lights closer to my plants, turning them up would just add to the heat.
- I'm defoliating as much large fan leaves off as possible
- My watering pH is at around 6.7 to 6.8.. I will not be flushing these plants
- I rotate my plants every day to make sure I'm getting light to hit every node it can
This week I'm pulling out the digital scope and doing the first trichome checks for these babies. The cheese auto is going to get the chop by the end of next week.. I hope you like the video I added of it.. it's the easiest plant I've ever grown and she's going to be FIRE.
The blackberry auto is giving off a gas/berry smell and is very sticky to the touch. A beautiful triploid... my first and I hope to get many more.
The Forbidden Runtz smells just like a zkittles does, it's bang on. Very dense very sticky buds. I almost tossed her during the seedling stage too due to her mutation. I'm glad I reconsidered ☮️
Thank you Fastbuds

Likes
20
Share


@Stickybudz420
Follow
Accidentally snapped a leaf off her today during her LST 😣 other than that though she’s progressing slowly but surely, can’t wait till she comes in to flower now🤩 happy growing everyone ✌️ 🌳
Likes
1
Share


@Mo_Powers
Follow
The cold days are behind us and summer is just around the corner. It’s only a small step so far, but with the warming sun, it’s set to take off in the coming weeks.
Likes
4
Share


@pzwags420
Follow
On day 1 week 2 flower the Gals are really stretching now, hope I have enough room 😂They seem to be taking the flower nutes well even without a transition phase 😀. On day 3 the gals have stretched so much they are within 6 in of my light hoping The stretch will slow down soon yikes 😱. I defoliated the lower and upper canopy to bring in more light and air flow. On day 6 the stretch seems to be slowing down. I increased my light intensity from 75% to 100% to see if I can halt anymore stretching. I also bent my highest colas down as they were touching the grow light 😂. On day 7 flower clusters are forming and the stretch has slowed. I will continue to bend over the tallest colas and do my best to manage the canopy without too much loss of yield. It looks like some of my colas might get light stressed/burnt. There is not much else I can do except learn from my mistakes...next time I would flip the plants earlier and give them stronger light intensity before flowering stretch. The top leaves are canoeing so I reduced light intensity back to 75% to see if they improve. I got my first clog in my blumat systems main line... I will be switching to liquid based fertilizers for the next run as I believe my fertilizer caused the clog. I released the clog by using a pipette filled with water. I took the pipette and squeezed liquid through the main line exiting my reservoir. Then the lines were running smooth 😂
