The Grow Awards 2026 🏆 


Likes
Comments
Share


@Exploding_buds
Follow
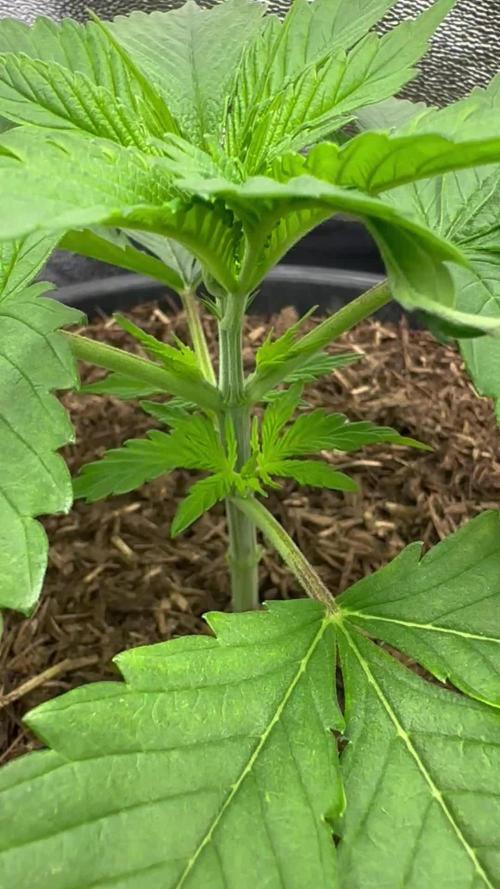
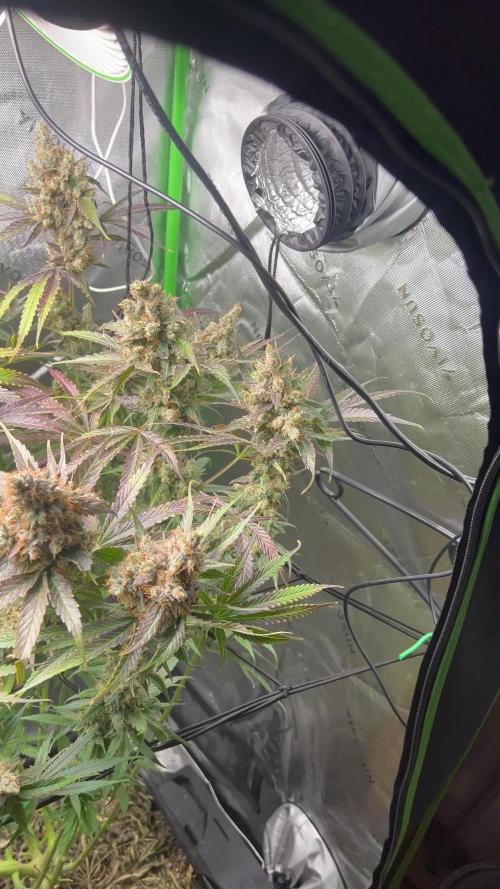
Esta semana no he notado mucho cambio pero si han engordado bastante
Likes
3
Share


@Badger161291
Follow
This is my first grow I have haze berry critical and northern lights and white widow automatic the baby’s are critical mush and the 2 seedlings are white widow all from RQS can people give me some useful tips and vote for me
Likes
5
Share


@Skynets_Growing
Follow
Tessa my Triploid plant has nothing to laugh. She work hard with all the LST I have done to her. But I know that all this going into a hopefully nice Harvest at the end and the Vegi Part is the most demanding time in my grow. She become her own box with a 230 w LED that I could give her enough light if she need and enough place without her sisters. The 12/12 Lightmodus for her change and hopefully in 1 week she will start in her flower Part… we will see in her week 5.
Likes
16
Share


@TheHighNews
Follow
Day 8 of Flowering, this babies are stretching hard and starting to show white pistils and i couldn't be happier! Even if the soil is pre
fertilized i just added 0,5ml of Biomagno FiorituraOM to help the plants start flowering,
as @Mangodudu said EC was only 1,2 it shouldn't get them overfert.
The structure il very nice and the plants are vigorous and always with praying leaves, i defoliated pretty hard and fixed every branch to a bamboo stick,
so they don't have to carry the weight of the buds in the next weeks and focus all the energies in the bulking up the buds.
I also just lowered the lights to get some light stress and help the plants stretch harder, and the response was amazing they just doubled the size in this first week of flower,
I'm also very happy with this canna plus pro soil, it takes the water and drys very fast it think it's thanks to all the cocco in it.
Likes
38
Share


@Snakeking
Follow
Gz# 1 & 3 & 6 is maturing
Gz#3 is not fattening so much and sugar leaves are turning brown.maybe i chopif in next 2/3 days .
I am happy with them
Processing
Likes
9
Share


@Tokologo
Follow
Day 78 plants are now going to grow outdoor.
Clones coming along nicely.
This week I'm giving the mothers a chance to get used to outdoor grow.
Day 84, mother enjoying the sun, got 91 clones from the first 3 batches.
Likes
27
Share


@GuerillaGorilla
Follow
2 october
What more can I say
Busy with harvest, last minute changes relocating stuff. Pfff
She has some time left. Some sunny weather once again. She is doing well.
I hope she holds on for another 3-4 weeks. My schedule is full. Sexbud is clming. The guerilla grow is coming to an end. Shit got hot..at last
Girls need it to finish😛
Likes
27
Share


@I_Identify_As_A_Dan
Follow
Start of week 4 for Kalini Asia
Shes not doing too badly, not much too report on her.
Likes
1
Share


@frankensoil
Follow
Es zieht sich alles nach hinten bis jetzt sind es 80-90% milchig der Rest Bernstein und noch vereinzelt klar
Processing
Likes
Comments
Share


@Ogbangbang2981
Follow
this week was a good week I watch my girl.grow from a seed to a plant and is now starting up.flowering stage she's the shortest out of my 3 plants and I just added one plant to my family didnt wanna be to excited with this one because I lost her twin sister already but her strain is (its 1 day since she popped up)"wedding cake "
Likes
7
Share


@nedreynolds
Follow
Starting out good... going in the tent soon.
I still have to buy 2 components for ventilation... the inline fan and charcoal canister to cover what I hope will be smellin earthy and stinky and sweet very very soon.
6am 4/1 - Putting the tent up.. might not fit though.
Likes
119
Share


@DogDoctorOfficial
Follow
Hello, my green connoisseur! The moment we've all been eagerly awaiting has arrived—the Harvest Report for our botanical queen, Jealousy, in the Power Buds competition. This has been a journey filled with anticipation, and now, we stand on the shores of botanical triumph.
Jealousy, in her final act, bestowed upon us a generous yield of 195 grams of dry bud. It's like a cornucopia of green abundance, a testament to the meticulous care and strategic decisions made throughout this green saga. Each nugget is a jewel, a culmination of weeks of growth, love, and dedication.
But the story doesn't end there. Jealousy, in her love for the trim bin, gifted us a beautiful golden pollen. This precious powder, transformed into ash via the French Cannoli style. Also gave me a Charas/Finger Ash ball. It's like capturing the essence of the plant in a tangible form—a botanical relic that encapsulates the spirit of our green empress.
Now, let's talk about the auditory symphony that accompanied the harvest. The sound, reminiscent of a tree making timber, is like nature's applause for the bountiful harvest. It's the soundtrack to a successful cultivation venture, a melody that resonates through the grow room, echoing the grand finale of this green symphony.
The drying process, carried out over two weeks with a temperature of 17°C and humidity at 58%, is like the slow and methodical crafting of a fine wine. Each day, the buds undergo a transformative journey, evolving from freshly harvested flowers to dried and cured masterpieces.
And now, the pièce de résistance—the preservation of terps with the Grove Bag featuring Terploc technology. It's like locking the aromatic essence of Jealousy in a time capsule, ensuring that every toke carries the full spectrum of flavors and aromas. The anticipation for the smoke report is palpable, as the strawberry candy profile promises an exquisite sensory experience.
Reflecting on this entire journey, from germination to harvest, it's like turning the pages of a botanical epic. The decisions, the challenges, and the moments of sheer joy have shaped the destiny of our green empress. It's a narrative that will be retold, shared, and cherished in the annals of our horticultural adventures.
As we conclude this harvest report, let's extend our heartfelt thanks and shout-outs to Zamnesia, Plagron, Grow Diaries, and the vibrant community. Your support and contributions have been the guiding lights on this extraordinary green expedition.
To my fellow contestants and growers, may your own harvests be as abundant, flavorful, and joyous as this one. Here's to the culmination of our shared green dreams, the thrill of the harvest, and the anticipation of what lies ahead. Stay green, stay inspired, and keep cultivating those dreams!
With true love comes happiness. Always believe in yourself and always do things expecting nothing in return, with an open heart. Be a giver, and the universe will respond in ways you can’t even dream of .
Friendly reminder: all you see here is pure research and for educational purposes only.
Genetics - Jelousy @Zamnesia
Nutrients @Plagron
Light - @viparspectra P2000
Room size - 3x3 - 0,9x0,9
Likes
22
Share


@GrowinHome
Follow
Welcome to the last week!
The ladies are allready showing some discoloration on the leaves.
This last week they will only get plain cold water, no nutrients.
Likes
25
Share


@m0use
Follow
This week has been good for these little ones, the runoff was a bit high for my liking so I gave them more water before feeding to help flush out their medium and introduced the bloom nutrients as they are now entering flower. Got one purple looking ones, one green ones and one mixed that is leaning more towards green in terms of colour profile. I remember before when growing these strains I was disappointed in the fact they where not all purple. Now I know and don't care to much. Nothing crazy on the smells so far, hoping they get real juicy and tasty in the next coming weeks.
The PH has been harder to lower when the nutrient solution is mixed, it takes more PH down to get ti to the 5.8 that I''m aiming for. Hopefully they explode in growth in the next few weeks.
Likes
15
Share


@the_big_pink_place
Follow
12/27/21 Start of Week 4 , Growth has started again from transplant , Watered 1ltr of Nutrient water to each.12/30/21 watered 1250ml of nutrient water each, plants have really started growing again. Thinking from germination threw week 2 both the ts600 and the ts3000 were too close and too powerful ,
just from my observation of growth, something to try on my next grow. Added video and pictures.
Likes
248
Share


@OrganicNature420
Follow
And so it starts ..... 🌱
Germination date 🌱 12/07/2021
Day 1 15/07/2021
Strain 🍁 Humboldt Purple Matcha (2nd time)
(Sherbinski x HSO)
THC%• 20-25
💡 Mars Hydro FC4800
• Power draw 480W + 5%
• Max coverage 5 x 5
• LED 2070pcsSamsungLM30B1&Osram660nm
• Max Yield 2.5g / watt
• Noise level 0 DB
• Removable Driver +2m cable
• Daisy chain (multiple lights)
https://marshydroled.co.uk/products/mars-hydro-fc-4800-led-grow-light-samsunglm301b-commercial-greenhouse-medical-indoor-kit 🇬🇧
https://www.mars-hydro.com/buy-fc-4800-480w-4x4-energy-saving-full-spectrum-commercial-led-grow-light-mars-hydro-for-sale 🇺🇸
PROMO CODE • (ORG420) DISCOUNT 👍🏻
marshydroled.com
⛺ Mars Hydro 120 x 120 x 200cm
📤📥 AC infinity 6inch
💧 10lt dehumidifier
❄️ 3.1kw air con system
💉 Nutrients GreenBuzzLiquids
Organic Grow Liquid • 1-4ml until 2wk flower
Organic Bloom Liquid • 2-4ml flower stage
Organic More PK • 2-4ml +wk3 of flower
Organic Calmag • 1-2ml/lt whole grow
Fast Plants Spray • first 3days at night lights off
More Roots • 2-5ml veg +2wks flower
Fast Buds • 5ml +wk2 of veg until 1wk flower
Humic Acid Plus • 2-5ml whole grow
Growzyme • 2-5ml whole grow
Big Fruits • 2-5ml flower stage
Clean Fruits • 5ml flush 1wk
Ph powder
Root Gel
Living Organics
https://greenbuzzliquids.com/
🥥 Growing Media • Coco Coir
Notes 📝
Light was set at 35% but raised it to 50% as I needed another degree of heat. Removable driver is a god send. I have it on bricks outside the tent to help consume some heat from the driver. I will wait until these girls are adult veg until I start upping the light %
New Nutrients have started well 🌱 fast plant Spray seems to of worked nicely and love the Organic farm smell they all give off
Happy growing fam ❤️🌱🍁👍🏻


