
Likes
Comments
Share


Likes
37
Share


@Smoking_Joe_Frasier
Follow
Nurturing My Cannabis Plants: Balancing Light and Protection
In the first half of the day, I place my seedlings on a south-facing windowsill to ensure they catch some light. During the evening hours, they travel back to my balcony. This routine helps them get the light they need while staying safe from pests.
Protecting My Plants: A Grower's Dilemma
I'm hesitant to leave them outside permanently because, unfortunately, all my other vegetables have been eaten by snails. I certainly don't want the same fate for my precious cannabis plants. For now, they’re enjoying a mix of south windowsill and balcony life, which seems to be working well.
First Watering: Preparing for Growth
Once the coco mix dries out, they will receive their first feeding. Terra Aquatica Tripart is my nutrient trio of choice. I'll start with a half-dose, as recommended by the feeding chart, to ensure they don’t get nutrient burn.
First Feeding: A New Stage
My ladies seemed to enjoy their sleepover in the greenhouse. Now it's time for their first feeding. I added Cal-Mag to achieve an EC of 0.5 mS/cm to start with. I gave them a half-dose of nutrients as described in the chart and watered with enough runoff.

Likes
4
Share
@Smev1337
Follow
So this grow is slowly coming to an end because the plants are telling me slowly that they want to be cut down and dried up haha, lets see what these plants will do in the last days now coming! happy growing all 💚✌️😎


Likes
2
Share


@MG2009
Follow
06/16/2019
Star Cookies has her own tent back,and good thing because she is spreading out and reaching for the sky! I can only hope she is done with the stretch and ready to fill out, otherwise I'll have to raise the tents top somehow.

Likes
47
Share


@Wastent91
Follow
Ehi ragazzi come va? Tutto bene spero! Bene questa settimana, quasi due settimane son passate, io sono un po' in ritardo poiché ho tanti progetti, la ragazza purtroppo da quando ha avuto probabilemnte uno stress molto intenso da troppi nutrienti, ha smesso di crescere in altezza ed ha iniziato subito a fiorire, un sacco di foglie sono bruciate nel tempo e ho provveduto un po a defogliarle, ma nonostante questo la pianta non ha smesso di produrre fiori! Magari è per questo che si chiama la "regina del succo!", comqnue sembra che si stia riprendendo anche a livello di sviluppo di nuovi fogliame, se pur in modica quantità, però sembrano che siano sane.. L ho rialzata dal base di circa 50 cmq perché ho alzato la lampada al massimo dato che le altre sorelle sono diventati due mostri di cannabis voraci d acqua e nutrienti organici! Mi sa che se non gli do da mangiare mi ritrovo che si metabolizzano la plastica del vaso😝 ahah ri grazio come sempre l attrezzatura di Mars Hydro che senza di essa non potrei avere un risultato simile! 👊😺😽😼🧑🌾🌱🌿🌲🍀💨
https://marshydro.eu/products/mars-hydro-100x100x180cm-grow-tent/
https://marshydro.eu/products/4-inch-inline-duct-fan-and-carbon-filter-combo-with-thermostat-controller/

Likes
15
Share


@Uwish
Follow
Hello guys,
Here I am again to present you a new run, still with the best leds of the market nevertheless as I changed my growing space from 120x120 to 150x150. So I had to update the material inside...
I will run with 3 EVO 5-150 lamps of 320W or 960W with Bluetooth dimmers.
For the Hydro system, it will be the V-SYSTEM from Alienhydroponics.
In fertilizers I am always with Advanced Nutrients.
I work with osmosis water.
Currently, 4 clones took on 4.
Once the roots are ready, I will transfer the cuttings from the propagator to the V-SYSTEM.
------------------------
since the 16/08, when I transplanted the plants in the RDWC system, I noticed some points that I will mention below and correct next time.
1. The cuttings are too small, allow enough time so that I can completely fill my pots with clay balls.
2. Cut out the bottom of the pots from the cuttings.
3. 3/4 of the cuttings are touching the water, so one is late. Next time when transplanting, add more water, up to the basket in order to immerse all the plants and not to create a difference between each one, consequence now I have 3 that are ready to explode and one that will struggle behind, problem corrected today by increasing the volume of water.
4. The b-52 is a real pain in the ass in RDWC, you have to clean the 2 filters almost every day, with this new soup I'm testing without and I think I'll continue like this just with the base sensi grow A and B, as I use Root rot X, I won't use voodoo juice since all the bacteria would be killed.
5. Use of Voodoo Juice is useless if using Root Rot X which will kill the bacteria.
I don't know why but when I transplanted in the RDWC, I put my set up in growth mode, except that the plants were not ready for it, moreover, I made a FIM on each. So I lost some days, these last days I went back to a ppdf of 150, now that my roots touch the water, I declare growth 0 on 22/08, I will do between 21 and 28 days of growth. And as my roots are doing well and touching the water I'll go to a PPFD of 300
++


Likes
27
Share


@Smokwiri
Follow
Nice development, i left the lights on lowest (4w) for half week, so letting IT grow another week
I have some discount codes for the light on Amazon, it's one best led brands around, pricing for us/ca market is very sharp, design is very slick and yields bomb.
Amazon: http://url-9.cn/0y9i
Amazon US: https://amzn.to/3e0P2bk
Amazon CA: https://amzn.to/3bTnEJC
Amazon discount Code:
it10smokwiri XS1000 10%
XSsmokwiri XS1500 8%
it20smokwiri XS2000 5%
it40smokwiri XS4000 5%
ViparSpectra 8% DISCOUNT CODE on the viparspectra websites (.com/.eu)
RUFFSELEKTAH
Likes
62
Share


@OwlGang_Uk
Follow
I’ll updats my comment tomorrow
Height Chart:
Girls Scout Cookies: 31 inches (3gal)
Stardawg: 35 inches
Girls Scout Cookies: 40 1/4 inches (5gal)
Gorilla Glue: 33 1/4 inches
Lemon OG: 41 1/2 Inches


Likes
31
Share


@Sider79
Follow
Some Faded bottom leaves . Temps are lower . Not sure if my questions are seen but moving forward with my first Auto Blow Dream grow.

Likes
6
Share

@Simba732
Follow
Week 3 has ended for Ms Purple
So far so good, she’s responding well to training.
The side branches are as sturdy and as tall as the main branch I’m happy.
This should equal to even light distribution on the canopy and more bud sites 🙂
I’m defoliating here and there to make sure the plant stays aerated.
Let’s see how everything goes.
Happy growing
Likes
2
Share


@Michijardinero
Follow
Hola familia bueno contarles estoy en el día 72 todavía le queda alguna semana y la otra es la misma casa la misma semilla y le falta un poco más la más grande ahora sólo la estoy regando con agua con un pH de 6 a la otra todavía le he puesto nutrientes aver como sigue la semana que viene un saludo familia que tengan buena semana paz
Likes
21
Share


@BB_UK
Follow
Was supposed to update my diaries yesterday but literally forgot lol #edibles but they’re flowering nicely and stretching as they go! They’re truly loving life under the ts1000 can’t wait to see what the next week brings!
Likes
43
Share


@Esoteric_growing
Follow
Light is at its maximum height and could do with being raised another inch or so, going to try and tie the reflector directly to the top of the tent. Stretched more than anticipated lol.
Slight tip burn so backed off the nitrogen and added the pk, I think they are a touch too dark green but will rectify during this week. Surprising considering the EC is only 1.4

Likes
16
Share


@Mrs_Larimar
Follow
2022-12-22
I love growing Solocups,
Because you learn soooo much. If you manage that Grow, you can grow everything.
This thime i ad alot of Medium ( around 0,5l), and for me it was quite easy to keep them happy.
I was watering them every day with a " light" Feedingsolution.
Plants stayed happy and turned out very well
seems i forgot to take Pictures of the second Skull in a Plasticup- but yeah the
Glassvessel ( Skull) is the Mainattraction
Likes
117
Share


@Ageddd
Follow
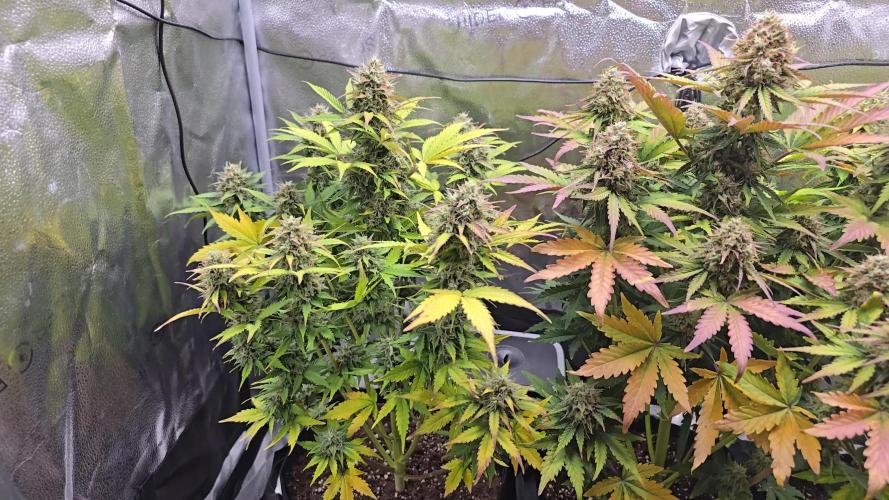
Yesterday i give her last PK nutrients. Last week only used it (BioBloom) one time so leaves will be turning yellow next days. Last week used 2 doses of Plagron Green Sensation which i get from my growshop as free sample.
I am using last Sugar Royal dose(1 time each week - 27/9 -), and 3 more doses of Green Sensation (1ml/l every day - 27/9 - 28/9 - 29/9 -).
I thought about harvesting around -30/9-, think buds can get fatter than they are today, but i will check trichomes from a microscope and then decide.
Sensi Seeds info:
-Compact plant
-Flowering 50 - 55 days
-Heavy Yield
-95% Indica

Processing
Likes
15
Share

@MG2009
Follow
09/26/2020
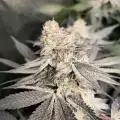
She is almost done, I gave her a little trim most trichomes are milky still some clear I think about a week before she is done.
Hope she gets fat!
Likes
5
Share


@Johngrowbr
Follow
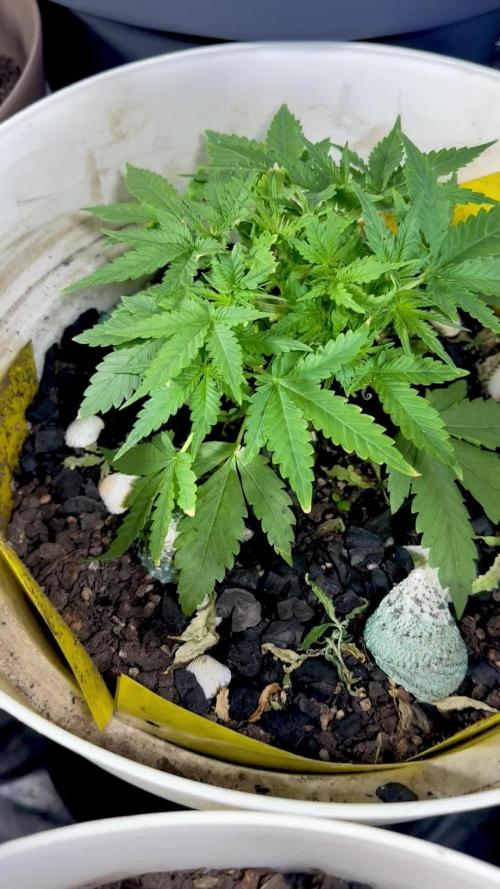
First week of pre flowering, just changed the schedule of the lights and the photoperiod
Likes
1
Share


@GoldenWeedGrower
Follow
WEEK 24-30 March. Finally a new space for the girls, on an homemade recirculating system that I named AQUALOOP, consisting in 2 drippers connected to a water flow system added with air. Air is also blown directly into the substrate and into the reservoir !