
Likes
Comments
Share


@GrapevineGrower2
Follow
Haven't updated my grow diary for a little more than two weeks due to a severe back flare up. Yup, bad back strain, which has made it hard to sit, lay, stand for any duration of time. Suffice to say, much has happened since last update. The PBCRbx has undergone a growth spurt after a bucket change and upping nutrient (ppm) levels as I transitioned her to flower. And in that time, she received one defoliation in veg and a recent (and last) defoliation in flower. At this point, I just need to maintain healthy roots, consistent environment, and proper water levels with feedings. She's due another bucket change soon as ppm levels dropping and ph is adjusting upwards every reading. This is good sign from my understanding as a first time DWC grower.
As far as feeding, lowered grow big (veg) and upped both tiger bloom and beastie blooms along with a splash of big bloom and cal/mag. Topping off buckets with about 1100+ ppm, which helps maintain ph in bucket at roughly 700-800 ppm. But it's getting harder to maintain those levels in flower, so that's why I believe a bucket change is in order.
Here are photos spanning the entire 2-3 week period since last update.


Likes
19
Share


@Budha420
Follow
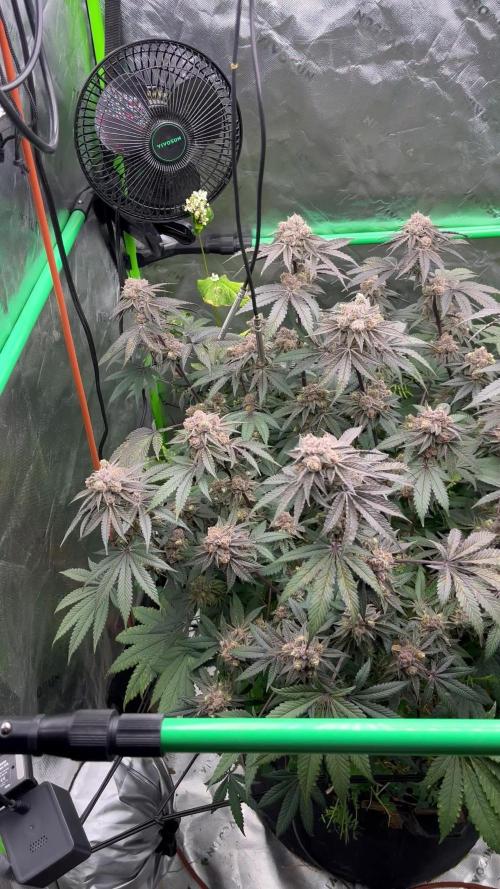
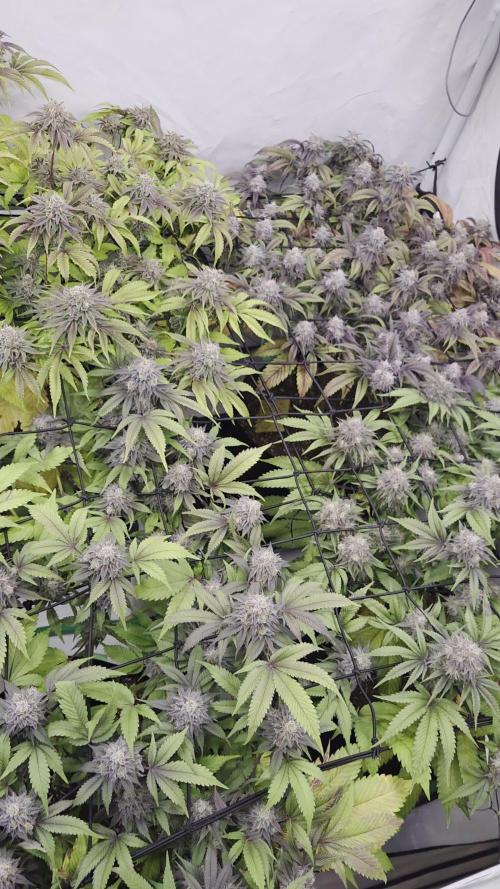
Day 30: Girls are stretching and starting flower😇 pots are getting dry quick so maybe ill have to up water to 1.2l once a day or even out through out the day🤔
Day 31: Gave about 1.3L feeding to all girls! made sure to hydrate coco all the way and gave some water to watertray so they can suck it up if they are still hungry! i cheked ppm on my water but didnt check runoff yet. ppm was 900 with 0.5 convert. ph around 6. will add pics later or tmrw😎
Day 32: gave girls little lighter feeding, around 3ml/L GH nutes b clmag.
I was too lazy to take proper pics with better light so took a vid instead😁
Day 33: i was thinking of pinning the tallest cola to scrog but decided against it. Mainly because these girls are doing very well, and my only consern is light burn. I cant get my light as high as i want to, cos my tent is only 180cm and got filter above my light. I think ill need yo setup next grow so my filter is outside of the tent🤔 thx for all commentors on my growquestion/diary! Made my day to hear my babies are doing well without any bigger problems😁💚 Edit: did some LST on bigger colas to avoid lightburn since these girls are strecthing almost 5cm a day😁 hopefully they will keep the same energy on developing buds😉 I checked ppm and pH from runoff; #1 ppm 750 ph 6.6 #2 ppm 750 ph 6.5 #3 ph 6.4 ppm 750 (all ppm converts were made on 0.5 rate) Gonna give low ph watering next day
Day 34: Good morning growers😎 this morning i gave my girls quite an heavy feed, 6ml calmag, micro, bloom and 3 ml gro into 5 or so litres. pH around 5.7 and ppm 1100 with 0.5. Pics are coming later afternoon with some runoff numbers😎 stay lifted💚

Likes
Comments
Share

@Danger_Mouse
Follow
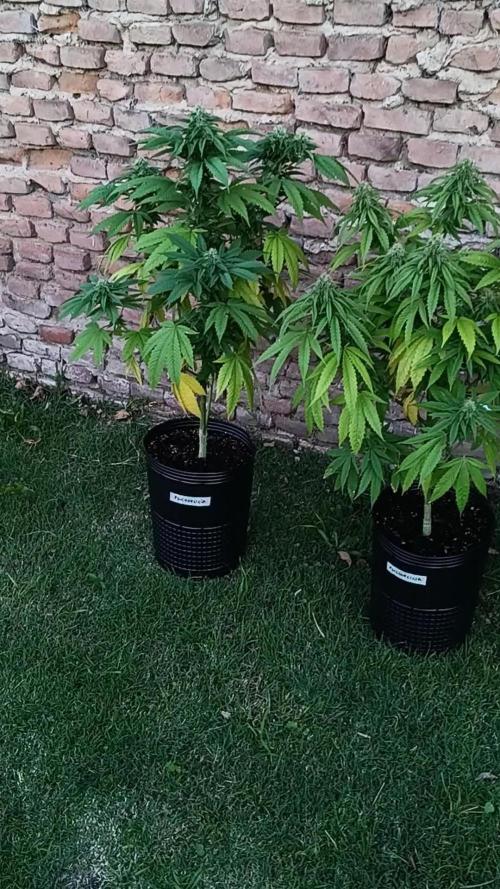
Continuan 6h en exterior (con sol directo), y el resto del dia en indoor, con 6 horas de LED 480W.


Likes
35
Share


@GODSGIFT_2005_JM
Follow
🍼Greenhouse Feeding BioGrow & Bio Bloom
⛺️MARSHYDRO
The ⛺️ has a small door 🚪 on the sides which is useful for mid section groom room work. 🤩
☀️ by VIPARSPECTRA (models: P2000 & XS 2000)


Likes
7
Share

@MrLahey
Follow
Today is day 51 of flower and the top bud site calyxes are already showing a good amount of amber on the trichomes. Maybe being stunted in seedling phase caused some change in the plants growth hormones. Who knows? I’m still gonna give her at least a week until I chop her. Gonna have to start checking overall plant trichomes nightly though just so I can get a feel for the plants overall maturity/ripeness level.
So excited for this harvest. The plant smells like heavenly maple syrupy butter lol.


Likes
5
Share

@A-C-H
Follow
Der Alien og und der Dosiruntz sind schon fertig, ich werde sie diese Woche schneiden, der Cookie braucht noch ein paar Tage und der Wild Cherrie eine Woche, vielleicht sogar zwei. Der Geruch ist wirklich stark und unglaublich.


Likes
16
Share


@GutterHoe
Follow
Tons of fresh small growth is sprouting on the top canopy. Like a whole bush worth is starting fresh! It's going to be big by 10 weeks.
Likes
32
Share


@ArtisticGrown
Follow
This weeks been good, I decided to lay off the nutritions this week and give em ph balanced water so they can soak up the nutrients they have and give em a rest. Next week will start with some bushdoctor bembe. Also got them sprayed with neem oil for big protection, looking glossy green
Processing
Likes
16
Share


@Max1973
Follow
Day 63 - haha.... mazar are lookin pretty good... one of the ssh was male, so
one of the mazar got moved into a big 19lt, IWS DWC Oxipot .......... lol
just kept it in the same established plastic top/basket, and just put it straight into the top of dwc pot....
fits ok, so there's no disruption to the roots..... 👍
fans arrived, 20w :)
just slowly moving along nicely.... not in any rush ... so just let em keep veggin...
might top em, or something... try to get their stalks alot stronger....
Day 66 - 2 vids... topped em, lookin good ...
👍😎
Processing
Likes
4
Share


@Purplekushkat
Follow
This week has been pretty smooth sailing. Since all 4 of the testers are being watered at the same time splitting a gal of water ph to 6.1 with products listed. Started some LST on them this week and seems like all the babies are doing well. Tester 01/#1 by far grown the most at this point but time will only tell how they will all turn out. Enjoying this grow quite alot and am super excited to see how it goes.
Likes
179
Share


@StarLorr
Follow
Welcome to my Øpium diary.
In this diary:
Seeds: sponsored by Ðivine Șeeds
Media: Promix HP
Nutrients: Advanced Nutrients, Diablo Nutrients.
Light and Weather: Şun☀️and Mother Earth.🌎
___________________________
Feeding:
Mon 03Jun: 2L water not pH'd in bottom saucer only.
Tue 04Jun: 2L water not pH'd in bottom saucer only.
Wed 05Jun: 4L nutrients pH'd 6.5
Fri 07Jun: 2L water not pH'd in bottom saucer only.
Mon 10Jun: 2 L water not pH'd in bottom saucer only.
___________________________
We had very warm weather and by the end of the week rain pouring.
Did spray the girls with Safers insecticide after sunset for good measure after discovering spider mites nests on june 3rd.
___________________________
Thanks for stopping by, likes and comments are appreciated!👊🏻😎
Keep on growin!
Keep on tokin!!!
😙💨💨💨💨💨

Likes
19
Share


@sneakymexican712
Follow
This was an amazing firat grow and I’m not done yet love mainlining. Depending on how these dry and the yields come out I may just do lst and get about the same amount of yield out of the grow but I still have another week or so till I chop the others


Likes
3
Share


@JeyGanesha
Follow
Sembra che inizia a riprendere forza e pure le foglie stanno sempre meglio


Likes
10
Share


@SgtDoofy
Follow
5/8
Watered both with plain PH'd water yesterday. Both of the plants are sucking up leaves. Trichomes are only really looking amber on the brown leaves, but otherwise milky.
5/10
Decided that these brown-leaved buds on Trainwreck were ready, so I tried a little bro-science and watered an hour before harvesting. Noticed there were some really nice green young buds intertwined, so I did my best to trim around to leave them for another week or so. No weight measurements yet, will wait till after trimming and before curing.


Likes
18
Share


@Staffedition
Follow
Привет друзья. Моей растихе сегодня 96 дней.
Заметил паутинного клеща.
Сегодня обработал раствором.
Растение почти пришло в себя.
20.10 перевёл свет в режим 12/12
Начал применять LST технику на 19 дне и продалжаю применять её через день, а 18 августа добавил ДЕФОЛИЗАЦИЮ
С 20.08 ДЕФОЛИЗАЦИЮ делаю каждые 3,4 дня
С 20.08 LST технику делаю каждые 4.6 дней
На сегодняшний день влажность 54%
5.09.2023 заметил высокий Ph 7.9
С 48 дня Ph не ниже 5.8
На сегодняшний день Ph 6.0
Начал кормить с 60 дня Canna Terra Vega
PPM 770
Всем мира и добра!
Не забудь поставить лайк❤️, если понравилась как прошла неделя