The Grow Awards 2026 🏆 







Likes
55
Share


@Max1973
Follow
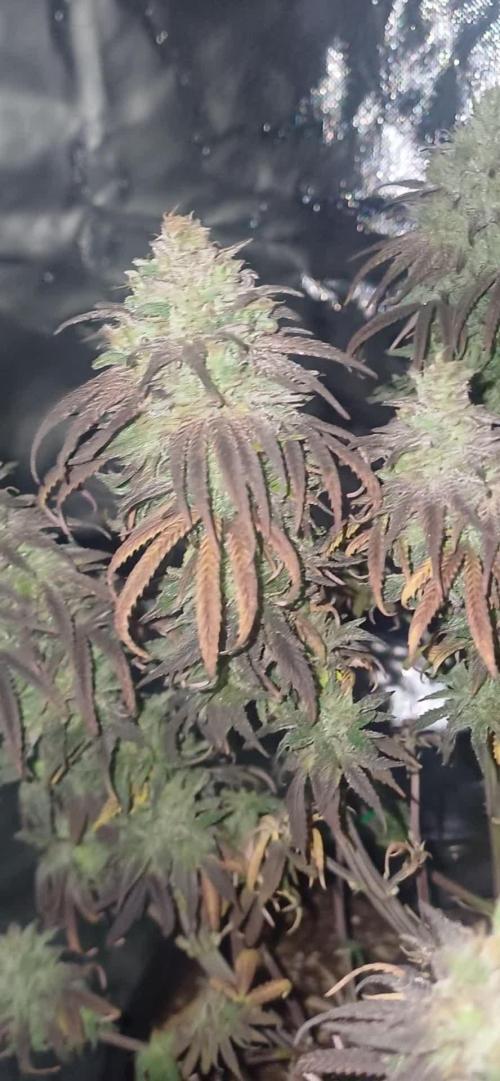
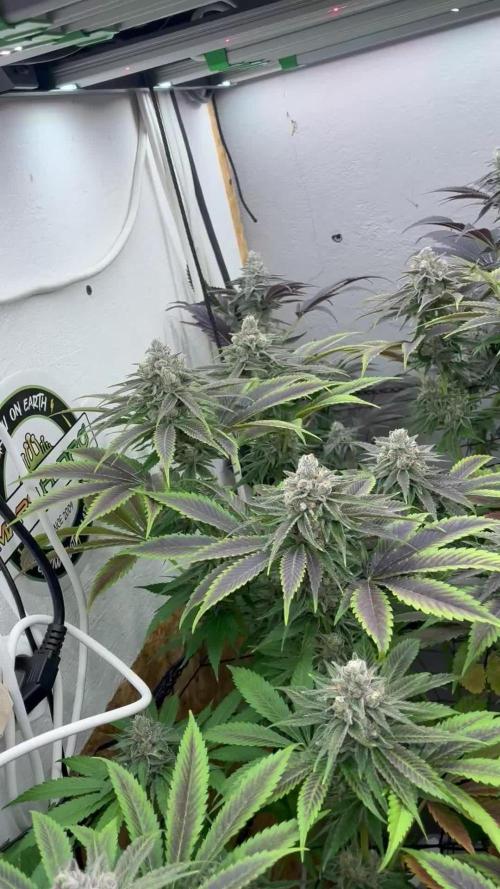
Day 86 - another week, not much to post, getting brown hairs, buds fattening up.....
normal feeding, they are happy..... 👍 😎
Likes
32
Share


@Weediz
Follow
Day 64: It seems to go well. I am still keeping an eye on the "hanging" leaves. I think they tend to hang a little more when light on, and less with light off but its hard to say if it is normal. It might be as @GrowingGrannie mentioned, they might be under watered, as there is not much run-off at the last couple of watering's, maybe 1l each time and I will give them a 30% run-off next time to be sure
UPDATE: I have noticed some more brown spots on the right plant caused by Calcium Deficiency. I think I should up the PH a bit more, going for 6.5 this time. I will also increase my CalMag supplement by 50%, and do 30% run-off today
Day 66: Thank you all for the kind answers 🙏 You all have different opinions, and it is hard to pinpoint the exact problem. I am almost certain that I got some heat/light stress as mentioned by @GrowingGrannie and @Chow_13. I have therefore raised the lamp and are keeping the dimmer very low, using about 140W in total. I am still investigating if there might be other problems to it.
@m0use, thank you for your answer. I do not think they are thirsty, at least not any more, as I am already on the subject for the last couple of days. About PH, It was difficult to get a good picture of the PH solution, but it was light-green to green (6.5-7.0) on the picture (And that was run-off PH) and what I put in was adjusted slowly from yellow to light-green aka 6.0-6.5 (I wrote 6.25 but it was auto adjusted)
@gottagrowsometime, thank you for the answer. I do not think it is a nitrogen toxicity. My leaves aren't that dark green, although they are a bit to the dark side but not like what I see on other pictures with that problem. I also think the curling is caused by light/heat stress as I just got a new lamp and are experimenting with it. But I will keep your suggestion in the back of my head!
@Chow_13, thank you very much for your answer. I think you are spot on, however I am not sure it is the only problem... It might be as you say, nutrients are not absorbed correctly due to the light-stress, but I will not put all my money on that
@Nugsery and @GrowingGrannie, a big thank you for your answers. The deficiencies might not be the same, but the cure is very similar. I cannot make up who is right, but I do have a plan. I will follow your recommendation @GrowingGrannie and @Nugsery, and do a flush, but with a ph 5.8 as both nutrients should be able to be absorbed in that level. I will then give her a light nutrient mix and adding PK, also 5.8 ph. This is almost the same solution for both deficiencies. I will then slowly get the ph back to 6.2
@ernesttwwg, thank you for your answer. I have known for some time I have some Interveinal chlorosis, but I do not know what is causing it. There is multiple deficiencies giving those symptoms. The tacoing of leaves, and leaf tips curling down I think is caused by the light, and I have therefor raised the light. I will keep investigating the symptoms you mention
OBS: I will not edit my nutrient schema as this is only temporarily, next watering will be as described
UPDATE: After flushing with 15L~ ph 5.8~ and a small feed with 5.8~ ph I still get about 6.5~ ph in my run-off water. I am going to do another flush tomorrow to see I can bring it down to around 6.0~ ph
Day 67: I think I see small improvements on the leaves. The new heat/light level seem to have done something. I did that second flush and are still getting about 6.5 ph in run-off.... I think I will let her dry for now, monitoring what happens, and do another flush in a couple of days
Processing
Likes
13
Share


@Cheesefarmer420
Follow
Growing this popsicle cake definitely had its ups and downs. What started out looking like a dud of a seed turned out to be something pretty spectacular. Stacks the buds nicely to fill up the whole colas, super frosty, with an un godly stench of sweaty dirty socks. Still in the curing process but definitely has a heavy indica punch!
Likes
24
Share


@Kirsten
Follow
26.1.25:
I have had a mistake 😕 i spilt some Fish Mix as I was experimenting with a syphon from some aquarium tubing I have. Unfortunately, I forgot to take the syphon out! Ugh 😣
However, it is fish emulsion and very thick consistency. Therefore, I was able to scrape it up with 2 of my business cards up off the counter. So added this extra into the next 2 ltr solution I mixed.
All plants were watered with at least 1ltr of dechlorinated water PH'd to 6.3.
Containing the following nutrients;-
♡ 3ml Seachem Seaweed
♡ 4ml Biobizz Fish Mix
♡ 4ml Biobizz Bio-Grow
♡ 3ml Biobizz Bloom
♡ 2ml Xpert Nutrients Bloom Booster
♡ 2ml Xpert Nutrients Cal-Mag
♡ .25g Ecothrive Biosys.
♡ 2.5g of Bicarbonate of Soda as PH UP.
Unfortunately I have broken my PH pen too. Accidentally submerged it under water, then the readings went crazy.
I'm leaving it to dry by standing it up but I'm most likely going to need a new one, which is extremely annoying 😑
I'm going start implementing the Scrog net probably some point next week if I let the plants that are in flower to just grow up now, as I do believe that I stunted Watermelon 🍉 by using too strenuous LST.
Hopefully the plants still are able to grow upwards at this stage during flower for all the Purple Punch P1, P2 and P3.
We will soon see!
28.1.25:
My PH pen has packed up 😣
I've got to wait to get another.
It's super annoying 😑 so I'm just judging by memory how to regulate it.
Unfortunately, that's my only choice! I'm also out of the dechlorinator 😕 things are not going very well this week so far 😅
I guess we will have to make do, until I can get replenished.
29.1.25:
I removed all the plants, hoovered, and disinfected the tent.
There were several accidents when watering, causing some debris and splashes.
I decided to just go ahead and get a few other things done. It's crazy how quickly things can become neglected! 😣
So I defoliated moderately on all plants except Gorilla Cookies seedling.
I have absolutely dropped the ball on my lighting situation!
My light was much further away than I thought!
I turned it up to 100% and dropped it down to just under 2 feet away.
After I reset the tent, I set up my scrog net. I removed 80% of all LST pegs. I am planning on letting the scrog net take over the training from here.
I really want to minimise the risk of mould, so I decided to start using my dehumidifier. It has raised up to 73% RH this week, so it's necessary.
Hopefully, I will be able to get my dechlorinator and PH pen soon! That's kind of essential to me.
It's been a little bit of a stressful day in the garden, to be honest 😅
30.1.25:
So I am expecting the arrival of my new PH pen today, as well as my new bottle of Ecothrive neutralise.
It is supposed to measure the TDS and EC in addition to the standard TEMP and PH, which I had previously. Obviously, time will tell if it's any good or not.
I realise, much too late now, that my lighting is very insufficient for this many plants. I need double the watts at least, and coverage is very poor.
I remembered I had an old LED floor lamp, which was in a corner being unused.
I decided to take the stand off, and Zip tied the pole onto the tent pole at the back left corner.
I have no idea what the wattage is, and it's quite pathetic 😅 but I mean, I might as well use it, being as I definitely cannot afford more lights! 😣
Next grow, I will probably only grow 2 plants, max 4, and just use larger 7-10 Gallon pots.
Being as I ran out of dechlorinator, I only watered some plants properly because I only had enough to make 6 litres. When my pen arrives, I will get everything properly watered.
31.1.25:
The leaves of several plants are showing signs of iron deficiency. This is likely due to my PH pen packing up earlier. I now have a new pen.
Due to this, I decided to use my Seachem Prime, which I use for my aquariums. As I wanted to get them watered properly, and my Ecothrive Neutralise hasn't arrived yet.
I watered each plant with 1ltr of dechlorinated water PH'd to 6.0. I added .25g Ecothrive Biosys to the water.
May give them a breather on the nutes and just use the Cal-Mag and Biosys.
Being as I've just topped dressed with rich fertilisers, I'm sure that will be OK for the next several waterings.
1.2.25:
Watermelon 🍉 has started flowering.
The size and shape of her is quite laughable 😅
Retrospectively I started the LST too early and went in too heavy with it too. That obviously wasn't a great idea.
Still, this is my first run attempting to do LST, and I have a whole bunch to experience and learn from here! 😅
We may get lucky with a stretch. Who knows right.
I remember this one was supposed to finish really early, like 10 weeks or something so hopefully will get at least a bit bigger 🤞
Also the new growth is still a little bleached out.
Hopefully the switch to a functional PH meter will correct the imbalance which may have occurred due to my previous one packing up.
Snipped another couple leaves which were annoying me 😅
I realised this is one of the pots I put my clay pebbles the bottom of.
So I've probably not been watering enough, as she's right at the back, and assuming all was good because the pot was heavier.
Removed a couple of leaves from Bubble Kush
Likes
2
Share


@DrBud420
Follow
02.11.'24
After 5 days of drying, this little girl who was a little bigger than a meter gave 950 grams and a little bit of popcorn...this picking was 870 and a little bit of popcorn, and 4-5 weeks ago during a storm, one branch broke, which yielded about 100, but let's say 80 for sure, a total of 950 grams of beautiful, huge, potent buds
Likes
24
Share


@GR0WER
Follow
New week starts.
☀️06.12.2023
I've watered 'Fruit Spirit' with 'TA Final Part' (Ripen). All other plants are standing in a wet soil, I'll water them soon. We are near harwest, two weeks left including this one, I think.
I've downloaded new music video and photo made from the hole im my grow tent, bacause of strong odour.
Likes
8
Share


@HavelGrower
Follow
Six weeks ago I flipped the light to 12/12 and I got to say it’s pretty fast growing. Trichomes looking good. Harvest get closer and closer. 4 of 5 plants are colouring pretty hard. Nice bud to leaf ratio and overall nice appearance.
This week I started to lower the temps for terpene preservation. Smell is quite skunky and a little bit fruity.
Conditions of the Grow:
💡 PPFD: 1000 umol/m2/s
☀️ DLI: 43 mol/day
🌓 Lightcycle: 12/12 h
💨 Humidity: 45-47 %
🌡️ 🌞Daytime Temp.: 21-22*C
🌡️ 🌙Nighttime Temp.: 19-20 *C
🌡️🌱Leaf Temperature: 20 *C
🌡️💧Water Temperature: 19-21 *C
Water TDS: 1000ppm | EC: 2000us/cm
🚰Watersource: Rainwater (TDS: 15ppm | EC: 0.03 us/cm
Flowering Equipment:
🔦 Lamp: Mars Hydro FC-E6500
📤Container: 3x DIY 63L Euro-Box with lid
Pot: Netpot 2 inch
💦Pump: M.R.S. Ultimate Whisper Powerpump 22 bar
🚿Nozzles: 12x 0.3mm
🫧Waterfilter: 150 microns
🌬️Fan: 3x Clipfan
🌪️Duct-Fan: AC Infinity 200 mm with Controller and Carbon Filter
🍶Nutrient Brand: Terra Aquatica
🔬Sensors: Waterstation (EC, TDS, Temp, PH, Salt), CO2, Air Temp. & Humidity (VPD), Temperature-Sensor Root Container
Processing
Likes
29
Share


@CanadianFillmore
Follow
Week 4 begins for LSD, the good trip continues! Lots of nice bud sites developing and she has a somewhat sweet aroma. Removed some larger leaves and some yellowing one's. Overall plant looks great. I also increased feeding to 5 liters.
Thanks for looking 👽🔥🌳
Likes
92
Share


@CachimboDaPaz
Follow
Day 36 I've just tightened up the LST and watched them grow. Tomorrow I'm gonna feed them cause the soil is dry enough. At least 10cm beneath the surface.
Day 37 I've watered each one of them with:
-2L pH 6.2 water at 20.5°C with
-1ml/L Biobizz Top-Max
-2ml/L Biobizz Bio-Bloom
Run off was 700-850 ppm pH 6.3
Day 38 I've just watched them.
Day 41 I've adjusted some LST and a little defoliation again because they are stretching now
Even if they look a little bit small I'm happy so far with my first grow.
I still have a lot more to learn and it is a never ending journey i guess.
Thank you for passing by to check my diary, I do really appreciate it.
Happy New Year to you all and you beloved ones.
Processing
Likes
4
Share


@Skillgrower
Follow
Estamos a meio da 2° semana a crescer bem ja cm boa ramificação mas a dar indicios de falta de magnezio, mais uma semana começa o lst
Afinal vai começou mais cedo q o esperado.. a crescer muito rápido, mais uns dias estamos no inicio da 3°semana
Likes
88
Share


@CBD_Sweden
Follow
My second growroom is built and the girls have moved in.
Medical Mass is a new medical cannabis strain with a high CBD content and a low THC level that provides good medical properties without a strong psychoactive effect. This is a mostly indica plant that contains 40% sativa and 60% indica. Critical Mass and CBD rich strain were crossed to create this amazing valuable variety.
The plant suits both for indoors and outdoors, for beginner and experienced growers. The strain grows up to 60 - 100 cm tall and produces good yields for such height of about 500 - 550 gr/m2. The plant demonstrates great results even in small spaces. The flowering time takes only 7-8 weeks and the harvest comes in late September.
The smoke brings very strong, intense flavors with sweet notes of honey and skunk and an intense pleasant relaxation. Medical Mass is the great choice for each medical user due its small height, ease of growing, fast flowering and of course great medical potency.
----------------------------------------------------------------------------------------------------------------------------
2017-12-25. Week 16, day 3. The girls starts to look better now and the buds are growing. Had to support the branches and did a defoliation and rearrange some of the buds so they get more lights. Added pics and video.
Likes
24
Share


@Mrs_Larimar
Follow
2023-03-15
Please add one more Week in Flowering!- i was in Holidays here
This one is kinda perfect strain for me
growing vigor and sweet, getting great Strucutr, no Training needed
Just love , water and nutes
and good Conditions in Light and VPD, made her outstanding
I LOOOOVE her Colors in the End, and she smells fbulous, quite Zkittley with alovely Piny undertone, and some
Kush Notes. Iam very courious to her taste and effects
Likes
12
Share


@MicroHidroGrow
Follow
Después de una mudanza, volví a armar el hydro, pero con piezas nuevas que conseguí dentro de todo barato. Aún así le falta mucho para lo que me gustaría armar con más espacio y un poco más de presupuesto. Pero estoy urgido de poner las plantas porque ya enraizaron.
Las plantas son 10 esquejes de Green Tiger del banco BSF. Tienen entre 5 y 8cm. de altura. Parece una planta muy frondosa, dado que la madre me permitió cortar un total de 24 esquejes en 48 días, creciendo en hidroponia DWC. Los pequeños van a crecer por unos 15/20 días y luego pasarán a floración.
Mañana veré que tal anduvo el trasplante. Hoy ya por lo menos está andando. Ya lo iré poniendo más cómodo.
Processing
Likes
7
Share


@Chronnoisseur
Follow
Well she seemed to slow down and now her roommates have over taken her. But fingers crossed she still put out some nice buds
The cheese candy is starting to become more smelly this week stay tuned....
Likes
Comments
Share


@BruWeed
Follow
11/10 - empezo su quinta semana de floración.
Se encuentra perfecta, su olor es muy fuerte y esta muy resinosa.
No tuve ningún problema hasta el momento. Su evolución fue muy rapida en comparación a otras geneticas que cultive.
Aprox le faltaría un mes mas para ya poder podarla, los pistillos se encientran muy blancos por el momento.
Likes
5
Share


@Hardy_
Follow
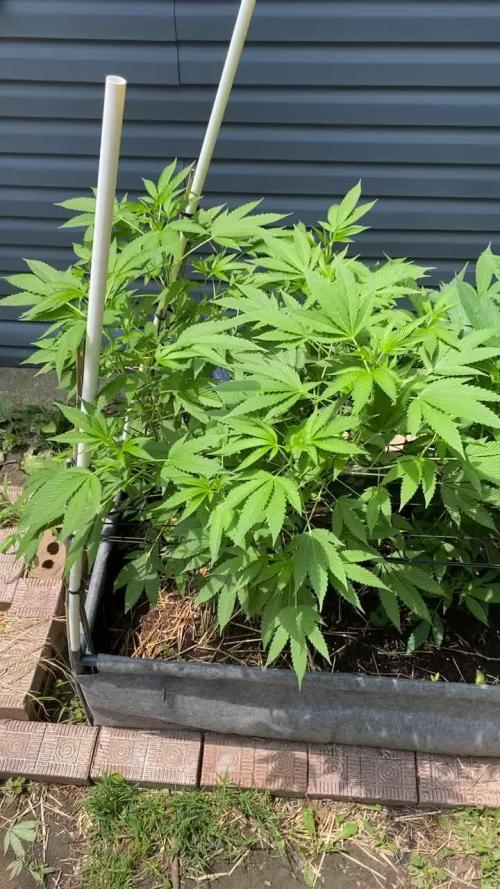
Day 29, please give feedback, thought i stunted them, not sure, have nothing to compare against! Thanks folks
Processing
Likes
39
Share


@DjDaveAtHome
Follow
Started LSTing. We'll see what a few weeks does to them! Growth is vigorous in DWC.
Noticed that the DinaMed's PH was dropping drastically over 24 hours. PPMs were way up at 1100. Diluted the solution by two thirds and re PHed her.
Likes
3
Share


@Bobaloo
Follow
Hoping these do well all my seedlings went downhill fast
Took 15 clones today at 6:30 am
🕰️ Best Time to Start Your Cloning & Defoliation Ritual
🌄 Ideal Window:
Start between 6:30 AM and 10:30 AM ET
This time aligns with:
• Pisces Moon energy still strong
• Cooler temps and higher plant hydration (better clone success)
• Rising sun = energetic ascension (matches your “ascending leaf” flow)
• Moon still waning = perfect for rooting


