
Likes
Comments
Share


@Herbangardener671
Follow
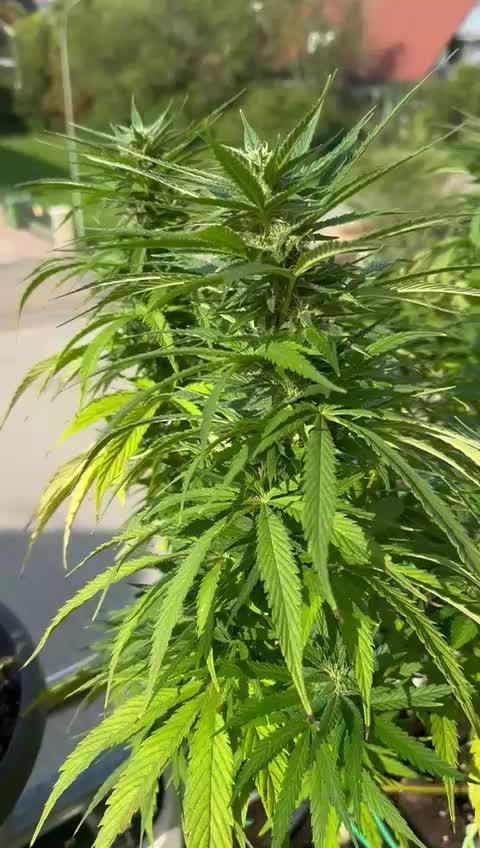
Flushing 114 days from seed
The smell is amazing best smelling bud just need to let finish flushing and maturing. Excited to harvest

Likes
12
Share


@blindreaper9
Follow
The first week after the flip.
What I have been working on is bringing Gelato's soil pH up. Gelato was given water at 6.5 pH and the run off was measuring 5 pH (yikes.) After flushing with 3 gallons of water at 8 pH, the soil pH was still measuring 5 pH. The reaction the plant had tho after the flush was positive, which is to say, no more burning or yellowing leaf tips 5 days post flush.
Sour Diesel and Do Si Dos were fed VEG nutrients at 50% strength ( 1.5 tsp Big Bloom and 1.5 tsp Grow Big.) and the pH of the liquid was 6.5.
Everyone is looking good. Because it is only the first week of flower, "the stretch" is yet to be seen.


Likes
8
Share


@Froggman
Follow
The ICE is almost done; the NL doesn’t even seem close. Interesting since ICE sprouted a day later than the NL.
Likes
15
Share


@Seabass
Follow
11.7.
Zoo im Gewächshaus
- trauermücken
- fliegen
- Schmetterling
- grashüpfer
- Mäuse
- keine Schnecken
Nächste Woche mal Naschi ernten zum probieren?! Dann ein paar Tage später die beiden reifen Pflanzen komplett
Likes
11
Share


Likes
12
Share


@BB_UK
Follow
Lemon pie chose to pop up later than the others (2days) I won’t be topping any autos this run! I will be only low stress training until scrog and then I’ll high stress train if necessary! I’ve given the first feed today of biobizz (doing fastbuds organic the other 3 synthetic) my aim is to keep the veg period vigorous! As a great veg equals great bloom!
Likes
45
Share


@GreenHouseLab
Follow
Hydro will be going in the flower tent once this run is wrapped up. I’m all out of horizontal space which is limiting the goal of gaining more width.
Week 6 flower wrapped up I’ll say she’s the last one showing signs of bulking now from what I’m seeing she might out up the fattest colas in the tent once complete. All n all very happy with this homemade cross from WS.
Likes
2
Share


@Captensmokey
Follow
Lekker plantje met veel thc wat ze erover zeggen klopt snel klaar en bomvol geurende toppen😎🦍...

Likes
17
Share

@Naujas
Follow
today is day 126!!!! i only received so many photos, it seems that the biotabs nutrients are working great, i'm still on vacation so girl, i water it myself with the help of wifi, and a few times a week she comes to water it separately :) everything looks pretty nice:) good luck to everyone:)!
Processing
Likes
6
Share


@Creatorknbsland
Follow
Semanas andamento satisfatório uma esta com 4 semanas e as outras 2 com 2 e meia!nao vejo a hora de poder apreciar a engorda dessas plantas!
Likes
17
Share


@simps
Follow
Clover shake One and two of us doing great nothing to complain about strong little plants I’m probably gonna top clover shake Two and a few days come over shake one is it just behind clover shake tail but happy with the growth
I went ahead and topped pheno 2 growth is good nothing going wrong as of now I’ll be transplanting in a few weeks
Likes
6
Share


@RatmanJR
Follow
September 20th. 97 days post flip.
Clones:
Clones continue to grow. Trichomes really starting to show on #4. Not much on #3 yet and almost none on #2
#1:
Got cut months ago had balls. Parent is still chilling though
#2:
This one has struggled to grow based on being outcompeted by the other two. I had to remove even more rotten growth this week from this plant. All the pets that had rot were devoid of all light. At this point I think we are good.my humidity’s are constantly sub 50 this time of year and I’m okay if I have to toss some come harvest time. Even the healthy unrotten growth on this thing lacks very much smell. Peppery at best
#3:
Not much has gone on with this one. Still has a lemoney and piney aroma. I think this one might just need more time before it takes off with fattening and Trichomes development.
#4:
I’m starting to become very very happy with this plant in particular. Grow the start this thing has been explosive. Twice as large as #3 which is twice as large as number 2. This is clearly a tree like plant when grown outdoors. Along with explosive growth and structure this thing has amazing smells of oranges and vanilla. Very strong smell compared to the other plants and the most Trichomes by far at this point. Can’t wait to smoke this thing and at the moment this is our winner.
Parents:
These things have not been happier. Need a defoliation which I will be providing them tmmr
God bless!

Likes
18
Share


@Manic
Follow
I feel like they could be more light green in color but they are growing really well. Alaskan purple seems to be growing a little lower than the blueberry but I'll bet it's just the genetics. Overall haven't been feeding them water til the soil is dry on top with the ffof, and they seem to respond well to it with no discoloration or burns. Haven't used any nutes and don't plan to til the week of flowering or a week after depending on how the transplant goes. Will add more pics throughout the week, if anyone notices anything I'm missing feel free to spill the beans.

Likes
7
Share


@Thebyrdman420
Follow
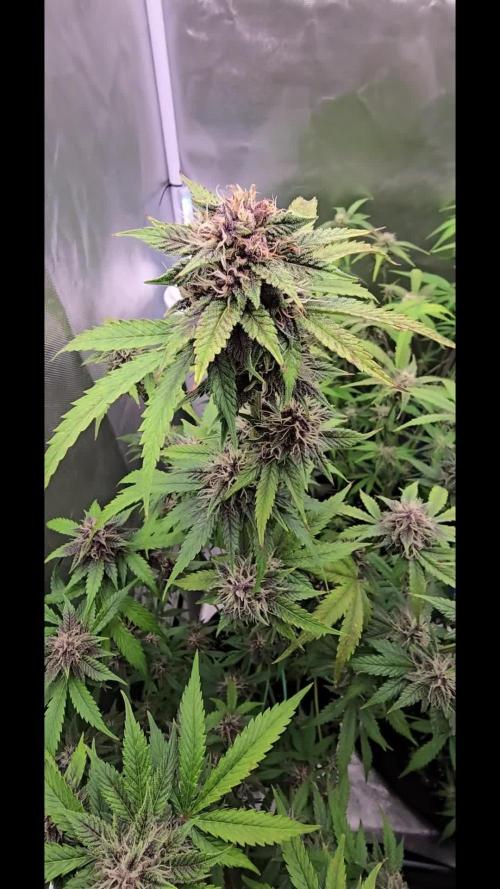
I’m in love with this plant! Beautiful huge colas, awesome color, terps are like sour cherry candy and gas it’s ridiculous how good this plant smells! Harvest is gonna be sickkkkkk.

Likes
2
Share


@KeemBboomin
Follow
So where I live we had a really bad storm it had knocked out my power for a full 24 hrs so I had to give them some extra attention to insure there was no mold or any pest with no fan rotation. Then I also had to put them back on there proper timer to get things back on a roll so far so good they still look and smell amazing wish me luck
Likes
38
Share


@PapaNugs
Follow
And that's that! The autos were ready quick at ten weeks time. It went by quick overall. These girls were super easy to grow. However they lack smell. Some good color on them. We'll test them at report back in the rest.
Dimmed to 80%
Here are the lights details:
Medic Grow Mini Sun-2 150W LED
Model: MN150-022
Spectrum mode: V1
Efficacy: 2.8 umol/J
Thanks for stopping by!
You can find the light on Grow Diaries:
https://growdiaries.com/grow-lights/medic-grow/mini-sun-2-150-watts
You can find the light on Medic Grow's website:
https://medicgrow.com/


Likes
41
Share


@Coopmc
Follow
This is a new seedling I topped think I’ll keep 8 tops was considering only keeping 4 but I’m going for 8 there all staying up equal hight on there own
Tied her down she good!
8 nice tops one more week and flower time!

Processing
Likes
Comments
Share

