
Likes
Comments
Share


@DarkRaven420
Follow
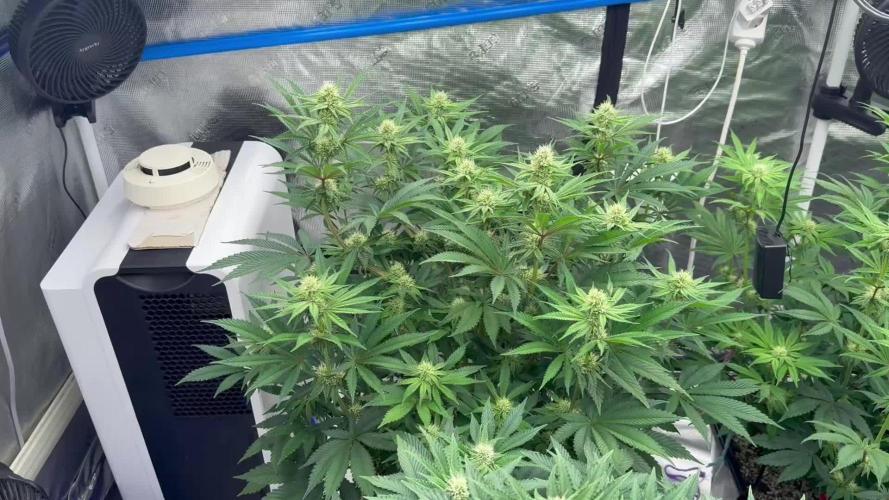
Welcome back to Colorado Gnome Grown. This week the gnome’s have been busy with the irrigation system. The water is stored in a 5g container and I mix the feed in it and it gets feed every time I water, which is twice a day for 1 minute, or until the plants drip. The plants are setting on a rack so that the water can drain away from the plant and into a tray. The plan is to buy Big Buds the first of the month to keep on hand to finish up in 4 weeks. Cookie Monster is 4in today and Noel is 2in, and both are starting to grow their bud site. Next week I will Top and defoliate for the first time. Well that’s all this time, tune next week for more information on; Colorado Gnome Grown!!!😎

Likes
8
Share


@Jonny_Blaze269
Follow
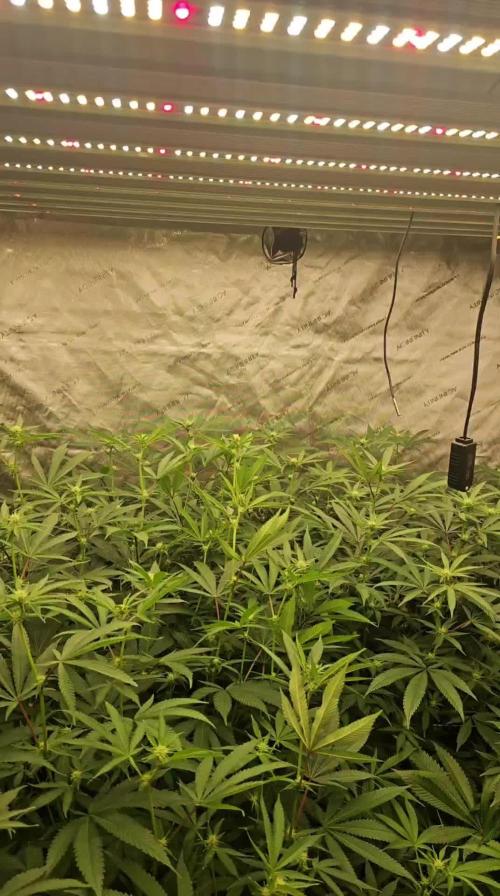
Wk4, Day22, 4/27/22
Wk4, Day23, 4/28/22, continued defoliation and tied down tops, each plant has at least 6 tops
Wk4, Day27, 5/2/22, no issues requiring adjustments
Wk4, Day28, 5/3/22, heavy tie downs and defoliation to finish Wk4

Likes
9
Share


@SilverBud
Follow
She's almost ready, I,m thinking that in two weeks Iwill cut. Lets see..
Likes
2
Share


@Saintvicious
Follow
Leaf scaring getting worse but seems to have stopped progressing. Buds look amazing and can't complain about tricome production.
Likes
3
Share

@madlangs
Follow
All going well
Ppfd 950
25.1.26
Bubba kush super cropped 71
Gelato 41
black cherry gusher
64
Gelato 62
Lemon cherry super cropped 67
super boof 62
bubba Kush 59
amnesia 41 & super cropped 65

Likes
21
Share


@rhodes68
Follow
7/27
Transplanted as roots beginning to exit the cups on Titania and Pea
Into 5 gal pots one time dose of kangaroots 10ml/gal and Fish SHit 2ml/gal
7/28
They are surprising us with the rapid growth already looking at topping in a few days while still in week since showing green.
Lights on hours reduced due to heat to 16
Nuets increased to next stage
7/31
Being forced to use Cal-Mag per the feeding schedule released by GH was hoping it would not be needed but yes can see the beginnings of def.
Thats one strike on the new nuet line.
Adding 1.5 ml/gal cal-mag on routine basis and not happy about it
8/2
From results we are seeing have decided to go back to the cocotek, this is ok but getting problems we just did not have with the other line.
Some color lightening on her as well as Pea

Likes
37
Share


@Vegetoo420
Follow
Starting week 3 like this ! Bud sites are legions and it seems like stems gonna be full of buds ! Can’t wait to put this lady alone into the 4x4 tent !!!
D Day homies! This baby is finally into her new home ! Now I can play with her legz!!!

Likes
39
Share


@BigDaddyK
Follow
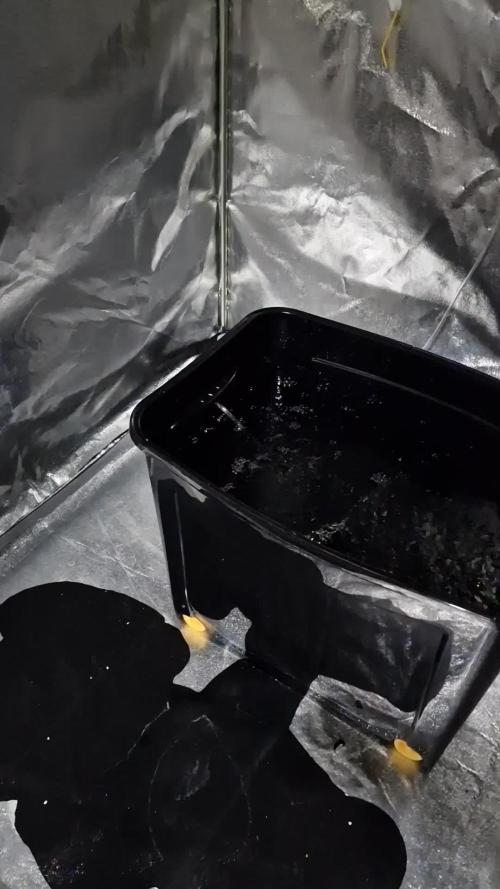
Testing the drill pump , remember the hose always has water in it haha 😂
The reason I use 6 inch net pots , is because it’s easy to interchange between small and big pots , some people use the 10 inch net pots , it’s too hard to start in , I want to be as quick as possible , the more lst or defoliation you do will delay flowering
The really useful boxes have a little lip that you can drill LST anchor points , you can still remove lid without any issues, only drill through lid , DO NOT DRILL WITH LID IN PLACE , I used a 5mm drill bit
Drilled the lid on the Wham Bam boxes , and dropped two purple lemonade in
have also cut the locking part of the lid off , it’s a ball ache to open otherwise 😜
RESULT - the really useful boxes are amazing , the other ones are ok , but these 35litre are the best

Likes
6
Share


@Fuego19Drippz17
Follow
Making a schedule. And tracking your schedule is vital. They are alive and lively. Sundae Batter catching bubble in there stretch.

Processing
Likes
32
Share


@Ganjagrandaddy
Follow
DAY 56 Since flip: well all of these ladies have come past the official harvest dates mow of max 56 days. I am happy to say it is because they all want to continue swelling and pushing new pistils to show off their prowess.
FFT#1 Is starting to brown off nicely all over and will need a loupe soon to determine how close she is to her sweet spot . She smells so much of pineapples now that I think she has to be on that track for her true identity. Nice solid buds , not the biggest but a few around so shouldn't be too shabby on her yield.
FFT#5 Is racing with #7 to the best sized buds I think. She has a couple that are certainly the 2 mains picked to quad from but even the secondary challengers are nice and fat and verybfrity sweet. They are developing a lot of new tricks too and could go another week at least.
FFT#7 Is the heaviest bidder of the whole grow so far. She continues to swell and push plenty of new fresh pistil sets out at a fair pace. Her lower down growth is showing through the canopy all over and does her genetics very proud. She is my favourite of the for growth but #5 is doing amazing too. Let's see what next week brings to the game shall we.
Be sane growmies.


Likes
1
Share

@Shefman93
Follow
Forgot to take a video of the other tent at day 14, but my day 21 upload will have it. Tent 1 had a short stretch, while tent 2 stretch has been amazing.


Likes
3
Share

@PEAKYPLANTERS
Follow
Good evening everyone, brother farmers! we will try a new dwc system but this time in a box that has a capacity of almost 20 gallons Everything has been designed and modified by hand with a 15w pump... we'll see how it ends, stay up to date


Processing
Likes
32
Share

@Ganjagrandaddy
Follow
Day 21: I think these girls are amazing. They have been growers from the off and never fail to impress at every turn. There stretch is finished I think and they are a good height to build some buds on with a little head space if needed. Their development for 21 days is amazing. They look so much further along than they are and seeing how they are stacking up below is a welcome sight.
FFT#1 Has remained short and wide so far with a lot of mini versions of herself around the various quad branches. She has some nice chunky budlets on top and will hopefully use all her space to make them.
FFT#5 Is huge and very happy to go big. She has impressed me with her stretch in all directions. Buds are stacking well among the podgy stems. Approx 20 mains that could create some baseball bats when finished.
FFT#7 Is still way out in front for size and development. she is nearly 3ft and has a very good circumference at the back. There is plenty of room for her lateral growth too so she could be a major yield In the room.
I will be cleaning out some leaf to get air moving through the canopy but won't be doing a defol as such as I want to see what they do fully leafed.
Likes
27
Share


@RDWCGrowing
Follow
5/23/2023
Week 7- Day 1 of Flower (Day 110 overall) (Day 49 of Flower)
There was a couple of small super small sucker buds on the lower stocks that needed to be cleaned off but that was it. Just watching them Flower!!
5/24/2023
Week 7- Day 2 of Flower (Day 111 overall)
Tucked a few fan leaves below lower buds but didn't see any blatant offenders that needed to be removed. I typically do start my checks in Week 8 but since this is a new strain I decided to go ahead and do a Trichome check just to see what was what.. Just as I thought nothing but clear glassy Trichomes. I will check again in one week....
5/25/2023
Week 7- Day 3 of Flower (Day 112 overall)
Just letting them grow today!! Smell is getting stronger I would say it is a hint of Pine and a heavier fruity smell.
5/26/2023
Week 7- Day 4 of Flower (Day 113 overall)
I did Nothing but took some pics and I enjoyed it!!!! It is nice to be able to just sit back and watch them on auto pilot.. :-) Tomorrow Water Change Day!!
5/27/2023
Week 7- Day 5 of Flower (Day 114 overall)
I admit it.. I had to defoliate a little bit.. I looked in while changing the water today and there were just a couple blatant offenders blocking the light from lower bud sites and those leaves they just had to go. Other than that I changed the water and this week is where I drop everything and start preparing them for this last phase of the grow. Loving a few of these buds they are starting to beef out very nicely.
I added 36 gallons
Mammoth Silica = .5Mil/Gal= 18Mil
Root DRIP = 1Mil/Gal= 36Mil
CalMag= .5Mil/Gal= 18Mil
FloraMicro = 3.8Mil/Gal= 137Mil
FloraGro= 2.8Mil/Gal= 100Mil
FLoraBloom= 4.6Mil/Gal= 166Mil
LiquidKoolBloom= 2.5Mil/Gal= 90Mil
TPS SIGNAL= 4.0Mil/Gal= 144Mil
ORCA = .5Mil/Gal= 18Mil
Water Temp= 70.1
Tent Temp= 76
Humidity =64 ** I have two dehumidifiers running on Ink bird controllers to try and keep the humidity down, In late in flower I like to keep the humidity above 45 but below 60.
5/28/2023
Week 7- Day 6 of Flower (Day 115 overall)
Opened the back of the tent today and boy did she need some defoliation love in the back. Other than that I took off a few little sucker buds trying to form. I did start to setup my Dry space as well as did a Trichome Check today and the brown tips are coming in nicely.
5/29/2023
Week 7- Day 7 of Flower (Day 116 overall)
Found a few baby sucker buds trying to form so I removed them. Other than that I am enjoying watching her mature.
I also started my Reverse of the Clone I took 6 weeks ago in Apr from #3. I am uploading footage of the reversing process for your viewing pleasure.

Likes
28
Share


@Sators
Follow
Regards ladies and gentlemen!💚
🌱Day 78. Keep watering with 3L clear water 150 ppm and 6.6pH. Runoff water 350 ppm and 6.3pH.💚
🌱Day 80. Watering with 3L clear water 150 ppm and 6.6pH. Runoff water 250ppm and 6.7pH.💚
🌱Day 82. Watering with 3L clear water 150 ppm and 6.6pH. Runoff water 250ppm and 6.5pH.💚
🌱Day 84. Watering with 3L clear water 150 ppm and 6.9pH. Runoff water 300ppm and 6.6pH.💚
Likes
58
Share


@GreenHouseLab
Follow
Look 👀 at my bush! Probably the one I’m most excited about BF combined with blueberries god damn how can’t you be. Few days waiting on her sister to grow up and flower here we go.
Drinking around 2.3L per day it’s ridiculous when you control all environmental factors added with Mycorrhizae its a deadly combination.
Automatic watering system would be welcomed with recommendations, Stay safe and keep it green!

Likes
28
Share


@eldruida_lamota
Follow
Que hay familia, vamos con la octava semana de floración de estas Apple Fritter de Zamnesia.
La temperatura está entre los 21/24 grados, la humedad está entorno al 55%, y el ph lo mantengo ahora al principio en 6.2, el foco por supuesto está enchufado 12 horas , estan creciendo bien fuertes.
Y aparte añadimos nutrientes de Agrobeta, que no puede faltar semejante gama.
Todo correcto hasta ahora, ya van madurando las flores y ya están bien resinosas, estas próximas semanas veremos cómo avanzan.
Os comento que tengo un descuento y para que compréis en la web de Zamnesia de un 20%, el código es ZAMMIGD2023
The discount 20% and the code is ZAMMIGD2023
https://www.zamnesia.com/
agrobeta: https://www.agrobeta.com/agrobetatiendaonline/36-abonos-canamo
Mars hydro:
Code discount: EL420
https://www.mars-hydro.com/
Hasta aquí es todo, buenos humos 💨💨💨.


