The Grow Awards 2026 🏆 


Likes
Comments
Share
@Reyden
Follow
Per fortuna sono riuscito a tornare in tempo e le mie piante stanno bene! Non ho potuto monitorare per niente e mi sono affidato alle poche indicazioni che avevo lasciato e non posso lamentarmi…in questa settimana i fiori sono cresciuti e le piante hanno raggiunto la loro altezza massima, alcune stanno già scaricando le riserve di nutrienti e alcune foglie sono diventate gialle, vedrò se aggiungere un ultima volta il Top Dress di Dogma Organics per dare loro supporto per le ultime settimane…per ora sono super soddisfatto sia delle genetiche di Fast Buds che del super soil di Dogma Organics..è tutto così semplice ed efficace per queste ragazze e il risultato lo vedi già dalla crescita vegetativa, le piante hanno solo bisogno della tua attenzione per il ciclo asciutto/ bagnato ed il resto andrà bene sicuro!!!

Likes
7
Share
@Dreamhighersmokingmomma
Follow
For my first ever harvest to finish. I am proud got 59.85gs for an autoflower and no prior experience I am pleased. I learned alot and want a better finished yield for the future but pleased with this girl an her turn out.


Likes
17
Share
@JonnyKush
Follow
hey guys sorry for the absence but in this period I have had a lot to do with my work and I have not been able to bring a good detailed diary, but finally now the holidays will start and I will be able to dedicate myself 110% to a new crop and new ones diaries. having said that, I think I will leave him a week at the most and finally reap the benefits 💚🌳💚🌳maybe my fault the RQS slow release nutrients did not perform as much as the ADVs in my tent, you can see it from the video of 27/07/22 where you can see that 2 out of 6 plants are visually leaner and less compact to the touch , I wanted to try on the same varieties in order to have feedback. I think it could also be caused by the crowding of the tent but with the ADV I have not encountered any problems. I will definitely try them again, giving them much more attention.

Likes
15
Share
@JeyGanesha
Follow
Iniziò seconda settimana ,sé tutto procede più che bene...da questa settimana inizierò a darGli anche un pochino di Ph perfecto 😉💪👍..........
Oggi all'11 °giorno ho tagliato via 2 foglie perché ho trovato delle macchie di ruggine su 2 foglie......
Likes
15
Share
@Rangaku
Follow
She’s taking her time finishing up and really stacking on weight , beautiful plant that promises high THC and after the lil nug I smoked yesterday I can confirm it sits you right down . The future is nearly here , not even Biff Tannen can stop me now 😂

Likes
32
Share
@Bossman
Follow
Looks like I'm going to be satisfied with the autos and the photos their coming along fine very nicely. I super cropped the one outside and that's turning out fantastic

Likes
6
Share
@Rangaku
Follow
Should be the end of the stretch now hopefully she’s a leggy girl , smell is already strong looks like real nice buds on the way
Likes
4
Share
@NiBaMeCa420
Follow
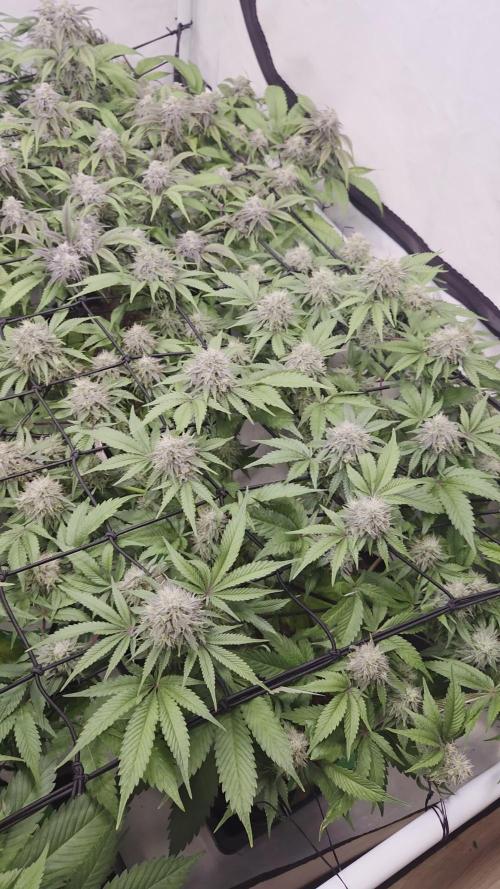
Another week another diary we are keeping busy in these difficult times spending some extra time with our ladies and we also started a new diary we really appreciate if you can check it out and give us a like
as for these ladies we added hy-pro Generator to the mix this is a new hy-pro additive which helps with maximum growth, protection against stress, strengthens the immune system and leaves no residue in the water again we are amazed with the quality of the hy-seeds, the plants look really great and the flower development is off the charts the combination of hy-seeds and the hy-pro nutrients created a winning team
we removed the bottom 30% of the leaves and twigs so that the plants does not put effort in the little flowers that get trown away anyway
that was basically it for this week
Talk soon
Stay safe, stay green
Cheers,
Nibameca

Likes
Comments
Share
@Kadash368
Follow
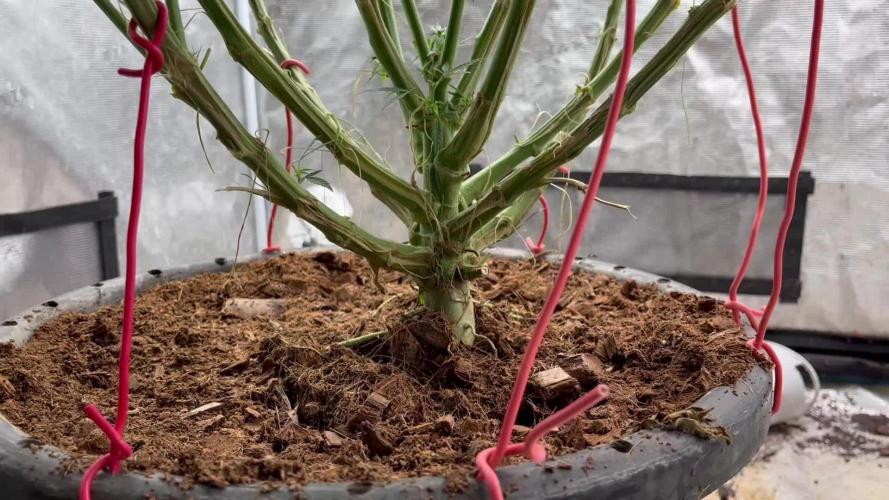
Changed into big box and bigger pots. Lets grow them 3 to 4 more weeks and then send them into flowering. Yupiduuu 🍆🌲🌞🍇
Likes
21
Share
@Techpuffin
Follow
This plant only started flowering after I switched it to 12-12
Not an autoflower
This plant also has a mystery graft!
I grafted a few and only one survived but as I did not label them I’m not sure what it is
Could be RQS royal Cush or northern lights automatic both indica plants suppose to be autos.
Bare in mind this royal jack is sativa!
It seams to be ok
I will be providing it more light to incourage it to flower
Looking forward to seeing what the flower will be like.
Likes
27
Share
@Dunk_Junk
Follow
20cm vertical growth this week.
Going well into flowering.
Pretty much on autopilot 😎


Likes
56
Share
@Cannabeast40
Follow
The cold is taking a toll, that’s for sure. Still looking decent but I’m sure I’ll get my fight with this one
________________________________________________________________________
Light from @MarsHydroLED 😎
FC-E6500🔥
730 Watt⚡️💥
2.85 μmol/J🔥
Full Spectrum 🌈
WiFi smart connection 😱

Likes
7
Share
@Ginger_gnome
Follow
Man what a busy week. I left for a small vacation with the family and left the plants in the care of someone and luckly everything is still alive lol. Then today I almost forgot to post my weekly diary because I was busy build my new grow office and moving all the equipment in. The room I built is where all the plants well eventually end up ones my coco and perlite arrive.
This washing machine strain is growing really strong. Not surprising seeing as how nice ripper seeds strains have bee so far. Only one plant of the 15 ive done has been a dud. Roots are at the bottom of the 1 gal pot and well need to be transplanted soon.
Well that's all for now so happy growing everyone.

Processing
Likes
15
Share
@eldruida_lamota
Follow
Que pasa familia, como podéis comprobar tienen un pequeño exceso de nutrientes, algunas hojas doblan hacia abajo, no obstante , esta variedad está empezando apestar con un olor bastante peculiar.
Es una variedad que como te descuides también crece bastante, controlamos los parámetros de la temperatura y la humedad en lo establecido, 0 problemas en ese aspecto.
Veremos cómo reaccionas esta próxima semana al overdrive y si notamos ya las diferencias.

Likes
1
Share
@A-C-H
Follow
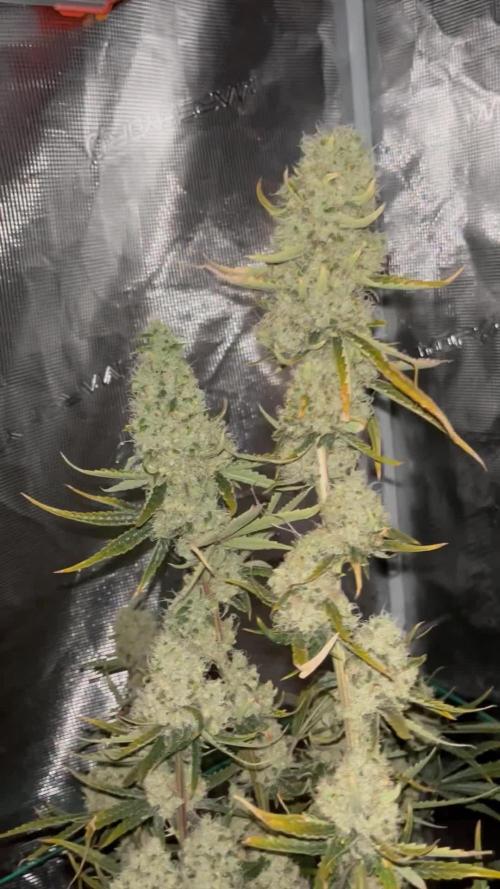
Die Blüten werden von Tag zu Tag größer und verströmen einen sehr intensiven Duft.
Likes
10
Share


Likes
1
Share
@nefcxt
Follow
These 2 are growing amazing, especially plant 1 is doing great.
I've had the humidity on about 40% for most of the time since I have another flowering auto in the tent but these don't seem to mind. I've also had them on about 400umol/m2/s

Likes
6
Share
@urbanmitchell
Follow
my god the frost on the leaf and the swell is like the blueberry note aroma whit the dosidos and the background this baby i will keep it for the next batch clone done under the light other tent