
Likes
Comments
Share


Likes
19
Share


@BLAZED
Follow
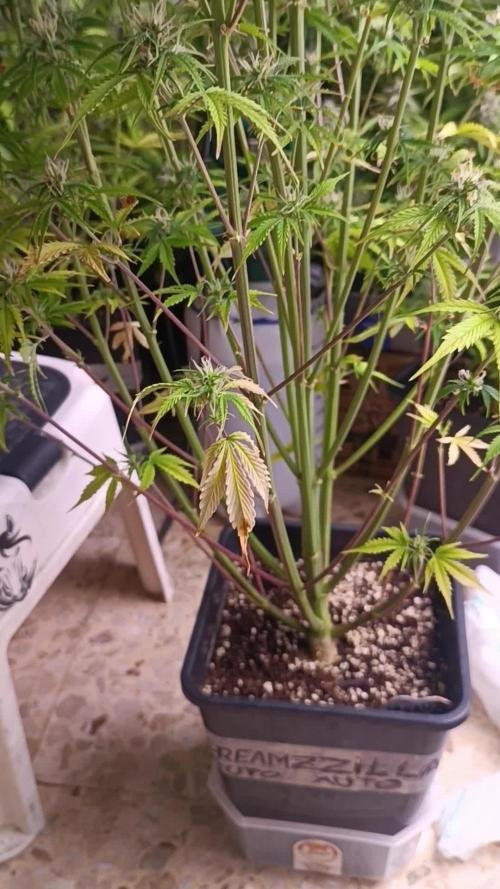
Week 15 Harvest
21-2
Temperature: 29.7 degrees (lights on) 19.9 degrees (lights off)
Humidity: 67% (highest) 44% (lowest)
Watering: None.
22-2
Temperature: 29.9 degrees (lights on) 19.9 degrees (lights off)
Humidity: 65% (highest) 41% (lowest)
Watering: None.
Today is the last day, tomorrow i will harvest her.
I removed all large fanleaves and took some pre-harvest pictures.
23-2
Today is harvest day! I left the buds on the branches and hang them to dry.
Temperature: 18.1°c to 19.9°c
Humidity: 57% to 72%
24-2
Temperature: 17°c to 18.8°c
Humidity: 56% to 64%
25-2
Temperature: 16.8°c to 17.9°c
Humidity: 57% to 69%
26-2
Temperature: 16.2°c to 18.1°c
Humidity: 56% to 61%
27-2
Temperature: 16.2°c to 17.5°c
Humidity: 55% to 61%
28-2
Temperature: 16.3°c to 17.6°c
Humidity: 57% to 64%
29-2
No info.
1-3
Temperature: 17.8°c to 18.7°c
Humidity: 56% to 61%
2-3
No info.
3-3
Temperature: 16.5°c to 20.3°c
Humidity: 46% to 62%
After 8/9 days of drying the buds are dry enough, so lets start trimming!
The buds are pretty airy and foxtaily, but very resinous, she smells good, but i think the buds are a bit overdried.
End results:
Trim: 18.12 Gram.
Popcorn buds: 37,11 Gram.
Normal Buds: 70,98 Gram.
Total buds: 108,09 Grams.
I will post the progress of me making bubble hash in this diary very soon, so if you are interested make sure to keep an eye out!
Likes
72
Share


@Roberts
Follow
I am starting Auto Maxi Gom. I scuffed the seed lightly, and placed her in a glass of water. She will be in there for 24 to 48 hours. Basically once I see a root tail start I will drop her in the coco. I will dome her and keep moist. She will be under a Medic Grow Mini Sun-2. She will be in Xpert nutrition. Thank you Medic Grow, Seeds Mafia, and Xpert nutrition. 🤜🏻🤛🏻🌱🌱🌱
Update: first seed appeared to be a dud or just really slow to germinate. I started a second seed, and it went right away.
Thank you grow diaries community for the 👇likes👇, follows, comments, and subscriptions on my YouTube channel👇. ❄️🌱🍻
Happy Growing 🌱🌱🌱
https://youtube.com/channel/UCAhN7yRzWLpcaRHhMIQ7X4g
Likes
10
Share

@NSABND
Follow
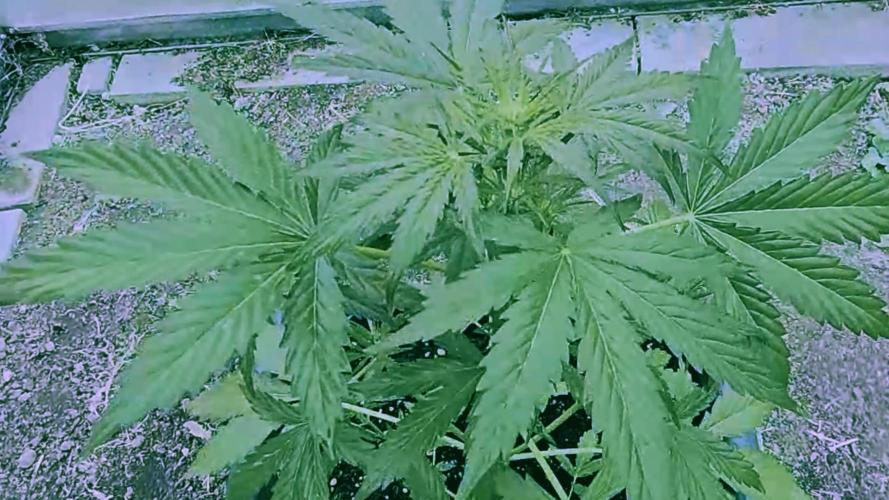
Day 29... afternoon very sunny and warm temp 👍
Day 30 damn hot and full of sun 😎👍
Day31 warm weather with sun in the morning, laters cloudy with high humidity 😃
Likes
22
Share


@White_Greengo
Follow
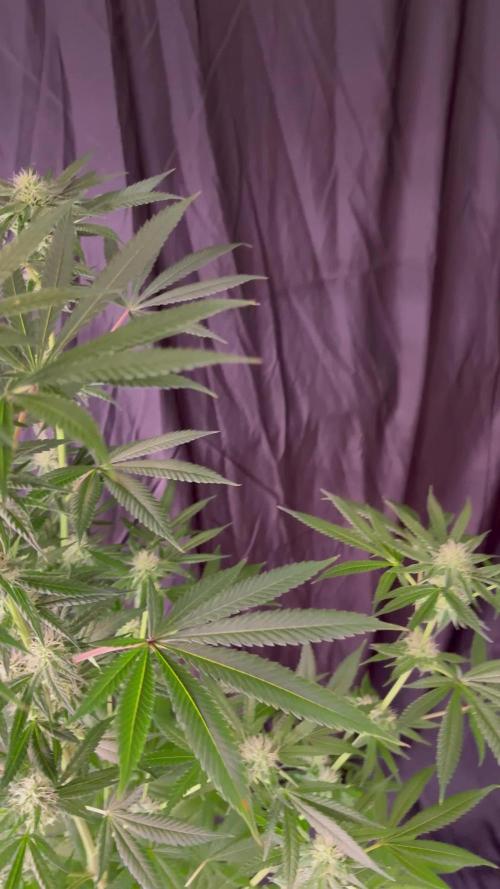
This was my first experience using Mapito and Ebb & Flow, together with the new LED light. The plant turned out to be unusually low. 👌
The variety is quite fragrant, but the smell appeared only in the middle of flowering.
At the time of trimming, the plant smelled of mint candies 😁


Likes
81
Share


@m0use
Follow
SPONSORED DIARY===SPONSORED DIARY===SPONSORED DIARY
TRANSPLANT #3 THIS WEEK!!!!
Big week, did the last transplant of the grow before she enters flower. I decided to skip out on the 3gal and upgraded to a 4.97 or 5gal container. The plastic is cheep and looks like it was going to break but its all the grow store had in stock at the time. Was talking to them about going from a 2gal to 3gal and how it did not do much for the plant but stress it out. They also gave me a free sample of a bokashi fertilizer, I divided that in between the two plants. It looks identical to the regular non fertilizer branded bokashi, and I feel its the same but with a mist of NPK on it or something.
Plants are doing well, Dynomyco had a slighter bigger root ball upon transplant and the plant its self is a tiny bit more robust. Given all the other soil boosters and microorganisms I have added into this, I don't feel I will see the true potential of just Dynomyco vs soil nothing else added. I just can't not add the others as it feel like a massive step backwards and end of day a big healthy plant is worth it. This diary may not have massive contrast in favour of Dynomyco but I will still use it none the less and I think its helps plus its not over just yet.
Would love to hear what y'all think about this, hit me up in the comments and I'd try and get back to yea as fast as I can.
I like how the dead Blue Cindy plant looks like a biophage, sifi like alien thing.
SPONSORED DIARY===SPONSORED DIARY===SPONSORED DIARY
This is my diary entry into the Dynomyco Show Us What You Got Contest!
#DynomycoShowUsWhatYouGot!
@DynomycoShowUsWhatYouGot!
@Dynomyco
Big Shoutout to @Dynomyco for picking me in their contest. Happy to be involved and as a user of Dynomyco I am curious to see this side by side with my own eyes. I will be honest I am a little skeptical it will show any major differences. but we will see what happens. Some disclaimers, I am still using LABS serum I made, This is also beneficial to the root mass however it's a bacteria based product and not fungal or mycorrhizae like Dynomyco.
https://growdiaries.com/giveaways/DYNOMYCO_Show_Us_What_You_Got
Likes
181
Share


@GODSGIFT_2005_JM
Follow
🍼Greenhouse Feeding BioGrow
☀️ by VIPARSPECTRA (models: P2000 & XS 2000)
⛺️MARSHYDRO
The ⛺️ has a small door 🚪 on the sides which is useful for mid section groom room work. 🤩
🌱 by ‘GARDEN OF GREEN’

Likes
3
Share


@Menzee420
Follow
Been 10-14 days since I fixed the lighting issue & she's flowering very nicely now. Tho the top of the plant is still a bit behind. There's a street light outside my balcony which still shines a bit of light over the wall that catches the top branches & I wondered if this could be slowing down the uppermost branches. I found some extra sun netting & have hung it on my pergola to block out the street light some more too. Not sure this will make much difference but it has the added benefit of giving her some more privacy as she is getting huge!
Have seen some evidence of thrips & mealyworms, which seem to be kept under control by the bio insecticide I have been using.
I thought I might have to prolong the grow til late October but the rate she's bulking up now I don't think she'll need to be out there for that long. Time will tell!

Likes
100
Share


@MadeInGermany
Follow
Hi people :-)
This week the Victory Kush F1 (Phenotype 1-3) and the Zkittlez (Phenotype 1) were harvested.
The Orange Sherbert (Phenotype 1-2) and the Zkittlez (Phenotype 2) were flushed.
The rest fertilized as usual.
Next week it continues :-)
I wish you all a nice and healthy weekend.


Likes
24
Share


@SMELLYBUDZ
Follow
Week 3 day 7.
Buds are getting icey and stretching around 1-2” a day.
Dropped the carboload and is going to be replaced by a PK booster (big bud).
Watering everyday. Plain RO on every 3rd water.
The kind LED is pissing on the hps if im being honest. Bud development and vigor seems a lot nicer.
Stay baked.

Likes
8
Share


@ZombieKushAddicted
Follow
FC-E 4800 lamp ,
to view this lamp or any other marshydro product go to: https://instagram.com/marshydro_aliexpress?igshid=YmMyMTA2M2Y=


Likes
71
Share


@DogDoctorOfficial
Follow
🌸 Week 7 Flower — Eternity Grow Cup Update 🌸
📍Week 18 from seed
📸 +150 high-quality photos & videos provably more ups but they are shining and they deserve the attention
EC 2.5 | pH 6.2 | Full spectrum + under canopy light tuning
Welcome back to one of the most breathtaking updates so far in the Eternity Grow Cup. Week 7 Flower has arrived with a storm of frost, color, aroma, and structure — this is the beginning of the final masterpiece, and it’s nothing short of spectacular.
Each of the five phenotypes is shining in her own unique way, and the individuality of each plant is now in full display. From deep fruit tones to dense stacking, this week is a celebration of what happens when genetics, environment, and love come together in harmony.
💎 Standouts of the Week
• Pheno #1: Still holding the crown for the most intense fruity profile — bursting with sweetness, almost candy-like, and surpassing all expectations week after week.
• Frost levels are skyrocketing across the board. These buds are starting to look snow-covered, shimmering under every light source.
• Bud structure is really starting to swell — you can see the shift now as things gear up for ripening. We’re talking weight, mass, and beauty.
🔬 What’s Working
This is a week where everything is clicking:
• The mix of Plagron and Aptus nutrition lines is showing insane synergy. The balance of strength and finesse is just right, and the girls are loving it.
• ICL 300 under-canopy lights are performing beyond expectations. They’re lighting up every shaded spot, helping buds form from bottom to top with full integrity. You can see the results in the side buds — tight, frosty, and reaching up.
• We’re holding strong on spectrum tuning and DLI, hitting the right numbers at the right time, and that precision is paying off in how fast these ladies are moving forward.
• Temperatures and airflow have been key — we’re still running the vortex-style air movement, and it’s doing wonders for the microclimate around each plant.
🌿 Just 2–3 Weeks From Harvest
It’s starting to feel real. We’re entering the final arc. The finish line is not far, but right now, it’s all about patience, observation, and letting nature complete its masterpiece. Every moment counts now.
🎥 We’ve documented everything in full 4K and high-res stills. This is a week for the books — every trichome, every pistil, every sparkle. Be sure to head over to YouTube for the full experience and follow the journey with us.
🤝 Special Thanks
To all the growers, new followers, silent watchers, lovers, haters, and everyone in between — thank you. This journey is built with you, and this cup wouldn’t exist without your energy.
To all the participants in the Eternity Cup — congratulations. Every diary, every tent, every effort is valid. We’re getting close to the finish line, and it’s now in the judges’ hands. But no matter what happens, you’re all already legends for growing with intention and passion.
📲 Don’t forget to follow us on Instagram for sneak peeks, unseen content, and special behind-the-scenes looks. Every plant has a story, and we’re telling it together.
With deep gratitude,
Grower’s Love
DD
Reporting directly from 🌍 Eternity Grow Cup to You 🙌
--------------------
Genetics - Runtz https://www.zamnesia.com/6000-zamnesia-seeds-runtz-feminized.html
Nutrients - Plagron https://plagron.com/en/hobby
- Aptus Holland https://aptus-holland.com/
Controls - Trol Master https://www.trolmaster.eu/
LED - https://www.futureofgrow.com/en
LED - https://www.thinkgrowled.com
Soil - https://www.promixgardening.com/en
Germination - Cannakan https://cannakan.com/?srsltid=AfmBOopXr-inLXajXu3QFgKXCXXos4F1oEvScjMKIB5MR5dk8-GJ-F49
DOGDOCTOR 15% off
Smoking Papers - https://ziggioriginal.com/
Terpene saver - https://grovebags.com/
As always thank you all for stopping by, for the love and for it all , this journey of mine wold just not be the same without you guys, the love and support is very much appreciloved and i fell honored with you all in my life
With true love comes happiness Always believe in your self and always do things expecting nothing and with an open heart , be a giver and the universe will give back to you in ways you could not even imagine so
As always, this is shared for educational purposes, aiming to spread understanding and appreciation for this plant. The journey with nature is one of discovery, creativity, and respect. Let’s celebrate it responsibly and continue to learn and grow together!
Growers Love To you All 💚
#EternityGrowCup #RuntzHunt #GrowersLove #CannabisCommunity #AptusHolland #ProMixSoil #TrolMaster #Zamnesia #Plagron #ZiggiPapers #Grovebags


Likes
4
Share

@Ninjabuds
Follow
White Runtz is one of the tallest plants. The plant is starting to fill in nicely. The plant is very sturdy and has great vigor


Likes
23
Share


@Gordy
Follow
Beginning of week 10(veg):
Wow the progress this week. Biggie smalls(Short one) really took off. I added my flowering LED light for these girls and they are loving it!
I moved the girls into the flower tent for now. The ventilation inside my closet is horrible and I think I’m seeing white mildew spots on some leaves =( Now that they’ve been inside the grow tent for about 4 days I don’t see any signs of the white spots, which is a relief.
I defoliated biggie smalls yesterday, which made it so I could really see the branch structure underneath there. I’m really happy with what I see, some really good looking branches. They no longer need the ties, they seem to be growing how I want them to, and when they don’t I give them a little bend to match the canopy height.
I’m going on vacation in a month so I set purchased a drip system from amazon. After spending about 20 minute setting it up, and then painstakingly driving the stakes into the roots of my plants, I realized the product didn’t actually work. I’ve purchased another pump and some hosing, we’ll give this another go when it arrives.
I’ll be feeding them again tomorrow. One more week of veg for Biggie Smalls and then she’s going for 2 days of darkness and flower. Really excited for that. Hopefully she continues the strong growth over the next week.

Likes
3
Share


@AdirondackGreen
Follow
This week I laid the terrible stretchy net (seriously people, just dont buy them) but added some surveyor string to add the needed tension. That means all the wire can come off and I know these stalks were happy about that! Training did not go nearly as well as I hoped, but looking at 6-8 colas per plant.
