
Likes
Comments
Share


@Mett420
Follow
Dopo due settimane senza postare nulla siamo all’ultima settimana di prodotti prima del risciacquo. Tutte e 4 le piante sembrano avere un ottima struttura, una buona ramificazione degli apicali e teste compatte e profumate (a super incollose, senza guanti non si possono toccare. Partiremo a breve con il risciacquo con il ghiaccio per incentivare i pigmenti viola a formarsi ed espandersi su tutta la pianta. Ci aggiorniamo a inizio risciacquo!


Likes
9
Share


@SlickCityOrganics
Follow
Black Strap and Peach Crescendo getting close. I see they will get cut way before the Fat Bastard. Fat Bastard must have a long flowering period. But branch structure is thick. I will get a heavy yield from it. Peach Crescendo has so much frost on it. Ethos fkn rocks! Black Strap smells like baked cookies and gas.


Likes
7
Share


@StickyFingah420
Follow
Hace un par de días le he dejado de dar nutrientes y he suspendido todo tipo de alimentación para terminar con una cosecha más limpia.
Ahora solo toca ir aumentando el volumen de riego e intercalar los riegos de agua sola y enzimas para aprovechar todo el alimento que pueda quedar en el sustrato y así lograr la cenecencia.


Likes
6
Share


@TheOtherSide
Follow
Gorilla Girl XL Auto - A 6th Generation autoflowering strain. A tall, “Super Strong” marijuana strain produced by crossing two of most powerful varieties in the Cookies family: Gorilla Girl®️ x Sweet Gelato Auto®️ (SWS74 x SWS76).
10.7 - 10.13
-----------------------------------
10.6 - 2 CM+, 2 M, 4 B, .25 Flp, .25 EW 1 & 2
10.9 - 2 M, 4 B, .25 Flp, .25 EW, .5 Molasses 1 & 2
10.12 - 2 M, 4 B, .25 Flp, 1 FS, .5 Molasses #1
10.13 - 2 M, 4 B, .25 Flp, 1 FS #2
-----------------------------------
3 Gallon Fabric Pot
67% Cana-Coco
33% Perlite - Sta-Green
Green Clips
-------------------------
Tent:
2’x4’x5’ GA Tent 600D
1 Gal Humidifier
1x 6” Clip Fan
1x 28” Oscillating Fan
1x 4” Carbon Filter with 2x 200 CFM
-------------------------------------------
3 Gallon Tall Fabric Pots
Spider Farmer SF1000 LED - Spider-Farmer
Optic 1 54W 3500k - opticledgrowlights
Optic 1 XL 100W 3500k – opticledgrowlights
Optic 1 XL 100W 3500k (Dimming) – opticledgrowlights
Cana COCO - Coco Brick
Perlite - Sta-Green
Filtered Water – Everest Machine
Botanicare Cal-MAG Plus
General Hydroponic – Flora Series
General Hydroponic – pH Up, pH Down
Blue Planet Nutrients - Root Magic Mycorrhizae+
Real Growers – Recharge
Fish Head Farms – Fish Shit
Brer Rabbit – Blackstrap Molasses
Zelda – Terpenez Essential Oil Intensifier
--------------------------------------------
Variety: SWS82
Indica: 42,1%
Sativa: 57,5%
Ruderalis: 0,4%
THC: 18-25%
CBD: 0,1%
Indoor Yield: 450-550 g/m²
Outdoor Yield: 50-160 g/plant
Indoor/Outdoor Harvest: 9 weeks from germination
Height: 60-120 cm
Effects: Stimulating, Psychoactive
Taste: Cypress, Fruity, Citrus, Earthy, Woody, Sweet
Likes
13
Share


@SEGA_Y_Griega
Follow
Alle schriftlichen und visuellen Materialien sind nur für Informations- und Bildungszwecke bestimmt !!!
13.3.23 verschüttetes sauberes Wasser 150
(ppm) hervorragende Entwicklung im Moment
Red Hot Cookies Feminisiert - Sweet Seeds
Red Hot Cookies von Sweet Seeds ist ein feminisierter Marihuanasamen, der aus ausgewählten Tropicana-Keksen und einem Tangie gewonnen wird. Das Ergebnis ist eine atemberaubende Cannabis-Sorte, die für ihre spektakulären roten Blüten mit hohem THC-Gehalt und köstlichen Aromen bekannt ist.
Red Hot Cookies ist eine wirklich produktive und harzige Pflanze mit einem wunderschönen exotischen Aussehen. Sie blüht in 8 Wochen und in 60% der Fälle entwickelt sie wunderschöne rote Blüten, die mit Harz überzogen sind.
Red Hot Cookies präsentieren tiefe Aromen und Geschmacksrichtungen mit überwiegend süßen, zitronigen und fruchtigen Tönen. Sie erzeugt aufgrund ihres hohen THC-Spiegels einen starken zerebralen Effekt, ohne jedoch völlig narkotisch zu sein. Das mentale Hoch nimmt langsam ab und wird körperlich entspannender.
10.3.23
this week I decided to install a large tent Mars Hydro 120•120, for one and a lamp with a large coverage FC E4800. I set up the climate control, now the temperature is around 24, I installed two fans to blow the Secret Jardin monkey fan 20w, I wanted to buy them for a long time. The heater also works! Hope it warms up soon 😅
Likes
43
Share


@TheCannaProphet
Follow
~ GG4 SHERBET FAST FLOWER by FastBuds ~
Well fam, here we go again with another epic strain from FastBuds Fast Flowering stable. After having such tremendous success growing their Gorilla Cookies Fast Flower outdoors last year, I've decided to run another of their fast flowering strains outdoors this year... GG4 Sherbet Fast Flower!
The best description of this awesome cultivar comes directly from my friends at FastBuds which is as follows:
"Bred from extremely potent and flavorful Gorilla Glue and Orange Sherbet genetics, GG4 Sherbet FF (Fast-Flowering) takes all the best traits to the next level, offering a high-yielding strain that can produce up to 600 g/m2 in a 7-week flowering time. This super resilient Indica-leaning hybrid thrives indoors and outdoors, and in all types of climates while producing mouth-watering sweet, fruity, spicy and earthy terps that translate into a delicious sugary hazelnut aroma. Expect an extremely relaxing and overall happy effect that’ll leave you with a huge smile from ear to ear. It’s the perfect strain for growers of all levels of experience seeking low-maintenance yet highly productive photoperiod varieties that deliver quality and quantity without extra effort.
GG4 Sherbet FF grows chunky buds with long dark orange hairs and spade-shaped calyxes that get encrusted with trichomes by harvest time, giving them a gorgeous silvery-white appearance. This medium-sized photoperiod can reach up to 200 cm in height and yields up to 650 g/m2 while developing that typical hybrid structure. GG4 Sherbet FF grows with a stocky, bushy appearance, developing one sturdy main cola and fat side branches that support huge yields without much effort. This super-fast variety produces distinctive light-green buds with a high bud-to-leaf ratio, making your trimming sessions a breeze. It’s a top-notch resin producer that doesn’t need much maintenance and will thrive in almost every climate, rewarding growers of all levels with extremely flavorful resin that makes for outstanding hash end extracts."
________________________________________________________________________________________________________________________________________________________________________________________________________________________________________________________________________________________________________________________
The Setup:
This is going to be an outdoor grow, but I have started the GG4 Sherbet Fast Flower indoors as our weather is still too cold to put her outside (nighttime temp's dipping regularly into the 30's℉).
The plan is simple... let her grow inside under a 19/5 light schedule until the nighttime temperatures stay above the mid 40's℉, at which point she'll be moved outside and transplanted into the soil which I have already setup and inoculated with beneficial microbes, and then let the fun begin!🤪💚
________________________________________________________________________________________________________________________________________________________________________________________________________________________________________________________________________________________________________________________
Weekly Updates:
4/11- Here we go into the second week of life for my FastBuds GG4 Sherbet Fast Flower and she's doing really well!
All I'm doing right now is making sure that her medium remains moist, watering only when necessary. I'm checking her root development daily and she will be ready to transplant outdoors any day now!
4/13- Today is TRANSPLANT DAY! I moved the GG4 Sherbet outside to her prearranged 'new home' which I had previously prepped by adding some Coco/Perlite into the soil to improve the texture and drainage. I then pre-amended the soil with Gaia Green 4-4-4 All Purpose slow release dry amendment along with 3g of Wiggle Worm castings, 2 cups of ground Alfalfa and 1/4 cup of Extreme Gardening's MYCOS. After which, I kept the soil moist to allow the microbial colony to populate for a week.
To transplant, I first made a hole then placed a Solo cup in it to make sure that the depth was adequate, then packed the medium up against the cup firmly which leaves a nice Solo cup shaped hole in the ground. I then wet the inside of the hole that I formed and coated the hole with Extreme Gardening's MYCOS root enhancer, after which I removed the GG4 Sherbet from her Solo cup and placed her snugly into her new home! After planting her in the ground all that was left to do was lightly water her in... Let the fun begin!🤪
4/15- The GG4 Sherbet FF from FastBuds is doing extremely well in her new environment. To be quite honest I was slightly hesitant to place her outside this early as we are only getting approximately 13 or so hours of sunlight daily. Based on my experience last year growing a Gorilla Cookies FF, which was placed outside at a similar time and did extremely well, I went ahead with the transplant, confident that she would be just fine.
4/17- I'm watering around every 2-3 days right now using water straight from my well through a garden hose... super simple! I do not worry about PH as long as the water isn't chlorinated and is good enough for me to drink, it's good enough for my plants and the microbial colony in the soil will adjust the PH to where they need it and at the same time provide the nutrients that the plant requires... again, nice and simple.
Well there goes two weeks for this little lady. The next coming weeks should see an increase in size and vigor as long as the weather cooperates... fingers crossed!🤞
Thank you for checking out my diary, your positive comments and support make it all worthwhile! 💚Growers Love!💚😎🙏
Likes
4
Share


@Angelgrows
Follow
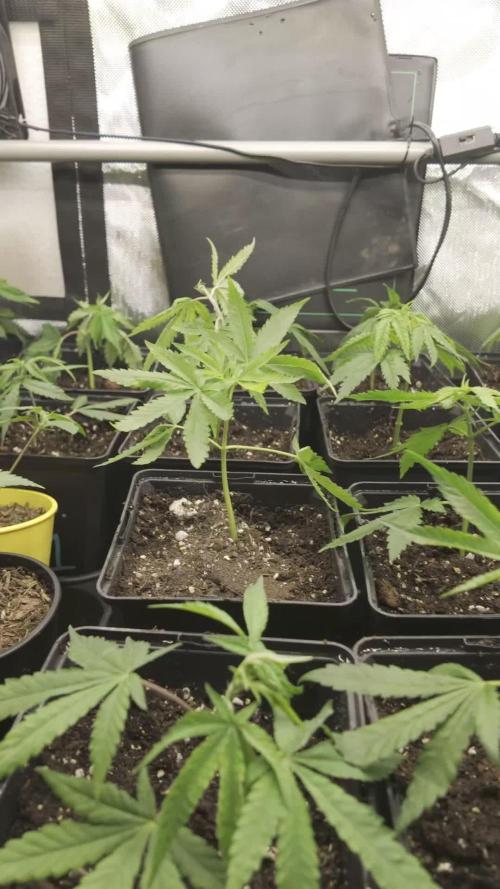
First auto grow and she’s smelling super good, like candy. Got a lot of tricombs but I’m not expecting much from this plant in regards to yield but still I bet the smokes gonna be really good :)
Likes
19
Share


@JoeGrowsGas
Follow
Thanks for checking out my grow growmie leave a like and or comment and I’ll be sure to check yours out!! 🌱
This week is lookin good as flower comes almost o a close 1 week maybe 2 weeks left max but the gorilla glue (middle row) is getting pretty close overall lookin great huge comeback from how they looked in pre flower

Likes
29
Share


@Damonkey
Follow
Great progress being made at a really fast rate. The orange sherbert are starting to catch up with the POG and the buds look like they’re gonna be big and fat. All OS fairly short bar one, all developing at breakneck speed bar one, but all looking great and like they’ll produce gold. Barneys Farm truly do have some great genetics going on, I’ve been so pleased watching every strain I’ve grown from them. In the past I’ve noticed a similar vigour with cookies kush and with gorilla Zkittlez. Anyhow, all moving nicely in the tent, if only it reflected on life in general😣😂
Really looking forward to tasting these girls now. In week 4 they’ve shown the kind of size they’re gonna reach, I think I’m doing better than previous grows but I kind of always think that or at least hope it and alas again I am a smoker and am prone to over exaggeration especially when comparing two ladies, you gotta be careful not to offend either one ya kna!😉😬

Likes
8
Share


@mojo1985
Follow
blühen fleißig vor sich hin... mal schauen wann sie gas geben um als ,,go fast'' durch zu gehen ^^🙏

Likes
9
Share

@MrGrowDiarie
Follow
Day 70
This plant stands out with a clean, well-structured shape built around four dominant main colas. Even though it only developed four primary branches, each of them looks thick, healthy, and evenly spaced, giving the plant a very balanced canopy. The foliage appears vibrant and strong, with a healthy green color and no major signs of stress or deficiencies. Bud formation looks clean and consistent, and the overall structure suggests efficient light penetration and airflow. It's a compact but powerful plant that's making excellent use of its architecture
Likes
11
Share


@CanadianFillmore
Follow
Week 8 begins for GG4, the last week of feeding nutrients. Week 7 went really well, the extra feeding definitely helped midway through the week. Looking forward to flushing this girl in a week's time.

Likes
6
Share


@HappyOne
Follow
07 august 2018, thick buds are al;ost ready for harvest. Will let it for couple weeks. Today gonna stop using Plagron and pass to clear water.

Likes
88
Share


@ILoVeThiSpLaNt
Follow
Giorno 42. Peccato per una watermelon zkittlez che non sta bene. Lavo terreno e ricomincio da metà dose levando le foglie malate


Likes
21
Share


@ClydeGrows
Follow
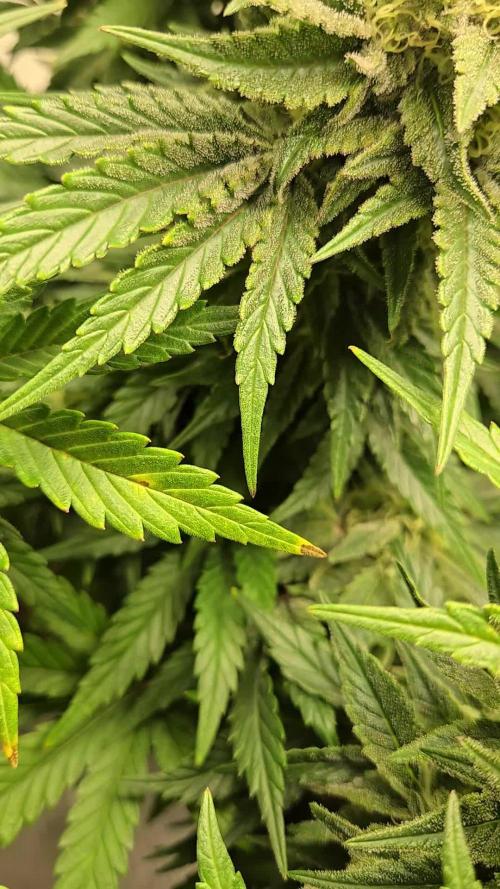
The substrate maybe got a little hot after the last top feed so won't be adding any more probably this grow! That's my best guess for the mottling on the leaves and crispy ends - as the ends are curling up rather than straight. That's my tip for telling whether it's over- or under-fed or another issue. I'm pH testing every drop she gets (and giving between 6-6.5), so I don't believe it's lockout from a pH issue. She's getting a proper wet-dry cycle. Must be too many nutes. I flushed her yesterday and will continue with straight up water.
Hasn't affected overall growth though- the buds are starting to bulk up, trichs continue to show themselves, and the smell 👌👌 it's like honey and citrus. Veeeery excited for this one ;)

Likes
50
Share


@Rwein93
Follow
Ciao ragazzi e bentornati qui per una nuova settimana al Limone 🍋
Ancora 20 cm questa settima e sembra voler continuare!🔝
La pianta numero 1, che è la prima a vedersi nei video, grazie all Lst ha sviluppato diverse apicali ed ora vedremo quante realmente prenderanno il sopravvento
La seconda nei video è la numero 3, che anche se avevo accennato anche a lei un po di Lst, ha ripreso una forma tradizionale. Ed ha raggiunto finalmente la sorella n.2
L ultima in fondo nei video invece è la numero 2 che mostra una stupenda, robusta e folta struttura a candelabro.
Sono molto contento di come sta procedendo la crescita delle sorelle. Ottimo!!!💪
L odore si fa più intenso ma ancora troppo generale per definirlo. Ora come ora, mi sento di dire aspro🤔
Ho defogliato loro nel giorno 58, giusto po di foglie più grosse che facevano ombra👍
Eh niente ragazzi! Siamo giunti al termine della settimana 9 e siamo CAMPIONI D' EUROPA!!!🏆🥇
GRANDI AZZURRI💙
🇮🇹FORZA ITALIA🇮🇹
Grazie a tutti per aver guardato e restate sintonizzati per nuovi aggiornamenti🙏
Buona settimana e felice crescita 🌱 🌱 🌱