The Grow Awards 2026 🏆 


Likes
Comments
Share
@Sejnik
Follow
Vypadají velmi spokojeně.
Díky odvlhčovači vzduchu je ve stanu trochu tepleji než bych si přál, ale to nevadí, vše je lepší než plíseň.
Shogun voní jako svěží citrón.
Sweet Orange XL voní skutečně jako sweet orange...OMG miluji tu vůni
Jednou zalévám pouze s RQS tabletami easy bloom booster (jedna tableta na 8 litrů) EC 0.7-1.
Podruhé RQS tablety easy bloom booster (jedna tableta na 8 litrů) + hnojiva od Biobizz EC 1,5-1,7.
Zalévám každou z rostlin tak, aby měla dostatečný odtok vody ze spodku květináče.

Likes
5
Share
@psychonaut420
Follow
Mental rainbow f1 I have just switched her to 12/12 light schedule to start the flowering stage and hopefully start to see more streaching and signs of transitioning become more noticeable been seeing the plant stretching over the past few days and foliage getting wider

Likes
1
Share
@Mofumbo273
Follow
She reached the 2nd net 5 days after flipping to 12/12. First signs of flower and female genitals.
Even though she was in veg, she smelled so strong.


Likes
27
Share
@adam_pawloski87
Follow
Over all was an amazing grow, super sticky dense nugs with smell of berries, highly recommended for everyone!!
Likes
13
Share
@Growyourownathome2x2
Follow
Thursday the 8th of June day 43 of 12/12 just plain ph water from now until harvest

Likes
11
Share
@Growtopus
Follow
Alles wächst schön gleichmäßig und alle 3 Strecken sich gut. Die Chem Cake etwas mehr als die anderen zwei, wurde ja aber auch nicht gestoppt.
Tagsüber erreichen wir jetzt 25° C und das ist ne super Temperatur, RLF war etwas niedrig, aber die Töpfe waren auch komplett trocken. Jede Pflanze hat ca 5 L bekommen, das bisschen Drain hat die Wanne nicht annähernd gefüllt und das sollte dann die RLF auch wieder etwas anheben.


Processing
Likes
166
Share
@iMeus
Follow
~ Update ~
Hello my friends, welcome back to another weekly update. I have a few issues going on so I’ll put those below in the IPN. This has been a good week so far, the girls are very happy, except the bazar mazar… Other than that it’s exciting that I’m pretty much at the halfway point :) Anyways, enjoy the update and let me know what you think in the comments, I always appreciate feedback
~ Individual Progress Notes ~
[CBD]
Notes: This is the healthiest of the bunch, nice rich green leaves and fluffy buds. I’m surprised the this little mutant is doing so well. As I said in the vlog GCS got back to me last week, I’ll keep them up to date with my grow so they know what’s going on with this girl.
[Mazar]
Notes: Burn! I’m noticing a lot of small but noticeable spots, leaf chattering, and slight yellowing at the tip of the leaves. I feel like I should just avoid feeding this girl though I’m not sure if that will help the situation. If you guys can take a look at this girl I’d really appreciate it :)
Edit: I found out thanks to my friends here on GD that I burned my Bazar Mazar :( So time for water which I might only give her water and flower fuel then flush till harvest (might be my cleanest tasting and smelling afterwards). It's hard to feed 4 different metabolisms every watering, but hey I'm learning :)
[Super Silver Haze]
Notes: The beast of the grow! What a lovely plant. Even though this girl got really hungry and started cannibalizing the lower leaves her buds are massive! I’m impressed with the total growth of this beast. Honestly, I’m cheering this girl on, might be my favorite (don’t tell the others).
[White Widow]
Notes: More like purple widow, this dense girl is showing her dark side and I like it. I planned on the purpling, still surprising to see all this purple though. I like purple buds but I don’t want this (or any of the girls) getting shocked by the cold. Hoping the I can get a few more pieces of gear to help out the next grow.
~ Final Thoughts ~
What a week, some of the girls are rocking and the Mazar, not so much :) It’s a learning experience that will take some time for me to learn how to balance all (most) of the variables. Thank you guys so much for all the love and support, I always appreciate it :)
Happy holidays and good grow’n fam, much love
Meus <3


Likes
2
Share
@Saintvicious
Follow
Leaf scaring getting worse but seems to have stopped progressing. Buds look amazing and can't complain about tricome production.


Likes
8
Share
@GrowingABushWithButch
Follow
Top The 02 Kombucha Cream on 12/04)2022 And I LST the 02 on 12/05/2022
It's Day 26 For My 02 Kombucha Cream by atlasseed . And it's Day 25 For My Snow White and SpliffStrawberry by Spliff Seeds Amsterdam . Yesterday I Top the 02 Kombucha Cream and Today I Started the beginning stage of LST(Low Stress Training) . The 02 where Top on node 05. I will Top the Snow White and SpliffStrawberry when the hit Node 07 Then I will start Training those 02 When I Top


Processing
Likes
10
Share
@CanadianFillmore
Follow
Week 6 of the green crack bender continues. This lady looks healthy and happy, buds sites are bulking up and getting frosty!
Thanks for stopping by, tune in next week for another episode of growfessor theatre. 👽🌳🔥


Processing
Likes
15
Share
@420Consinc
Follow
Week 5
----- Day 29 -----
Fed 1100ppm at 6.4ph 23 Liters
Everything's good.
No real updates. Front right Glookies stretched a bit but has stopped.
Plants are perfect, couldn't ask for a better beginning to week 5.
*Update*
Easy day, end of light cycle. 3 new pics.
---- Day 30 -----
Some fun photos today for this easy day.
Humidity in basement FINALLY hit 40% this morning. Within 5 days it should be 30-35% residual basement and 45% tent for a good residual humidity.
The hand shot has my fingers and palm forward from the bud tip, the bud tip is actually past my hand but it's nearly impossible to get a perfect shot with my arm in the tent and my other one far out trying to take a photo i can't see.
The Tropicanna Popcorn nugs are already bigger than my thumb... gonna be fun in 4 weeks to see bud finishing sizes
Wedding Cake - Cherry HubbaBubba smell
Tropicanna Glookies - Pink Bubblegum with a strawberry like hint peaking through.
Tomorrow is feeding.
Today is just emptying water from buckets from dehumidifier.
*knock on wood* it's easy streak from here on out... 35~ days roughly left. here we grow!!
*** Update ***
Took some measurements. Wedding cake is monstrous already. Upto 1.5 inch wide, 14inch long (it was longer than the 12" ruler). Popcorn nugs on Tropicanna Glookies already 1inch wide 3 inch long at the top.
Beaaautiful.
Slow and steady from here on out.
----- Day 31 -----
Beautiful as usual. Fattening up nicely.
1200 ppm 6.4 pH 23 Liters
If anyone is wondering why I switched to Blackstrap Molasses I put up the Nutrition Facts..
in 20 grams you have carbohydrates, potassium, Calcium, Iron, B6 Vitamin, Magnesium, Zinc.. and that's only the "significant" nutrients (Human based for that picture) It also contains micro traces of copper and more.
pH is quite nice too, with the nutrient regiment i'm on, it finishes itself at 6.4pH so I don't have to manipulate it with pH up/down...
Loving everything so far.
Humidity in basement was 39% today, SO damn close. Tent closed at lights on (highest residual humidity point) was at 48% ... woo hoo 3% more to go!!!
------ Day 32 ------
Wow. Wedding Cake larger buds I can't even wrap my hand around.. These buds are going to be mooooonstrous.
Humidity was under 40% in basement, tent was 48% this morning. Great news for me.
Easy day, pretty much standard operating procedures from here on out.. feed, drain dehumidifier, strengthen stems by shaking plants, open/close tents... rinse repeat.
Both plants are amazing, great genetics so far regarding bud structure building/plant size.
----- Day 33 -----
47.5% residual humidity
Fed at 1150ppm 6.4pH 23L
Everything's perfect, 30~ days left.
----- Day 34 -----
48% humidity in tent, i'm a happy camper.
Everything's perfect. Bulk has started, front right Tropicanna Glookies had double in thickness and diameter top buds of most stems.
Wedding cake 14 inch stem I've named Big Bertha. Excited to watch her fatten up on the couch so-to-speak.
I'm now on autopilot. Fed yesterday while half asleep, didn't even remember doing it. Thank god I take pics of ppm/pH before every feeding for data.
One more feeding this week before week 6 happens tomorrow.
This week Liquid Koolbloom ends, KoolBloom Dry begins for maximum bulk on week 6 first feeding (2 days into week 6)
----- Day 35 -----
Last day of week 5!!!
Fed at 1150ppm 6.4ph 23L
Plants are perfect, humidity is great.
Smell is RAMPED up now. Strong candy weed smell.


Likes
162
Share
@Lukush
Follow
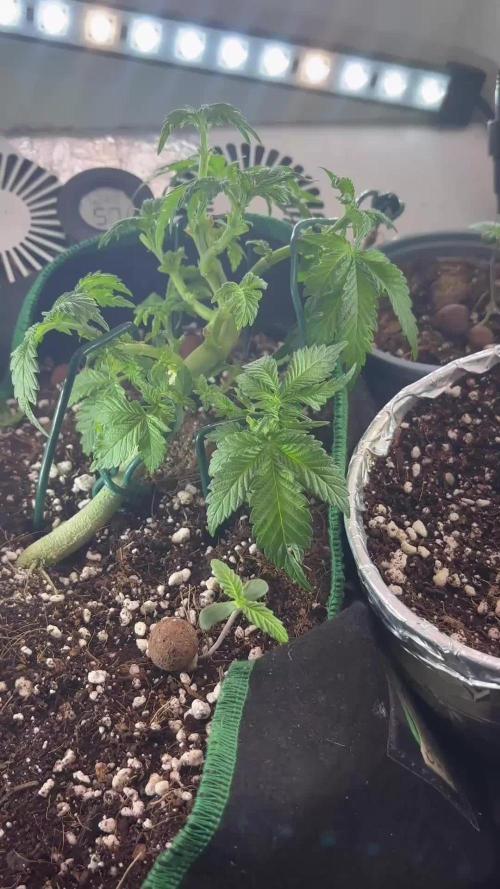
Hear we go with this beautifol strain Northern Light Auto..
Happy new year to all and have a good one growmies.
Finnaly she popt out so happy ❤️
Likes
54
Share
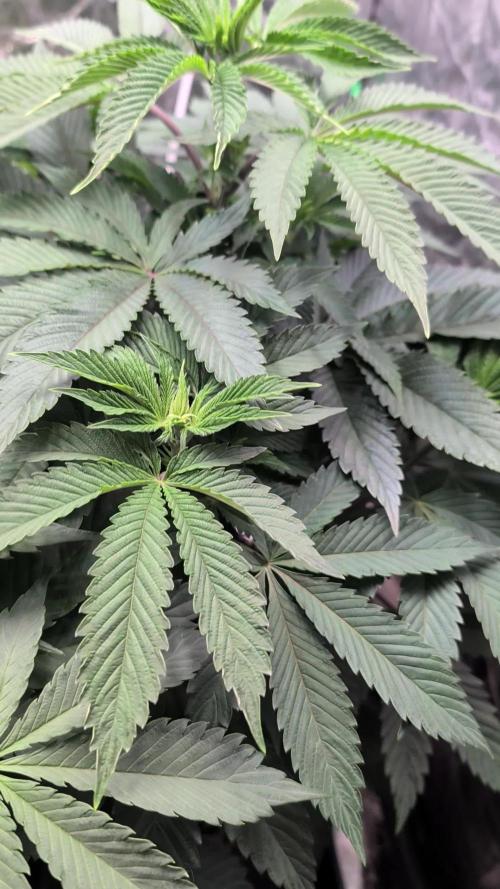
@RastaGrow
Follow
Привет привет друзья как дела как настрой ??? Ну вот и долгожданный репортаж от Раста ;) неделя прошла без изменений, как обычно всю неделю поправлял ветки от 707 показывал им как надо и в какую сторону им надо развиваться, в переди ещё 3-4 недели и я уже думаю чем мне закрепить ветки так как на этом этапе шишки уже очень тяжело. А ещё они только набирают вес и силы 😍😁