


Likes
35
Share


@SmokingTiki
Follow
First flowers appeared! :)
The dehumidifier is still always ON to get +/-50% humidity. Weather is pretty wet outside, it doesn't help. I poor +/- 2l in each pot during each watering (a little bit more for the 26l pots).
Second week with 12h of light and the stretch continues! Next week I will do a second big defoliation.
Plants heights at the end of the week:
Honey Melon Haze : 88cm (+18)
O.G. Kush : 60cm (+12)
Mandarin Punch #1 : 104cm (+28)
Mandarin Punch #2 : 95cm (+24)


Likes
49
Share

@masterofsmeagol
Follow
7/11 Got half in of rain last night. Glad I didn't water. Ph of rain water is very acidic. Added supports to the blueberry cheese in the 50. I just used string and went diagonal and attached to the cage. Wrote a ton but it disappeared. Anyway looking at previous diaries I was wrong about senescence. It wad the life cycle of those earwigs that did that to my plants (see other diaries). This soil mix is amazing. These plants gave only gotten like two small feeds of big bloom. I showed my commercial buddy and I'll keep it between us what was said but it made me feel really good. I'm considering either expanding the cage in one direction with some lumber I already have or moving a couple outside tge cage. That way I have more room. He said he's seen plants structurally similar reach huge heights (14f) so I'm just trying to avoid future problems. I at least need to get the trellis on. I hope poor that's food enough. Did a real nice video this morning but nothing wanted to upload and it just uploaded the same one twice. I'll try again and hopfully it will go up. If not I'll put it up tomorrow.
7/12 Dad has surgery this morning. I did a quick video and took some pictures. I need to do some rearranging with the plants and cut a pallet to fit in the back. Then I can put a vertical trellis up. Haven't decided if I'll add on to the cage, remove a couple plants or just rearrange things but I'm leaning towards the later. They will need water again and I'm wondering if I should start nutrients but everything looks so good. By this time on past diaries I'd be losing all my leaves bu now. MI think it wad part ear wigs and part to many nutes. This soil mix is taking these plants through veg. I'll probably do a feeding soon but it will be organic and it will he small like a big bloom or ancient amber. Im leaning towards not using growbig this year as my plants seem to be doing great without it. We'll see. I'll keep this updated.
UPDATE: Went back over and gave plants a full watering. Some were slightly drooping. I was going to add nutes but decided against it as I didn't see any deficiency. So far NO Earwigs! I comed through the plants and I did find a jpn beetle which I happily killed. I mixed up 8 gallons of water and gave it to the 11 plants so it wasn't quite a gallon a plant. I need to rearrange the plants so I have room to move around. I also need to cut another pallet and use the spaces I'm not. Trellis needs to go up.
7/13 I think I've got the watering amount down. Now just to find how often which will depend on weather. I've watered very little this year. They loved that gallon. I was going to use big bloom and kelp me/you but looking at my garden I decided not too. My buddy asked what i was addingvthings for and to wait fir what i added to do what I wanted it to do. I see no nutrient deficiencies so why add anything? I think this soil mixture will get me all tgexway through veg. I dont plan on using much in fliwer either. Definitely good genetics. I really need to cut that palley and move the 1 10gallon to the far back coener. It will open thibgs up so much better. The garden looked so beautiful this morning. Getting very aromatic. I started untangling trellis netting but had to leave. I'll update what I do. Happy growing folks
UPDATE: Went back over as I had a slight intuition that I needed to check the garden. I found and killed at least 7 jpn beetles. That's what's been making holes. They tried to escape and bounced off a tarp but I got it. I went through the interiors and found two pillars. If these beetles are gonna be around I'm ordering a net. I'm also close to positive I'm going to extend my cage in the back a few feet. Things are getting unmanageable in here. My buddy said I'll be having problems soon if I don't do something. I'll document what I decide to do.
7/14 Found ONE jpn beetle in the garden this morning. I can manage those well enough. The birds help too. I check my garden multiple times a day so I manually remove many pests. However I've noticed some thrip damage on a leaf and a leafhopper damage on "A" leaf so there are "some" pests around but not enough to spray shit. A couple wasps were doing there job while I was there. Supposed to get thunder storms after three and tonight. Supposed to get over a half inch of rain tonight. I lifted the bags and decided to hold off and let mother nature take care of it as the bags weren't totally dry. Only problem I really have is space. I AM moving that 10gallon (that's the same size as some 20's) in the back. There's 27in not being used and a few feet the other way. My buddy cautioned me that I'm going to have problems since my plants are so crowded. I agree with him. I spoke with me father and we have most materials to extend my cage four feet in the back. I think that's my plan. I'll extend the structure before the stretch then I can put up the supports. We'll see how this goes.
UPDATE: Went back over to check the girls as I had a feeling I ought to. When I got there I saw that a couple of the blueberry cheese were pretty light (liftng the smart pot) but the others seemed to be fine. ONE 10th planet was light like that and the purple punch in the 10 gallon was as well. Each plant thar needed it got at least a half gallon of water. I'm waiting to see if we get the thunderstorms and the half inch of rain. I watered the MASSIVE blueberry cheese in the 50 but I only gave it 1 pitcher which is like 1/4 gallon or so. Don't know why I even gave it that. Looked fine but the soil WAS pretty dry. Next year I'm giving myself way more room. I was running trying to chase these jpn beetles. This time I have the dawn and water and a measuring cup to knock them in. This ain't my first rodeo. I did notice some bright yellow streaks on a leaf edge and I'm hoping it's not septoria. I doubt it but I have an anxiety disorder and I worry. I hope I can get the cage extended sooner rather than later. It's getting hard to move in there and more importantly I can't take any more plant pathogen problems. I'm considering starting a plant doctor regimen just to be safe.
7/15 Got a bunch of rain last night. No jpn beetles in the garden and not really much damage. I did notice this (I think it's leaf hoppers) that leave those dots close together on a leaf so it appears I've got a variety of pests. I'm considering how to approach this. I mean the damage is very minimal but I don't want it to get out of hand. Another thing I need to look out for is leaf septoria or any other fungal pathogens. I believe that has been part of my problems in the past. I think that's what caused my earlier grows to drop all their leaves so quick. I think I'm being overly cautious but its very crowded in there. With my father just getting out of surgery the girls will need to wait a little bit before before I can extend the cage. I could still cut the pallet and move the 1 10gallon and that would give more room. I rearranged a LITTLE BIT so they have a little more room but I've really got to get this cage extended.
UPDATE: IT Rained so hard I had to pull the car over. We hydroplanned the whole way home. After working ob my house I went to see what the damage would be like. NOT A SINGLE BREAK THAT I COULD SEE. I took a video but since the wifi here sucks I'll have to upload it tomorrow. Walking around in the cage even if I cant get it extended I think I'll be OK. It obviously will open me up to lots more issues but at the very least I can reorganize before I build on. The 10 gal purple punch would fit perfectly in the back and I have a pallet I can cut to fit it in place. Putting that one back and pulling the others forward will be much better than what I've got going on now. I'm also thinking about running an extension cord and putting fans under the canopy or at an angle to keep the wind moving. Just thinking outloud. However after that storm the girls looked as happy as I've ever seen them. All happy praying to the sun, thankful for the much needed rain. Mother nature does a pretty good job with out me messing with it. I've noticed a couple interior lowest leaves turn yellow and die like a nitrogen deficiency but everything else is fine. Also noticed a leaf that looked like a p deficiency but again, it was the VERY bottom leaf on ONE plant. Again the rest of everything looks fantastic. I'll keep an eye out for anymore nutrient deficiencies and if anyone that reads this sees some please let me know. I should've taken stills since they looked so good but I got it on video.
7/16 It POURED last night and throughout the day. TORRENTIAL rain. The branch breaking sheet rain that us outdoor growers learned to fear. My plants aren't trellised currently. I know what I need to do now. I have a pallet to put in the back corner and I'm moving the purple punch in the 10 there. And pulling others forward where there's more room. Then when I extend it (it's gotta be done this week) everything g will be in their proper place and I can just throw on a vertical trellis. I also noticed more (leafhopper) damage on a leaf. Different leaf of the same plant so I'm considering spraying something. I have a number of products but I was trying not to use them. Luckily I have these diaries so I can look back and see certain plants reactions to certain nutes or fungacide/insecticide/nutes and the doses used. I haven't been using much but if my plants will remain cramped I'm going to start the plant doctor. I'm seeing more pillar damage too but BT is super narrow so I'm thinking when I fo spray for pests I might use cap jack and be done with it. Then I can apply the BT in flower if it's necessary. I took a video but I have to wait until tomorrow to upload. I took a quick snapshot though.
7/17 Despite the torrential rain I don't have any breaks. I'm noticing more pest damage though. Another leaf on the same plant had those closely shaped round circles. I forget what pest it is but it's there. Caterpillars are there I'm sure so I may do a preclcentative spray. Just unsure what I'm going to use. I lost a COUPLE very bottom interior leaves that look like they just got used up. After this rain I think think the plants might benefit from a feeding. Probably next water after they dry out. I REALLY need that cage extended. I expressed that today and it should be done this week. I'm looking for pallets today. I have the little one that I can put in the back which will allow me to move the 10 gallon and move the other forward. That will help some but I need more room. I'll update as I go.
UPDATE: GOT A SMALL PALLET AND IT FIT PERFECT IN THE BACK ROW. I MOVED THE PURPLE PUNCH IN THE 10 GALLON ONTO IT. I SHIFTED A BUNCHVIF THINGS AROUND. I ROTATED ON BLUEBERRY CHEESE 180 DEGREES SO IT WOULD FIR BETTER. CROP ROTATION IS GOOD ANYWAY. I TOOK VIDEOS AND YOU CAN NOW SEE THE ROWS MUCH BETTER. 2 WITH 3 and 1 WITH 4. IT'S SIGNIFICANTLY BETTER THAN IT WAS. I CAN GET AROUND ALL SIDES OF EVERY PLANT NOW. GRANTED THE LARGE 50 IN THE BACK IS GOING TO HAVE SOME TROUBLE BUT ILL JUST STAKE IT TO THE CAGE. IT WILL GROW TOWARDS THE SUN ANYWAY. IM SUPRISED I DIDN'T LOSE A BUNCH OF LEAVES AFTER THIS RAIN. MOVING THINGS AROUND AND LOOKING ON THE INTERIOR OF PLANTS I FOUND A COUPLE LEAVES THAT HAD BEEN USED UP. I REMOVED A COUPKE LEAVES THAT HAD DONE THEIR JOB. I'LL UPDATE AS I GO ALONG.


Likes
12
Share

@Kirsten
Follow
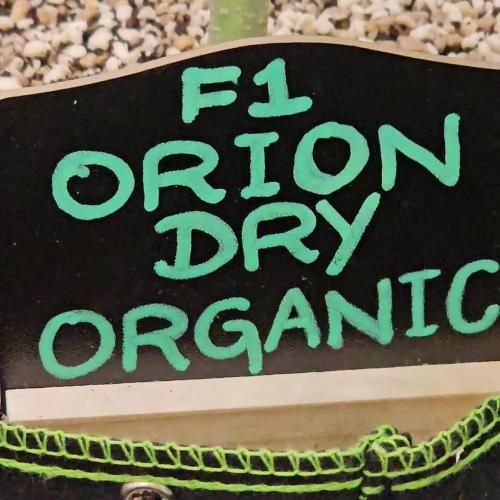
Orion F1 organic, dry amendments.
The plant is really developing the flowers while they look really dense, and like they will be some very top shelf buds!
The buds are beginning to stack on weight now, and hopefully, we'll just see the colas become larger and larger as we go on from here!
I have gone through the tent this week, and I have removed a lot of the lower branches on the plants, as they're not going to grow into big colas or anything.
So it's better not to waste the plant's energy, developing those to hopefully redirect it into the larger flowers.
I'm really impressed with this plant so far, and the organic dry amendments are really working wonders, and that's been really eye-opening for me during this experiment!
I'm very pleased that Royal Queen Seeds were kind. Enough to allow me to try this experiment with some of the F1 hybrid strains.
It has been, and continues to be an extremely exciting experiment, and I am again learning more and more with each plant.
I cannot wait for harvest and to see what these buds look like after I've dried and trimmed them!
3.8.25:
I watered with 2ltrs of dechlorinated water PH'd to 6.2 with;
💜 1ml Trace
PH: 6.2
PPM: 371
I've just been keeping the medium, not bone dry, but there were some fungus gnats.
So I have let it dry out more than I usually would probably, because I wanted to sprinkle some Diatomaceous Earth on the soil, and it only works when it's dry.
4.8.25:
I watered with 3ltrs of dechlorinated water PH'd to 6.6 with;
💜 3ml Ecothrive Trace
💜 1.25 TSP Ecothrive Biosys
PH: 6.6
PPM: 385
I am going to top dress next week as I checked and it has been exactly a month since I last did one.
Thanks for checking in and hanging out 😁💚✌️🌱🙏

Likes
3
Share


@Mismatas
Follow
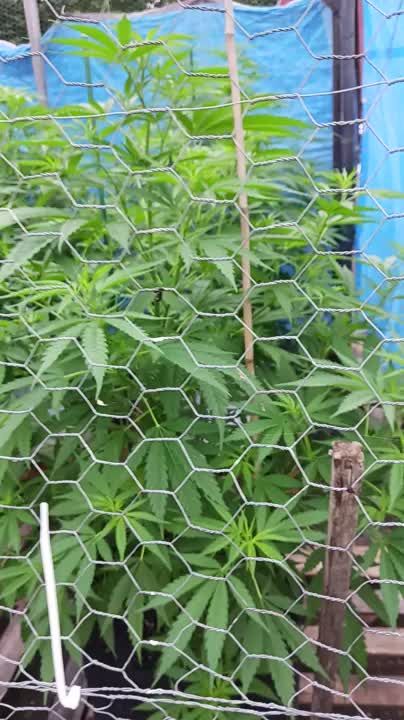
APROXIMADAMENTE CUARTA SEMANA EMPEZAMOS POR PRIMERA VEZ NUESTRO LST Y UNA LIGERA PODA DE BAJOS.
SEGUIMOS CON EL CABLE DE CALOR PUESTO Y TAMBIÉN AÑADIMOS UN CALEFACTOR PARA MINIMIZAR LAS BAJAS TEMPERATURAS

Likes
152
Share


@EBxAH
Follow
Week 20, week 10 of flower started 10/18 and the lights are now off until next run! I'll be cutting them down later tonight! So blessed to have gotten this far! I'm at a loss for words after that, happy growing everyone ✌️🍀✌️
Harvest update to follow........

Likes
3
Share


@theicyeffect
Follow
Another week growing strong!
Took advantage of the last summer days here in the island to get her some real sunlight, which I can tell she loved by the boosted growth.
Nothing like the real thing ☀️

Likes
44
Share


@Chedderbob112
Follow
Thanx for al the Support guys well appreciated there are some people on hear that a seriously do respect and consersider 💯 percent real deal growmies but hit me up ye never wee might end homies stay safe stay blessed n stay baked @chedderbob112


Likes
8
Share


@Cortez95
Follow
Plants reacting well to topping and LST , I’m preparing them to tradition into flower !

Likes
41
Share

@squalino
Follow
📖 Chroniques de l'Oasis : La Marque Blanche du Sahara
👑 Chapitre 4 : L'incroyable déployé de la sultane
Date : 19 Mars 2026
Âge de la Sultane : Jour 28 (Fin de la 4ème semaine de croissance)
Taille : 27 cm
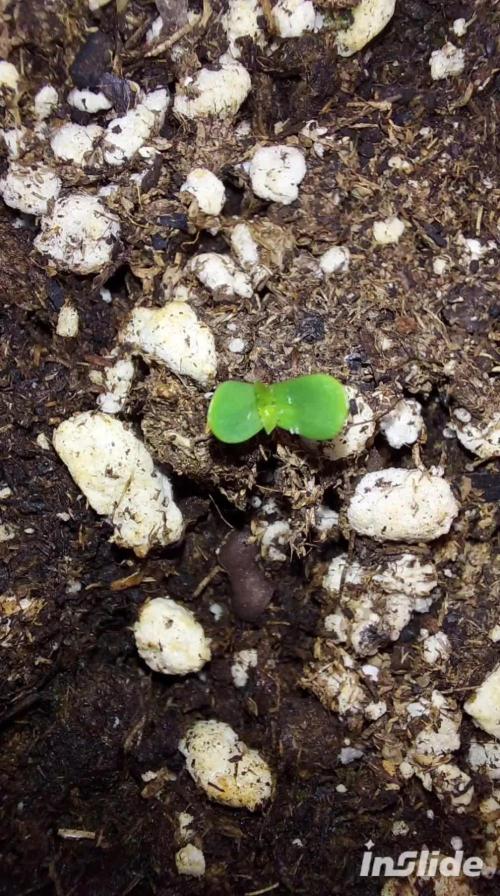
Je continue ma marche. Le sable glisse sous mes pieds de nomade, mais mon regard ne quitte plus cet horizon où la tache blanche semble m'appeler. Dans mon oasis, le temps s'accélère. La petite pousse que j'observais hier est devenue une Sultane impériale, prête à régner sur son royaume, son oasis.
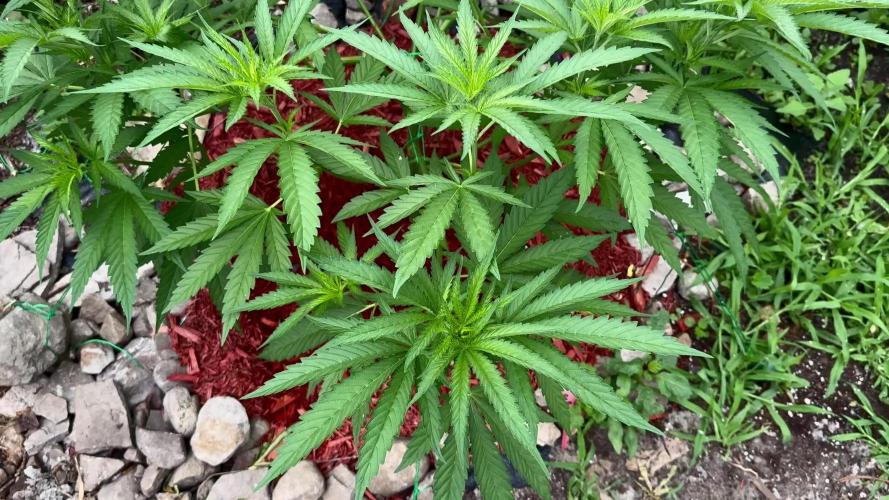
🏹 Le Domptage de la Reine : Mon LST
Mes mains de jardinier-nomade ont travaillé avec patience. Grâce au LST (Low Stress Training), j'ai courbé la structure pour forcer le destin. Le résultat dépasse mes espérances : 10 branches secondaires vigoureuses ont jailli du tronc. Chacune d'elles se dédouble déjà, me promettant une canopée de 30 têtes. je lui ai enlevé deux feuilles de sa robe qui frôlait le sol pour éviter tout problème de brulure ou de champignons pour que sa croissance rzste vertigineuse.
Je vois déjà le tableau final se dessiner : une armée de fleurs régulières, une géométrie sacrée qui portera bientôt ce givre légendaire. C'est une croissance incroyable, une explosion de vie que je guide jour après jour.
🏜️ État de l'Oasis
Le climat est celui des journées parfaites au pied du Rif, là où l'air est pur et la lumière généreuse.
Climat : 24°C - 25°C le jour / 20°C - 21°C la nuit.
Humidité : 55% (L'air s'assoit légèrement, parfait pour durcir la fibre).
Énergie : Intensité montée à 75% (La Lumatek tape fort, comme le soleil de midi).
Distance : Réglée à 87 cm de l'apex pour que chaque branche secondaire reçoive sa partie de lumière.
Nutriments Apportés (L'Élixir de vie)
Aujourd'hui, j'ai préparé l'élixir qui soutient cette croissance massive :
Hydratation : 0,5 Litre d'eau (Ajustée avec précision à un pH de 6,3).
Offrande : 5 ml d'Orgatrex.
Mon observation : En versant ce mélange, je sens que je nourris la terre et l'âme de la plante. Elle boit ce nectar organique pour transformer la lumière en branches solides.
📜 L'Anecdote du Rif : Le Secret des "Multiples Têtes"
Au Maroc, les anciens du Rif disent souvent que pour obtenir une résine "mielée" comme la Beldia, il faut que la plante "regarde le ciel par tous ses membres". À l'époque, ils ne connaissaient pas le LST moderne, mais ils inclinaient parfois les plantes avec des pierres pour que les branches latérales s'élèvent comme des minarets.
Aujourd'hui, mes 30 branches de têtes sont mes 30 promesses de richesse.Chaque nœud de la Sultane est une étape de plus sur ma route de nomade vers la Marque Blanche.
Note du cultivateur : "28 jours de voyage... La Sultane prépare son armure. Le chemin est long, mais le joyau est à portée de main."
aujourdhui le 22/03
le soleil tape sur cette douce terre la rendou aride. nous lui apportons un peu d'eau pour éviter une sécheresse
0,5 litres d'eau PH 6,3 pour la rafraîchir.
25/03
je lui ai apportéun peu de vie ( micro organisme) dans son oasis en lui donnant 1 grammes de bactrex.
à bientôt pour la suite de la chronique.
merci à tous pour vos commentaires.


Likes
4
Share


@knnabisgrower
Follow
En la 4ta semana aumentamos la dosis del fertilizante para crecimiento, regulamos su p.h en 6.0 e hicimos una poda apical en el 4to nodo de cada una de las plantas.

Likes
62
Share


@Roberts
Follow
Do-Si-dos auto is doing well. She had been growing really good. I did a solution change on her 2 days ago. I switched her to blooming nutrition then. She is looking ready to stretch and flower. Thank you Zamnesia seeds, Athena, and Medic Grow. 🤜🏻🤛🏻🌱🌱🌱
Thank you grow diaries community for the 👇likes👇, follows, comments, and subscriptions on my YouTube channel👇.
❄️🌱🍻 Happy Growing 🌱🌱🌱
https://youtube.com/channel/UCAhN7yRzWLpcaRHhMIQ7X4g

Likes
21
Share


@GODSGIFT_2005_JM
Follow
🍼Greenhouse Feeding BioGrow
⛺️MARSHYDRO
The ⛺️ has a small door 🚪 on the sides which is useful for mid section groom room work. 🤩
☀️ by VIPARSPECTRA (models: P2000 & XS 2000)


Likes
6
Share


@AutoCrazy
Follow
Week 6 of flower:
Things are looking up. The Red hot Cookies and the Lemon orange are ripening up. The mimosa x orange punch is starting at beef up a bit.
5.8-6.0 pH
440-380ppm
68-65F water temp
72 F tent temp
45% RH

Processing
Likes
13
Share


@ladyjane
Follow
8/17 - Fed the ladies with liquid nutrients today. Also did some selective defoliation. The soil looks really healthy. You can see how happy my worms are. The two are coming along nicely and just starting to bud.
8/19 - Top fed all the ladies today with Uprising Grow, Uprising Bloom, and Elemental.
8/21 - They are in bloom! They are beginning to flower and looking lovely. In between feedings I water with RO water and molasses. They seem to love it.
8/24 - Blooming along nicely! Watering just about every day now. Added some mulch to the tops that I made from the dried leaves I take during defoliation. Hoping to keep the tops a little more moist.


Likes
12
Share


@CheeRz
Follow
Almost Done. 💚💚💚 From now on the ladies just gettin' tab water. Wedding Cake and Cookies Kush #2 r ready to go in a few days. Cookies Kush #1is lookin'like she needs at least 1 maybe 2 weeks from now 😂.