
Likes
Comments
Share


@Roberts
Follow
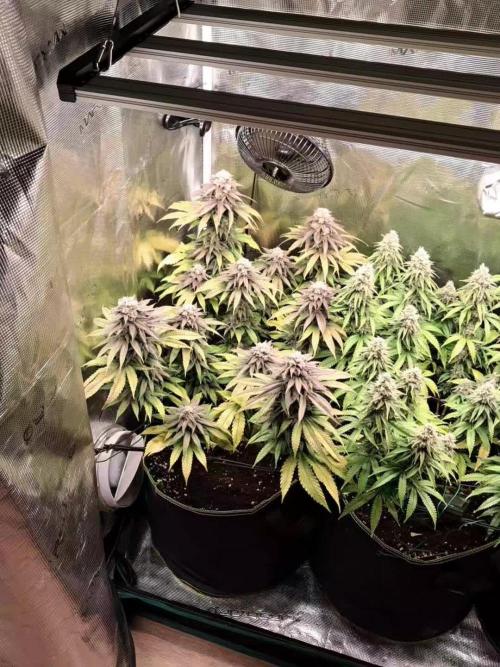
Gorilla Cookies is doing great. She has about another week of bulking to go then 1-2 weeks for ripening roughly. Everything is looking good with the Spider Farmer G3000 and other sf equipment. She has a nice smell, and is looking promising. Thank you Spider Farmer, and Pure Instinto Seeds. 🤜🏻🤛🏻🌱🌱🌱
Thank you grow diaries community for the 👇likes👇, follows, comments, and subscriptions on my YouTube channel👇. ❄️🌱🍻
Happy Growing 🌱🌱🌱
https://youtube.com/channel/UCAhN7yRzWLpcaRHhMIQ7X4g
Spider Farmer G300w: https://amzn.to/3S2zvsd
Spider Farmer 10X20 Heat Mat Kit - https://amz.fun/lsa0J
Spider Farmer Amazon Store: https://www.amazon.com/spiderfarmer
Spider Farmer Official Site: https://spider-farmer.com
Discount code: saveurcash (stackable)

Likes
15
Share


@Dunk_Junk
Follow
Harvest day for this girl!!!
Only 50g dry but it could have been much worse had I not scraped 2" of the depleted soil she was in and replaced with fresh compost in week 3. This has actually been a turning point in my growing and learning.
She is a fab high sativa strain. Very frosty.

Likes
9
Share

@Grow4ever
Follow
Ende Blütewoche 8.
Duft ist krass, ist mein zweiter Phäno der Pineapple Express. Der Duft ist fast identisch. Wuchs war etwas unterschiedlich, die Buds werden fetter und fetter. Zudem hat Sie eine dunkle lila/schwarze Farbe angenommen. Auch hier Ernte in circa 2 Wochen.

Likes
16
Share


@GreenMunchkin
Follow
Week 7 let's go !
Day 152 - 04/11 : The plant symptoms have seemed to slow down. The soil is also starting to dry out a bit more which might have been a problem.
Day 155 - 07/11 : She was flushed in the morning with about 4L of water and 2L of a 30% strength microbial+trichoderma tea to innocculate the soil in case the microlife took a hit. The run off was 1L.
I also switched the 400W MH for a 400W HPS to finish off with a little extra boost of light + different spectrum and see if it makes any differences.
The light were moved up by approximately 20-30cm. They are now at about 70cm from the plant. I wondered if the light were maybe too close and caused all those strange symptoms. Let's see if there is any change in their behaviour.
Day 156 - 08/11 :
It seems the plant is a lot happier. It has only been a day but I feel like she is fattening up faster suddenly. Or it could be that she has recovered from the slight chock from a few days ago.
Day 158 - 10/11 :
Yep she is definitely happy again. I am convinced it was the light or at least it was part of the problem, I am seeing a lot of growth all of a sudden, on all plants and not just this one. Trichome are up, pistilles are up, calyxes swelling, everything is running smooth again. She is looking ready already, from a bud general appearance I could almost harvest now, but the trichomes are still mostly clear and I have a feeling she has a little more in her. I suspect the reason for such large amount of already brown trichomes might have been the light excess they went through.

Processing
Likes
150
Share


@RussianGrower
Follow
I welcome all my like-minded people who are in different parts of the world. I thank everyone who provides moral support to Russian plant growers. 👍
It's me again-an underground Russian grower with some experience with different strains of cannabis. Subscribe to my diary if you want to follow my progress and learn a lot about the life Of Russian growers, and the difficulties they face every day👊
Today my have my plants 62 day life. 9 weeks. today I visited my underground production.
As I will have difficulties in financial investments, I had to collect from improvised materials additional ventilation and air filtration. In addition, I installed forced ventilation at the entrance with a computer power supply.
Bubblelicious Auto-with the genetics of this cannabis variety I was familiar before, so knew what to expect from these plants. I can say one thing, it is the most delicious and sweetest sort of marijuana I grow. Also, it produces a lot of oils which I think it is suitable for extraction or cooking cannabis food. I look forward to the harvest
Neville's Haze Auto - this variety of cannabis shows an unprecedented strength in growth, its flowering only in the early stages, and should take a long time before its full sexual maturity.
In addition, I made my girls an intimate haircut, so that their genitals become like full-fledged women.
In General, I'm doing well, thanks to this resource and the advice received here, I manage to fight with the stench, I'm free and I'm not going to finish my activities. Until next time. 😉


Likes
24
Share


@FrostyCloudzz
Follow
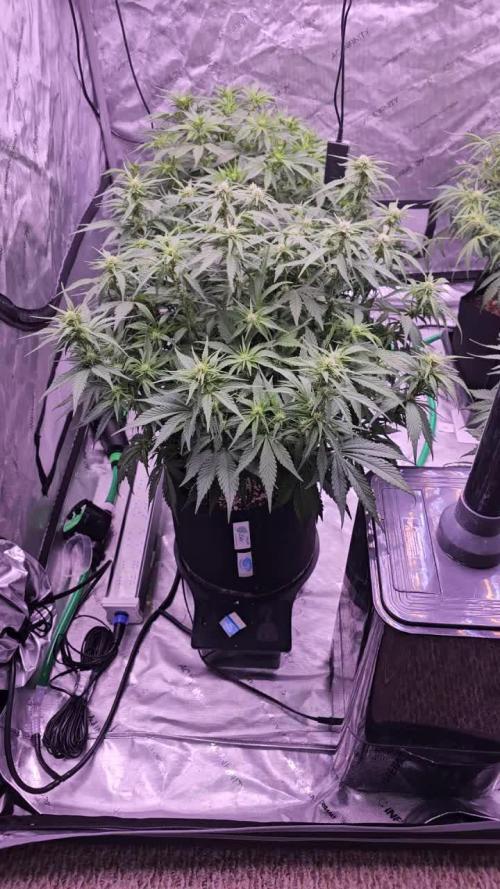
Woche 5 hat gestartet und ihn geht es prächtig sie verändern sich täglich, eine zeigt Mängel auf aber nur minimal.
bin gespannt noch circa zwei Wochen Wachstum dann in die Blüte.
Die Girls wurden langsam LTS gebunden und topping wurde gemacht bei jeder
Purple Punche wurde durch random seid ersetzt sieht bis jetzt gut aus

Likes
14
Share


@BlueDream123
Follow
Still at it. Now I have another tent on the go with some DWC and Autos


Processing
Likes
43
Share


@DaSofaSurfer
Follow
-mom-
So I had a tiny problem with my plant (the mom). pests. this is the problem I have with soil. tiny little cuntz. I don't know their name. tbh not interested. I've had them before. they suck the sap from leaves leaving tiny lighter spots (check vid if interested)
so I gave an aggressive foliar spray. then I watched a movie, smoked some bowls and fell asleep before washing residue. the lights came on and before I was even awake the light was burning spots on my leaves.
I was kinda bummed out. it's not serious, I know she will recover so I wasn't too worried but one never likes to see plants with problems. to me personally the eyesore physically hurts. plus this could have been avoided so it annoys even more.
the good news is no more pests. I can't see them and the new leaves don't have the tell tale sign these suckers leave. all good
today I went to water her and first pistils. I was kinda expecting that to happen since days are getting shorter (13.5 hours of wich only about 3 are DIRECT sunlight) but I was also hoping she would hold off for another week at least since I still don't have real estate for her under the lights. I'mma hold off 4 or 5 days and put her and her clones under the light so they can flower out in style. nature calls one must oblige.
Besides I don't like when plants flower and reveg and reflower. all kinds of weirdness happens, messes up their structure.
-clones-
I cut 2 clones and stuck 'em in same 3" rockwool cube. I had never done so but I only had room for the one pot. I did so because I only had 4 weeks to veg something out to replace the ak47 that flowered and I dripped off in the woods (didn't abandoned her, I still go and cater to her needs every 3 days) so I needed a plant fast and thought two plants in one pot would dramatically save veg time and I might just make it) my idea was to simulate a mainline but each clone would be half of a traditional mainline shooting 4 tops each. unfortunately one of the clones rooted much quicker and it screwed up the simmetry I was after. Now I'm thinking maybe one side will have 6 tops and the other 4. I'm pushing it a bit hopefully I won't regret this decision since I'm very limited in the grow space I have. one has to be resourceful in dealing with such problem.
Apart from that clones are doing great. vigorous growth and just beautiful foliage. in 2 or 3 days I'll step them up into a new home. a 20 liter fabric pot. can't wait to see her flowers and experience the aroma she has to offer.
I'm really looking forward to growing this strain.
LETS GROWWWW !!! 💪👨🚒👊

Likes
8
Share


@valiotoro
Follow
Hello everyone 😎
Week 4 of flower for the Orange Sherbet auto from Fast Buds 💥
She grew fast with a beautiful green color,for the nutrient 4ml/L terra bloom & 1ml/L power buds from Plagron
Spider Farmer SE-7000 70%
Have a nice day 😋

Likes
12
Share


@Willy_Balls
Follow
After lots of perturbations, including visit from electricity company and moving 80cm-1m plants to another location in plastic bags 😅 we finally can start this run. Plants look super happy so far. They are all my best clones. This time I will try another cut of violet face and it will be probably the last time I grow her. I have coco jambo from. Anesia in another tent. There is so many names strains to discover. I’m so pumped for the future.
If you wish, please join me on the next adventure.
Cheers,
Growers love


Processing
Likes
3
Share


@sgmKaleb
Follow
Slow to start as I remember. Have to fly forward to 8 weeks in....Sorry, found this app too late to start with it.
Likes
1
Share

@GrowOpsAnonymous
Follow
Still struggling to get the EZ Feed dialed in.
The APs are looking great. Number 1 is going to be a monster.
The two EZ Feed plants have skinnier leaves and the stems aren't as stout.
Also, swapped plants in back to the front from last week.
Processing
Likes
8
Share


@Spgrows
Follow
New light caused massive growth!
Definitely stronger and cheaper than the last light

Likes
73
Share


@Herbz_Unkraut
Follow
1 plant was very ripe, 1 plant was almost perfect to harvest and the 3rd could take another 1-2 weeks...but it was end of 10th week of flower and i had to go on vacation, so i perhaps choped 1 plant abit too early....still awesome result!


Likes
24
Share


@m0use
Follow
***Sponsored Grow*** = Medic || https://medicgrow.com || Grow = ***Sponsored Grow***
Ok, so bigger news this week, I got rid of one of the plants in the tent as it was an auto vs fast flower :/ and I performed a bunch of LST and some Defoliation to all the plants. This plant was not to bad in terms of lst needs and defoliating needs as much as the other ones. This will be the last week they are in Veg and switching to flower cycle next week with a 12/12 photoperiod. I was going to try a 13/11 but I wanted to test out the automatic light functions on the Medic Grows Minisun-2, So this will be relieved next week.
Been having issues with PH in the medium again and some nutrient uptake. I am thinking I will switch to another brand I have to use up, trip tonic from my last grow on the balcony. Its a bit more complex and not as easy as mix into water and feed but I think its going to help me solve a lot of the issues I am getting. Given this update is a few days late some of these pics are not from today. the clones in the photos above are from the beginning of the week when I potted them up. They have not done well at all and may not make it. can only hope for the next few weeks they pull through.
Till next week.
***Sponsored Grow***
Official Website:
https://medicgrow.com/
+
https://www.emeraldtriangleseeds.co.uk/
Facebook:
https://www.facebook.com/medicgrowled
+
https://www.facebook.com/OriginalETS/
Twitter:
https://twitter.com/medicgrow
+
https://twitter.com/emeraldseeds
Instagram:
https://www.instagram.com/medicgrow420/
+
https://www.instagram.com/emeraldtriangleseeds/
YouTube:
https://www.youtube.com/channel/UCNmiY4F9z94u-8eGj7R1CSQ
Growdiaries:
https://growdiaries.com/grower/medicgrowled
https://growdiaries.com/grow-lights/medic-grow
+
https://growdiaries.com/grower/emeraldtriangleseeds
https://growdiaries.com/seedbank/emerald-triangle-seeds

Likes
16
Share


@HowtoBubatz
Follow
LST went good the plant is growing ervery day for 1-2 cm
I am very happy with the products used.Until now i didnt run in any issue :)
Starting to give a little more Water.

Likes
Comments
Share


@Cannussy
Follow
6/21/25
She started week 3 and was ready to top for the first time. Her stem reached over 3mm and look at those big ass fan leaves of her. Holy molly. Never going back to soil. For everyone who wants to try dwc or hydro, do it bc there is nothing to fear! Ph is stable between 5.7 -5.9 I only intervene when it would suddenly drop under or over by a lot. Otherwise I just go by how the plants are looking and growing.
6/23/25
She is recovering very well. Starting to smell a little already, thats when you know its gonna be some good stuff. If I dont fuck up that is 🙃
Likes
34
Share


@HomeGrowHeaven
Follow
We chopped down the plants. Now they hang out to dry in the tent.
The Trichs looked very good. Some milky, some amber, hardly any clear. Just the way I want it. The popcorn buds were rather milky. So we have more of a couchlock effect on the head buds and the maximum THC on the popcorns. I'm really looking forward to the taste💚

Processing
Likes
4
Share


@fezzollas
Follow
She´s amazing, really strong and so beautiful. I made some defoliation and she´s even´t get notice. Their buds are amazing, getting a lot of top buds who makes me dream with a good heavy harvest.

Likes
9
Share


@Scoota710
Follow
I decided to top her at the beginning of week 3 and she did super well! More than happy with all the extra growth I got from doing the Topping. Just debating on doing some lead stripping on it to allow more light into the bottom and center of the plant